Product Types
Aasaan supports a diverse range of product types, each with its unique features and specifications. Understanding these product types is crucial when creating a product, as it determines the specific input fields and options available.Physical and Virtual Products
- Physical Products: These are tangible items that exist in the real world. For instance, a physical book made of paper.
- Virtual Products: Designed for digital or symbolic content delivery, such as a PDF version of the mentioned book.
Key Differences
The primary distinction in your store between physical and virtual products lies in tax assignments. Different tax rates may apply to these product types due to their distinct nature.Bundle
Bundles combine several products sold together at a price different from the total cost of individual items.Manage Product
In this article, you will learn how to manage products at your store. Please make sure to add a category before you start adding your products.Add Product
- Steps
- Screenshots
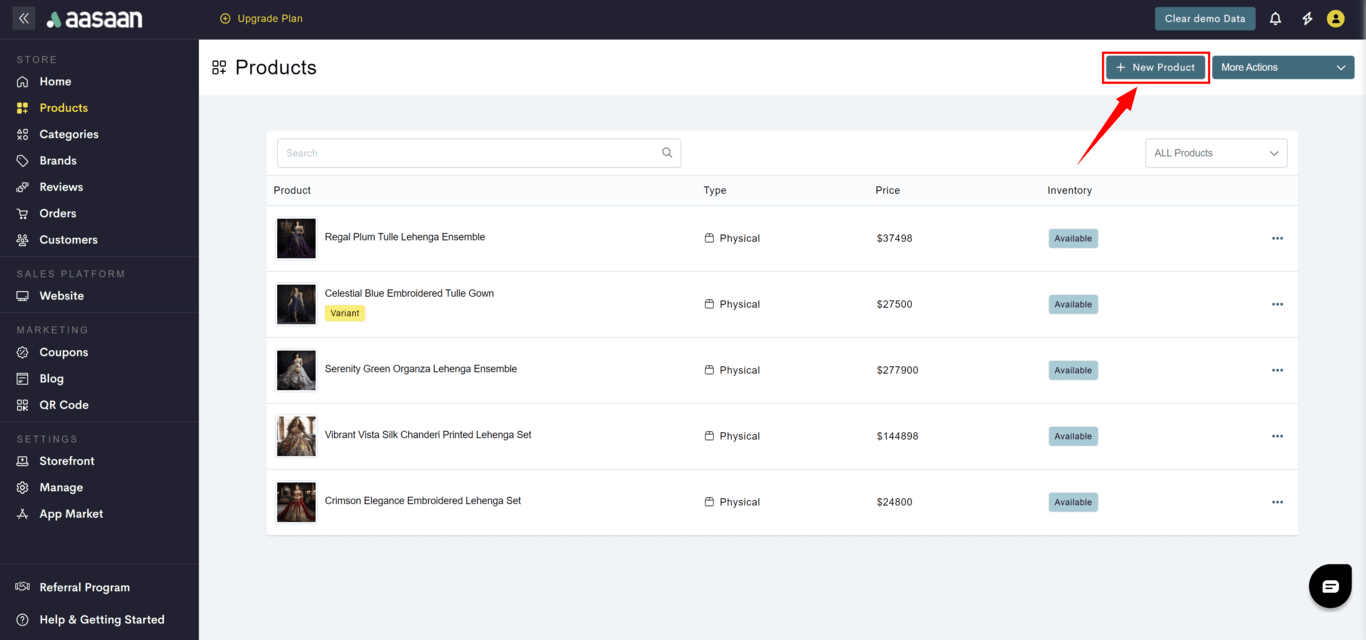
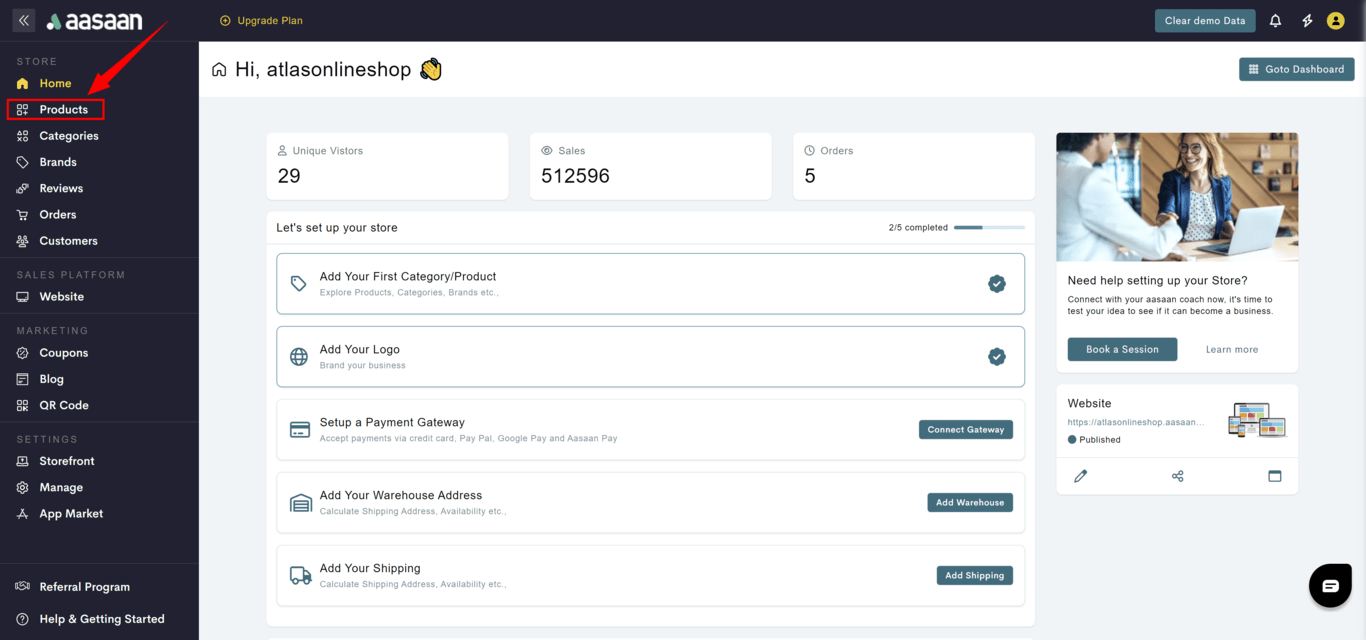
To add a product to your store:
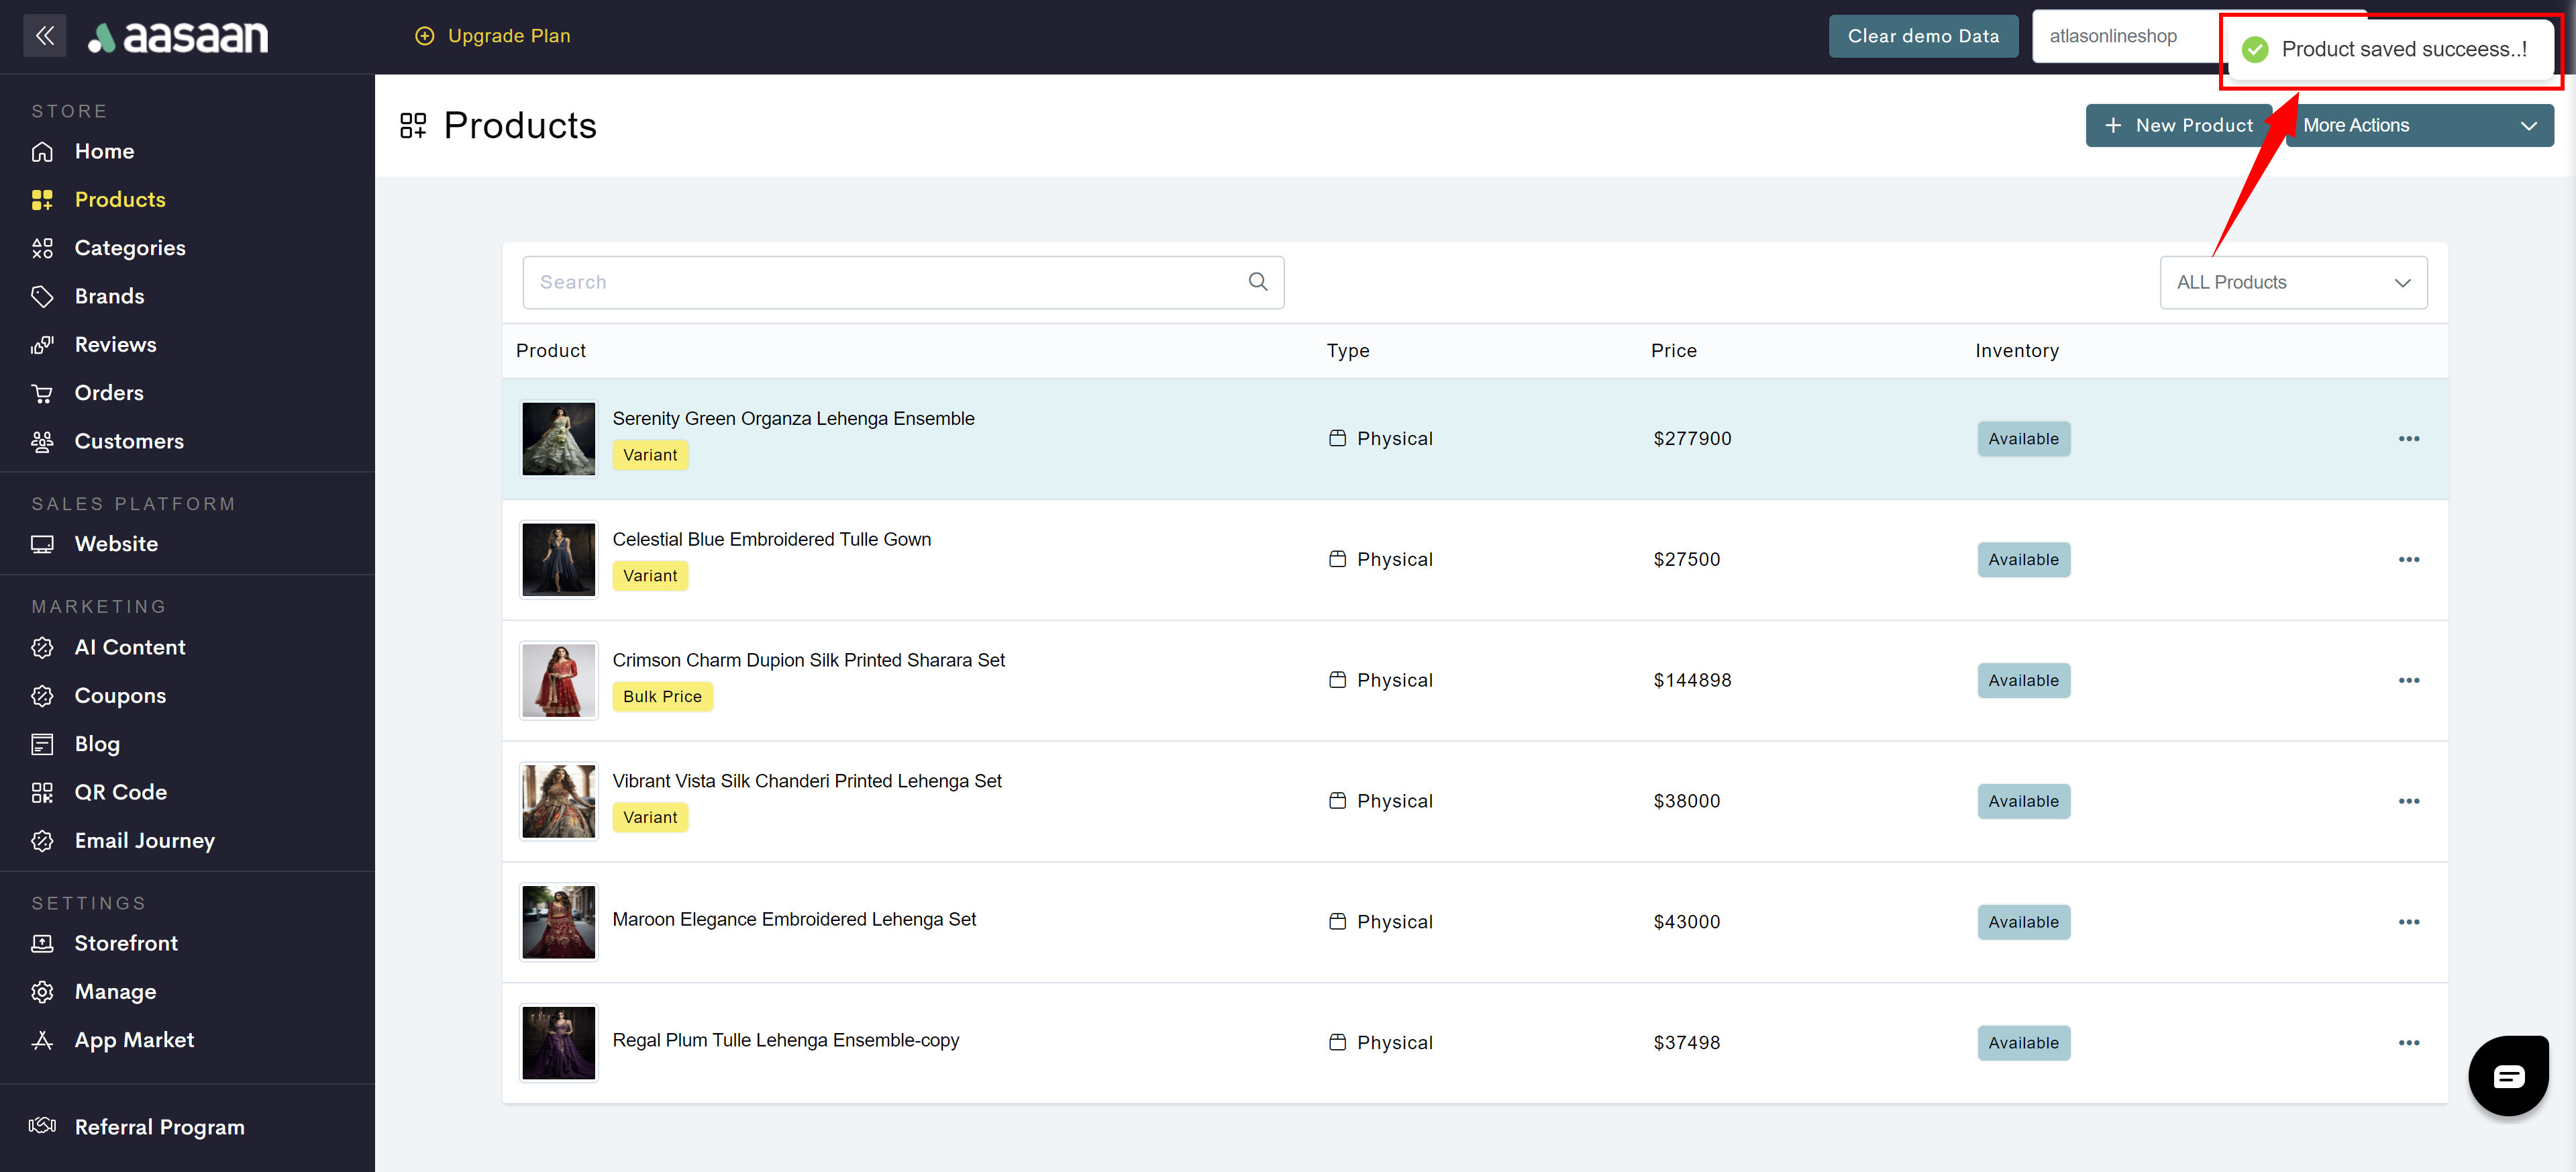
- Log in to your aasaan desktop admin panel and click on Products.
- Click on + New Product.
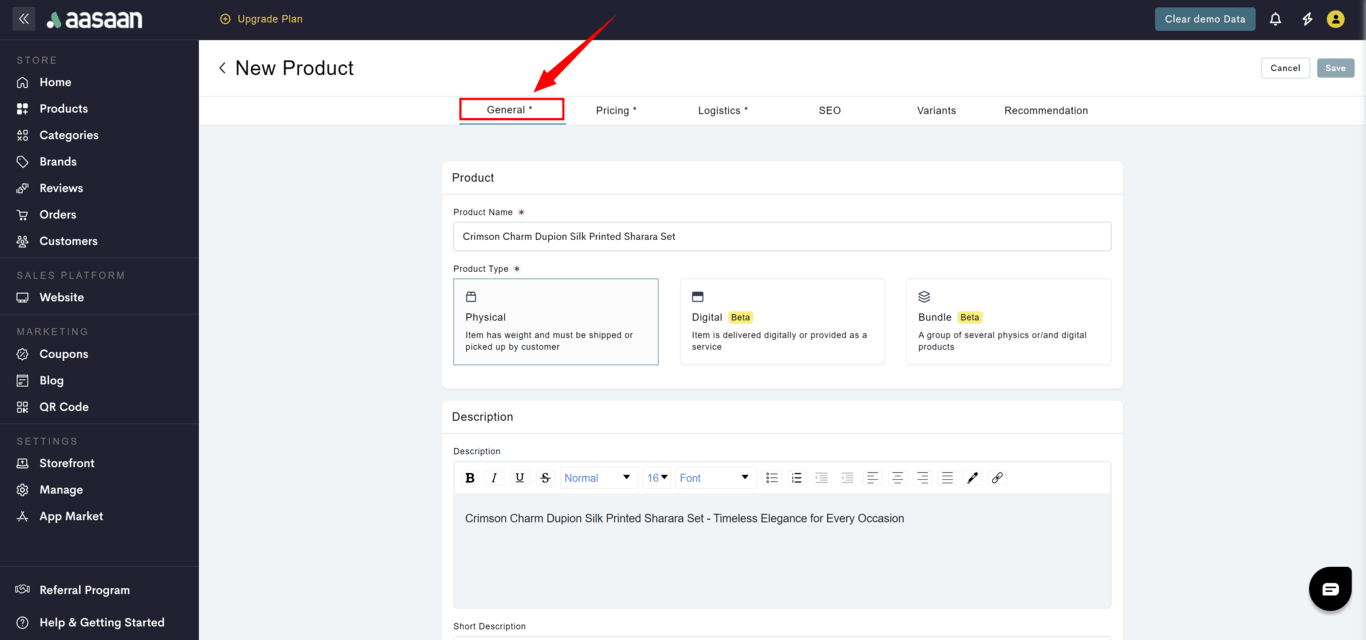
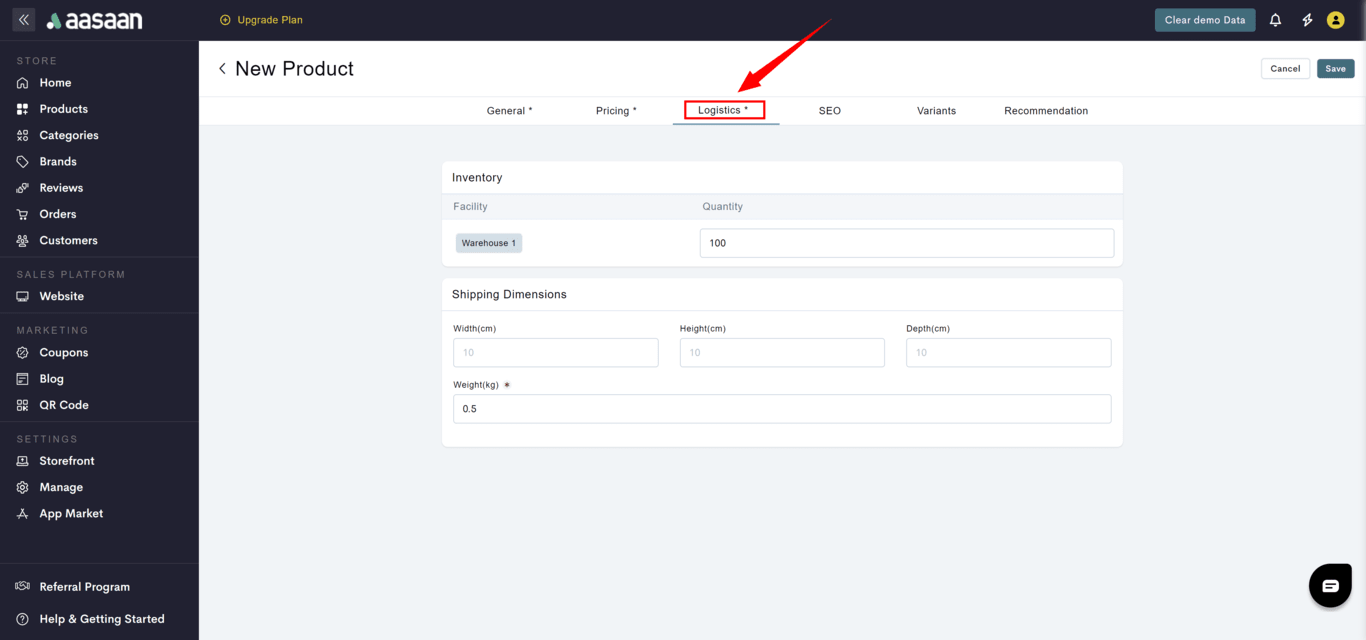
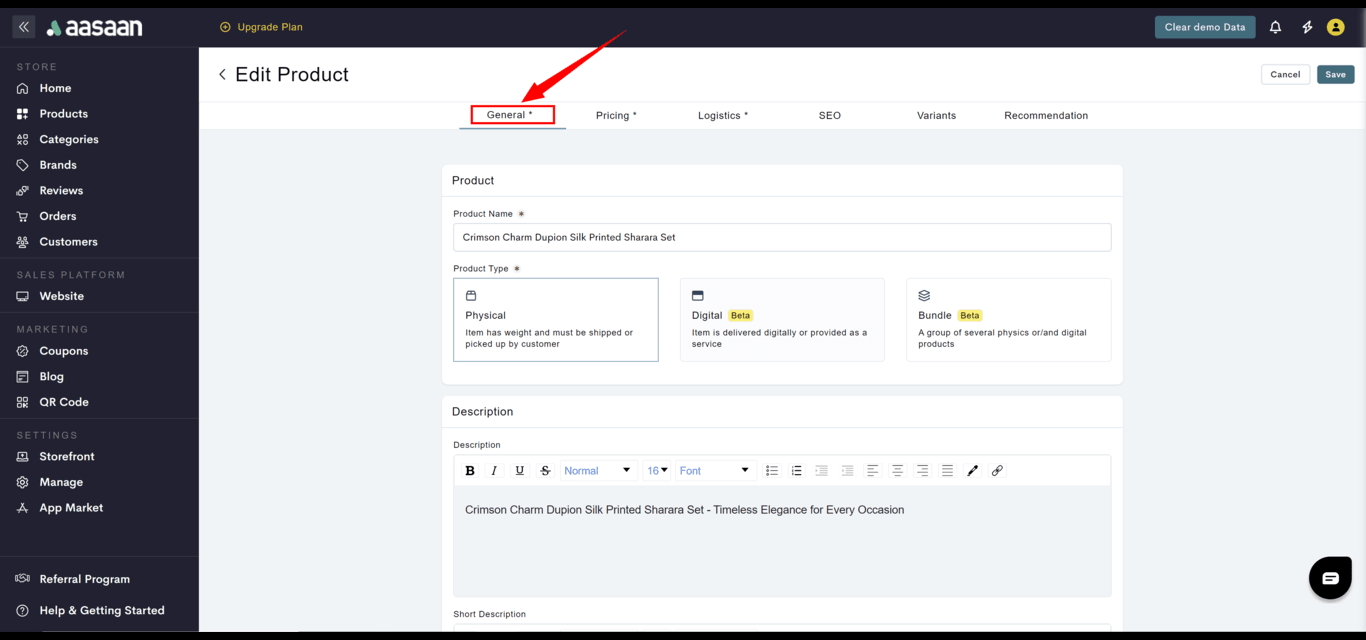
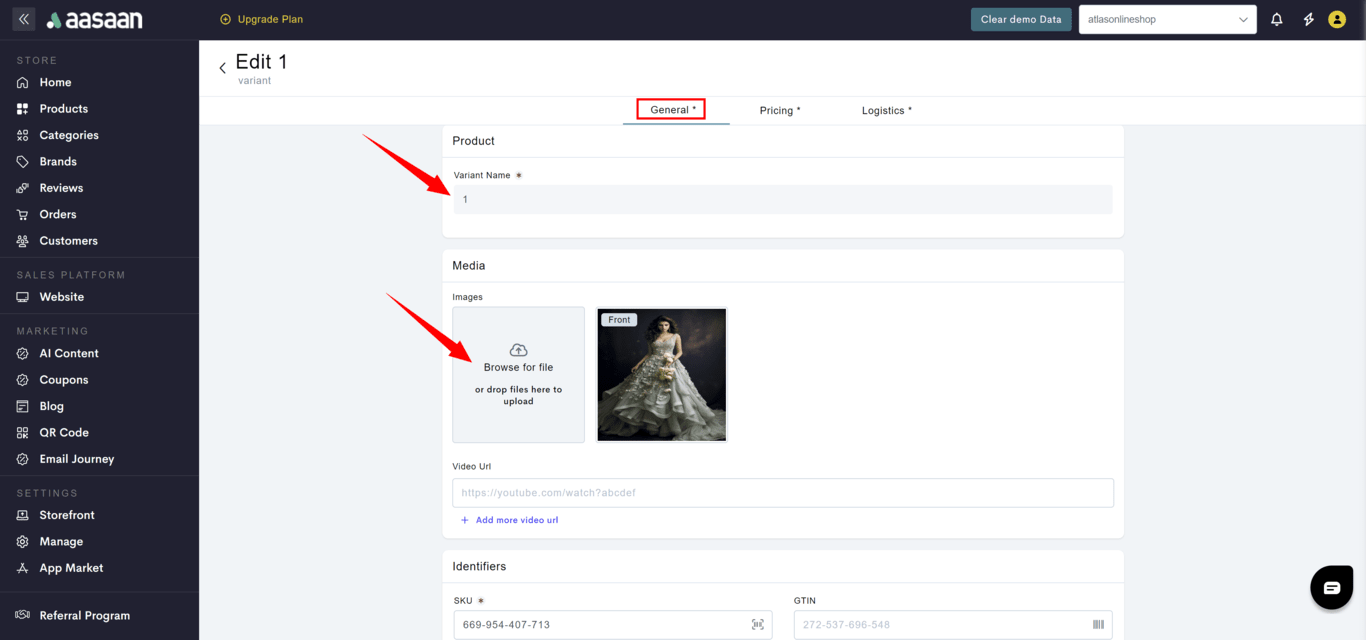
- Provide a name for your product, along with mandatory details like:
- General Tab -> Product type
- General Tab -> Categories
- General Tab -> SKU
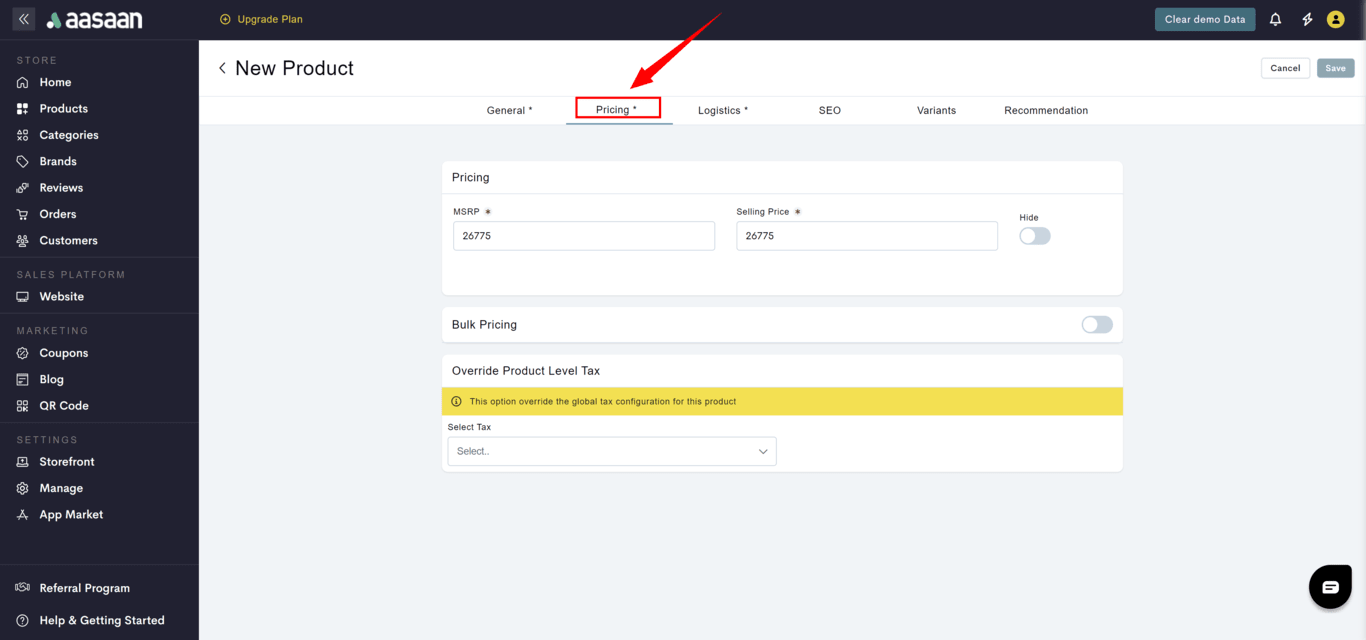
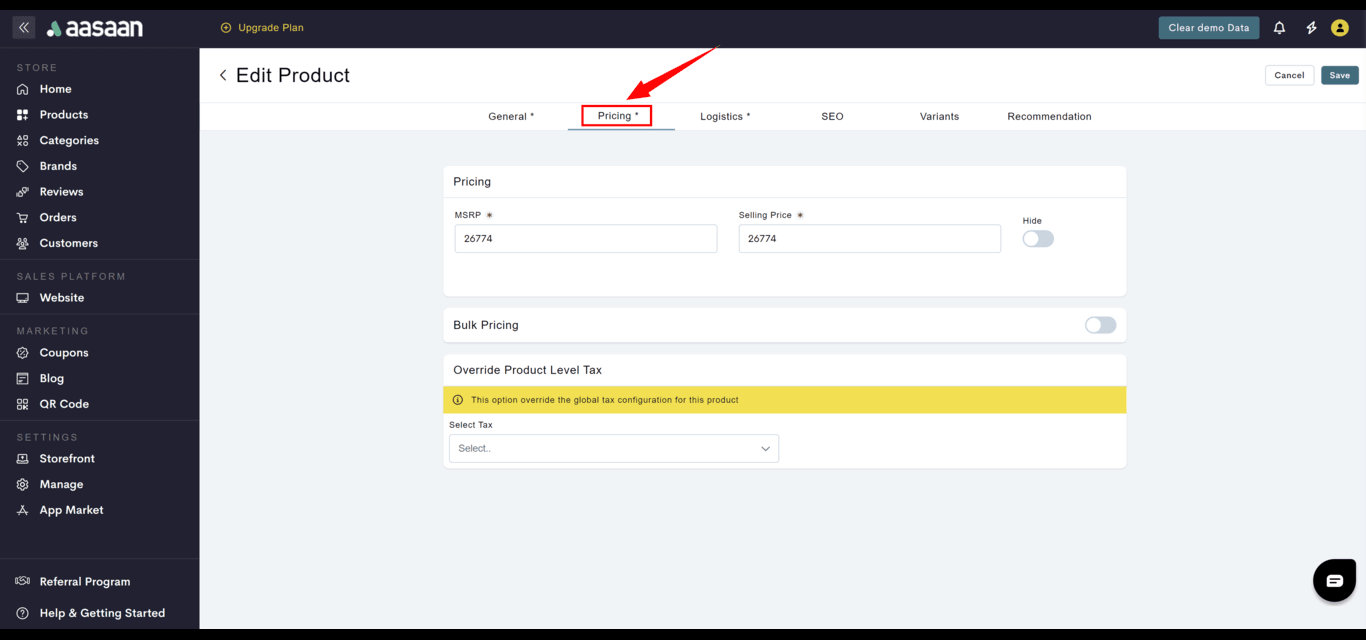
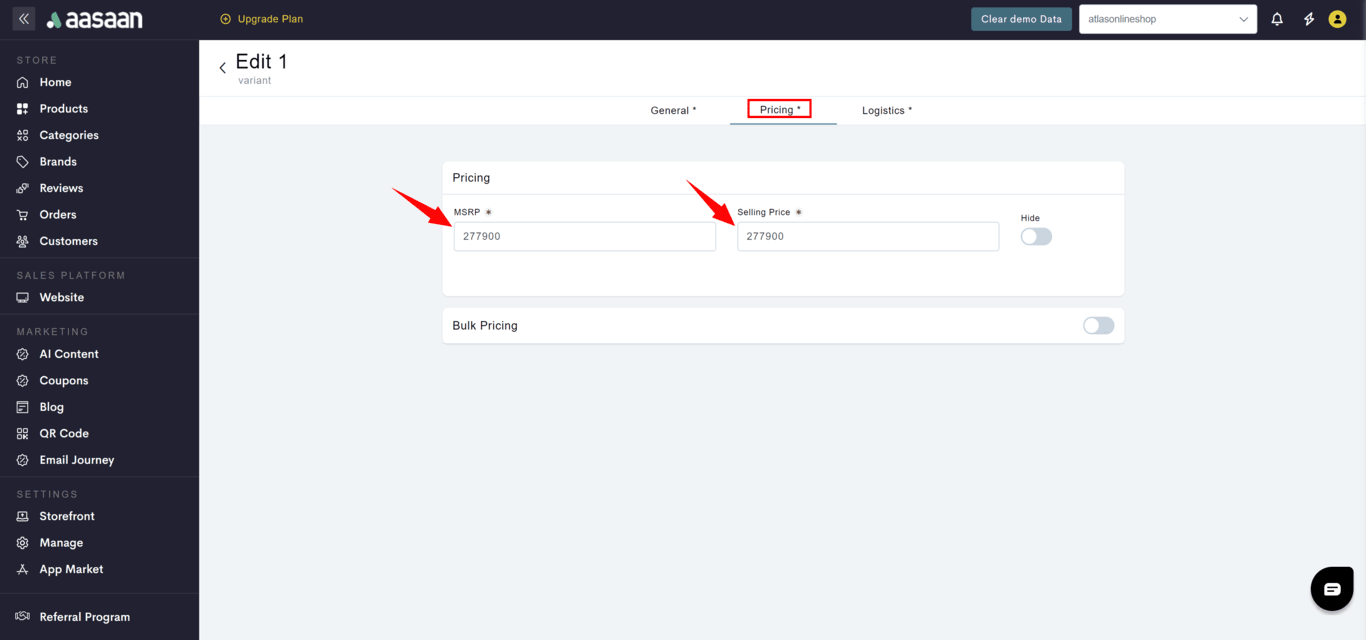
- Pricing Tab -> The manufacturer’s suggested retail price (MSRP)
- Pricing Tab -> Selling price
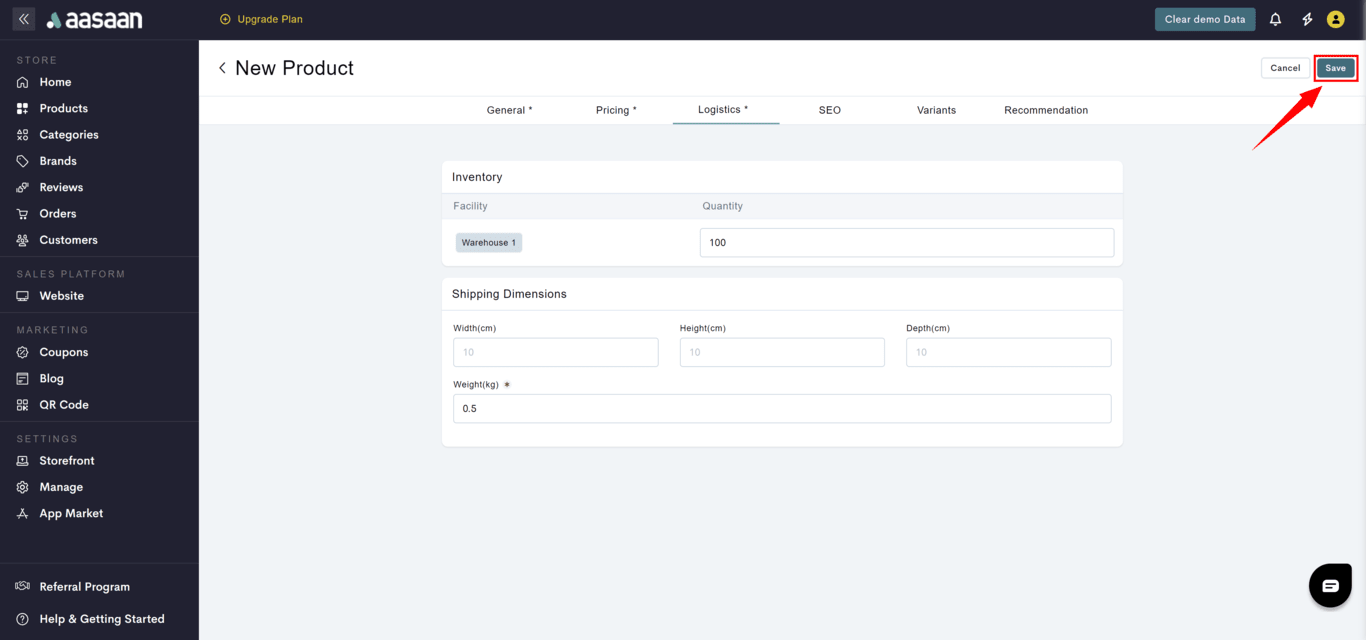
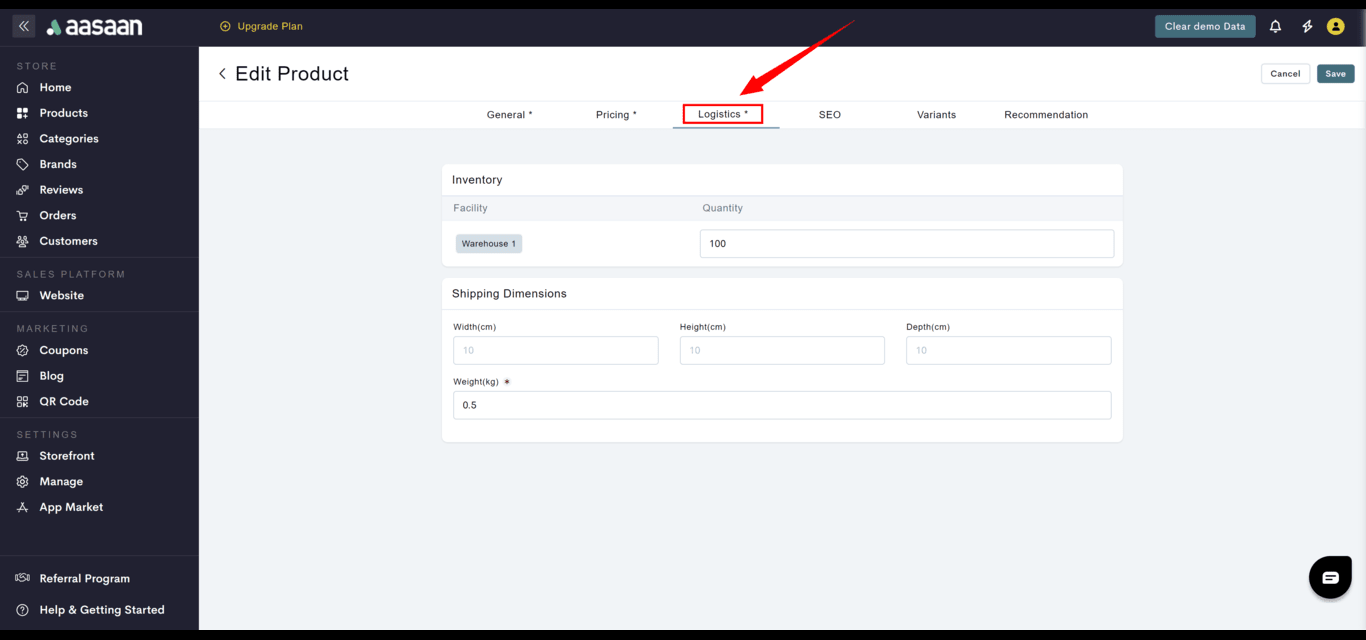
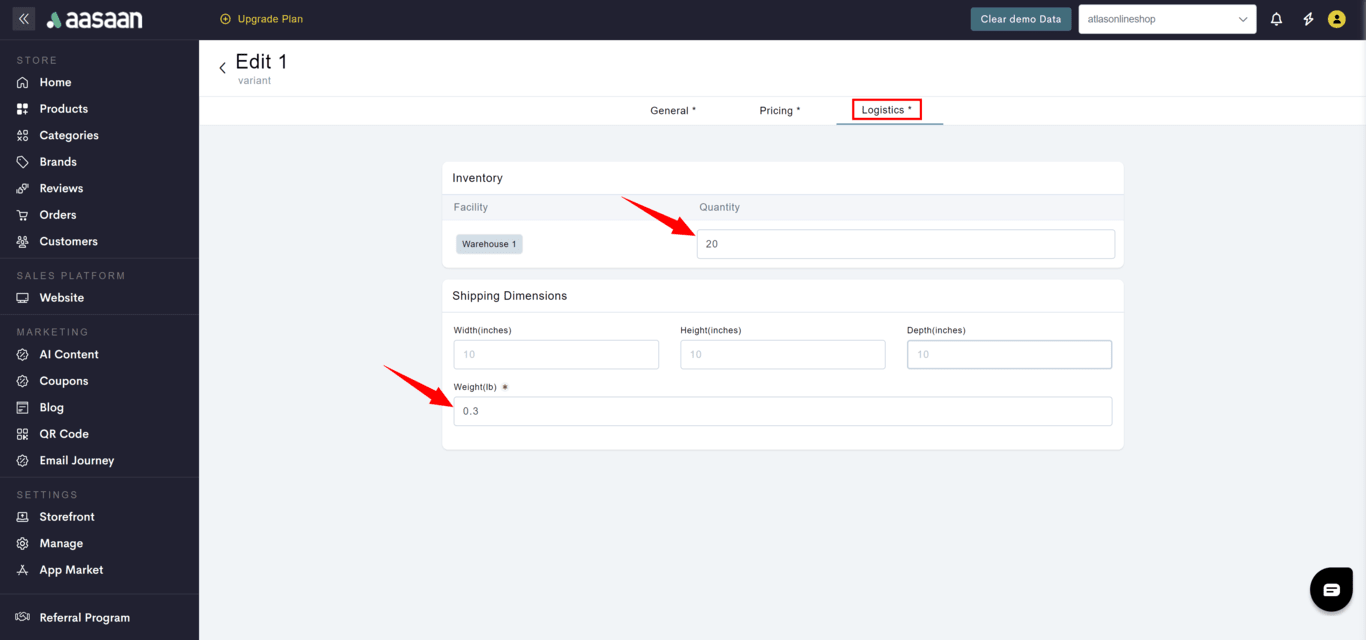
- Logistics Tab -> Weight
- Click on Save.
Edit Product
- Steps
- Screenshots
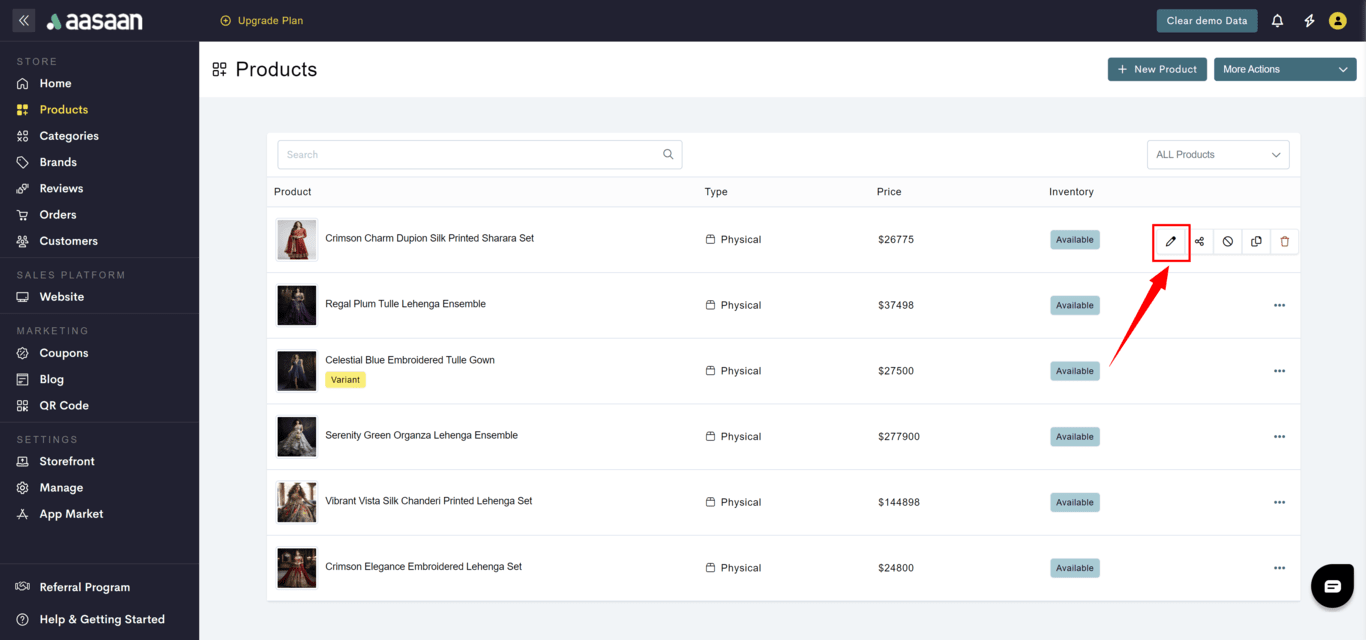
To edit a product in your store:
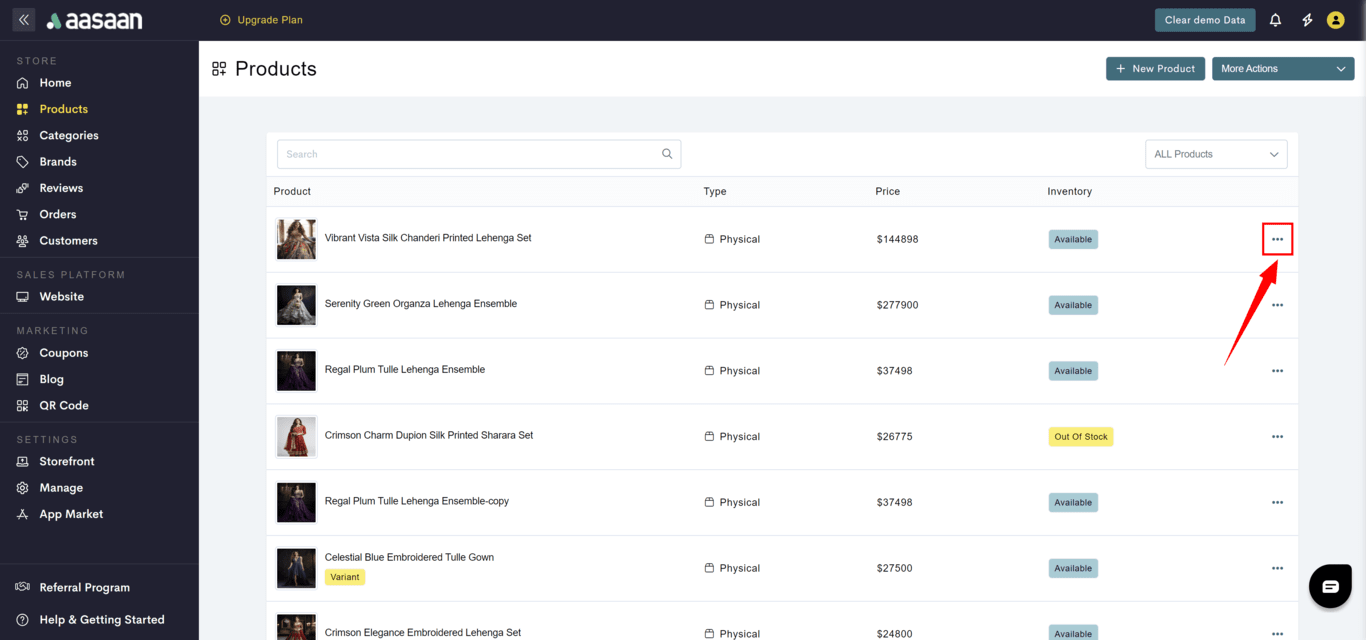
- Log in to your aasaan desktop admin panel and click on Products.
- Click on the product you want to edit OR
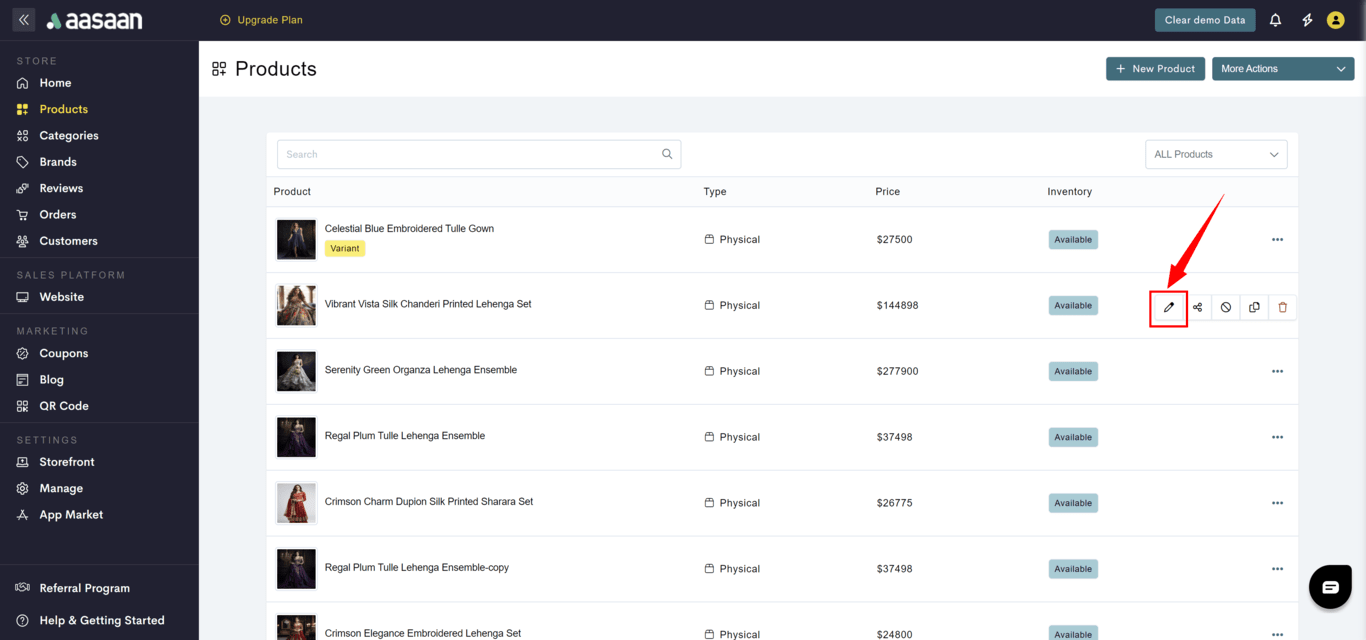
- Click on … at the product you want to modify.
- Click on the ✏️ icon.
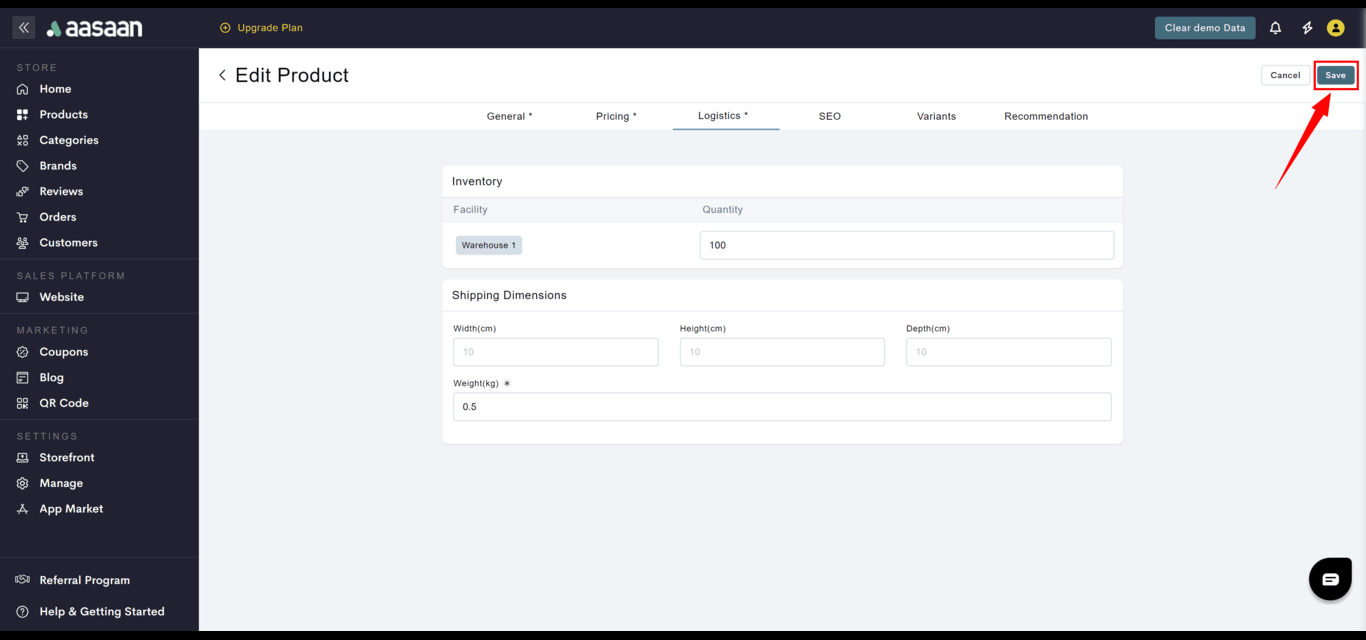
- Update the product details as needed.
- Click on Save.
Delete Product
- Steps
- Screenshots
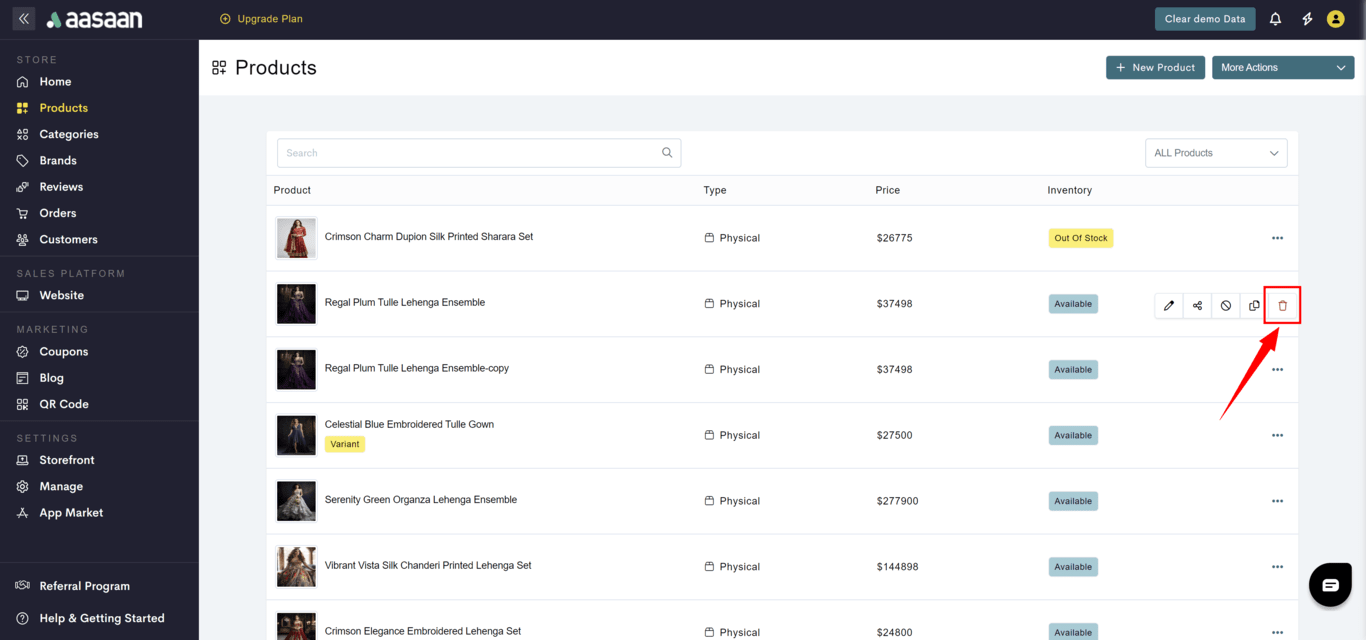
To delete a product in your store:
- Log in to your aasaan desktop admin panel and click on Products.
- Click on the product you want to edit OR
- Click on … at the product you want to modify.
- Click on the 🗑 icon.
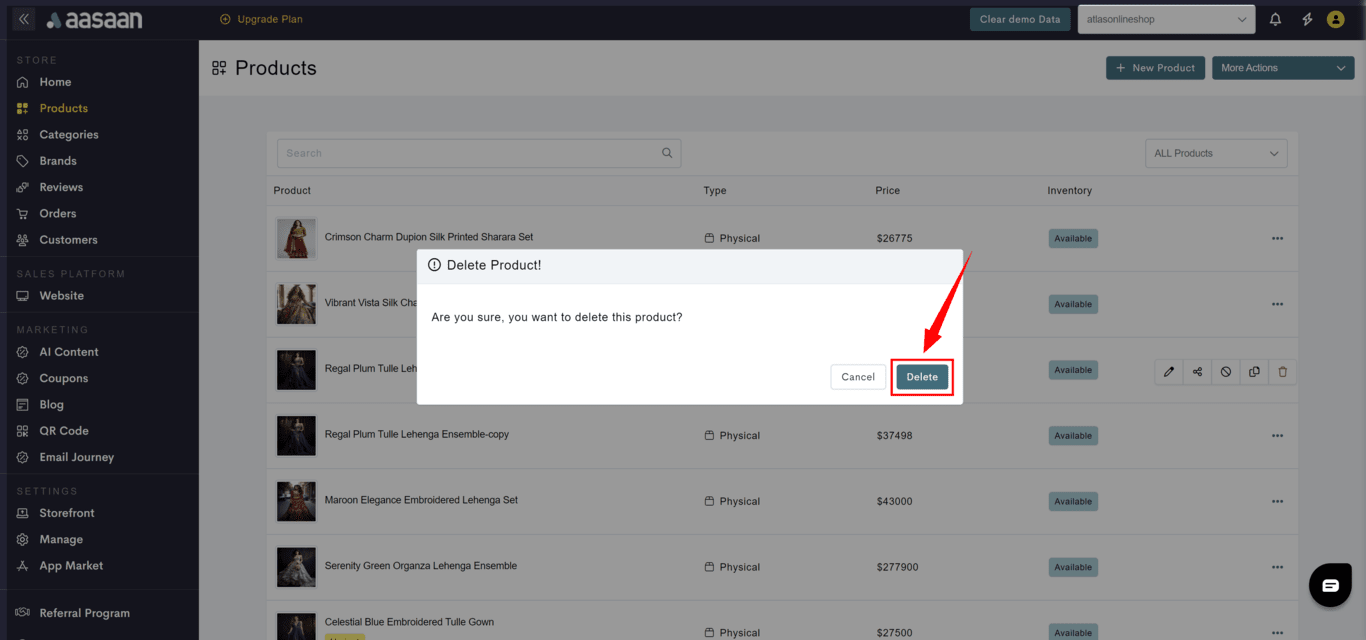
- A confirmation popup will be shown for your acknowledgement.
- When you press delete, the product would be deleted.


Product Details
Product Descriptions
Product Descriptions
Description: A detailed description of the product that includes its features, benefits, and specifications. It is usually displayed on the product page and helps customers understand the product better. For example, a product description for a laptop might include details about its processor, RAM, storage, screen size, and battery life.Short Description: A brief summary of the product that highlights its key features and benefits. It is usually displayed on the product page and helps customers quickly understand what the product is about. For example, a short description for a laptop might include details about its lightweight design, long battery life, and fast performance.
Media
Media
Product Images: Images of the product that are displayed on the product page. They help customers visualize the product and make informed purchase decisions. For example, images of a laptop might include pictures of its design, keyboard, screen, and ports.Product Videos: Videos of the product that are displayed on the product page. They help customers understand the product better and make informed purchase decisions. For example, a video of a laptop might showcase its features, performance, and design.
- For full-length Youtube videos, here is the appropriate link format: https://www.youtube.com/watch?v=samplevideo
- For Youtube shorts, here is the appropriate link format: https://www.youtube.com/shorts/sampleshort
Brands
Brands
Brands: If you sell shoes, you might have different brands like Nike, Adidas, and Puma. Each brand has its own unique style and target audience.
SKU
SKU
SKU: If you sell electronics, each product will have a unique SKU. For example, a laptop might have the SKU “LPTP-001.”
GTIN
GTIN
GTIN: If you sell products on a global scale, you might need to use GTINs to identify your products. For example, a book might have an ISBN code.
Custom Fields
Custom Fields
Custom Fields: Let’s say you sell furniture. You can use custom fields to provide additional information about your products, such as the type of wood used or the dimensions of the product.
Inventory
Inventory
Inventory: If you sell products, it’s important to keep track of your inventory levels. For example, if you sell t-shirts, you need to know how many t-shirts you have in stock so you can fulfill customer orders.
Shipping Dimensions
Shipping Dimensions
Shipping Dimensions: When you ship products, you need to provide accurate shipping dimensions to ensure that your products are shipped safely and efficiently. For example, if you sell furniture, you need to provide the dimensions of the product when it is packaged for shipping.
SEO
SEO
Product SEO: If you sell products online, it’s important to optimize your product pages for search engines. This can help improve your visibility and attract more customers. For example, you can use relevant keywords in your product descriptions to improve your search engine ranking.
Variants
Variants
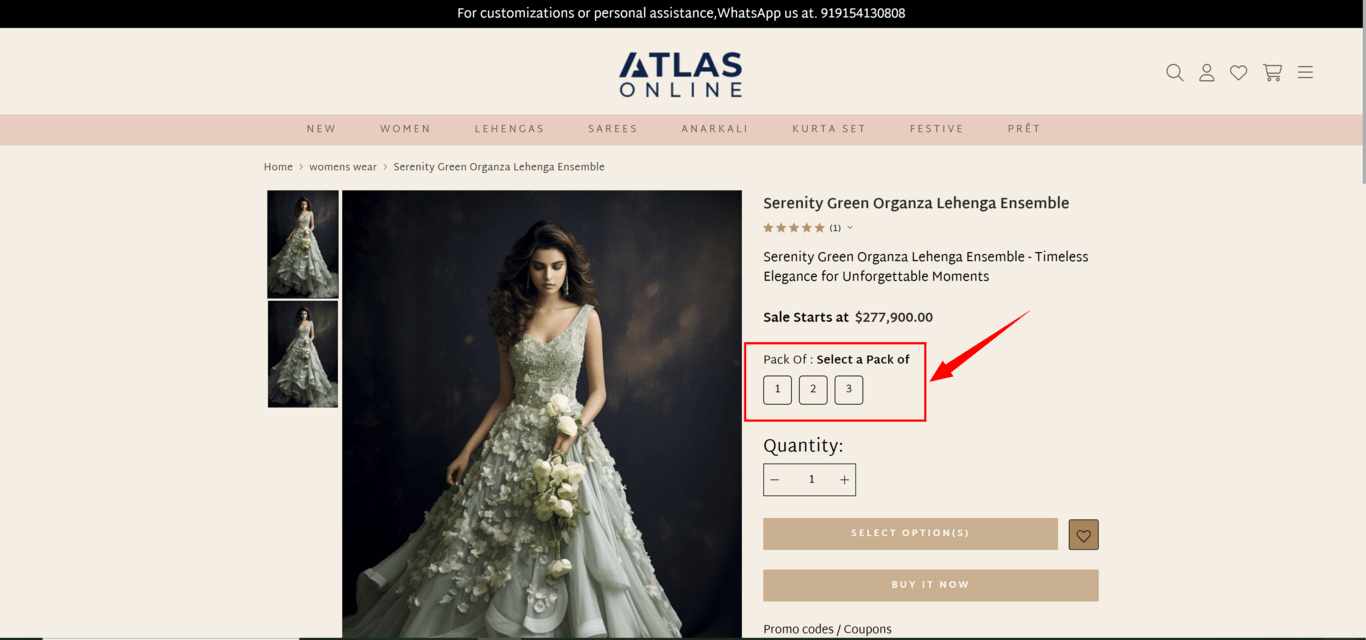
Variants: A variant is a specific version of a product that comes in different variations. For example, a shirt that comes in different sizes has size variants. Each variant of a product has its own unique identifier, such as a SKU or GTIN, so it can be tracked separately from other variants. For example, if you sell t-shirts in different colors and sizes, you can create a product for each color and then create variants for each size. Each variant would have its own unique identifier, such as a SKU or GTIN, so you can track inventory levels and sales for each size separately.
Recommended Products
Recommended Products
Recommended Products: Let’s say a customer is browsing your website and is interested in a particular product. You can use recommended products to suggest other products that the customer might be interested in. For example, if a customer is looking at a pair of shoes, you can suggest other shoes that are similar in style or color.
Up Sell
Up Sell
Up Sell: If a customer is interested in a particular product, you can use up selling to suggest a higher-end or more expensive version of the product. For example, if a customer is looking at a laptop, you can suggest a more powerful laptop with better features.
Cross Sell
Cross Sell
Cross Sell: If a customer is interested in a particular product, you can use cross selling to suggest complementary or related products. For example, if a customer is looking at a camera, you can suggest a camera case or a memory card.
Manage Product - Variants
Sometimes, products might have variations. For example, if you sell T-shirts, each T-shirt will have various sizes and color options. Adding product variants to your aasaan store is really simple. Here’s how you do it:Manage Options
- Steps
- Screenshots
To manage the product variant options in your store:
- Log in to your aasaan desktop admin panel and click on Products.
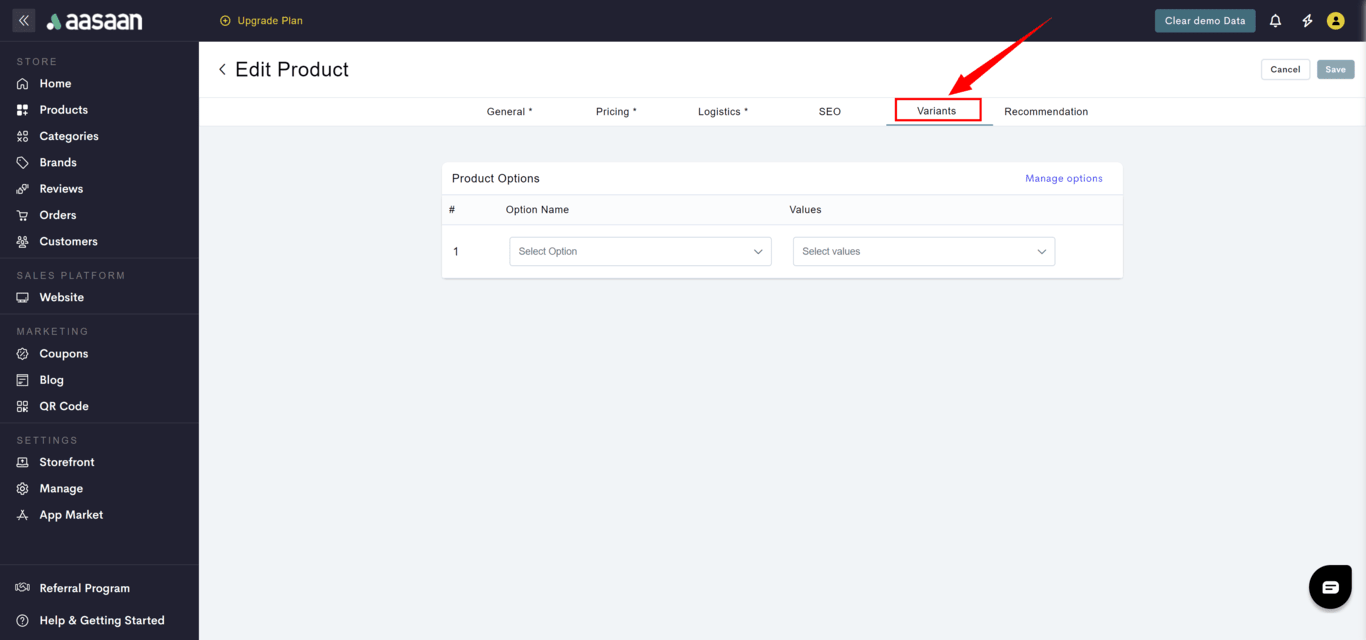
- Go into the product for which you want to add a variant.
- Goto Variants tab.
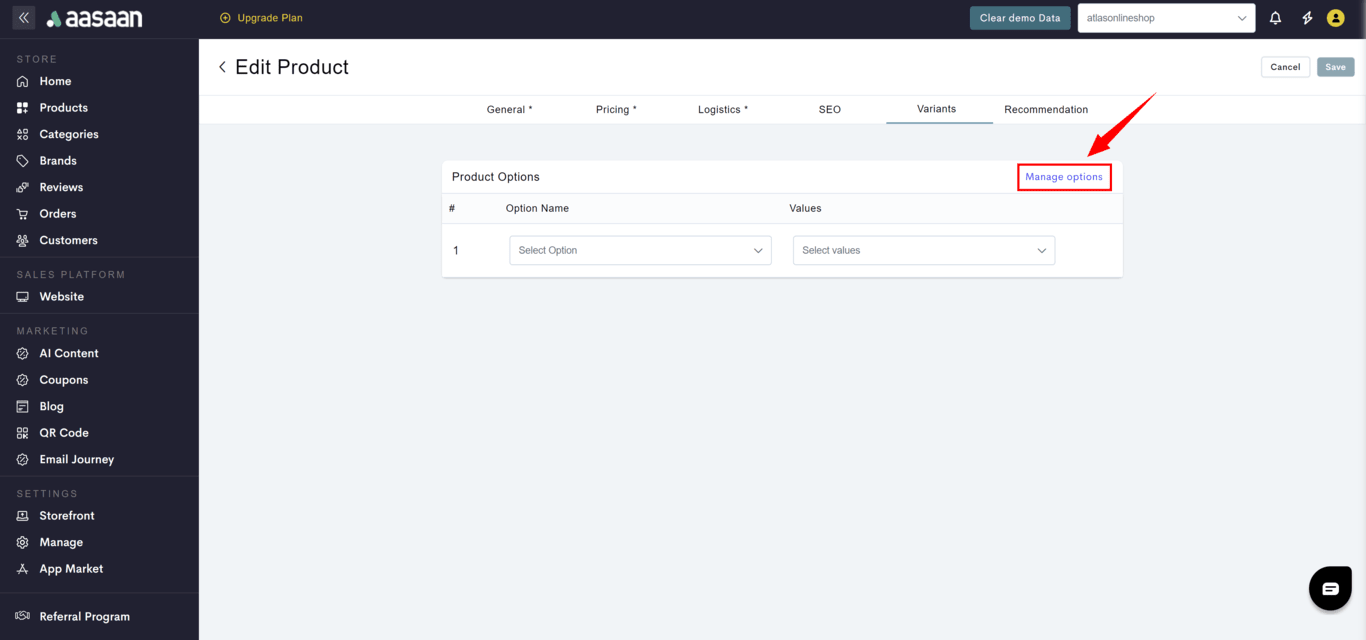
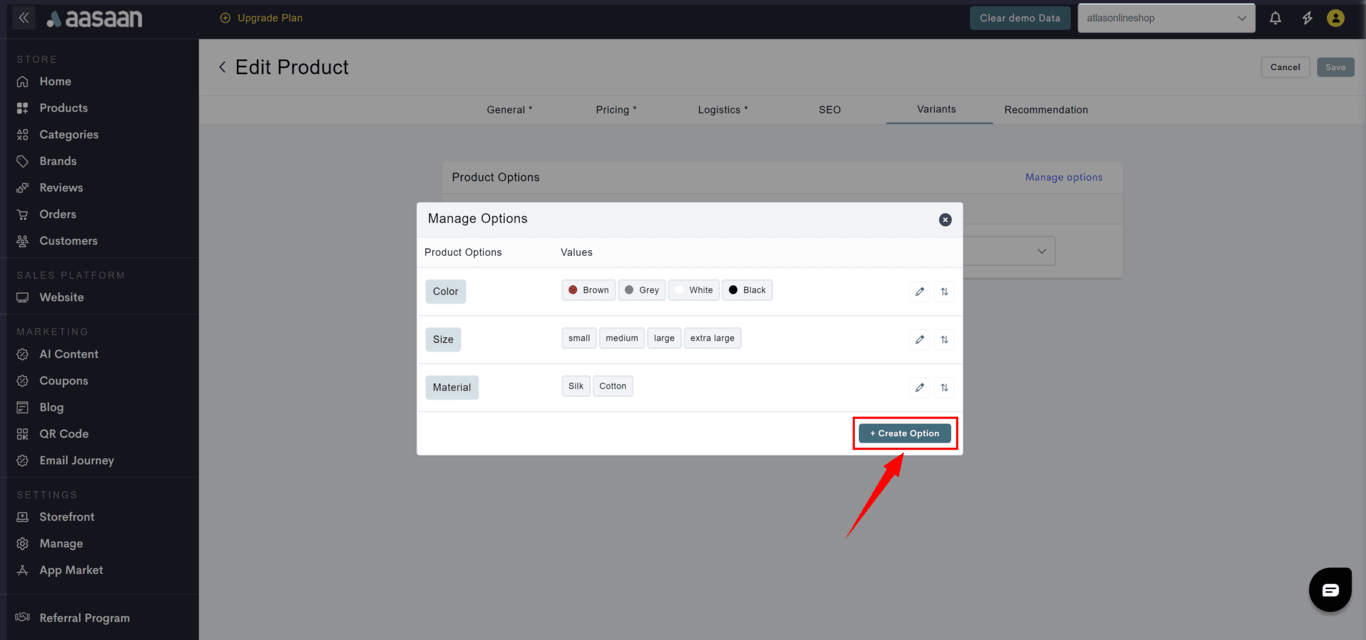
- Click Manage options.
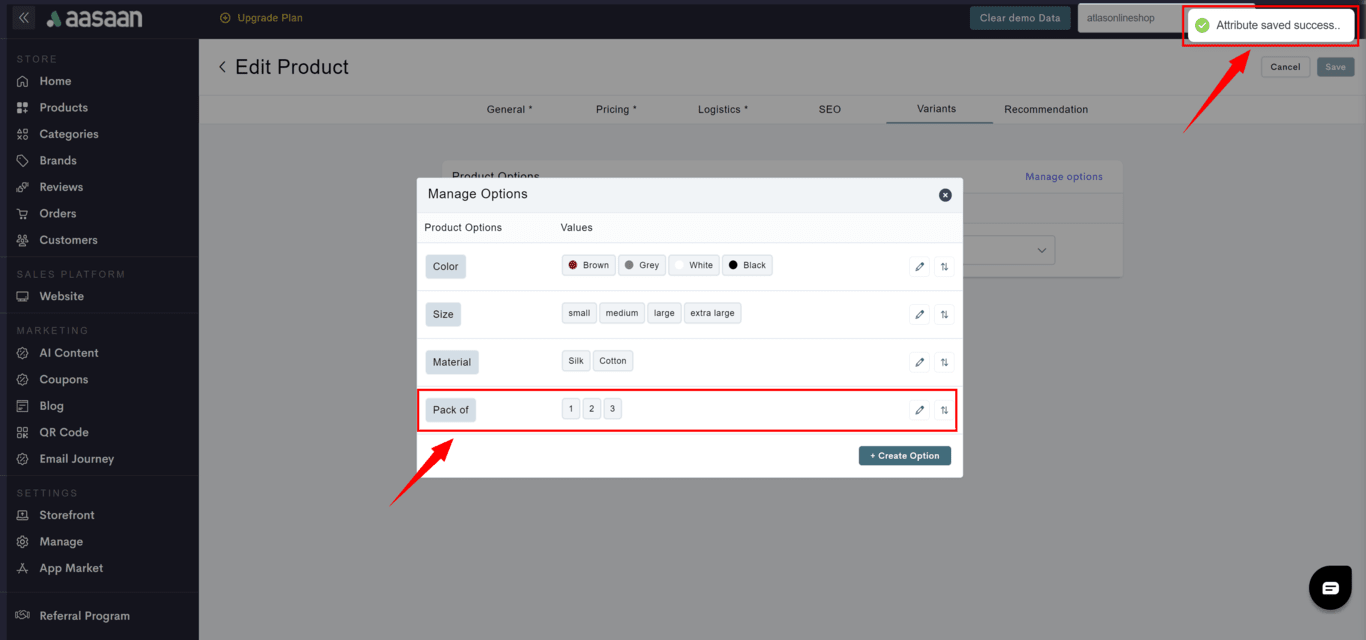
- A pop-up will appear, wherein you can add your variant option. Color and size are given as standard options, but you can add more options such as material and weight etc as per your product catalog by clicking the + Create Option.
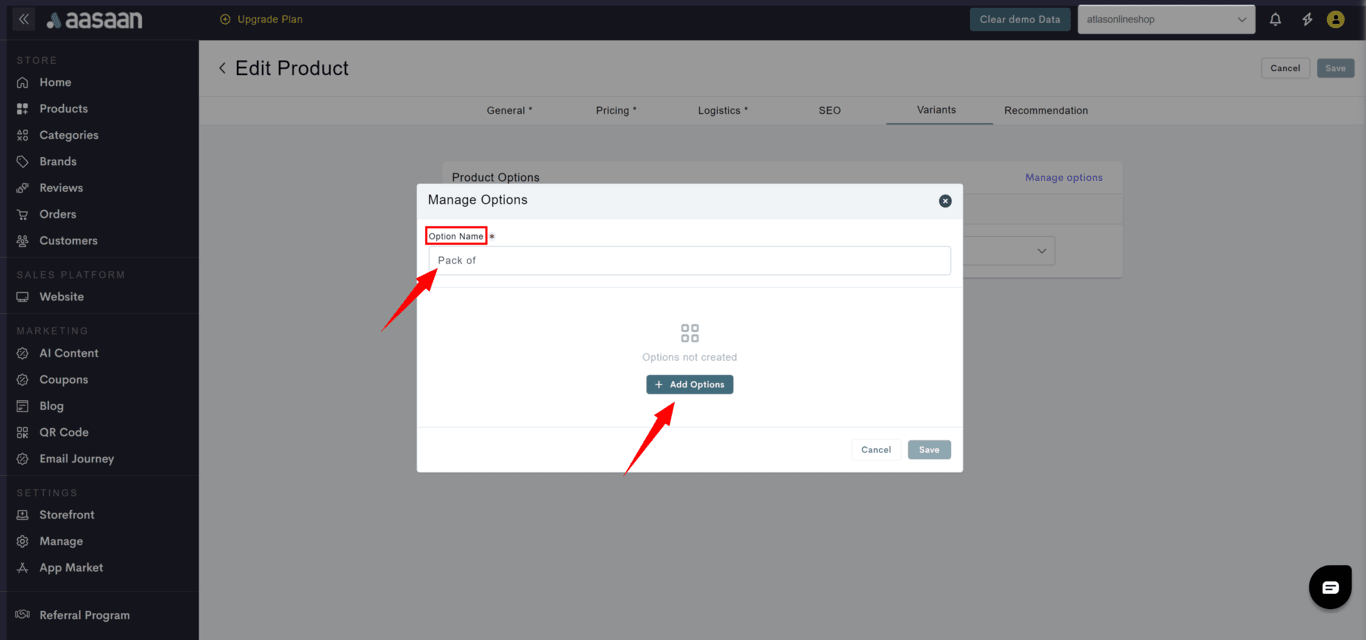
- Provide an Option Name which you want to create.
- Click + Add Option.
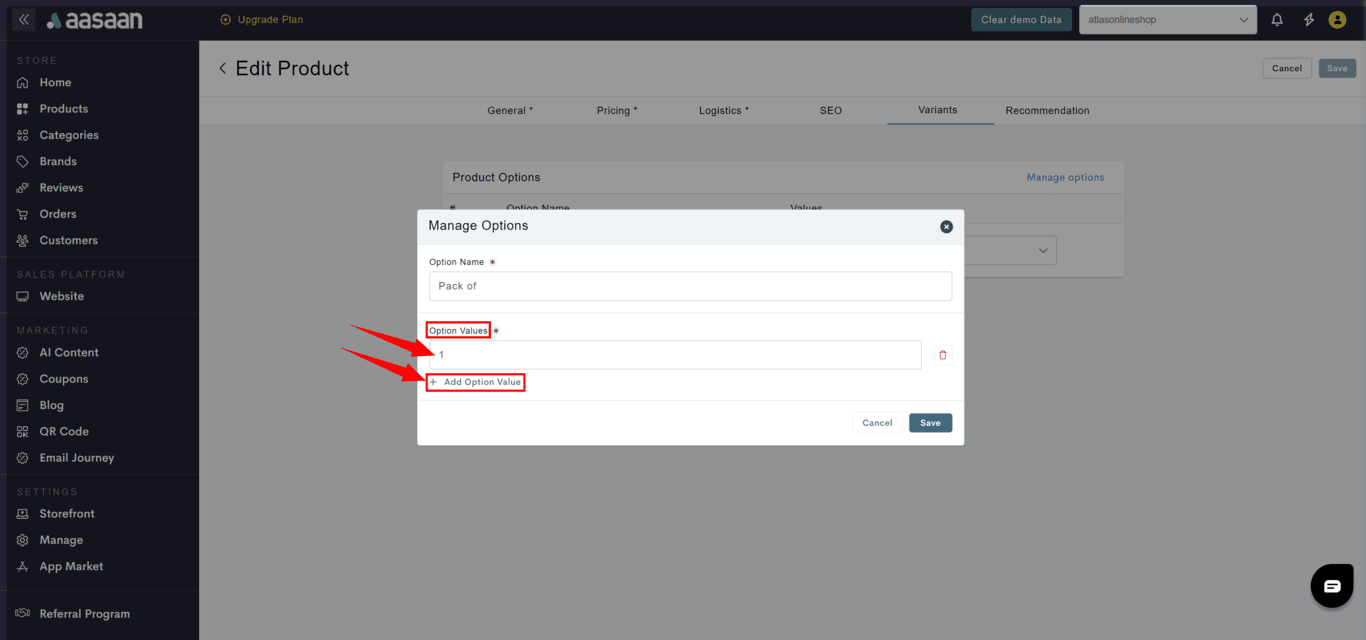
- Provide the Option Value.
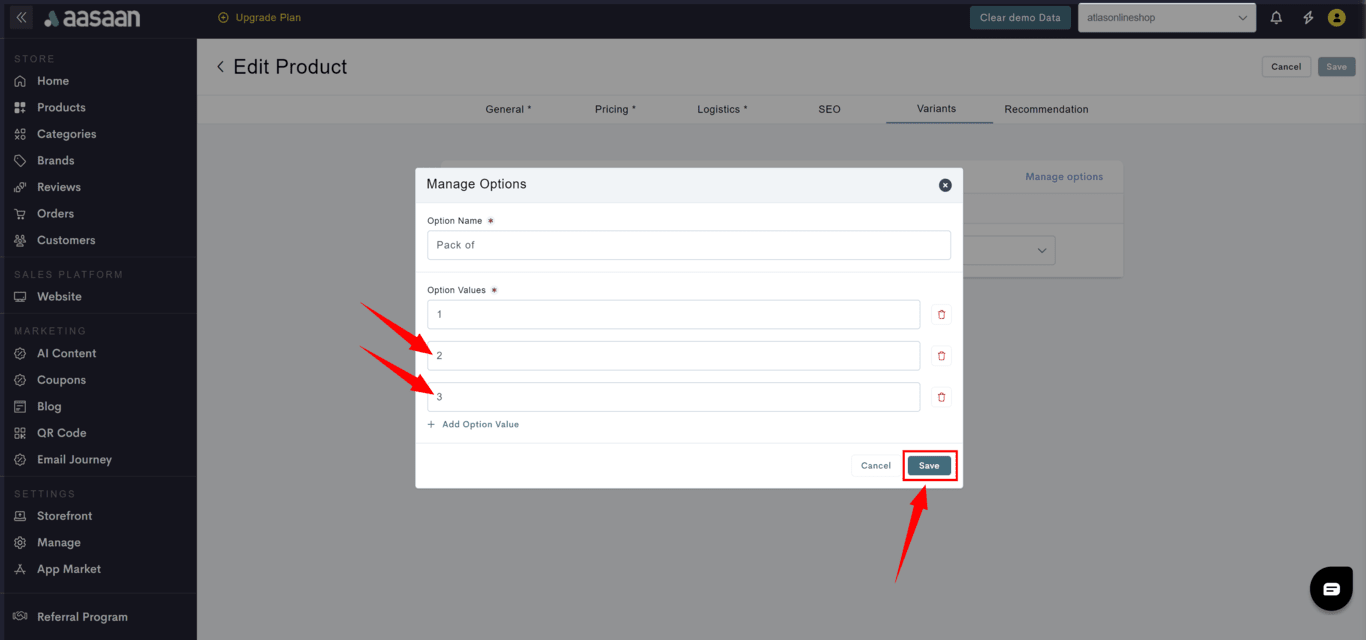
- To add more option values, click + Add Option and provide the detail.
- Once you added all required option values for the give option name, then click on Save.
Add Variants
- Steps
- Screenshots
- Log in to your aasaan desktop admin panel and click on Products.
- Edit the product for which you want to add a variant.
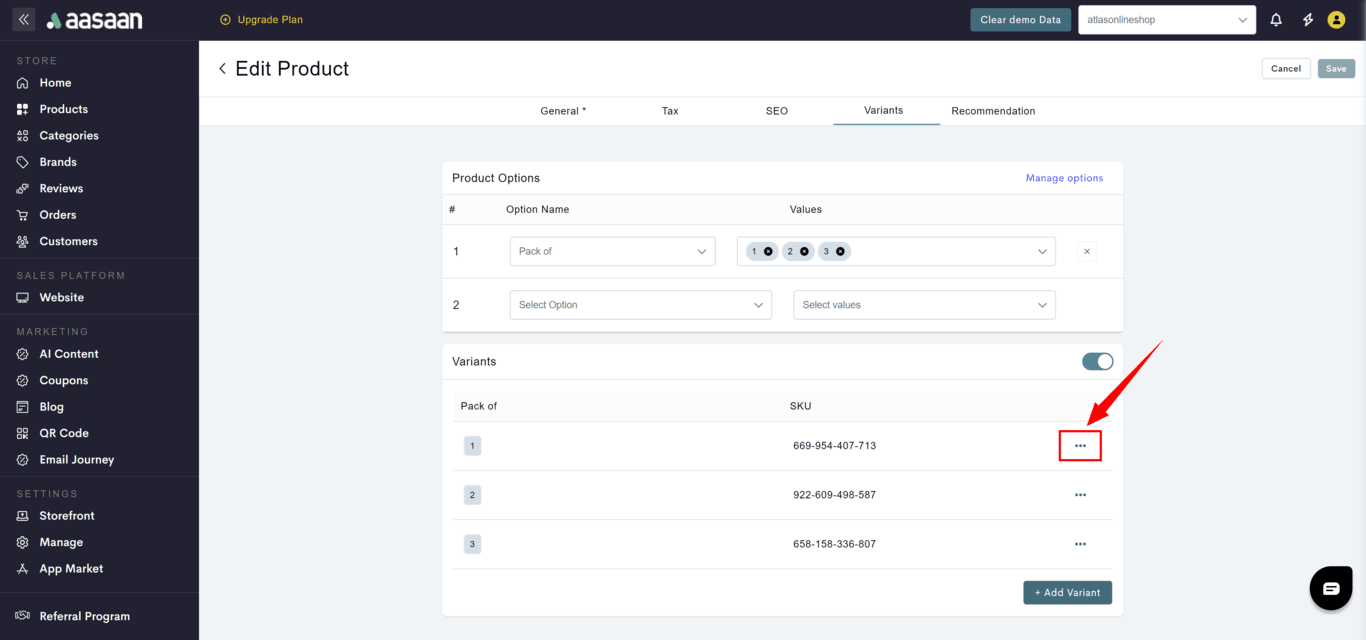
- Goto Variants tab.
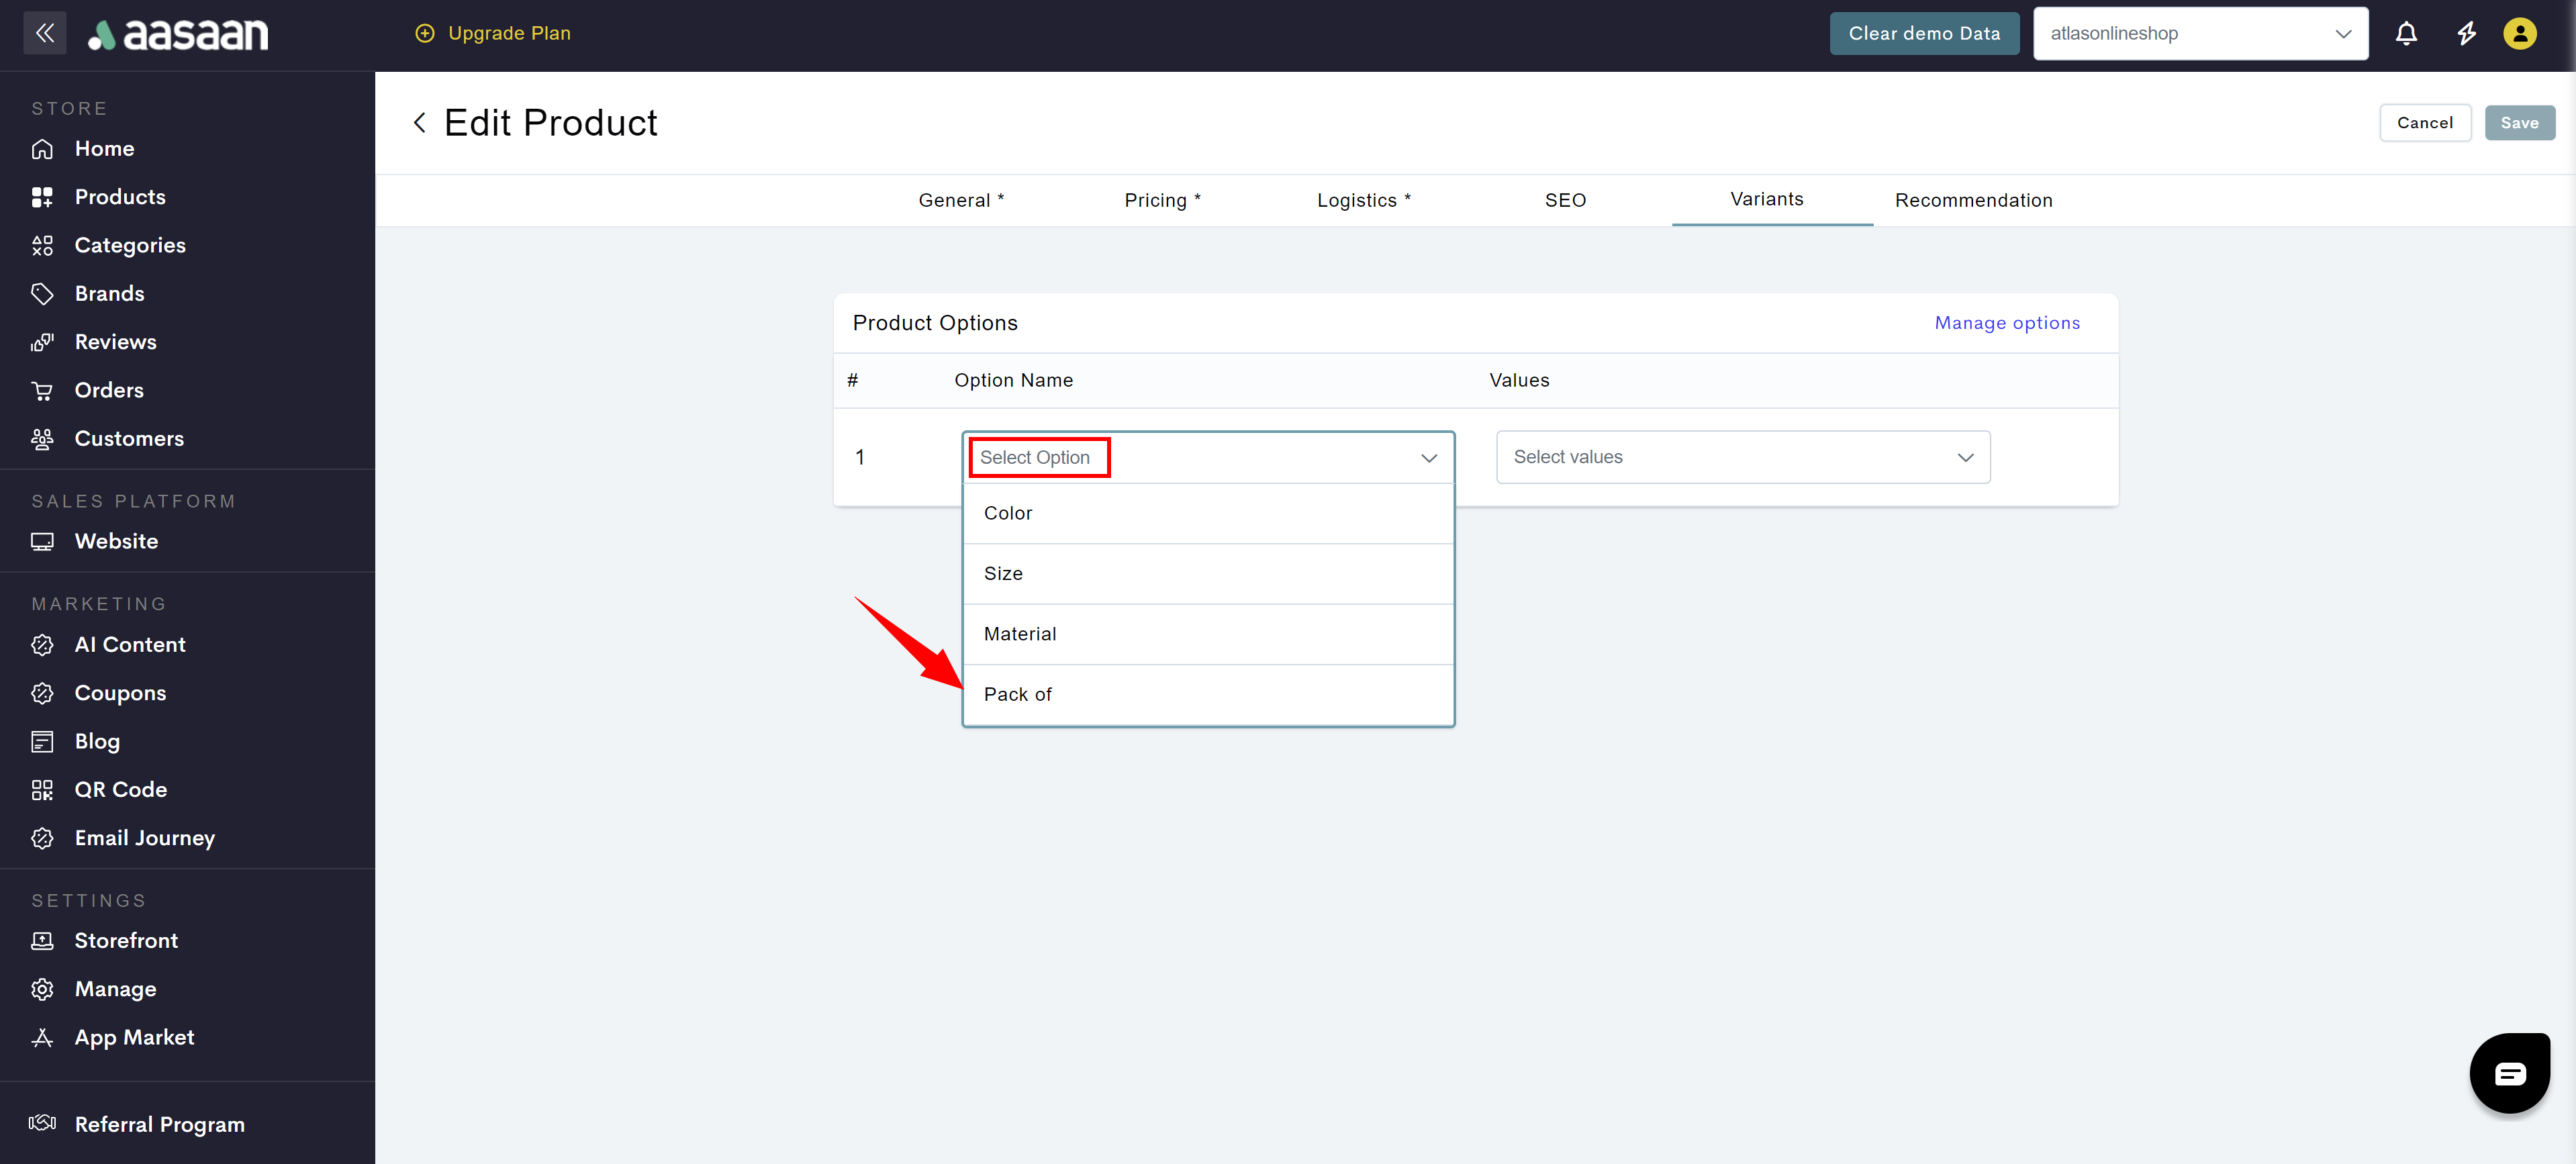
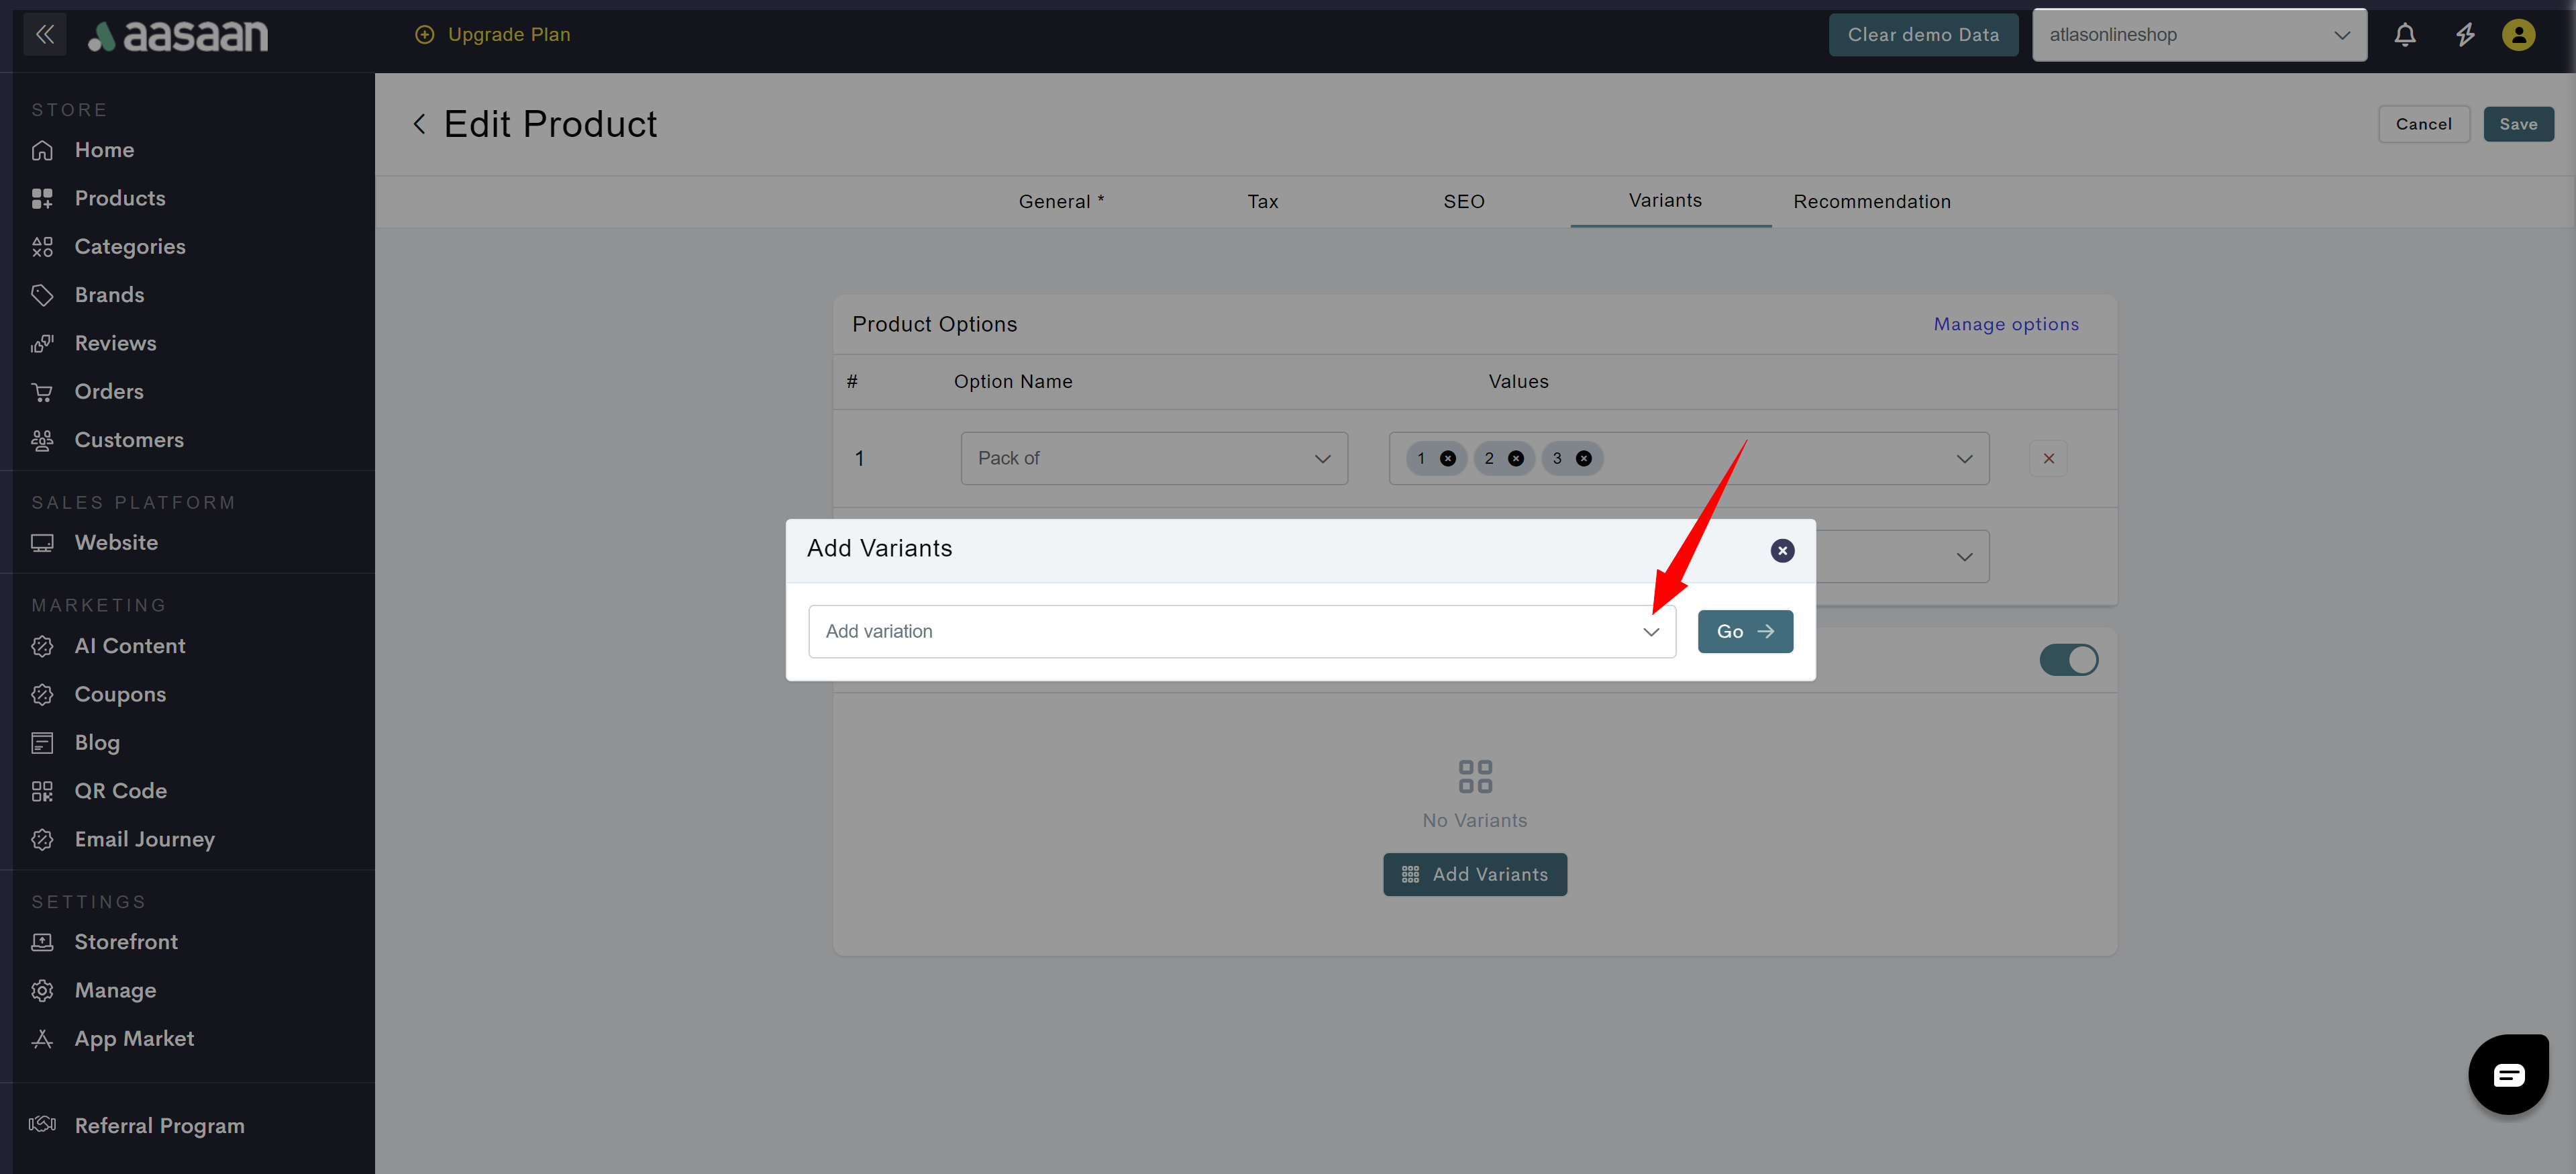
- Select the option name from the drop down list.
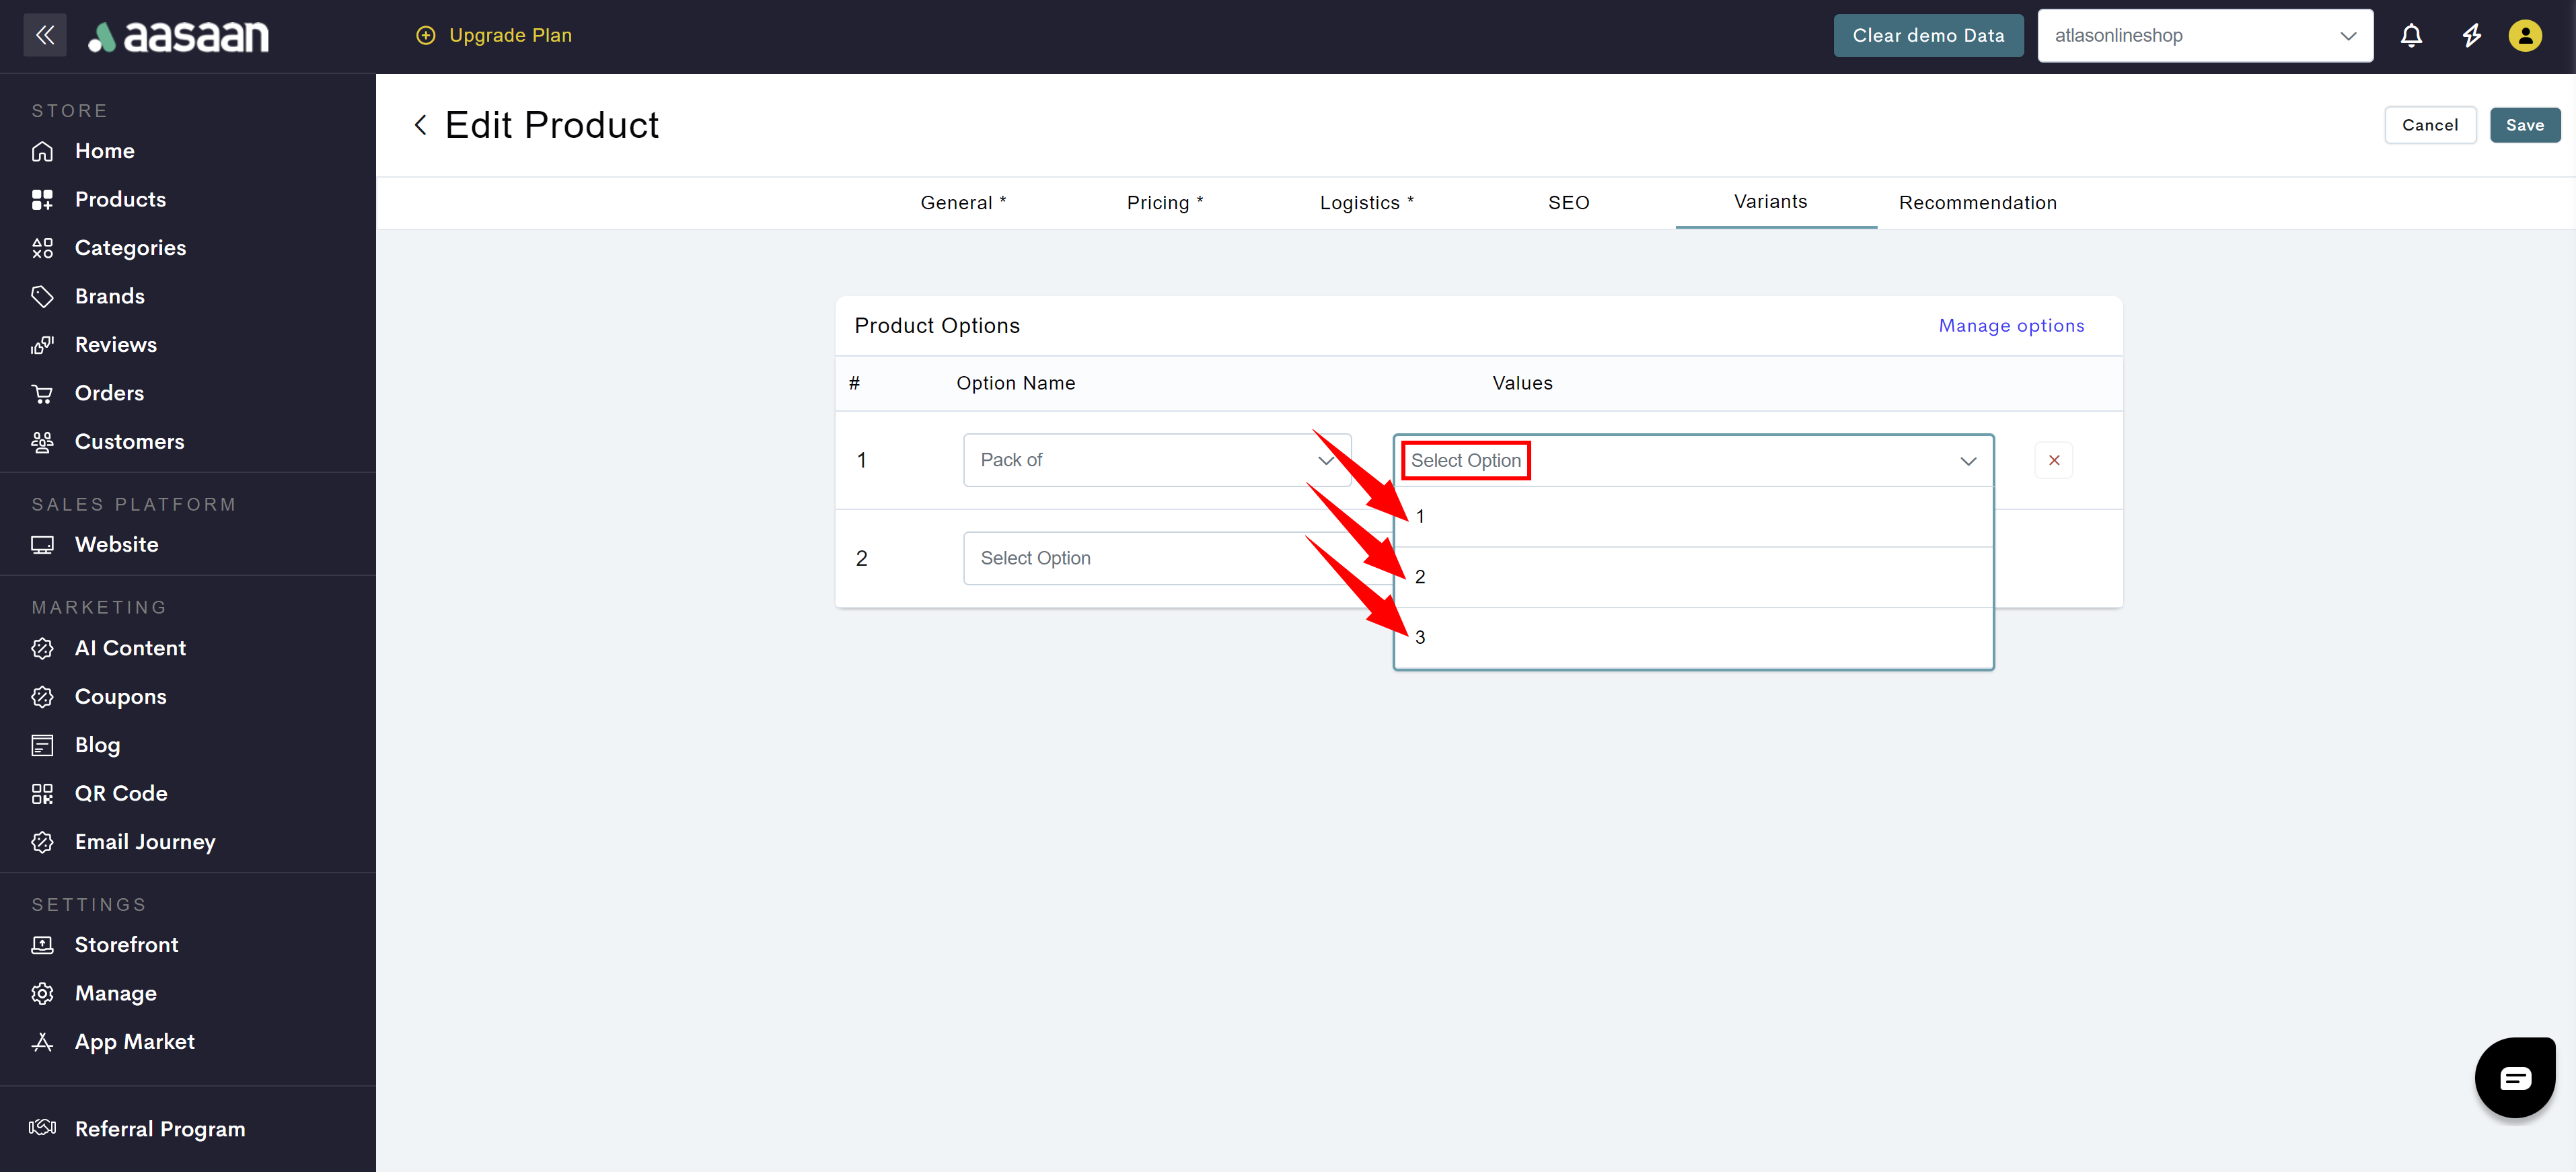
- Select all the relevant values for the selected option name, that you want to include as variants for the product.
- If the product has a second variant option, repeat the above two steps.
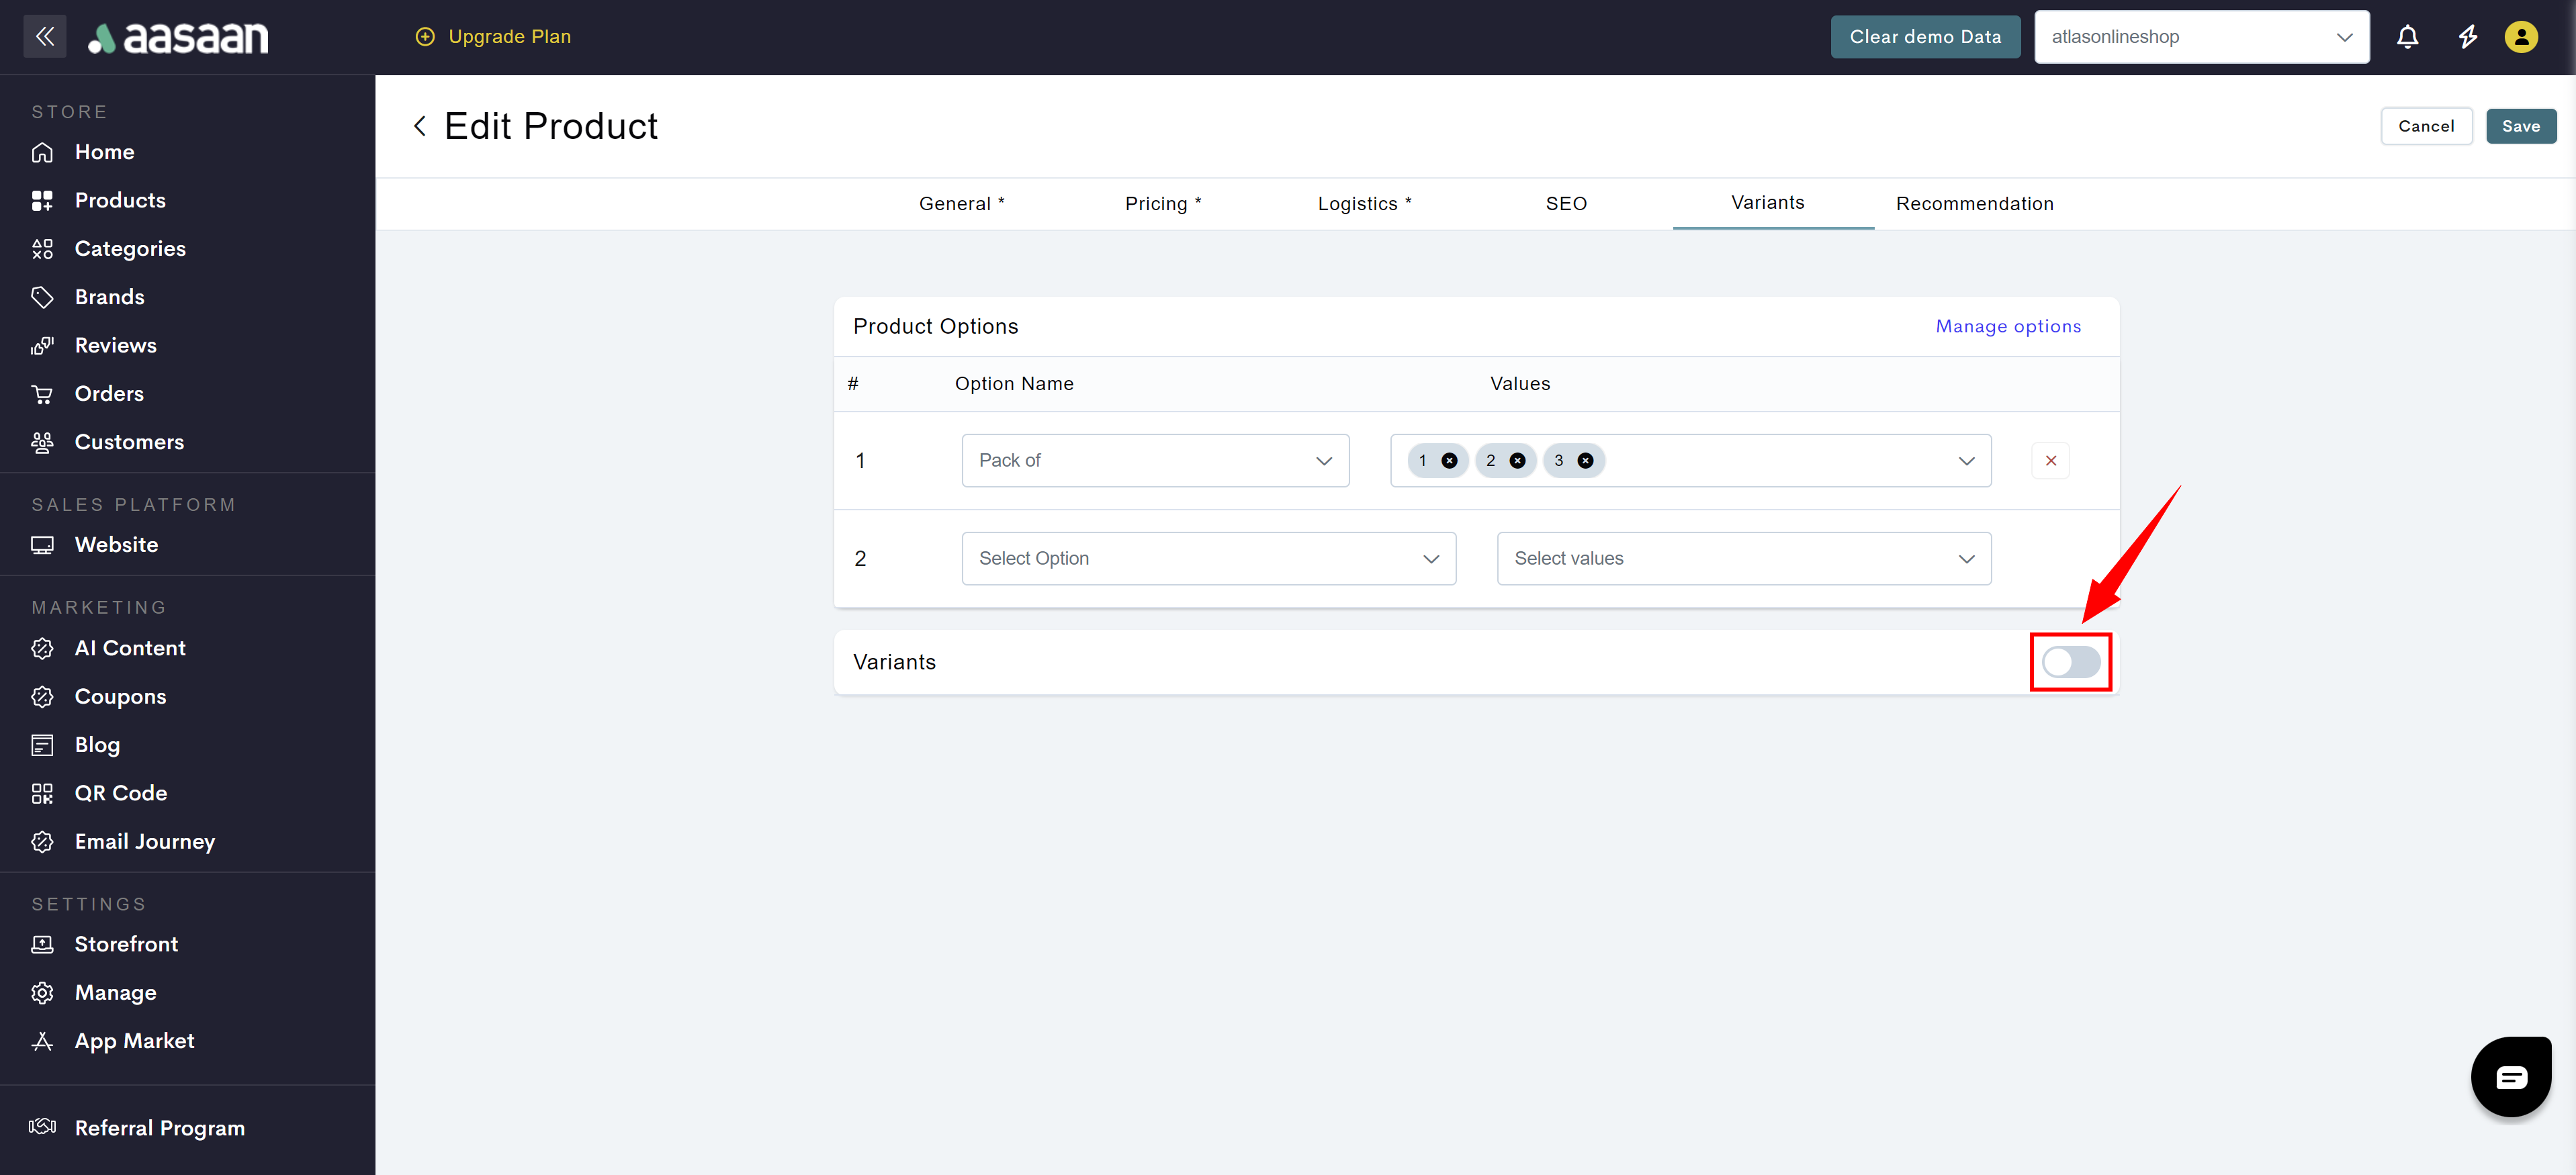
- Enable the Variant toggle.
- Click on Add Variants.
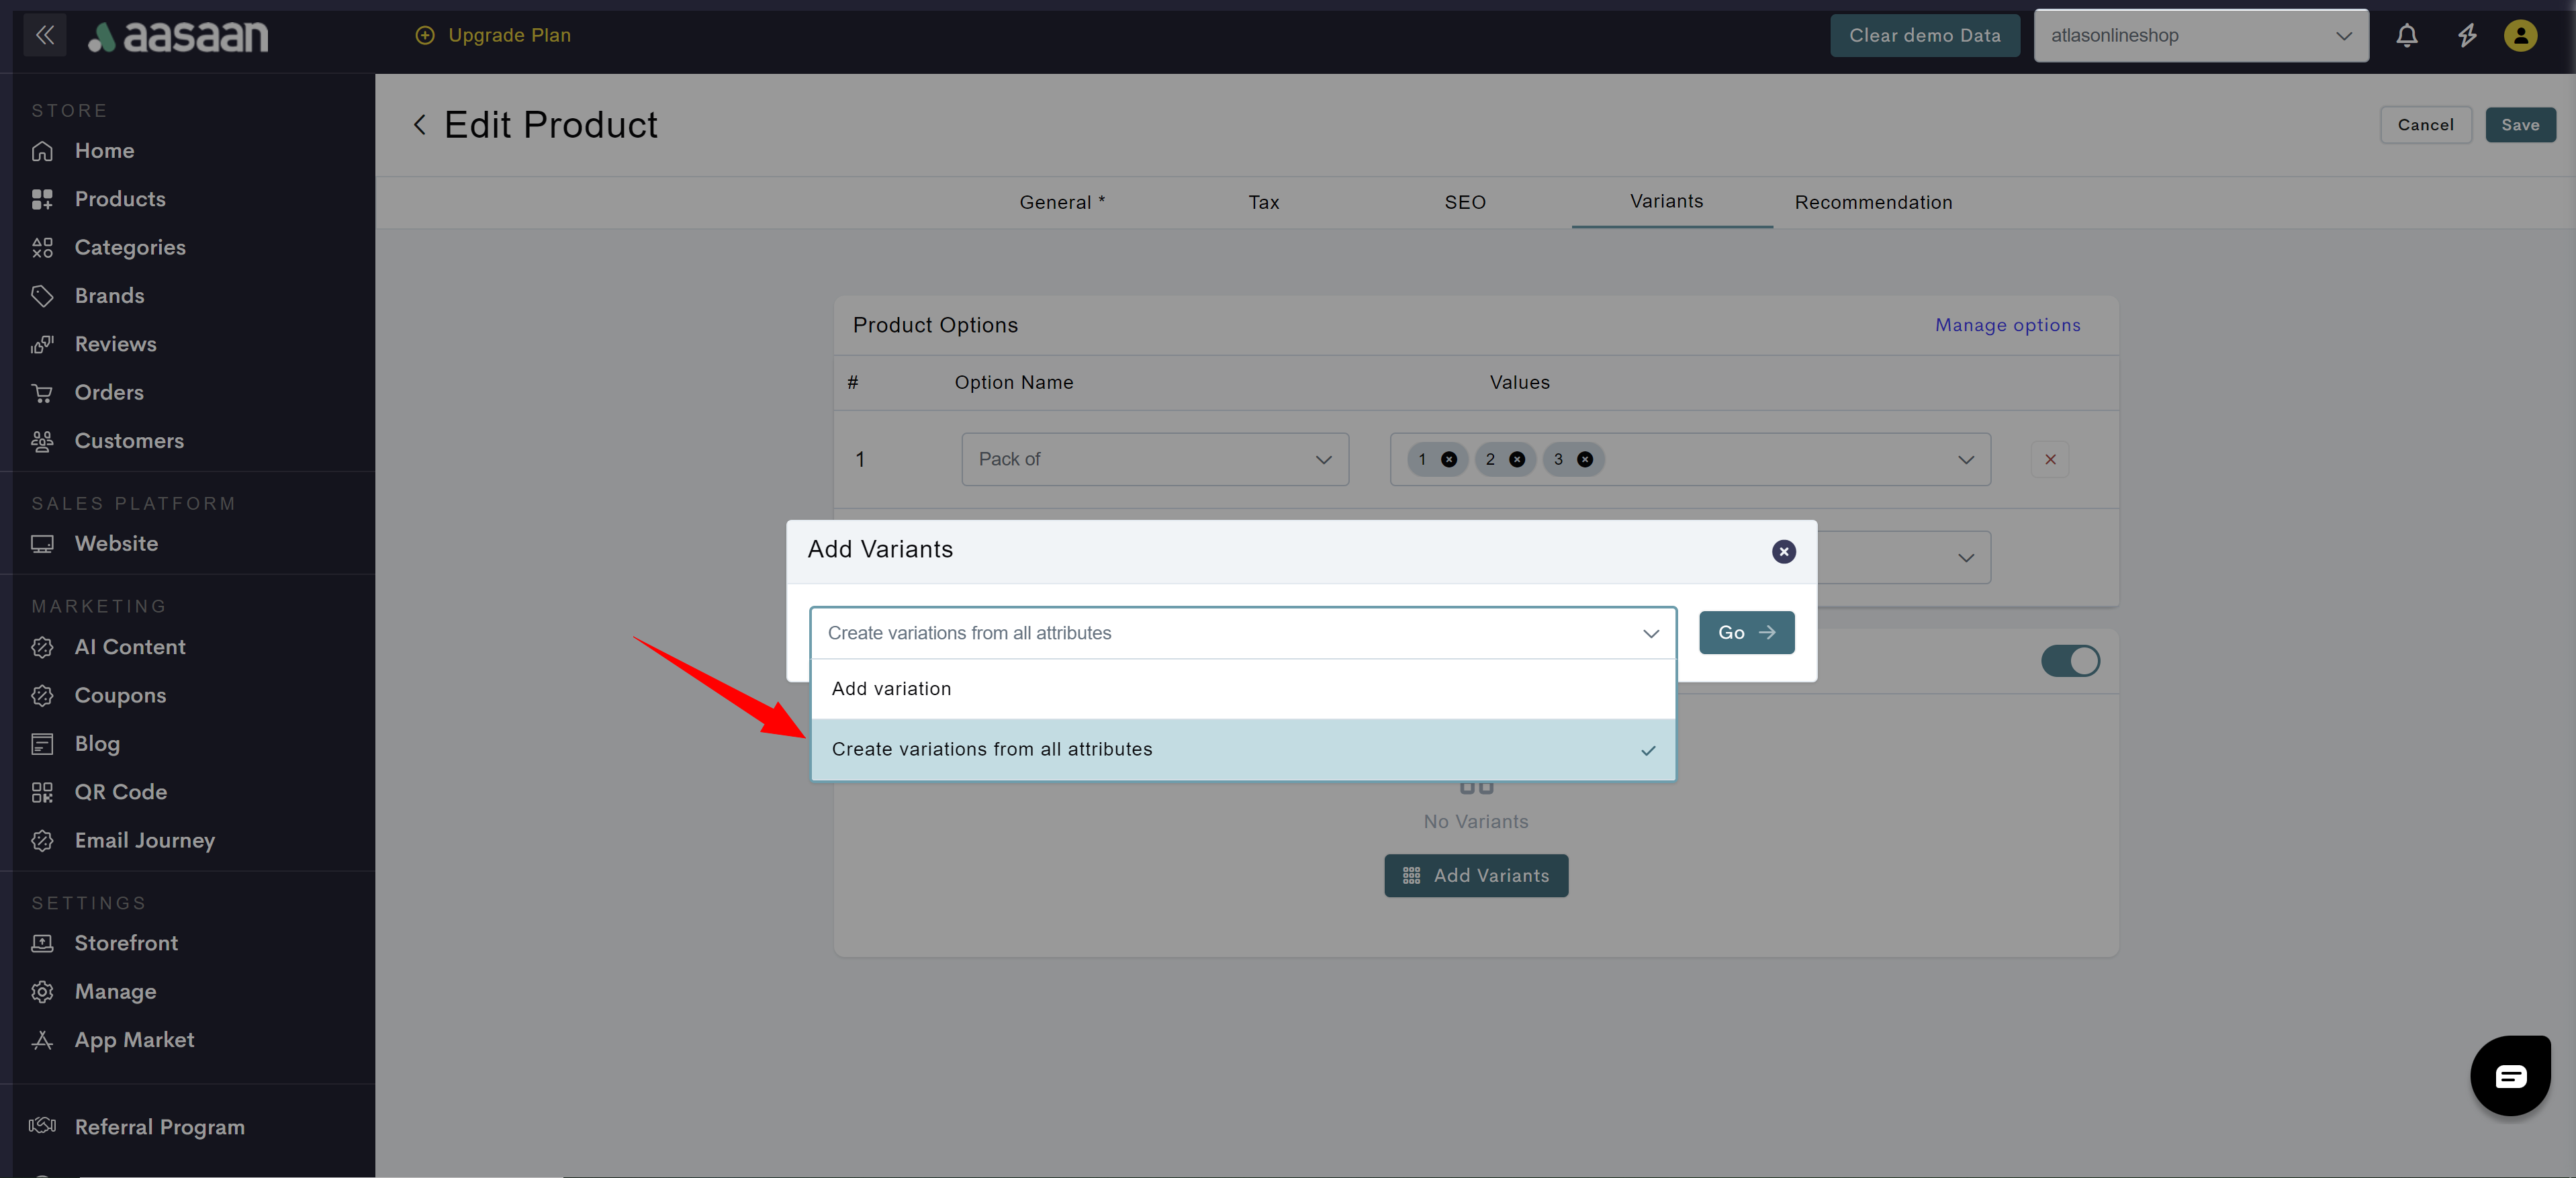
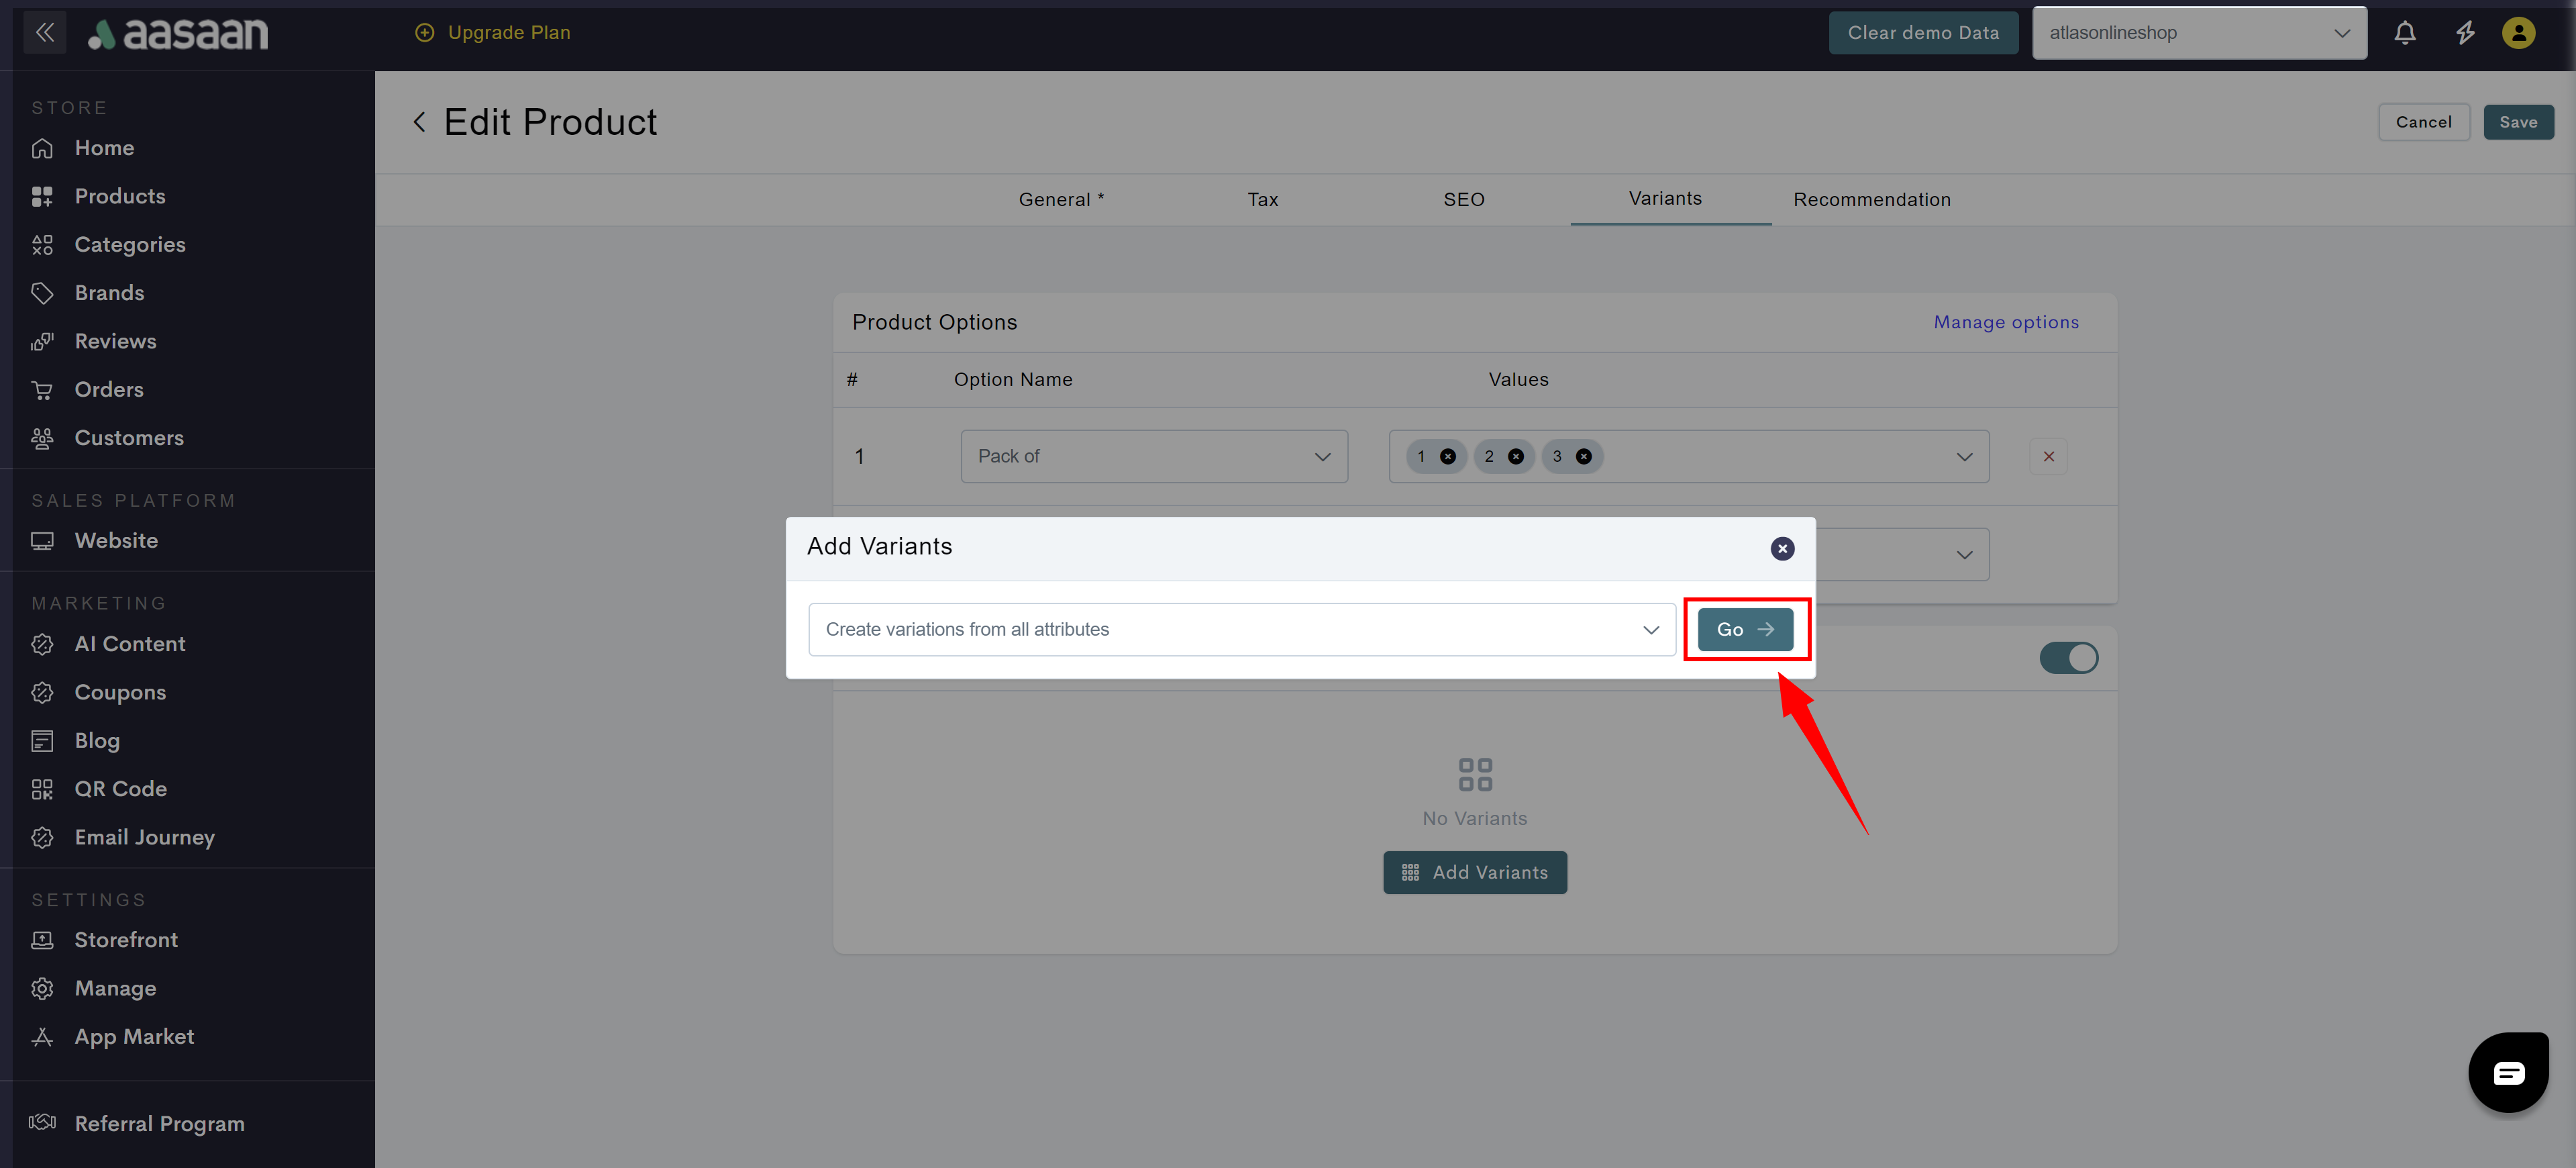
- Select on “Create variations from all attributes” and Click on Go.
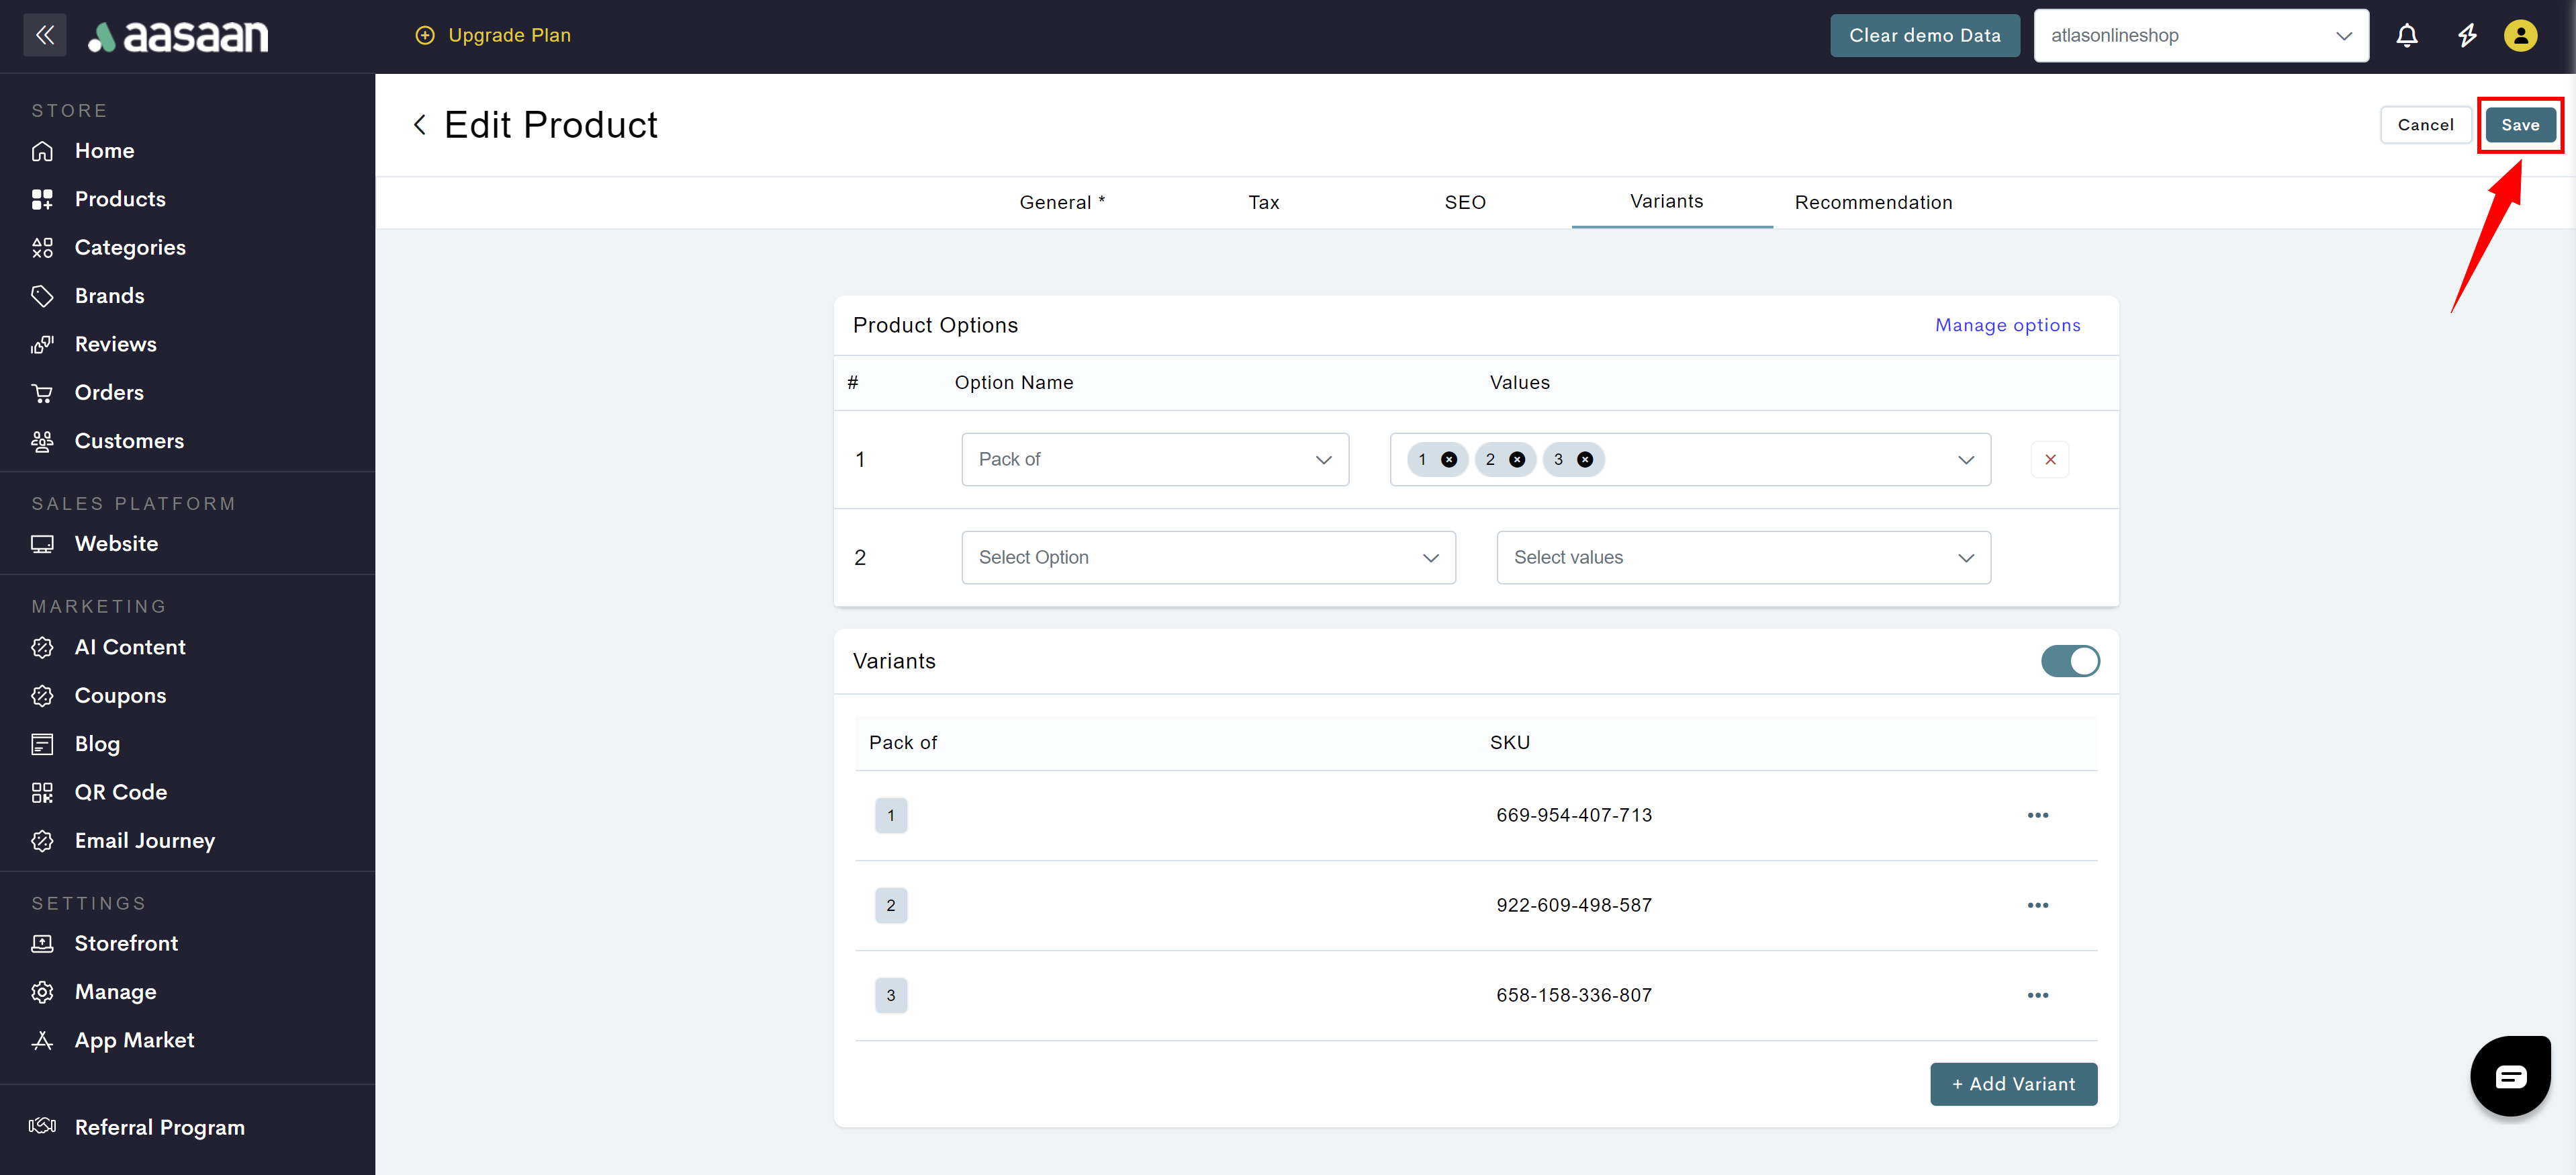
- All your variants will appear.
- Click on … at the variant.
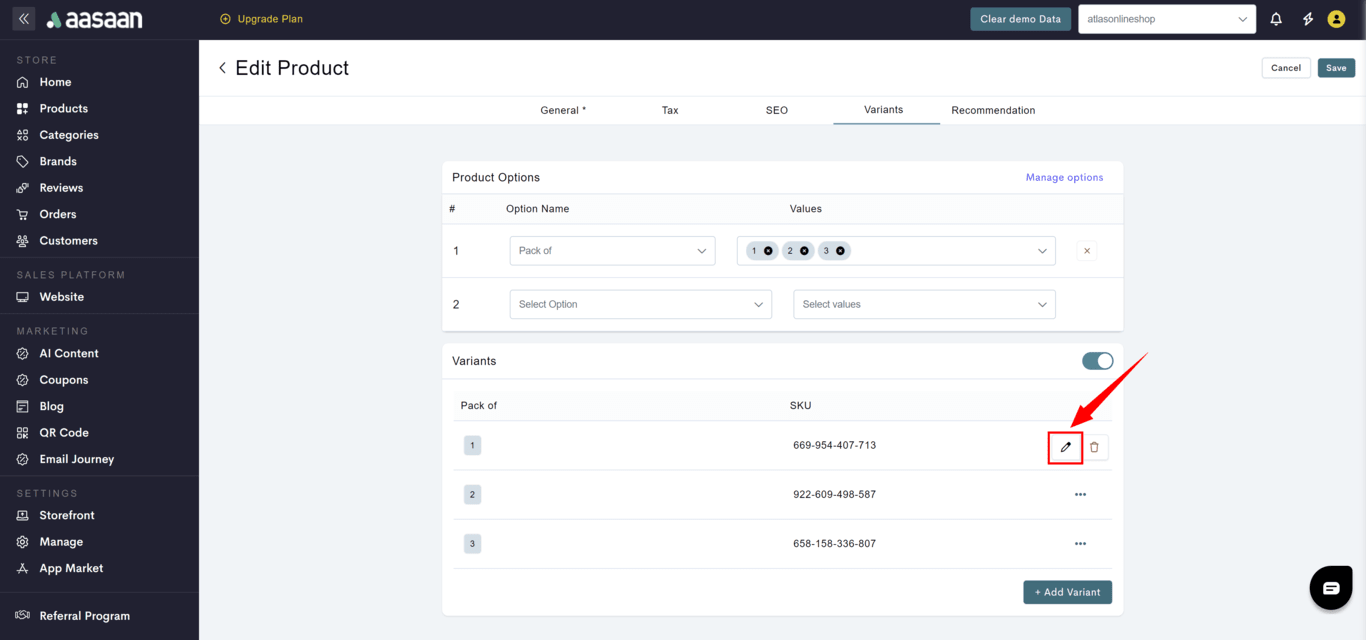
- Click on the ✏️ icon to provide the variant information.
- Provide all the details as needed.
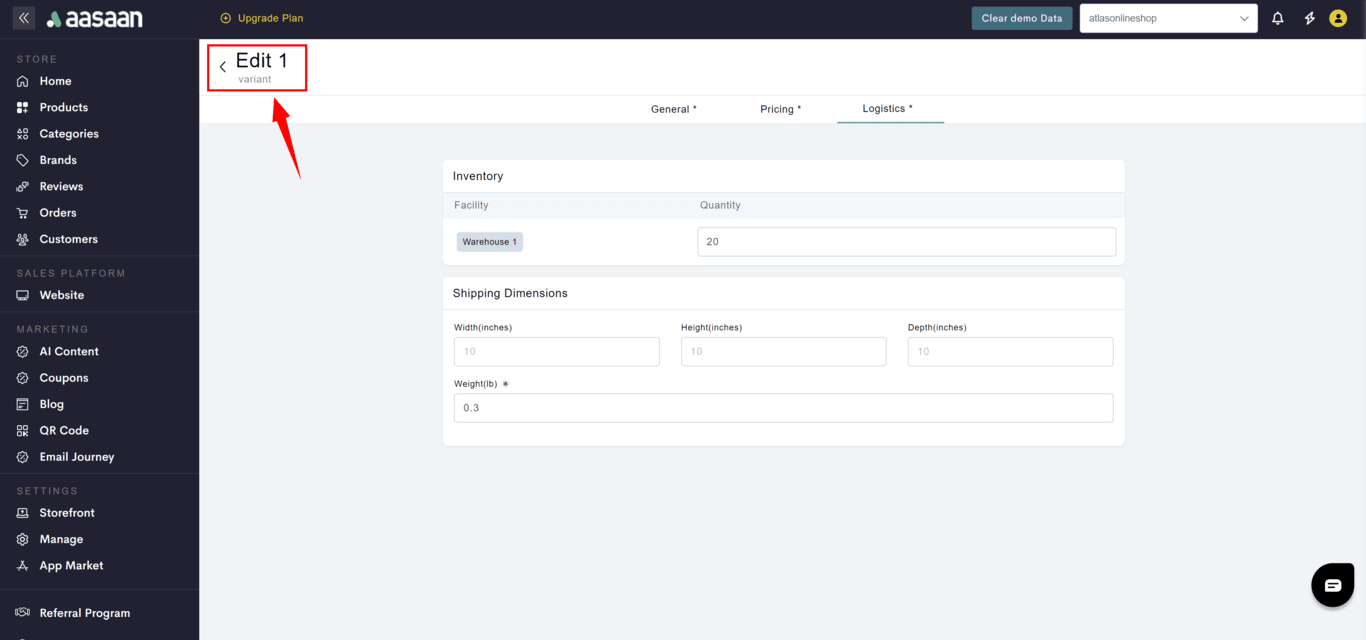
- Click on Back to repeat the task for the remaining product variants.
- Once you added the required information for all the variants, then click on Save.

Edit Variants
- Steps
- Screenshots
- Log in to your aasaan desktop admin panel and click on Products.
- Edit the product for which you want to edit the variants.
- Goto Variants tab.
- Click on … at the variant.
- Click on the ✏️ icon to provide the variant information.
- Provide all the details as needed.
- Click on Back to repeat the task for the remaining product variants.
- Once you modified the required information for all the variants, then click on Save.


Delete Variants
- Steps
- Screenshots
- Log in to your aasaan desktop admin panel and click on Products.
- Edit the product for which you want to edit the variants.
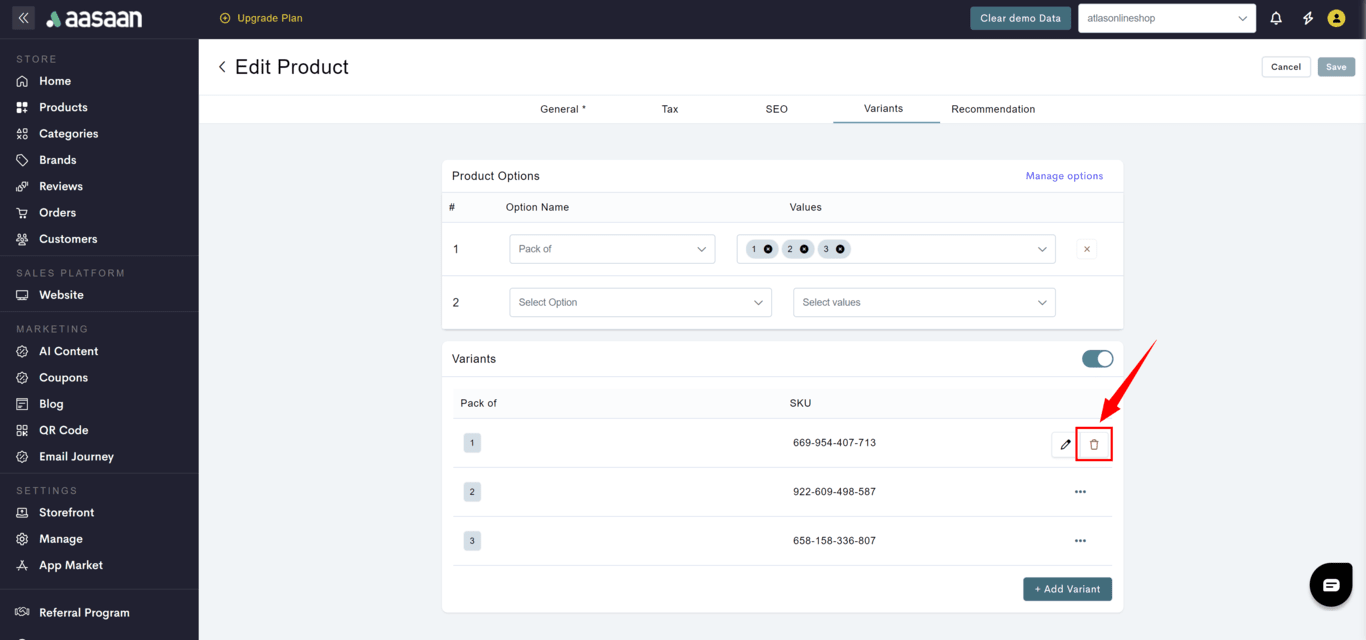
- Goto Variants tab.
- Click on … at the variant you want to delete.
- Click on the 🗑 icon.
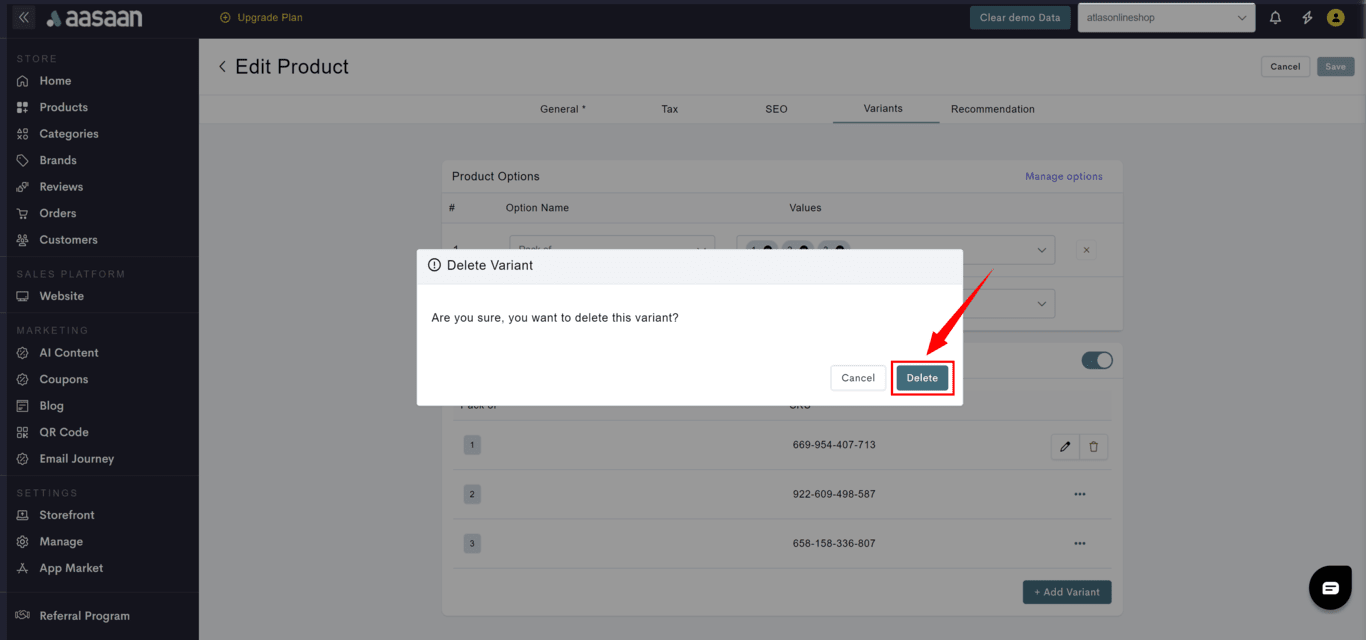
- A confirmation popup will be shown for your acknowledgement.
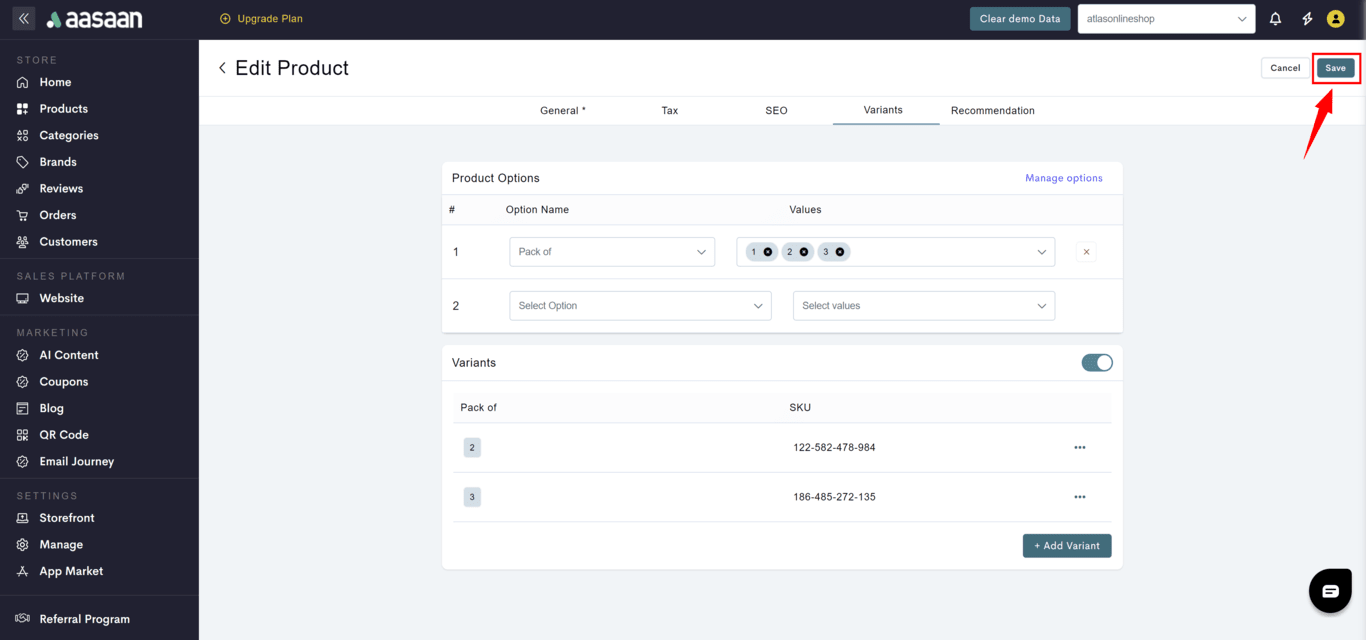
- When you press delete, the variant would be deleted.

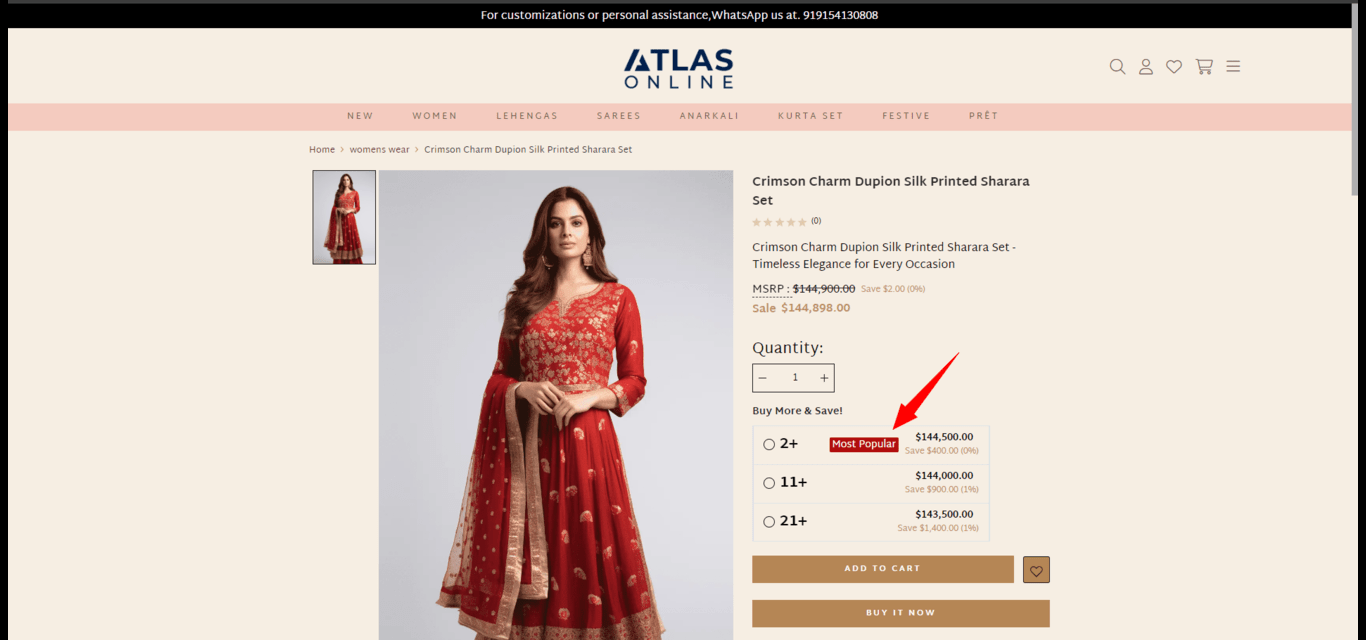
Manage Product - Bulk Pricing
If you’re selling products in bulk and want to provide different prices for higher quantities, then aasaan’s bulk pricing feature helps you do just that. Here’s how you do it.- Steps
- Screenshots
- Log in to your aasaan desktop admin panel and click on Products.
- Edit the product for which you want to provide bulk pricing details.
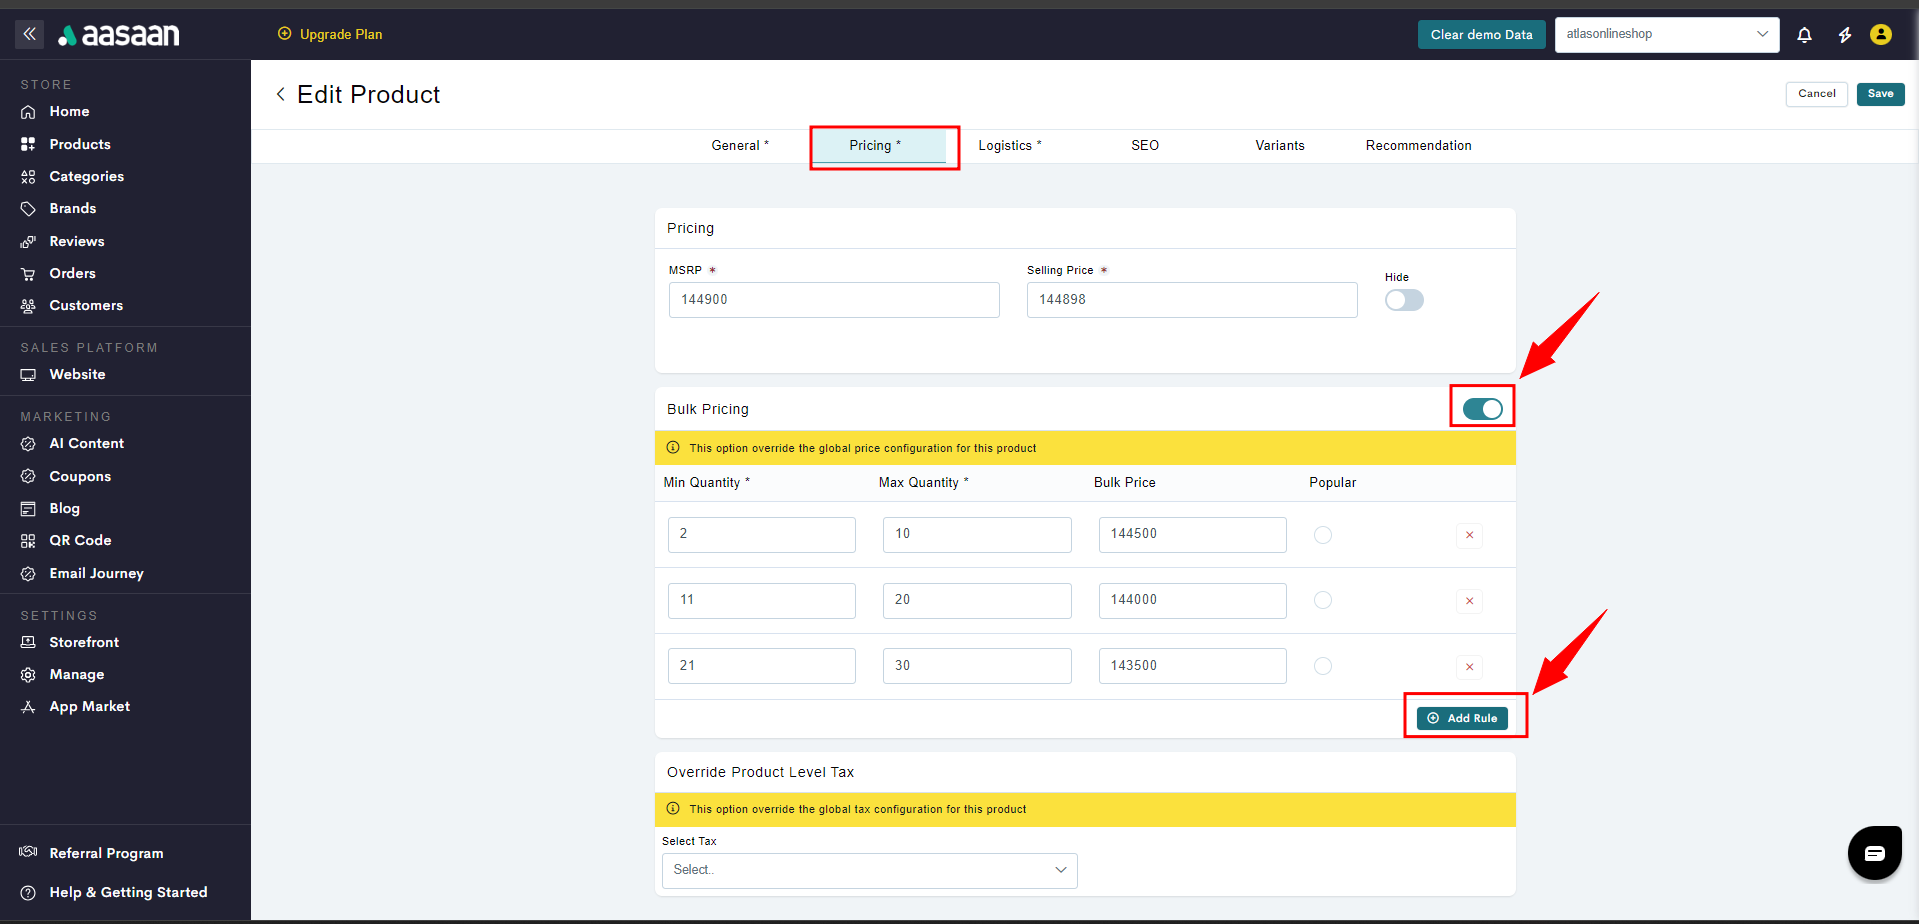
- Goto Pricing tab.
- Enable the bulk pricing toggle.
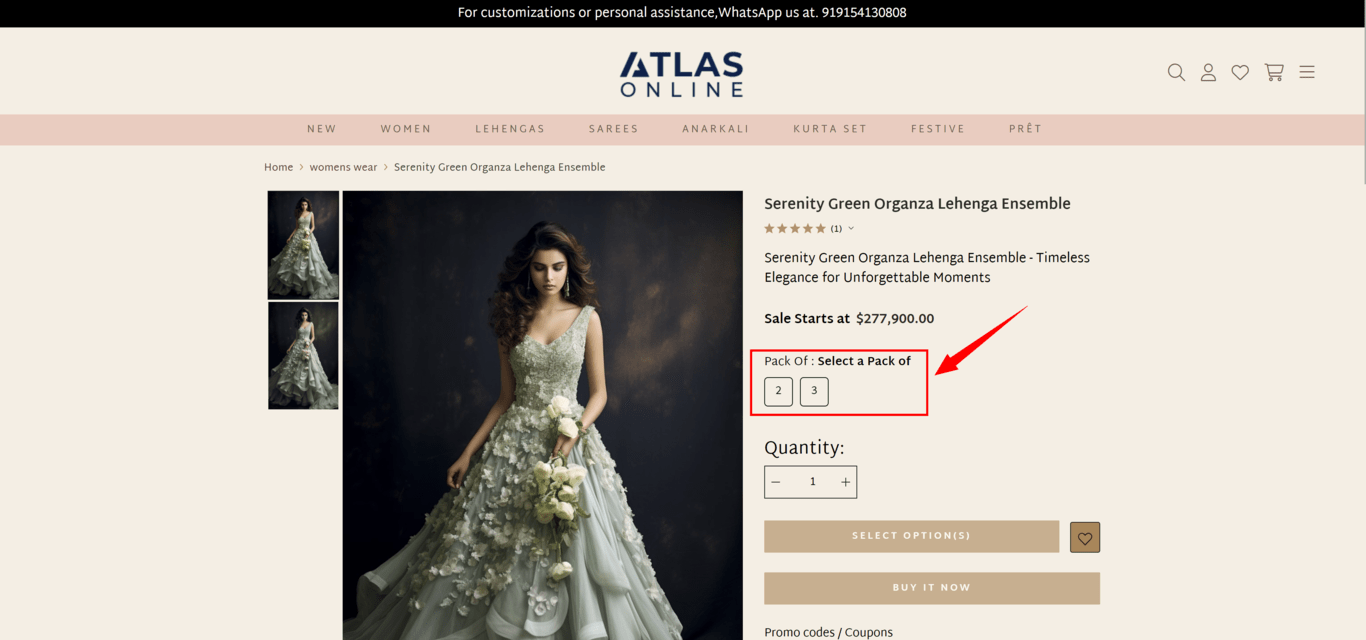
- Here you can choose the price per product and the quantity range. For example, if 5 to 10 units of this product are ordered, we have set the per-unit price to 500.
- Click on Add Rule to add further bulk pricing rules. For example, we can a bulk pricing rule that applies when 11 to 20 units of the product are ordered.
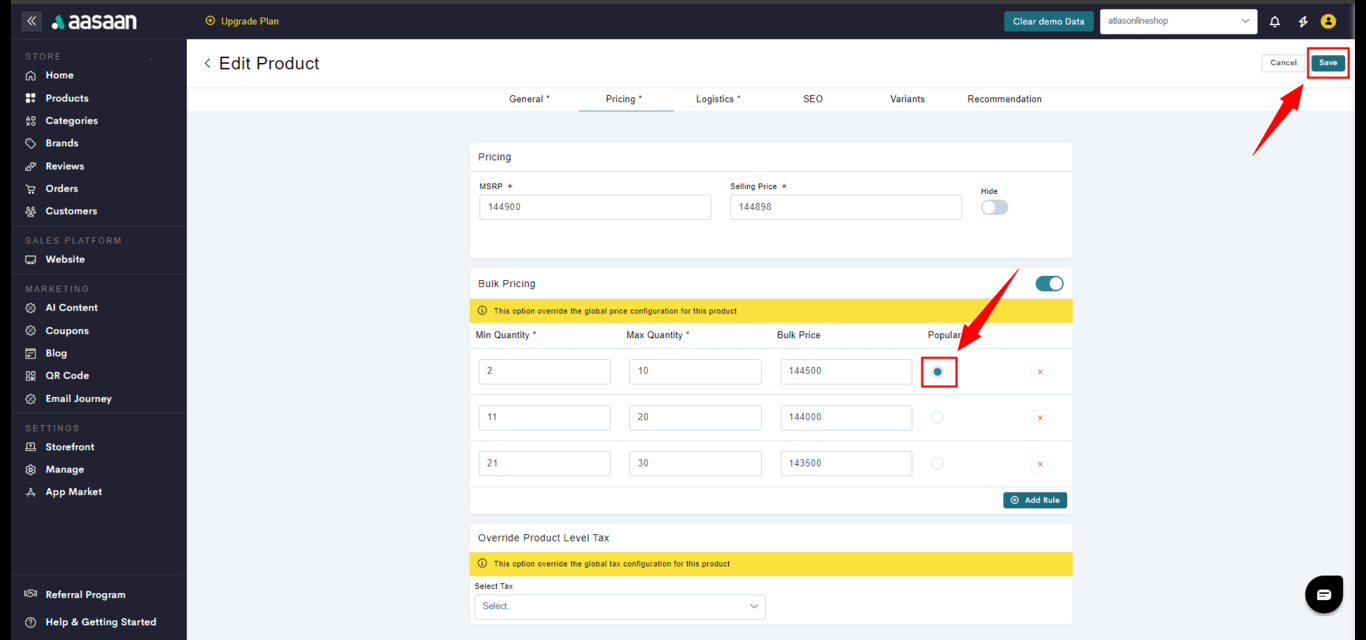
- You can keep adding as many rules as per your business requirement. Always remember to create a rule with no upper limit to consider maximum quantity.
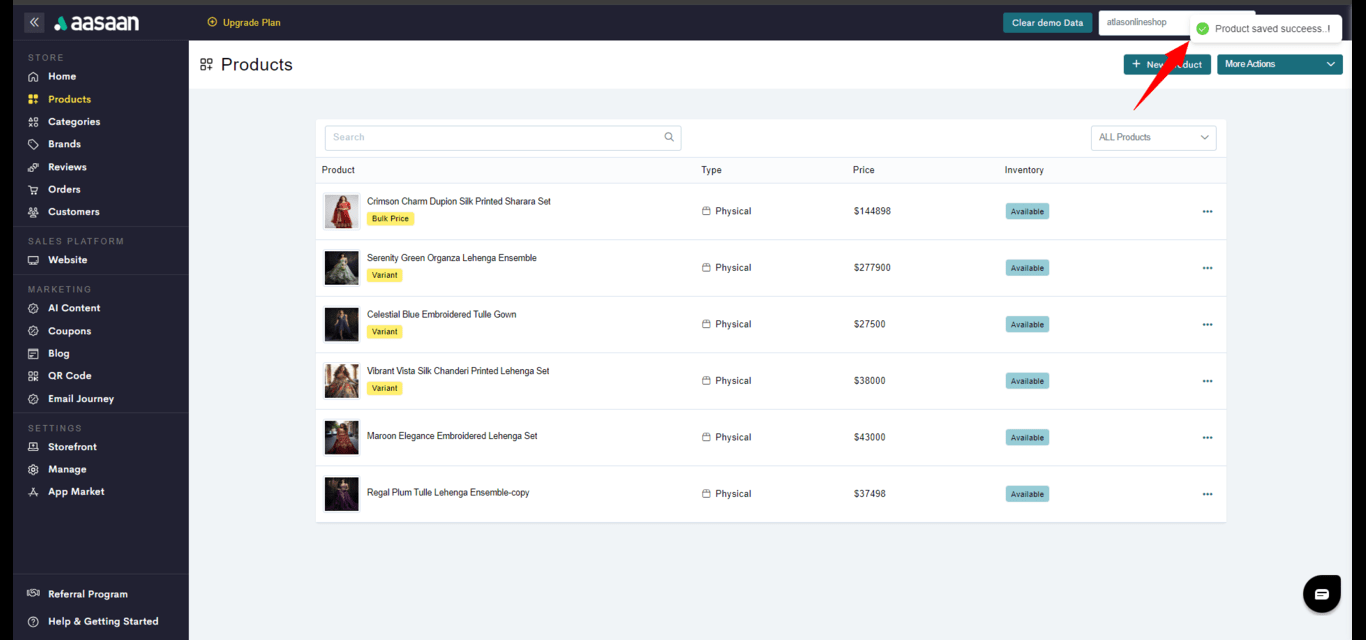
- Click on the Save button.
To provide bulk pricing details for a variant product, edit the variant and goto Pricing tab and follow the similar steps as detailed above.


Manage Product - Import
Using this feature you can add large number of products at once. Here’s how you do it:- Steps
- Screenshots
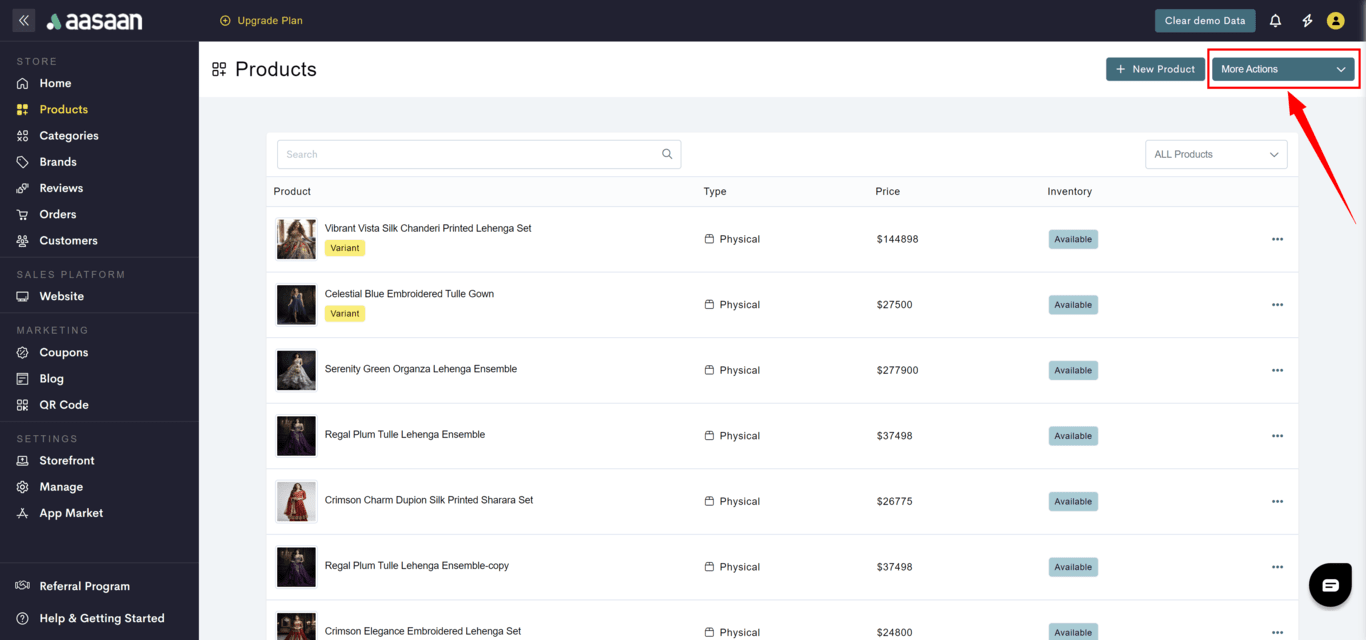
- Log in to your aasaan desktop admin panel and click on Products.
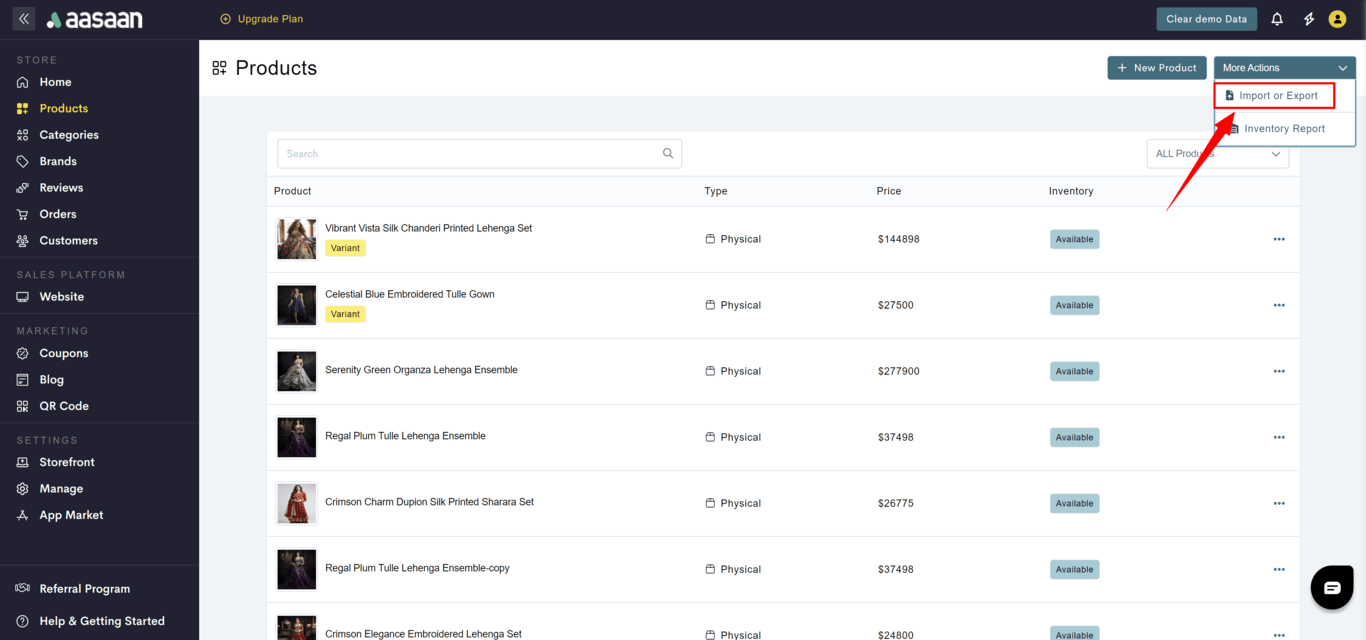
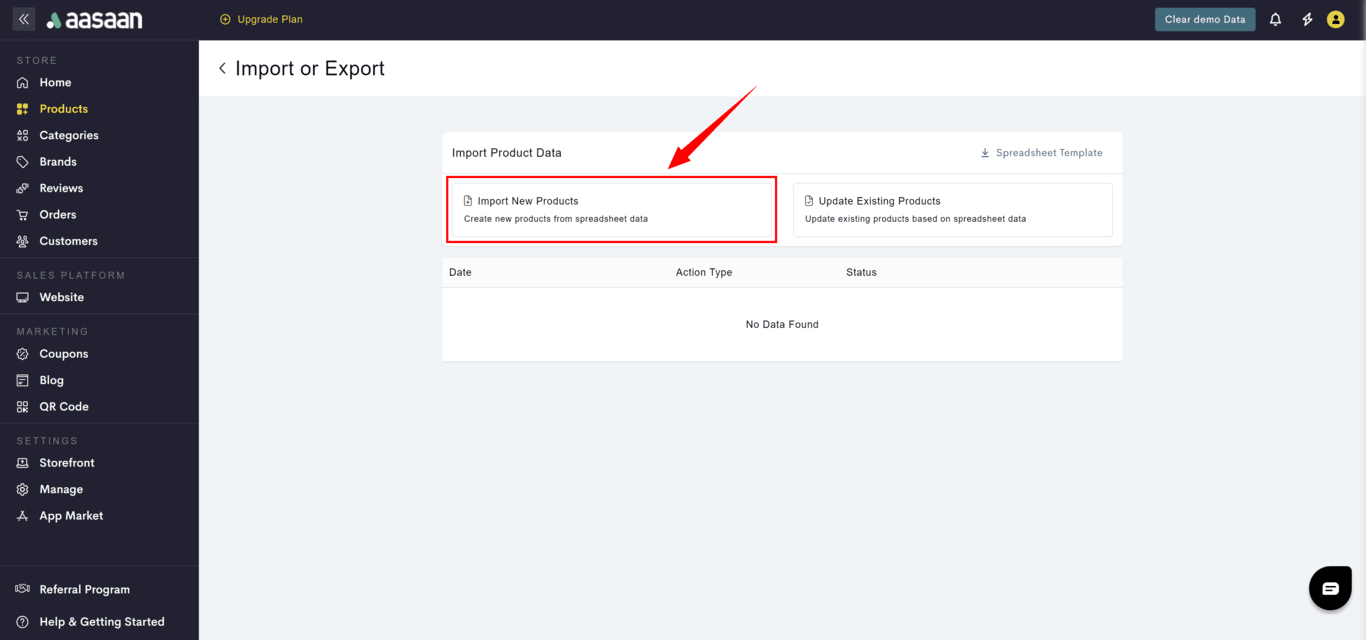
- Click on More Actions > Import or Export.
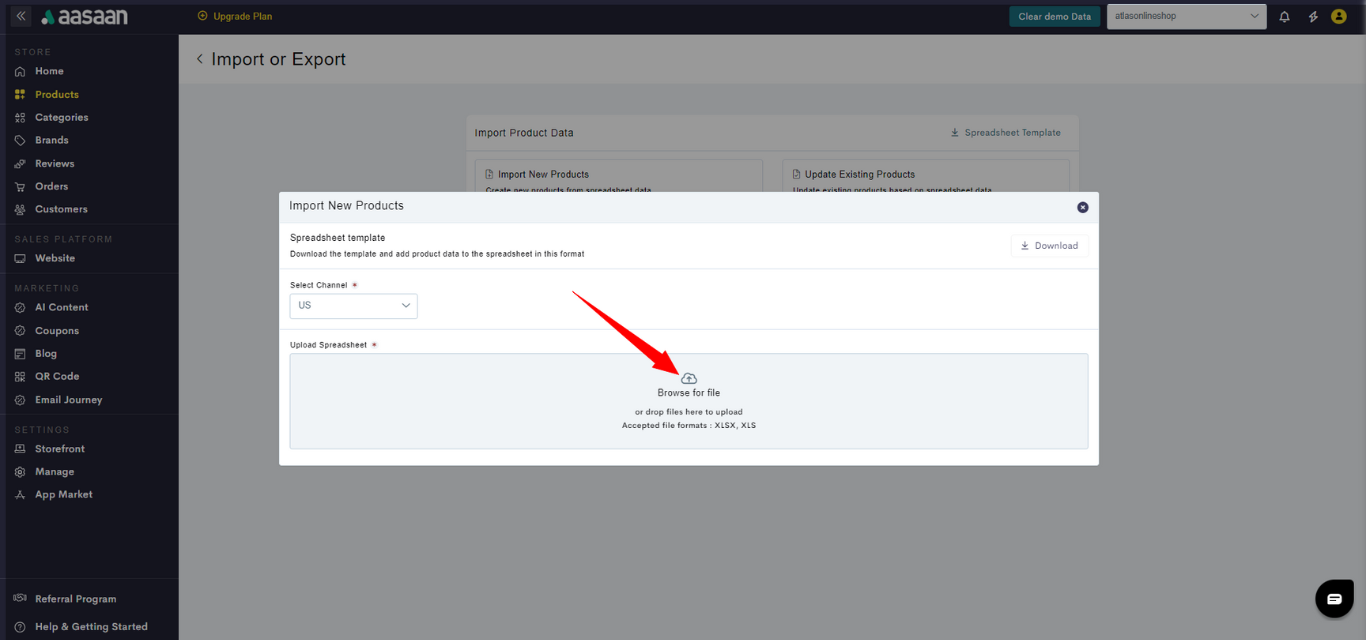
- Click on Import New Products.
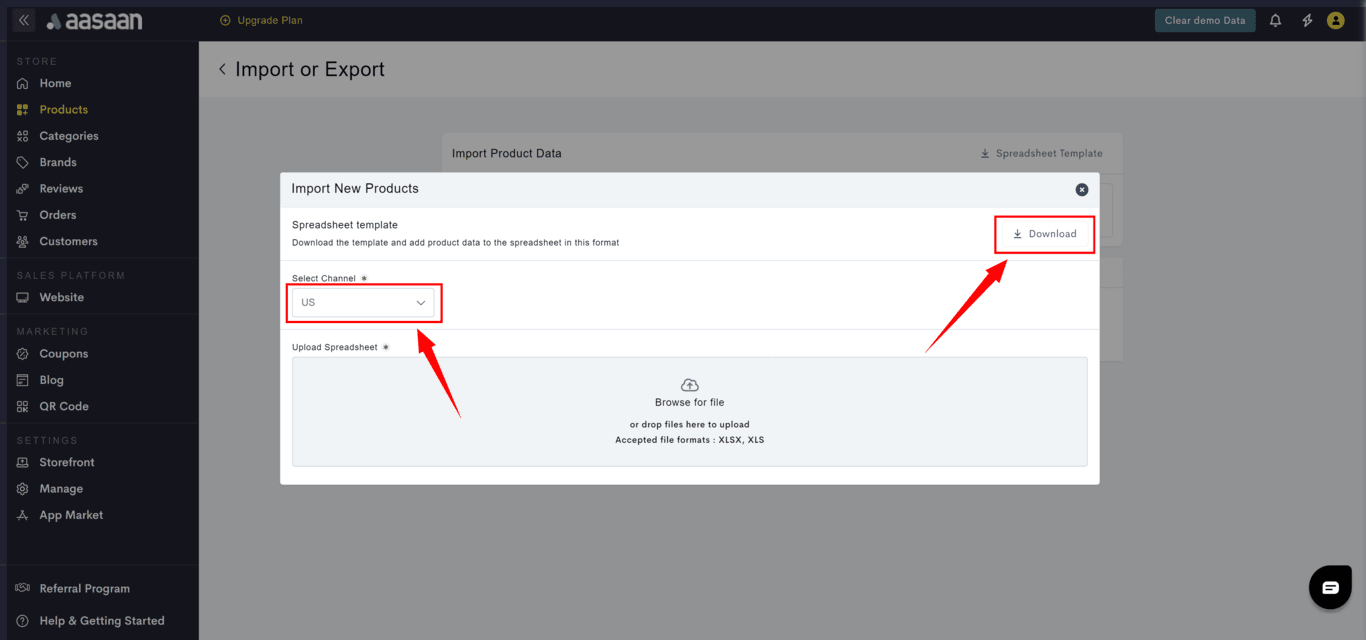
- Now you will have to download an excel sheet in which you will upload all your category and product details. Click on Download to download the template.
- The excel sheet will have one
- tab for you to add your categories.
- tab for you to add your products.
- tab for you to add your variants.
- tab where you can view the options you have to create your product variants.
- and tab for you to add your brands.
Note: The options tab will only show color and size variants by default. If you want to add additional options and variants(like weight, volume, or additional colors and sizes) to be displayed in the bulk upload sheet, create a product manually with the extra options/variants you wish to add, and then download the bulk upload sheet.
- Add your category details like name and description.
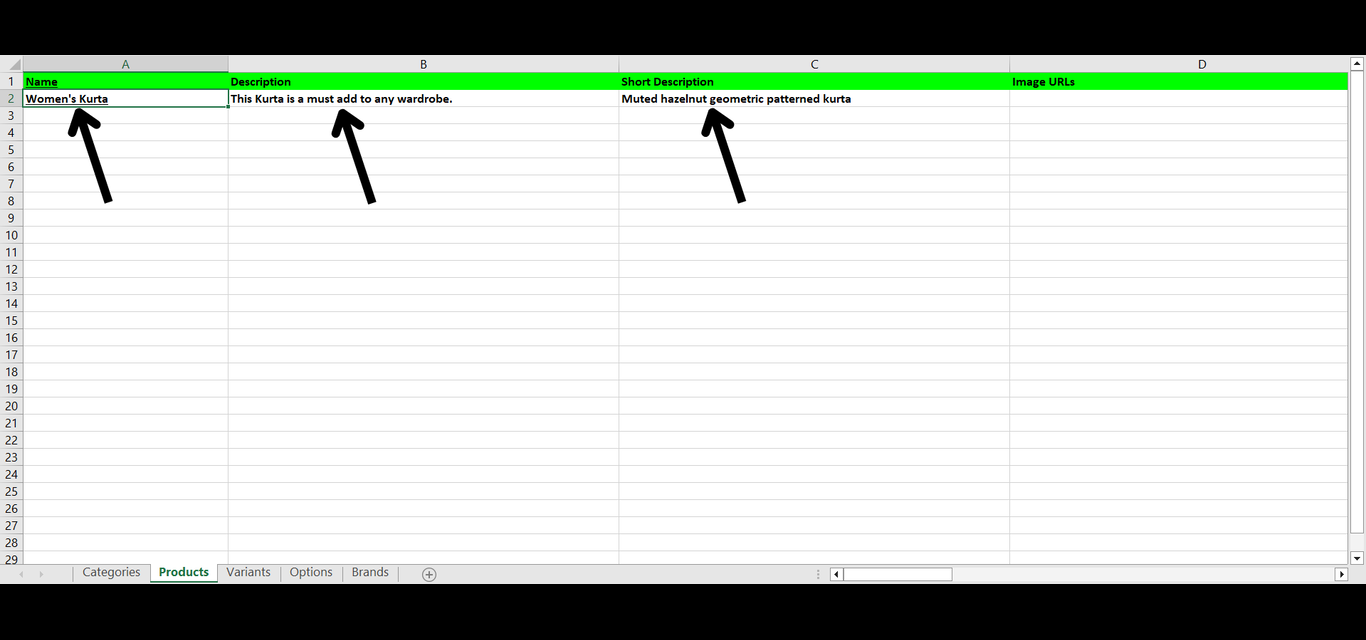
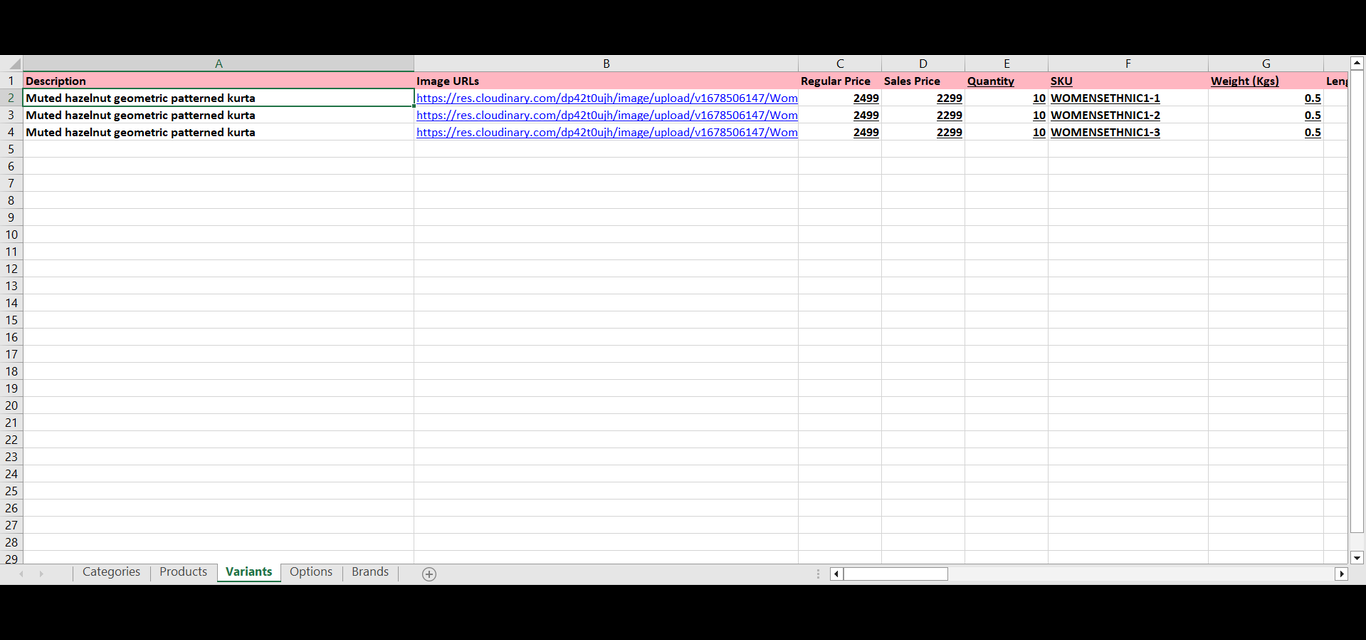
- Add your product name, description, and short description.
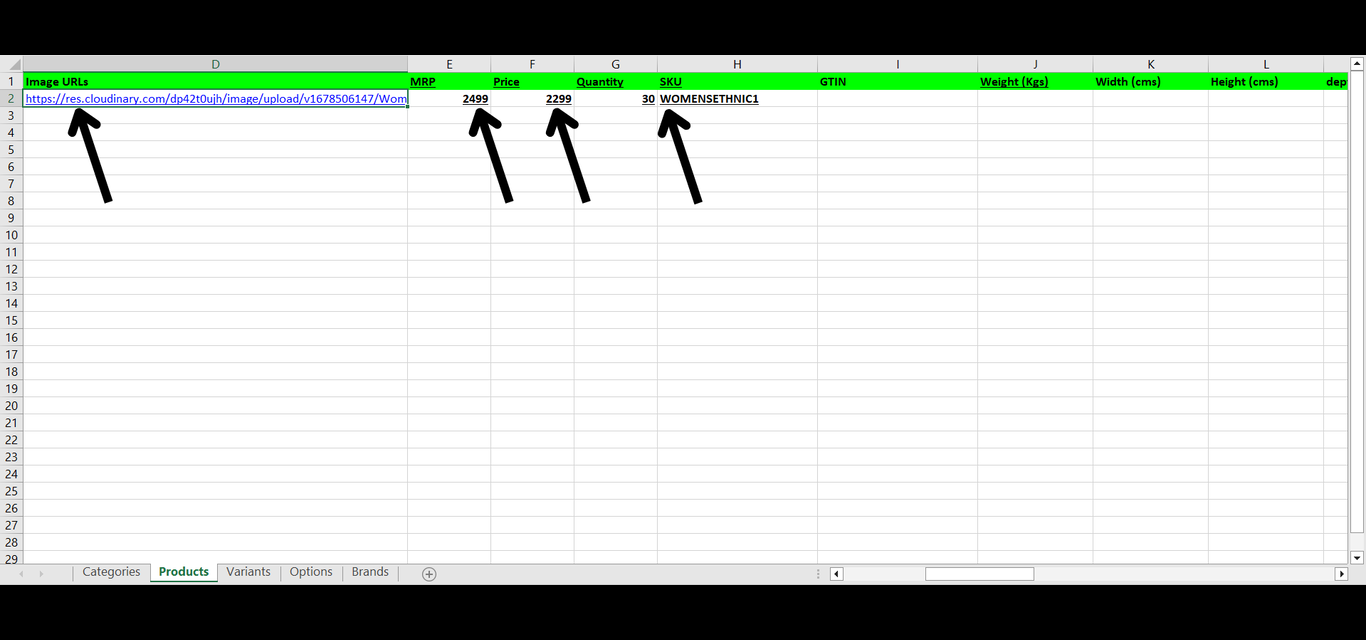
- Add the image URLs, pricing, and inventory information(quantity and SKU).
Note: To get image URLs, you can upload your product images to a cloud storage such as Cloudinary.
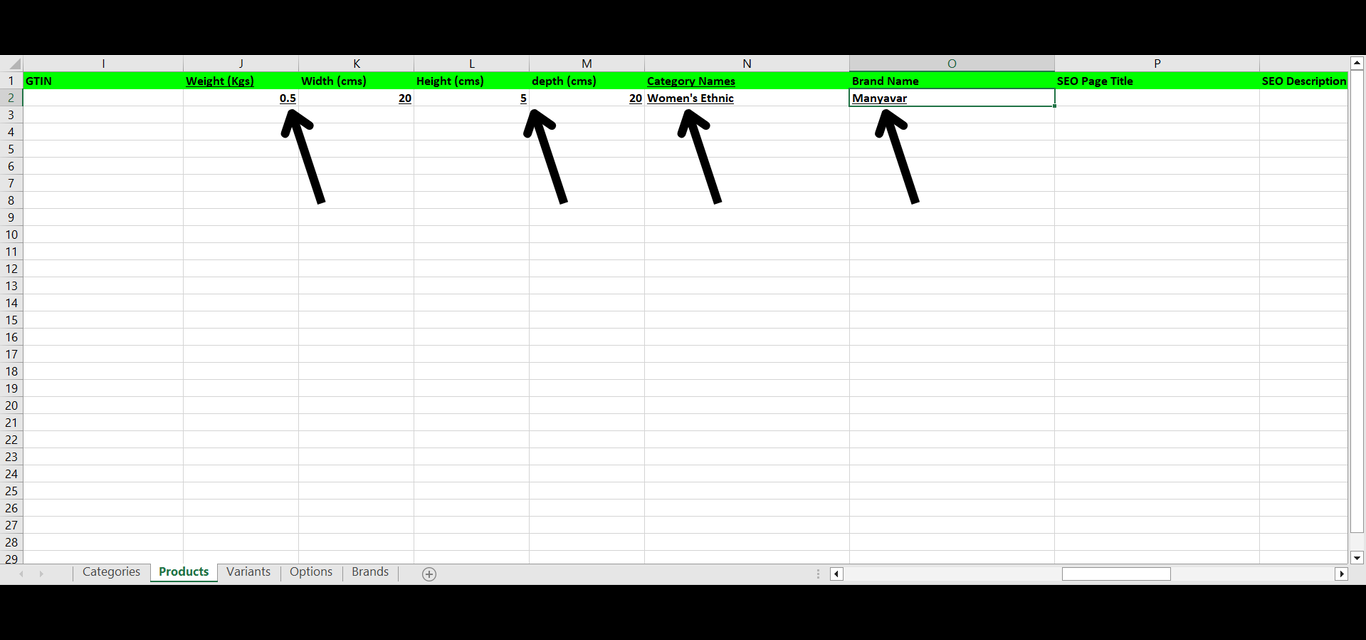
- Enter further product details like weight, dimensions, category name, and brand name.
- If your products have variants, then you can add their details in the variants tab.
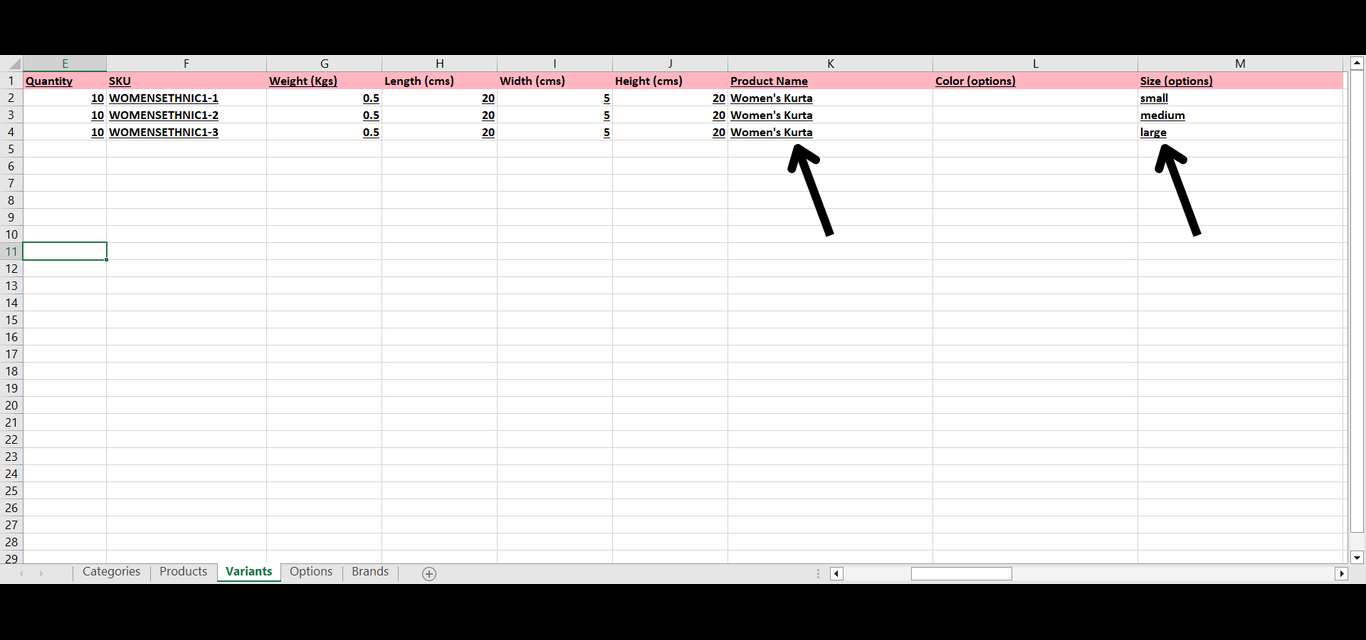
- To add variants to your products, first add your variants in the options columns such as “Color(options)” and “Size(options)”. Then add the product name in column M for each row in which the variant is present. For example, in this case, we are creating the following size variants:
- small
- medium
- large
- We will add these variants in the column “Size(options)” and assign the product name to each size variant as shown.
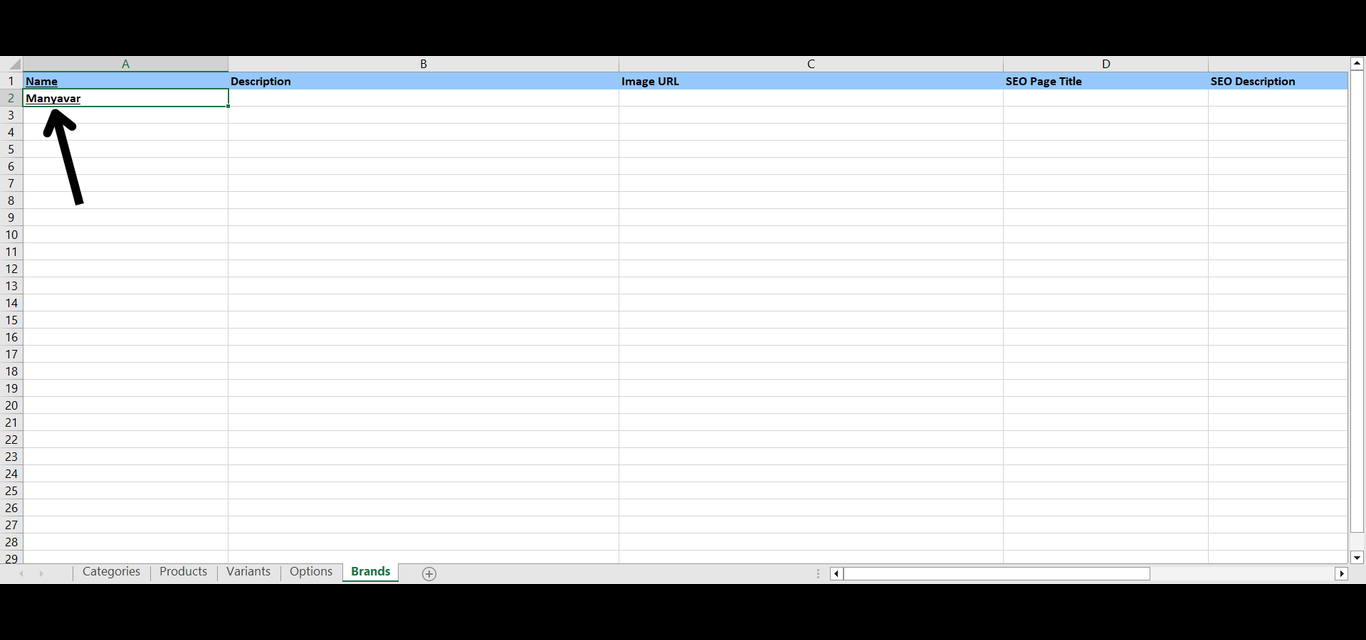
- Finally, add the brand details in the Brands tab.
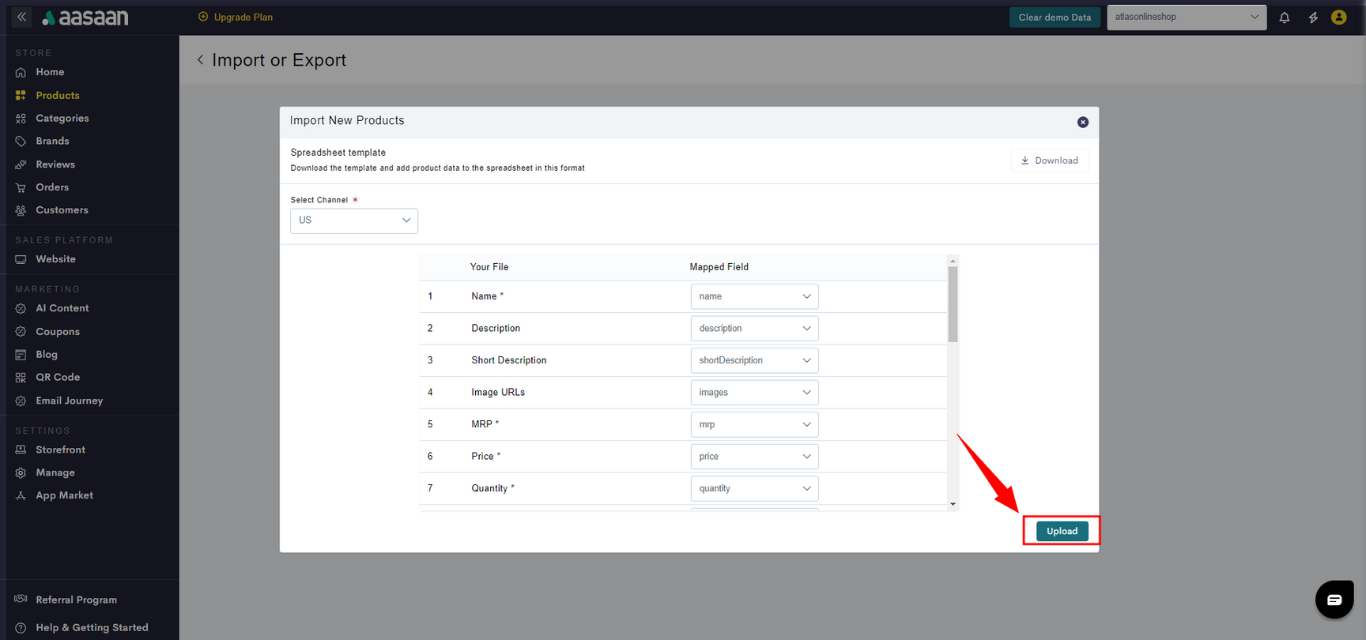
- After adding the product details in the import spreadsheet, go back to the aasaan admin panel and select the channel you wish to import your products in, as shown.
Note: The feature of choosing a channel to import your products into is only available on the business plan.
- To upload your import spreadsheet, click on Select a file to upload.
- Click on Upload.
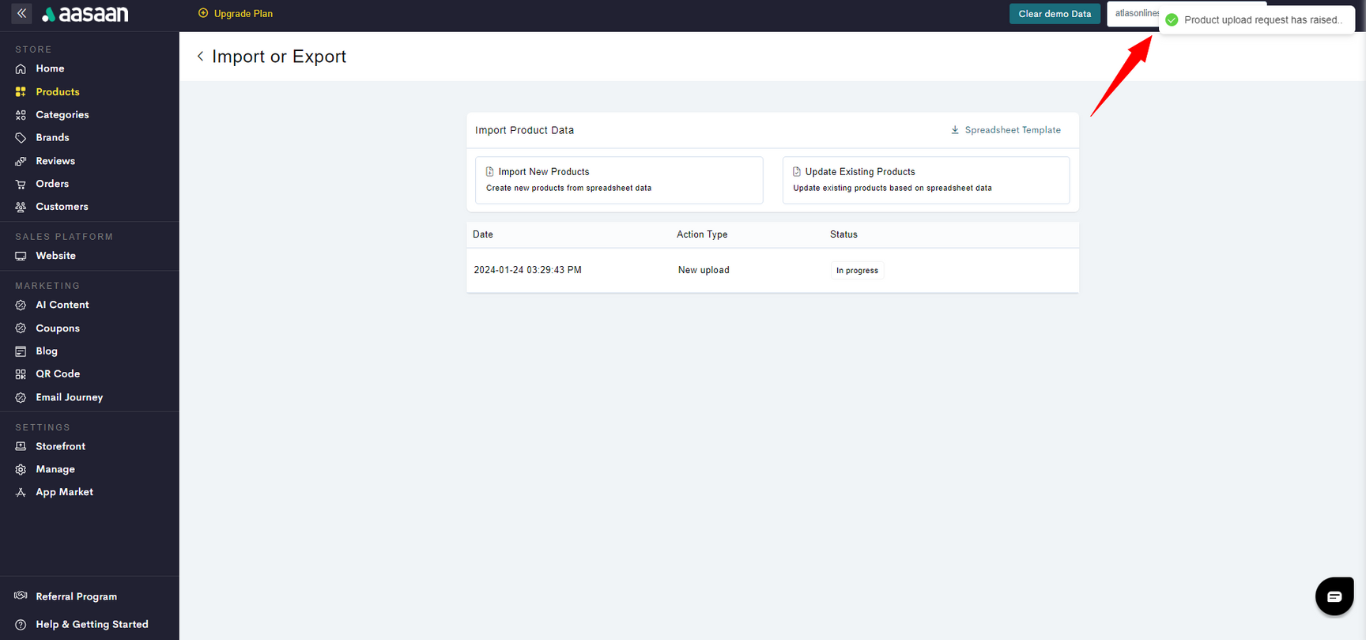
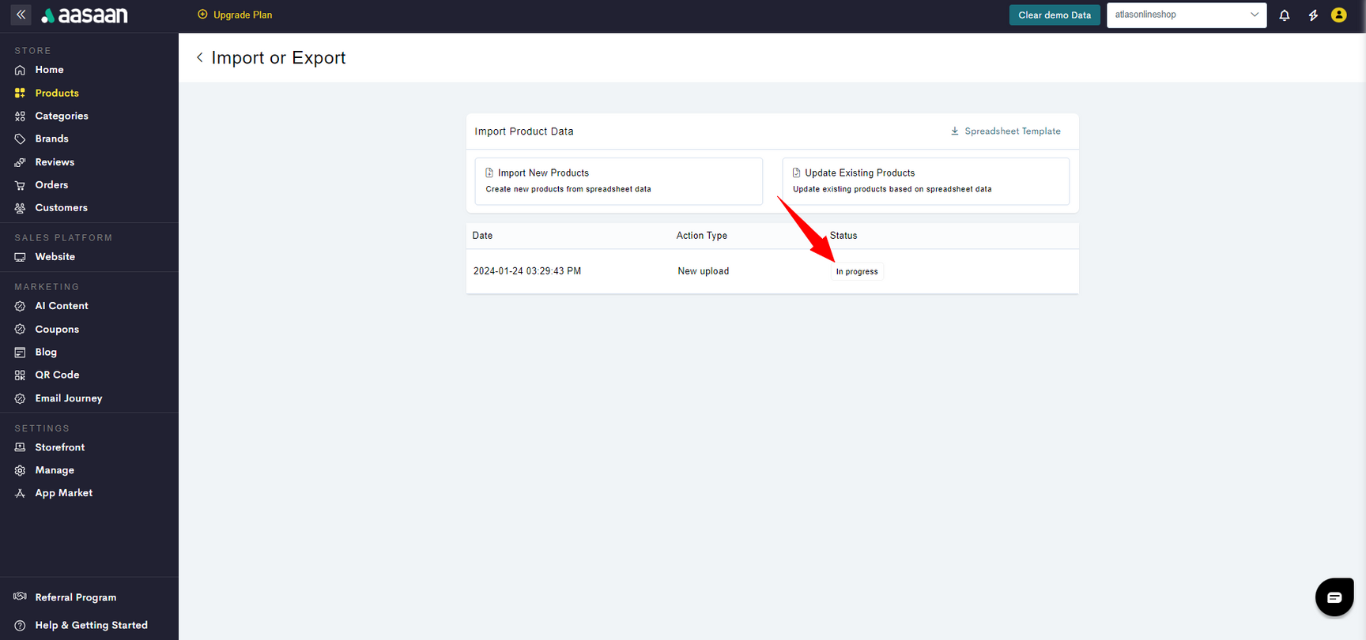
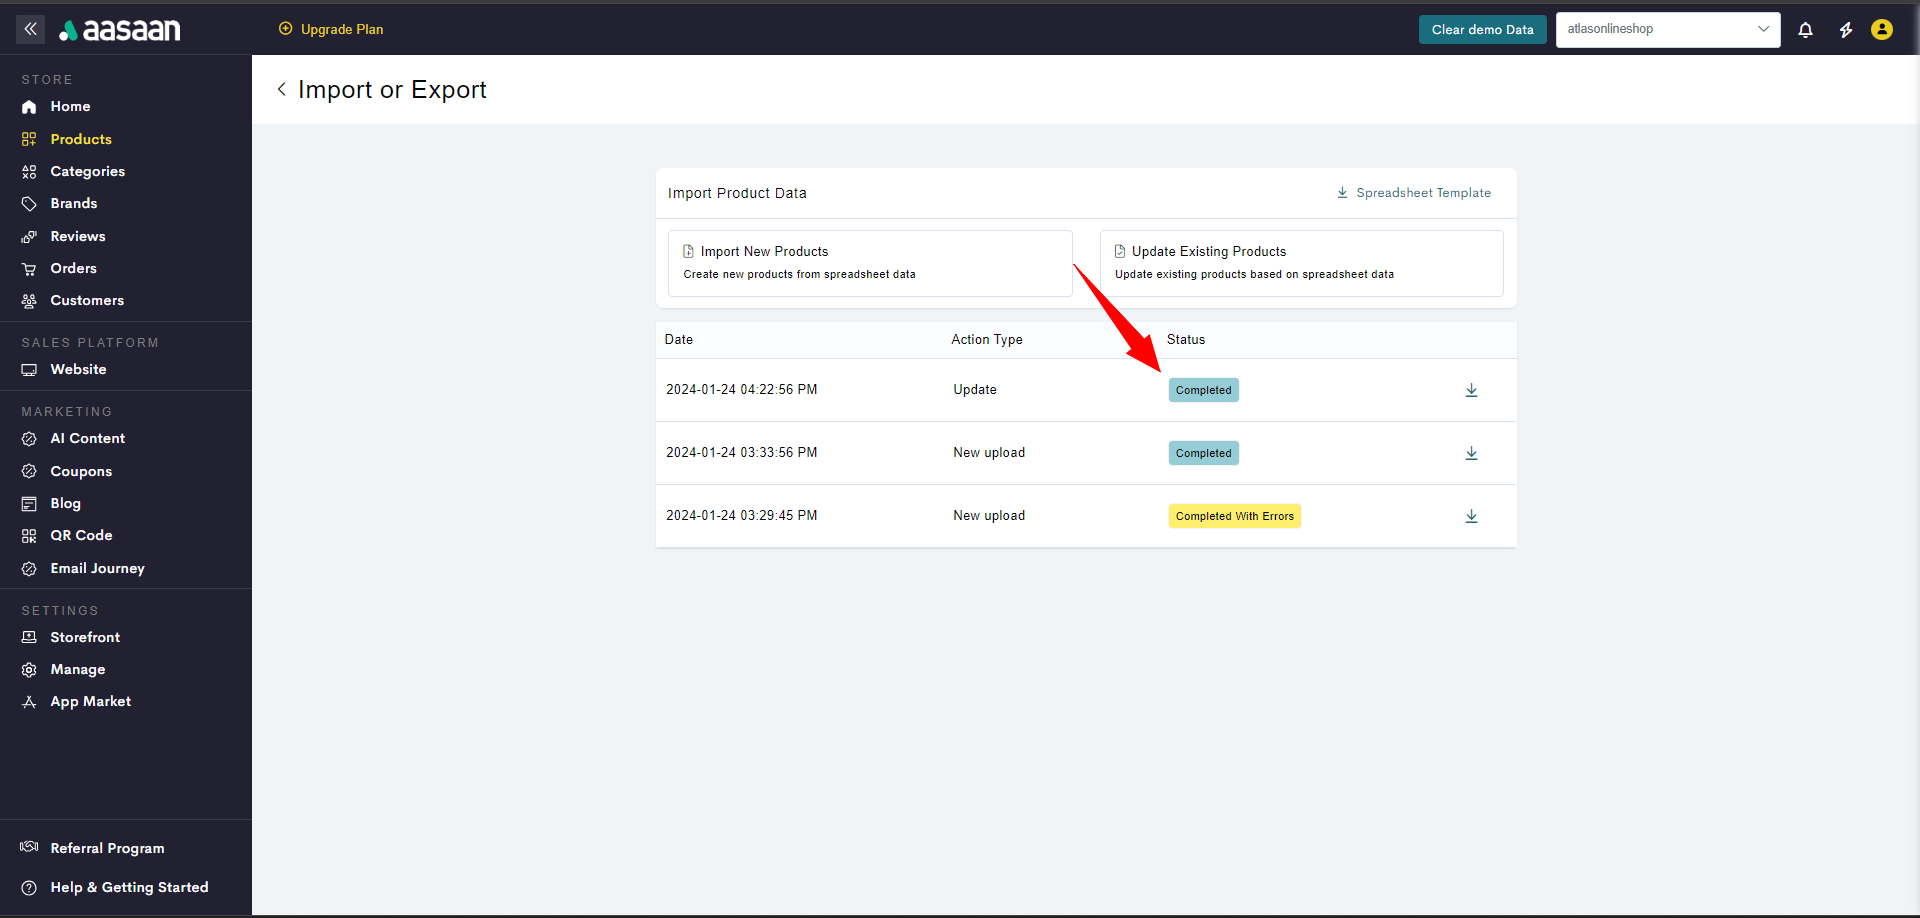
- The upload status will say “In Progress”. Click on Refresh to update the status.
- On successful completion of the bulk upload, the status should say “Completed”.


Manage Product - Export
Using this feature you can export category wise products at once. You can use this feature to update your products in bulk. Here’s how you do it:- Steps
- Screenshots
- Log in to your aasaan desktop admin panel and click on Products.
- Click on More Actions > Import or Export.
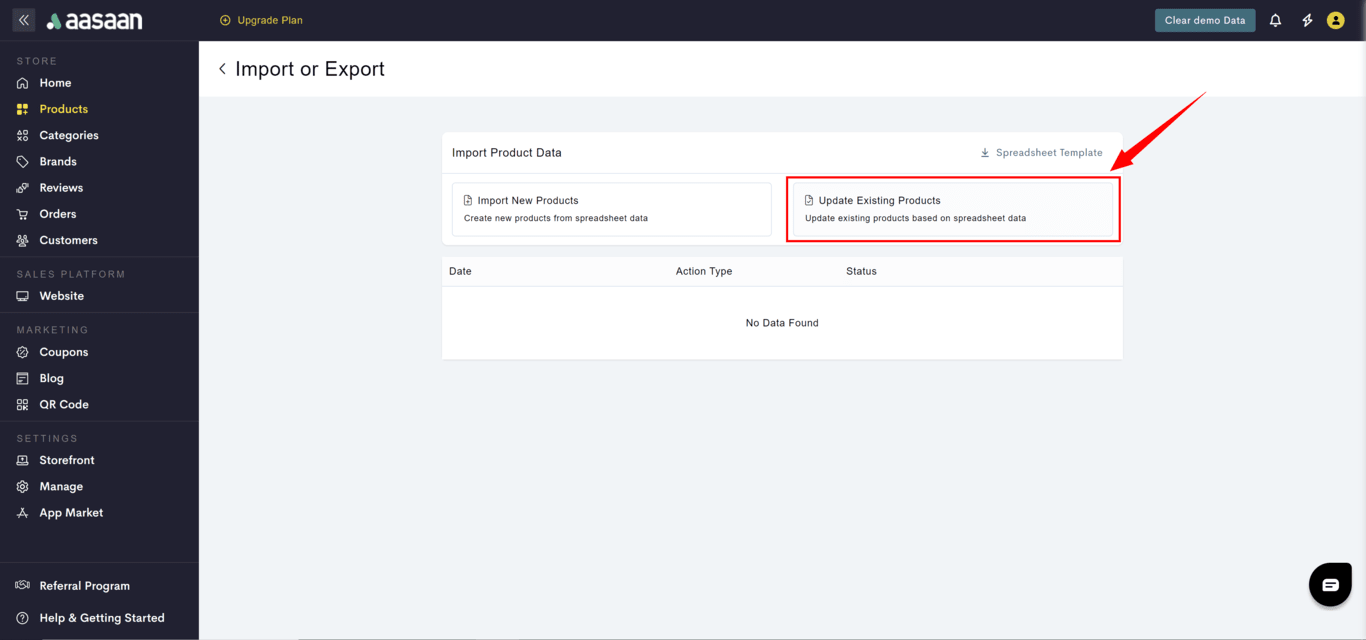
- Click on Update Existing Products.
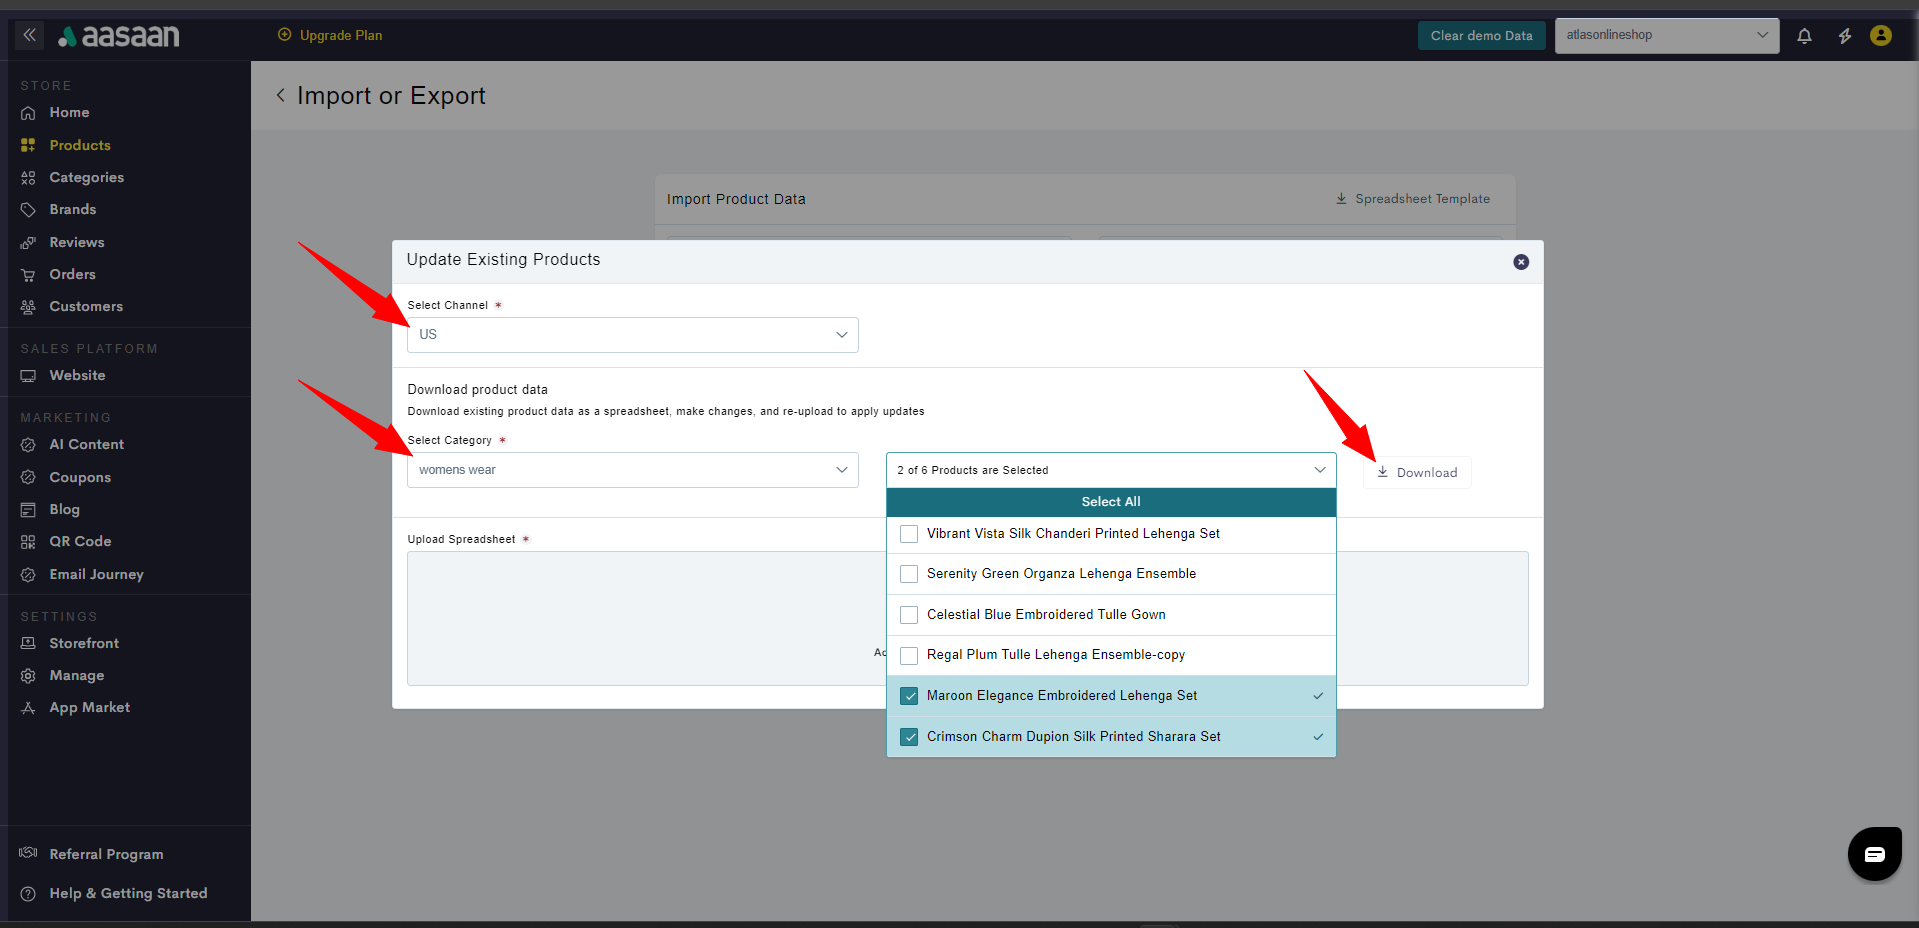
- Select the channel whose products you wish to update.
Note: The feature of choosing the channel whose products you wish to update is present only on the Business plan.
- Click on the dropdown shown to select the category whose products you wish to update.
- Select your desired category.
- Then choose the products you wish to update, and click on Download to download the update spreadsheet.
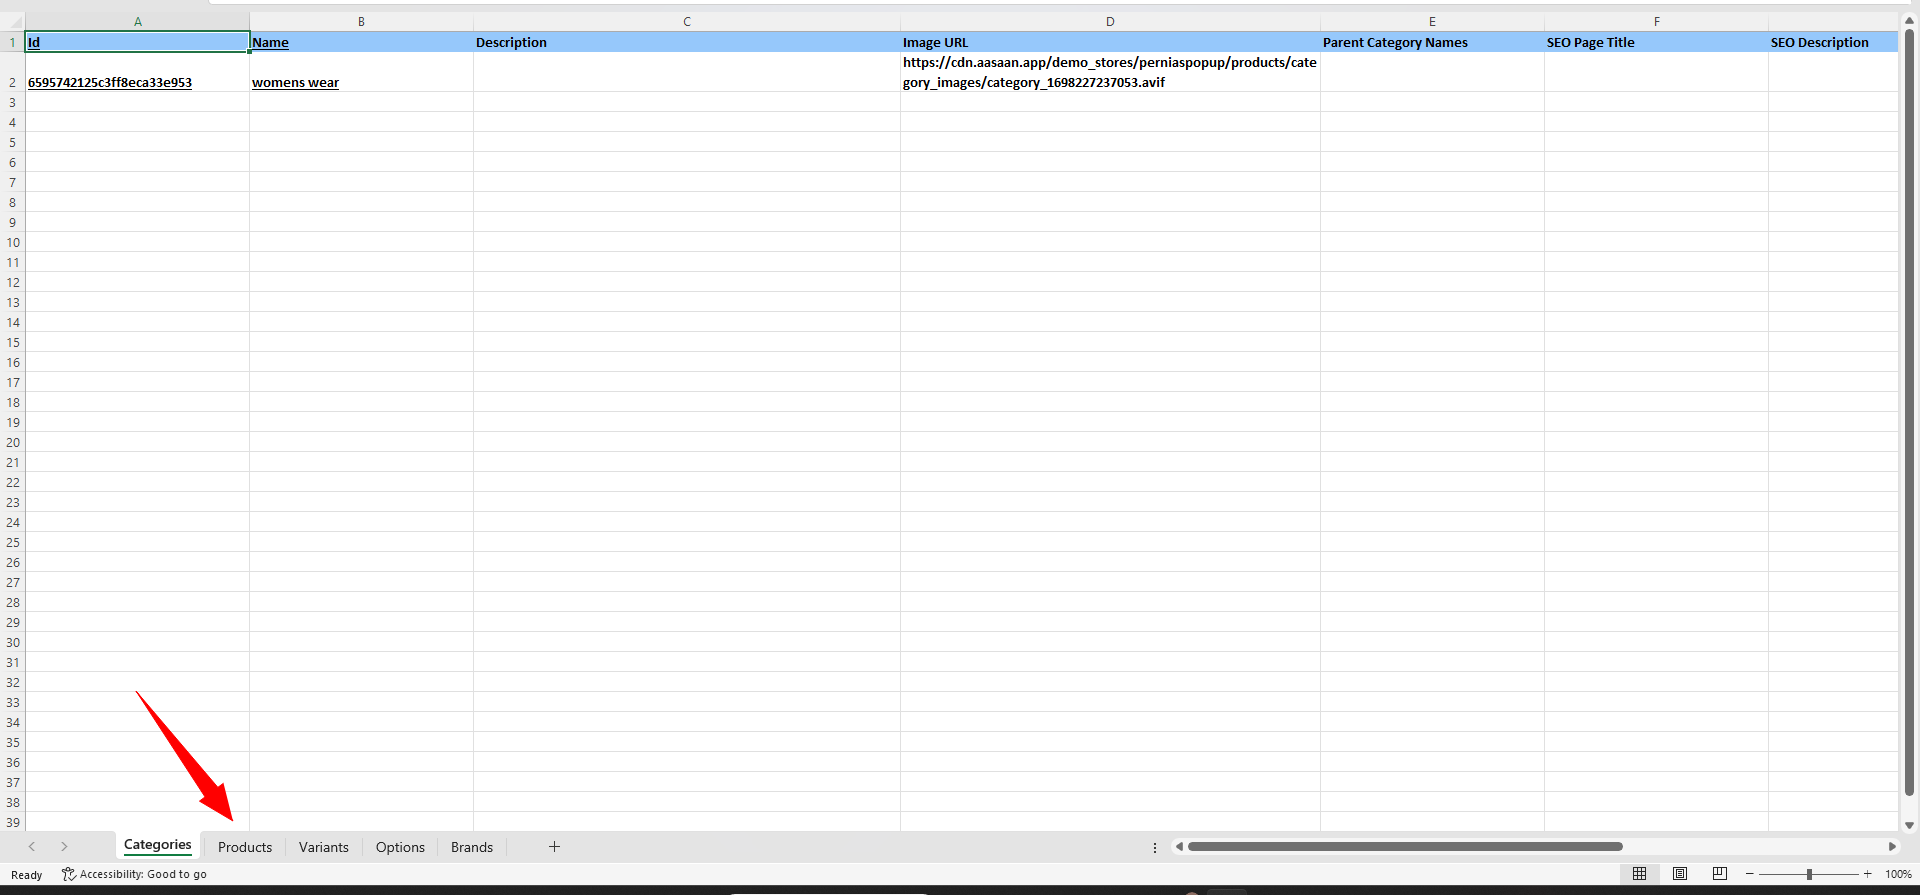
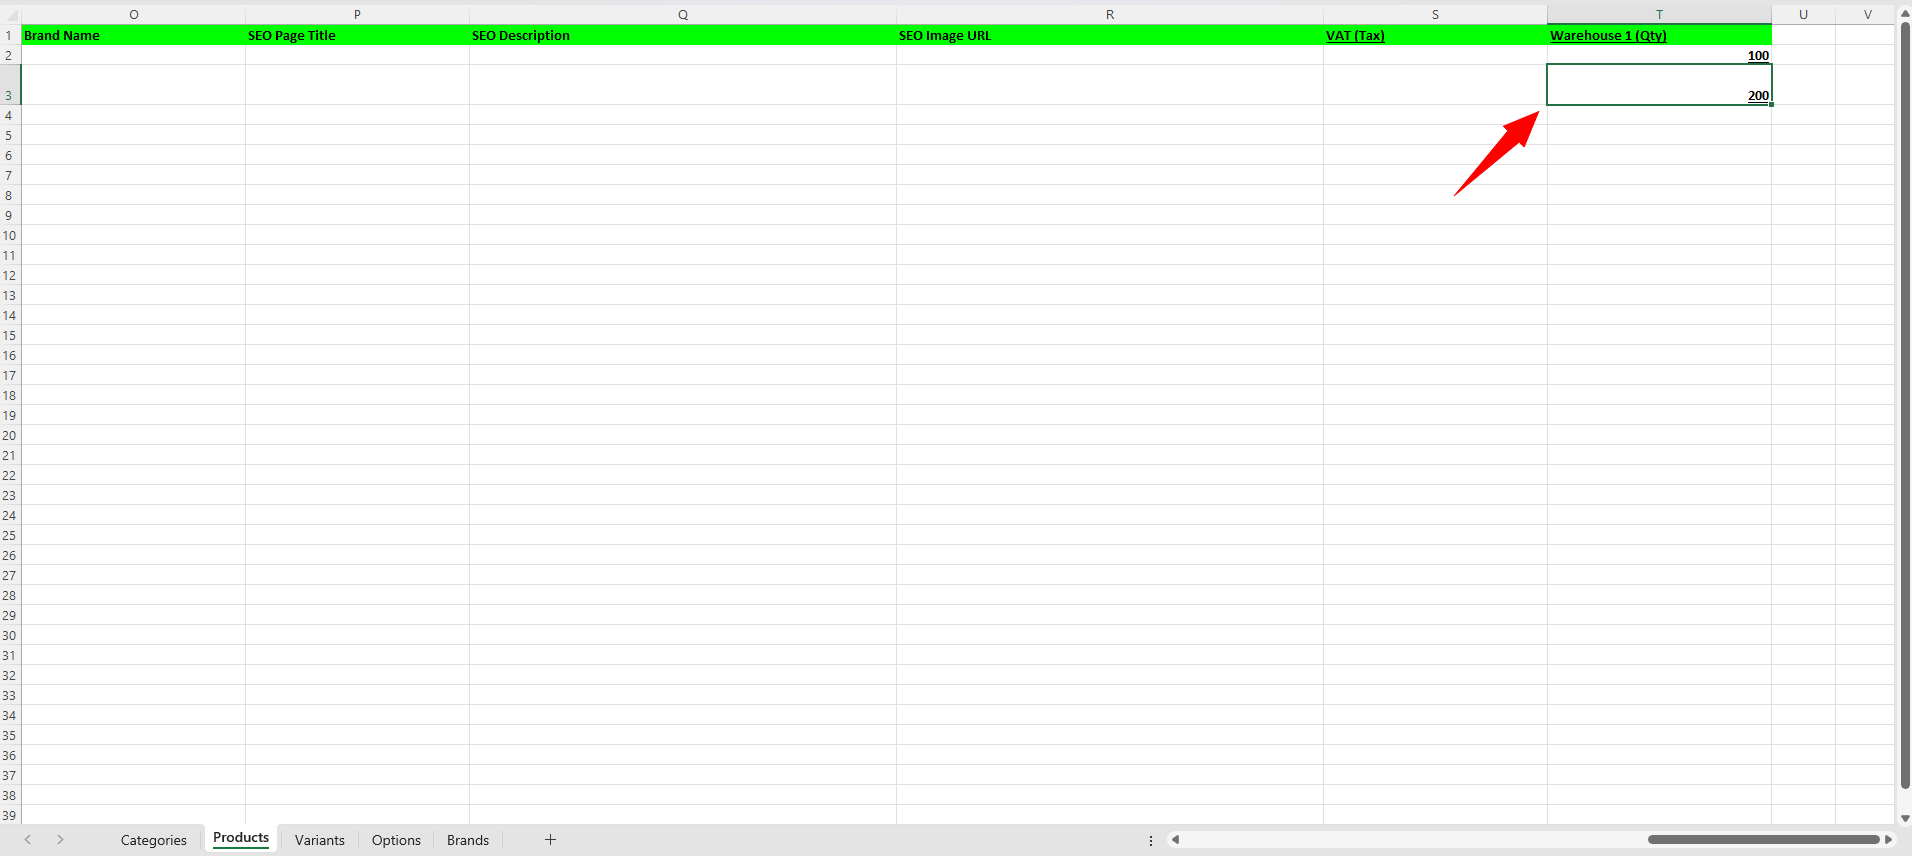
- The bulk update spreadsheet looks similar to the bulk upload sheet, with one key difference: Each category, product, variant, and brand has a unique ID associated with it.
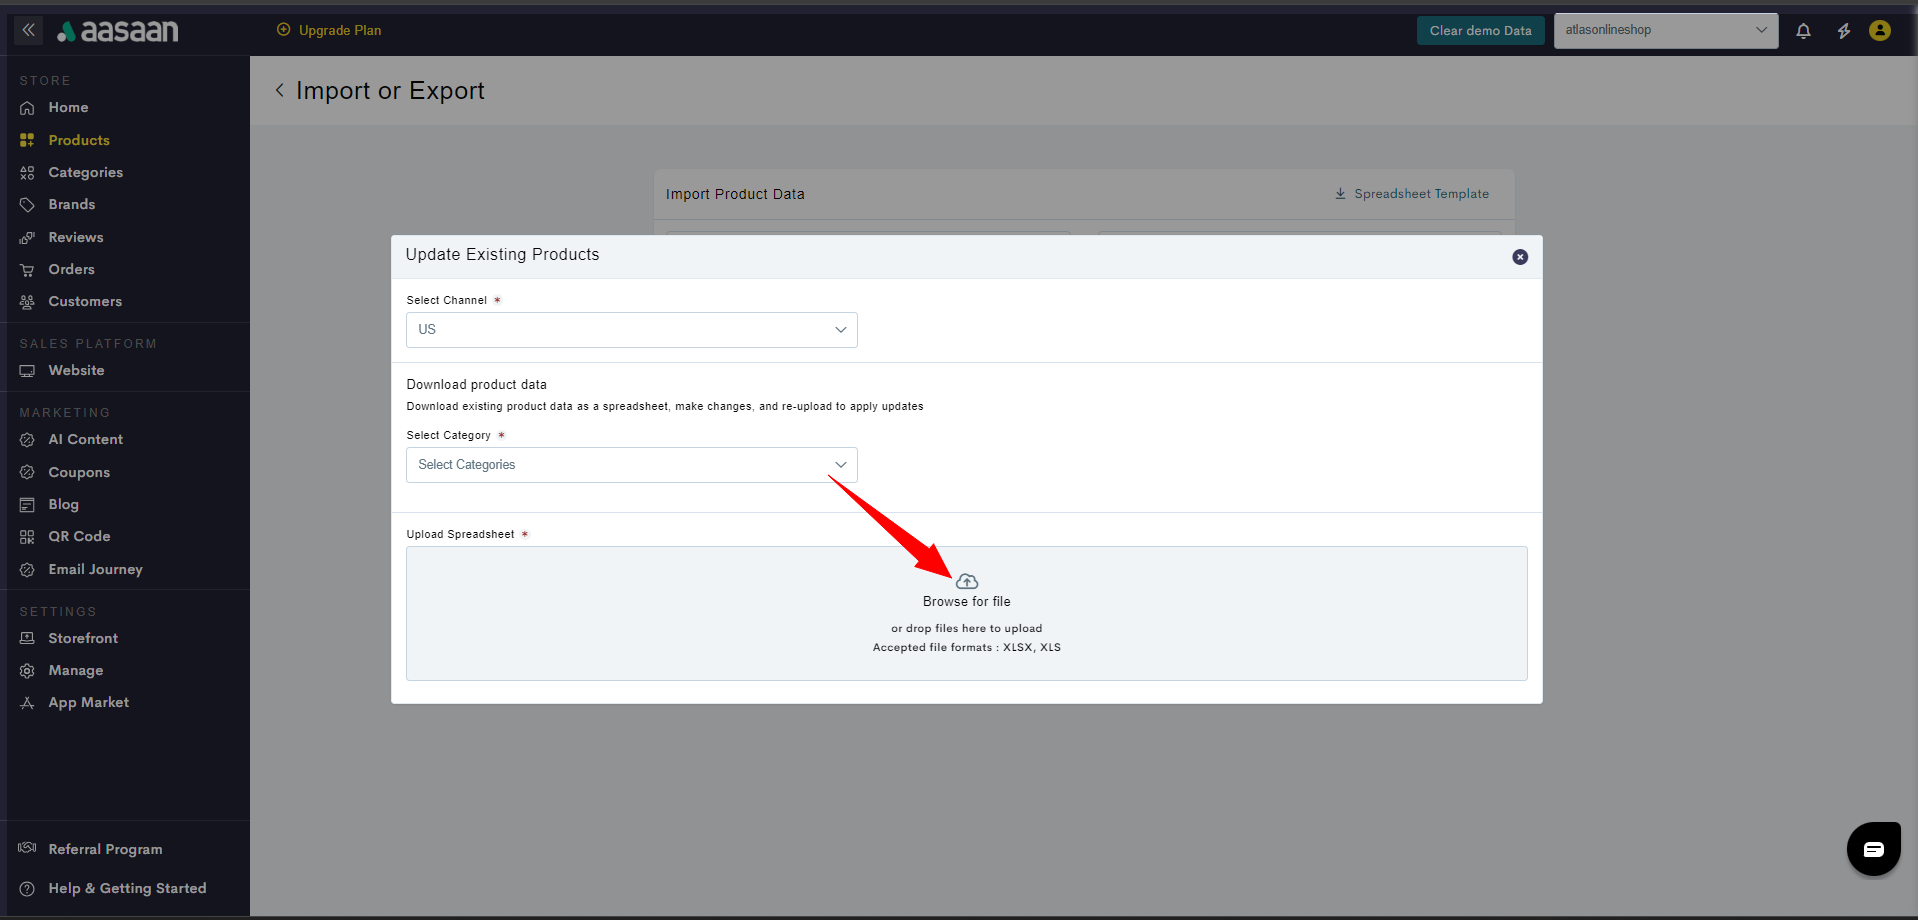
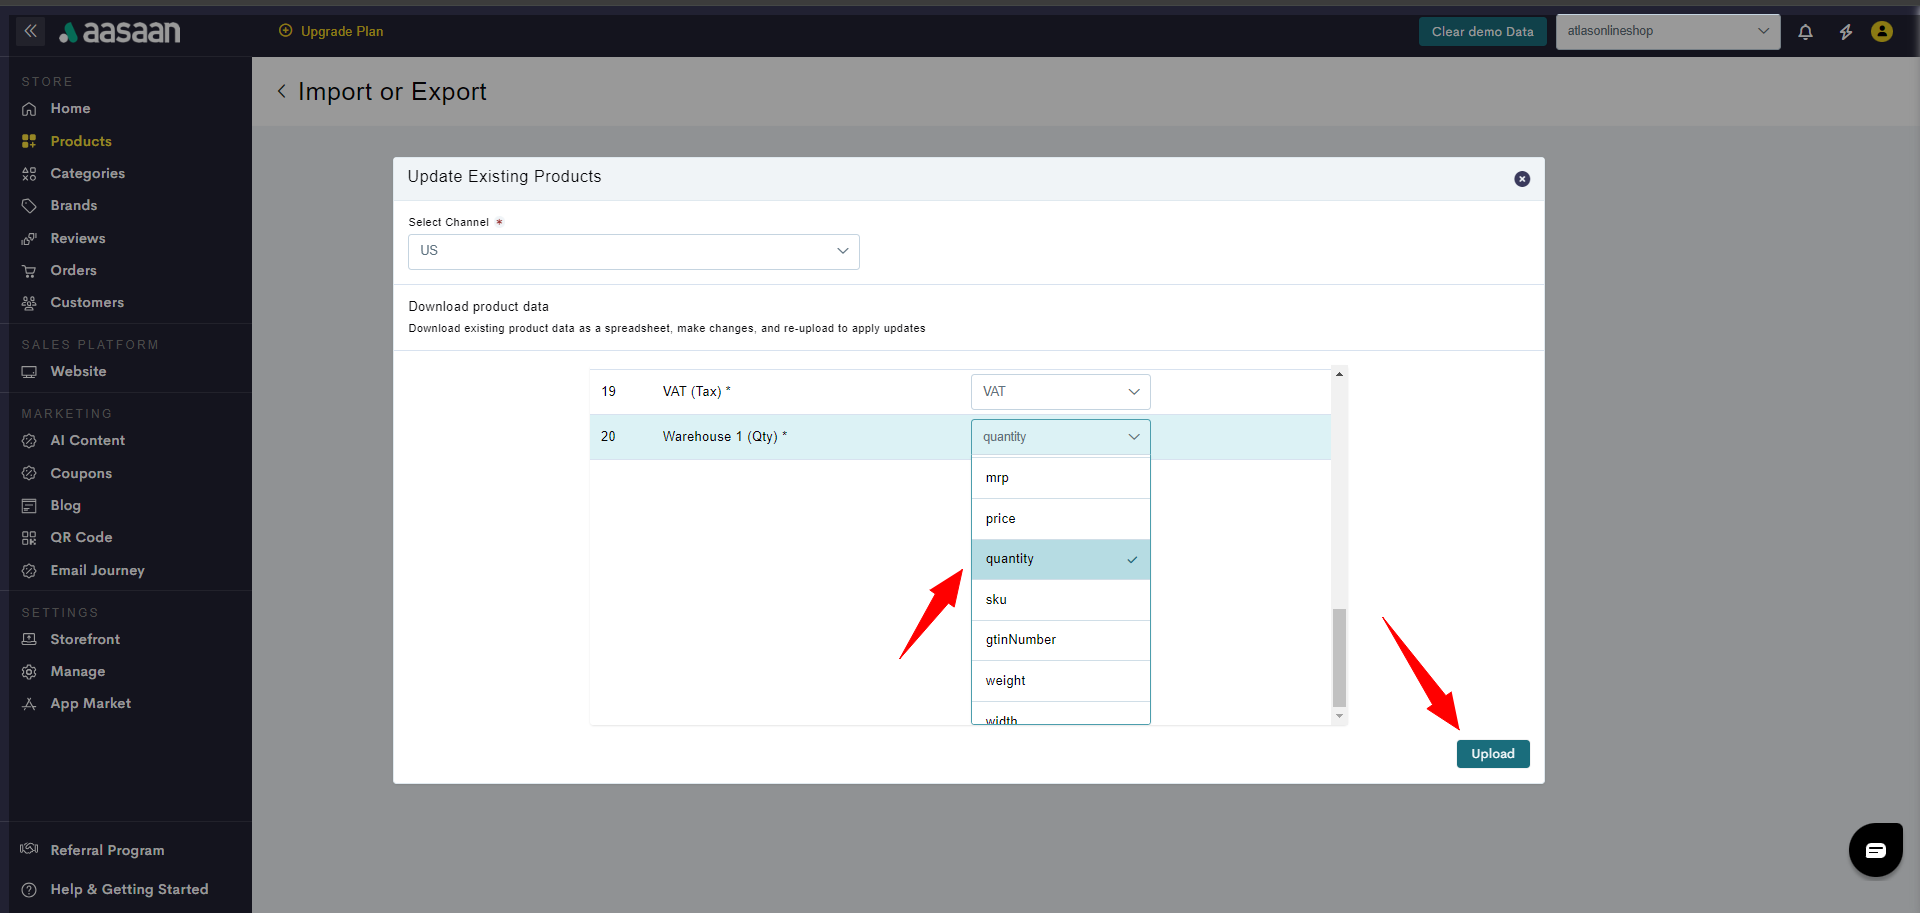
- Once the sheet has been updated, go back to your aasaan admin panel, click on the Select a file to upload button and upload the bulk update sheet.
- Click on Upload.
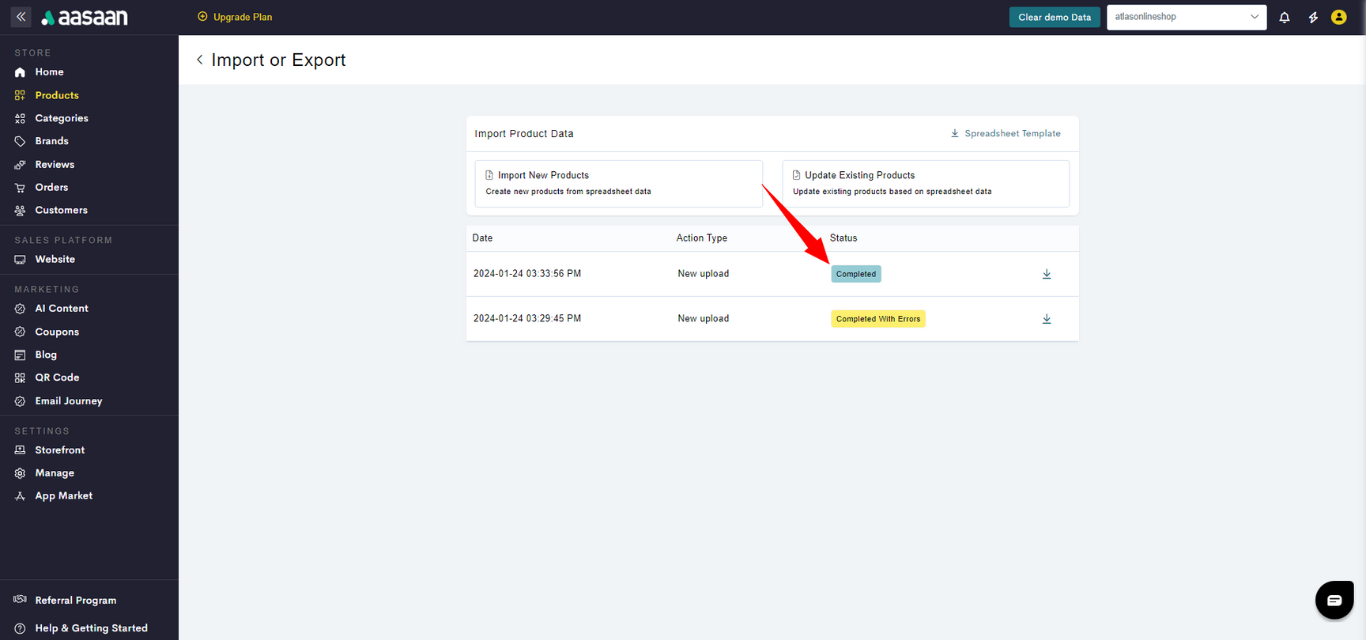
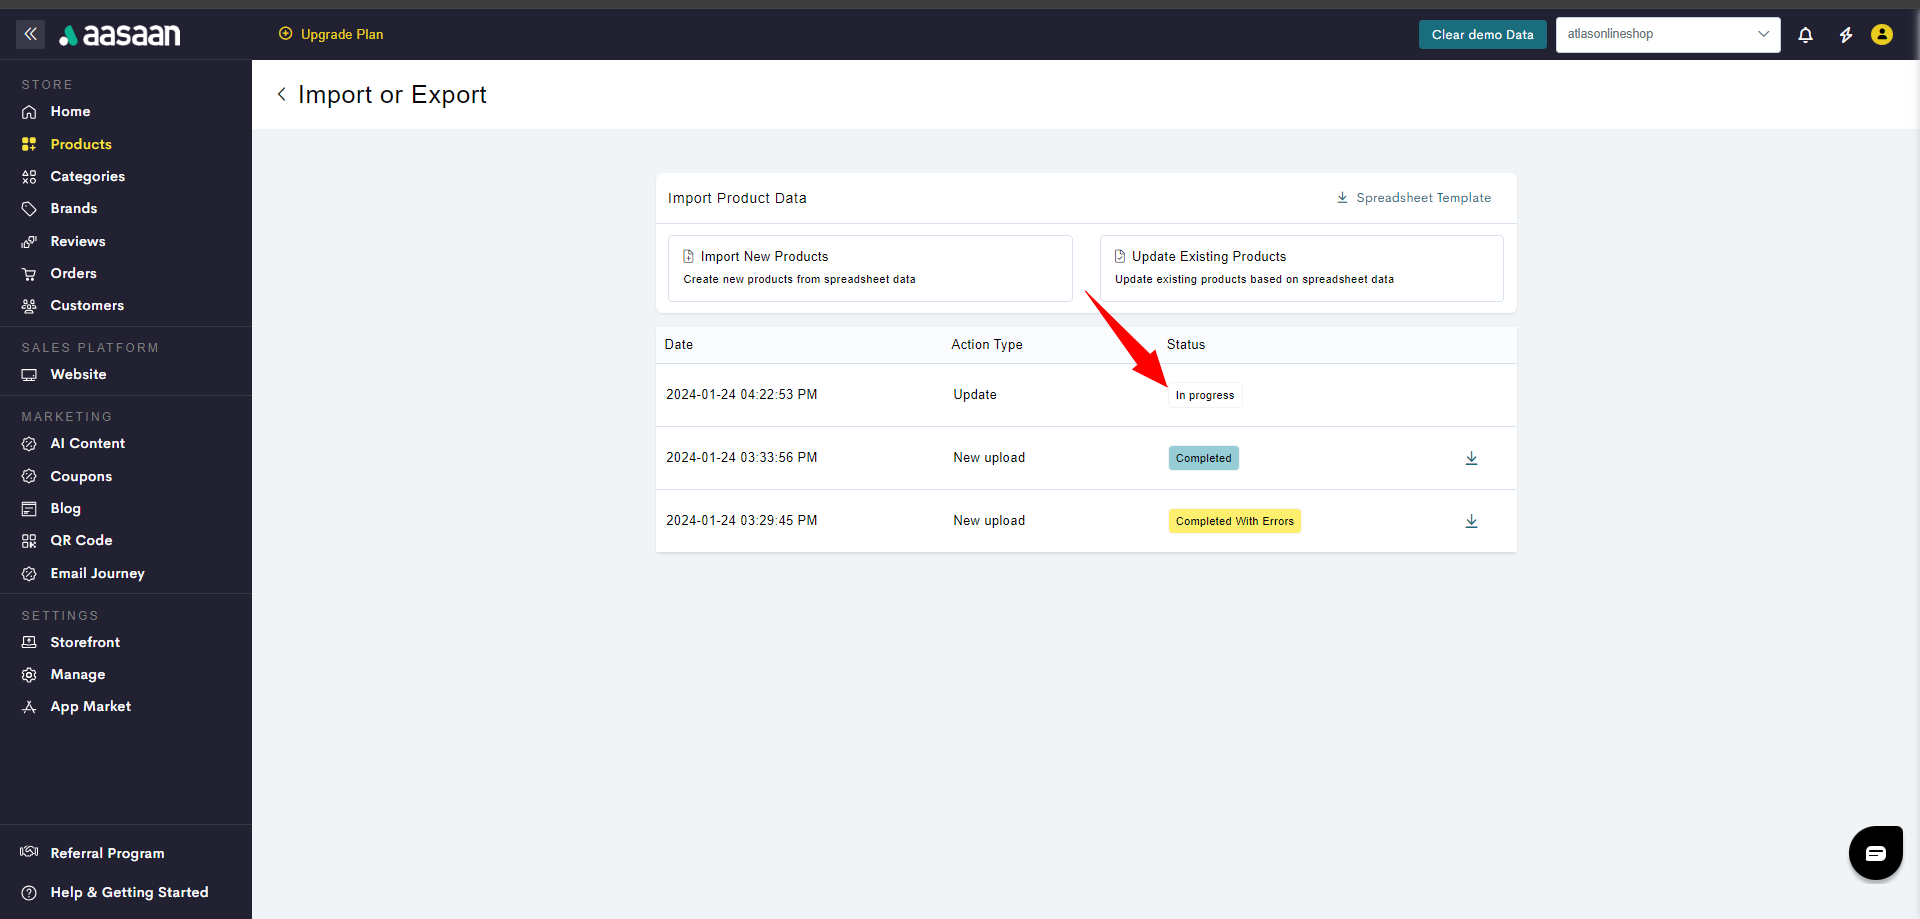
- The update spreadsheet has been uploaded. As shown, the status says “In Progress”. Click on the Refresh button.
- Once the update process has finished, the status should say “Complete”.


Frequently Asked Questions
Here are few questions which are frequently asked:How to duplicate a product?
How to duplicate a product?
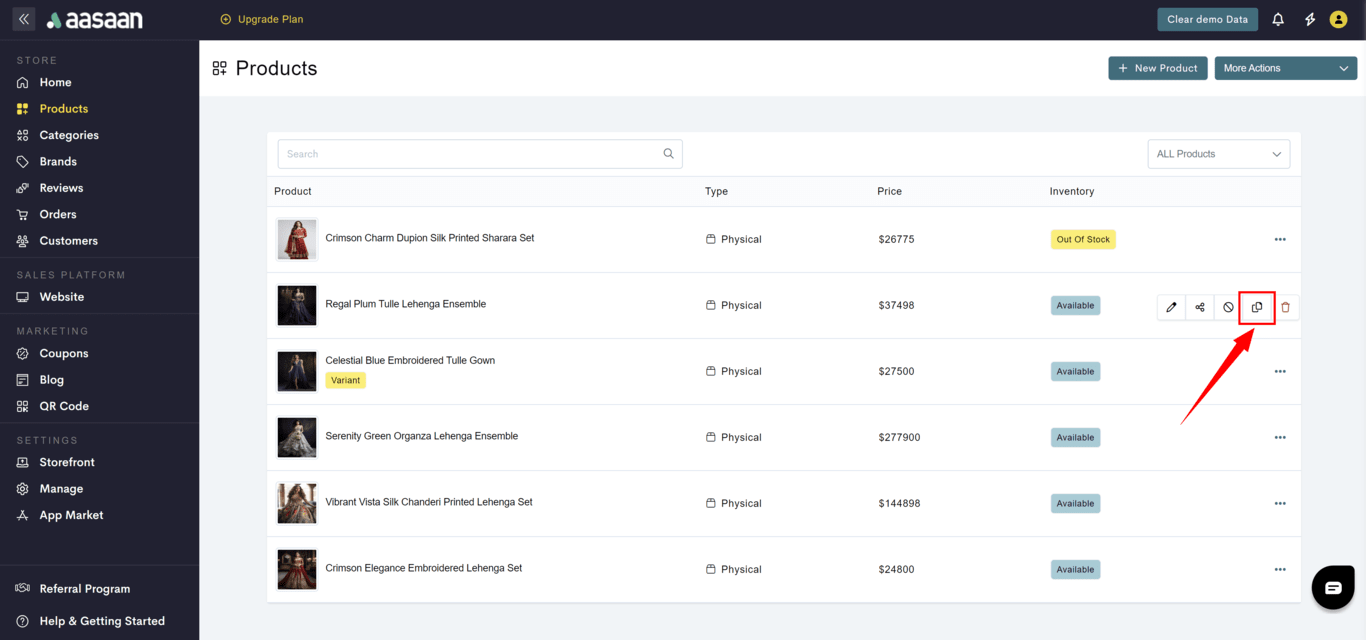
- To duplicate a product in your store:
- Log in to your aasaan desktop admin panel and click on Products.
- Click on … at the product you want to duplicate.
- Click on the duplicate icon.
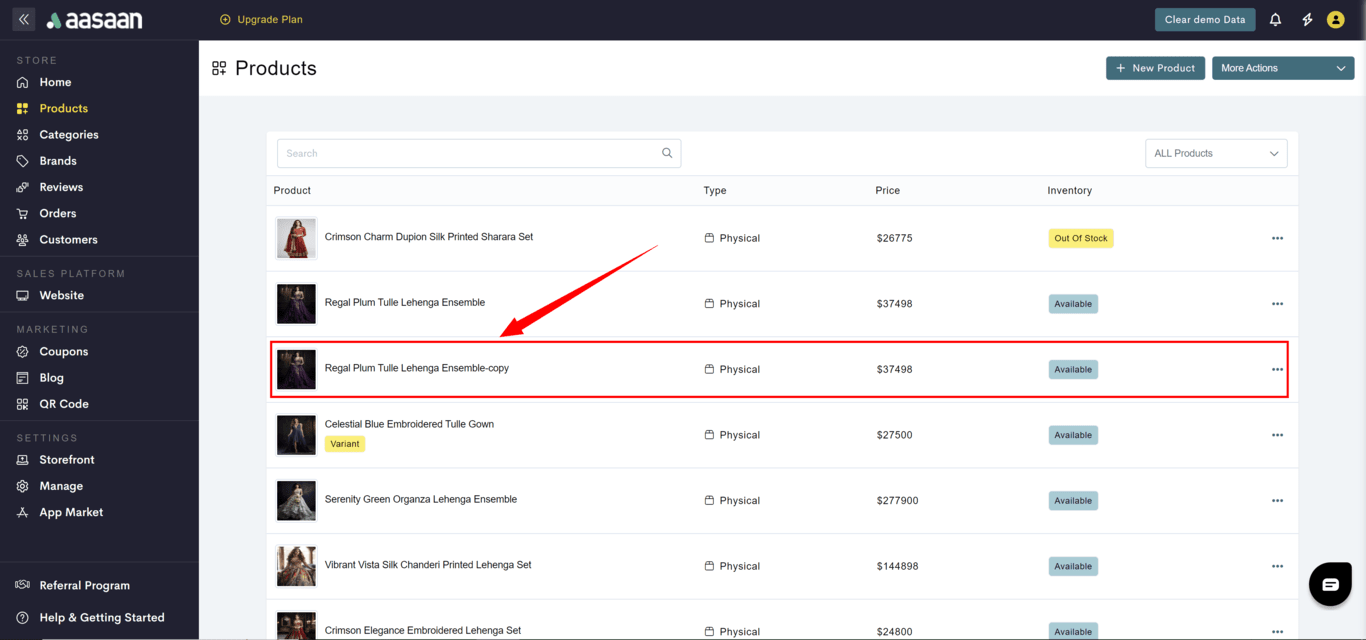
- A duplicate product with a suffix ‘_copy’ added to the product name is created and listed immediately.


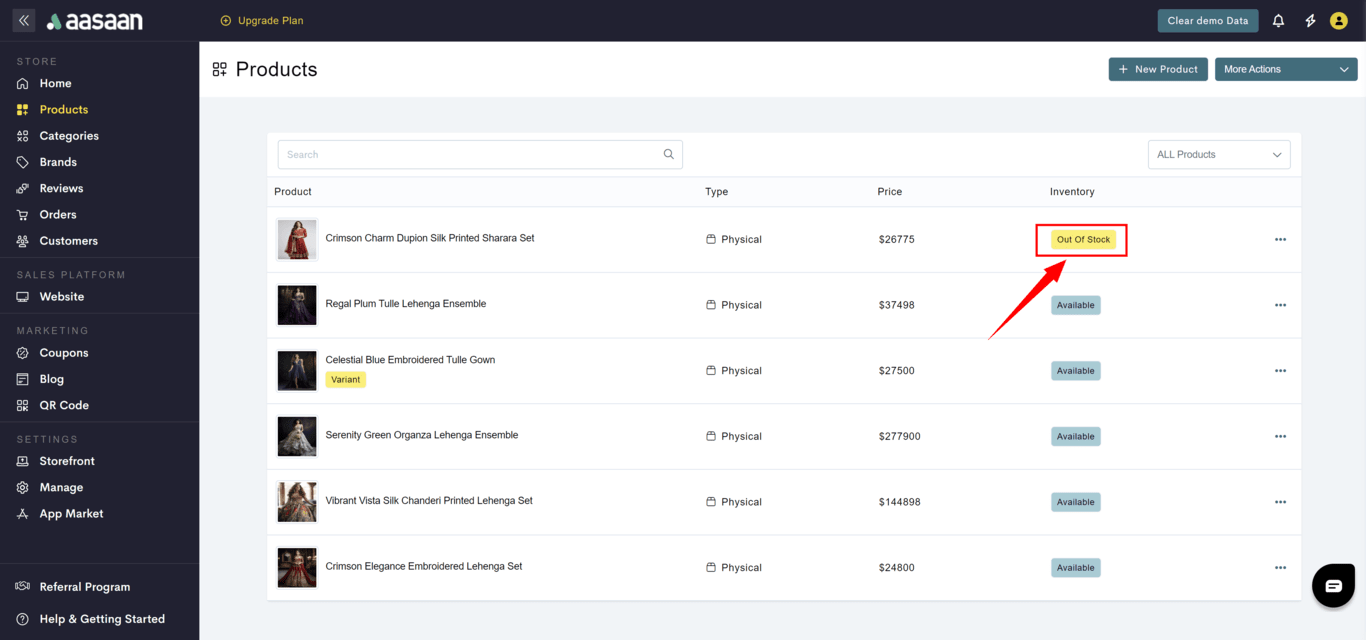
How to mark a product as out of stock?
How to mark a product as out of stock?
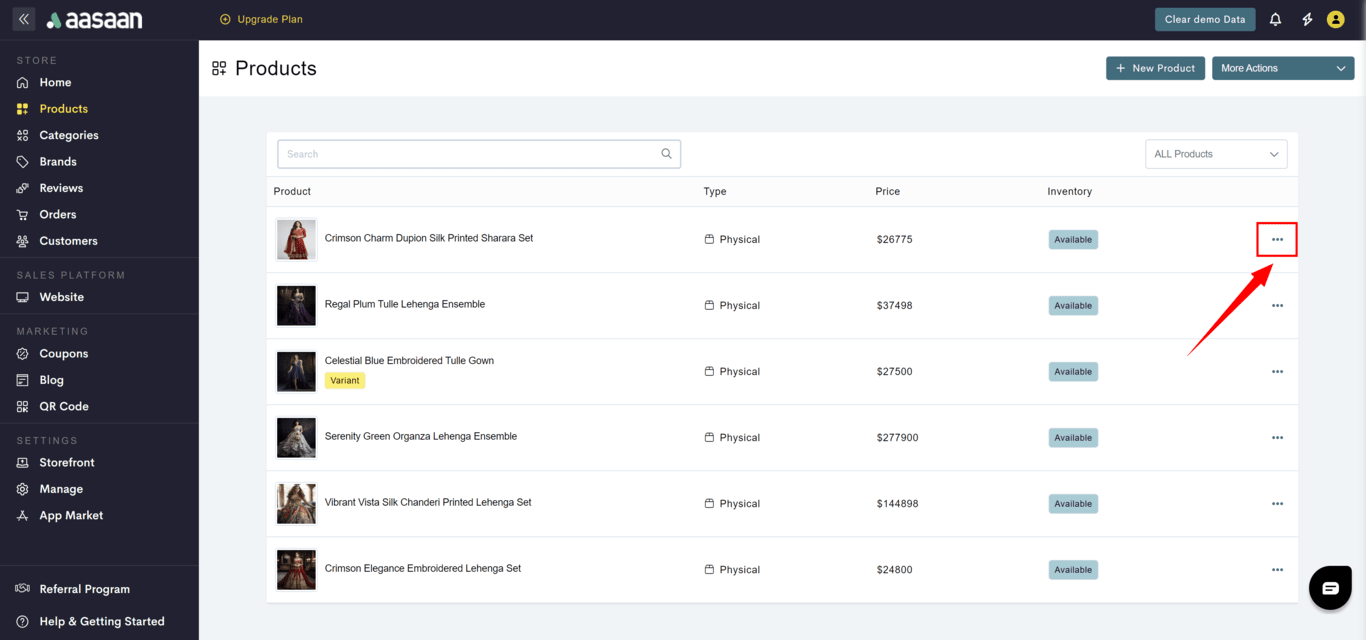
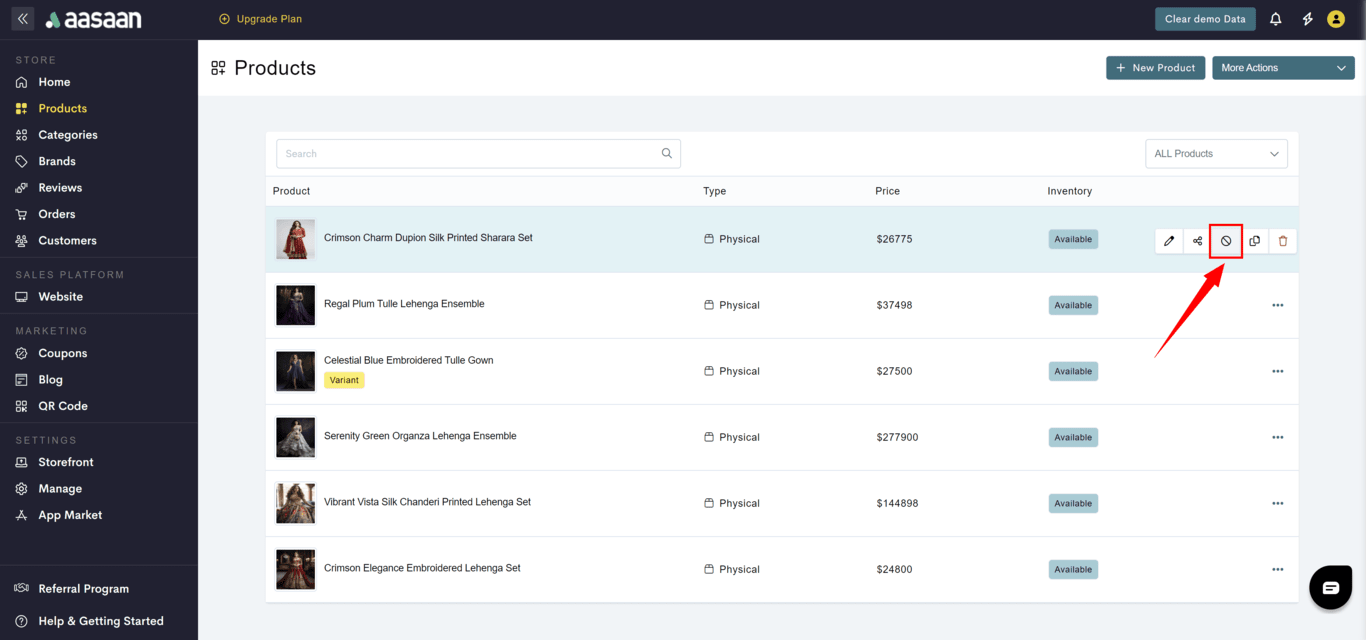
- To mark a product in your store as out of stock:
- Log in to your aasaan desktop admin panel and click on Products.
- Click on … at the product you want to duplicate.
- Click on the out of stock icon.
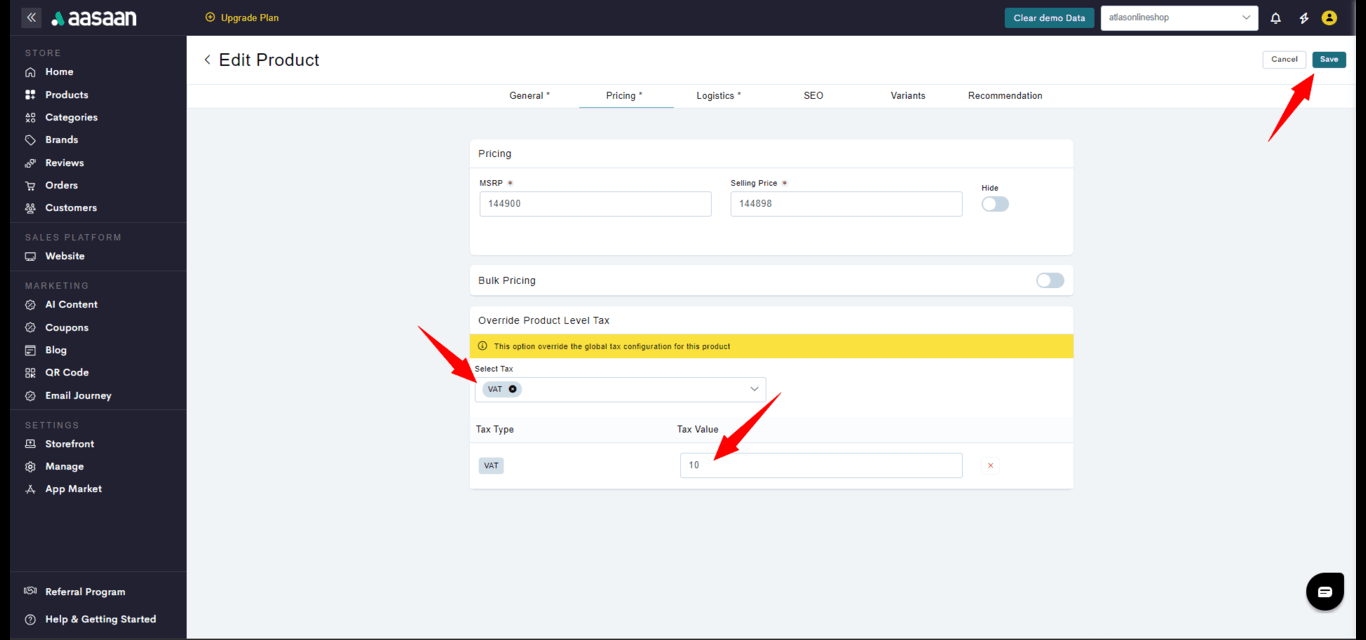
How to apply product level taxes?
How to apply product level taxes?
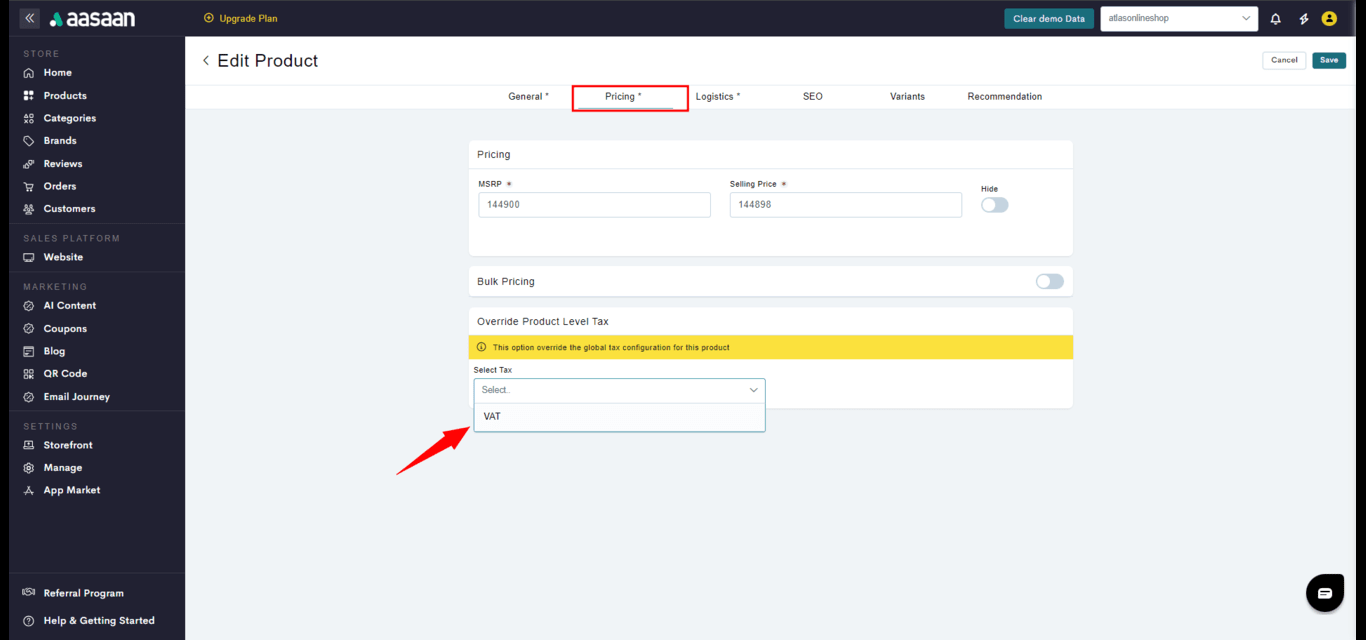
- Log in to your aasaan desktop admin panel and click on Products.
- Edit the product for which you want to provide product level taxes.
- If the product is non-variant product then-
- Goto Pricing tab.
- If the product is a variant product then-
- Goto Taxes tab.
- Goto Override Product Level Tax section, select all the tax which needs to be overridden and provide the necessary details.
- Click on Save

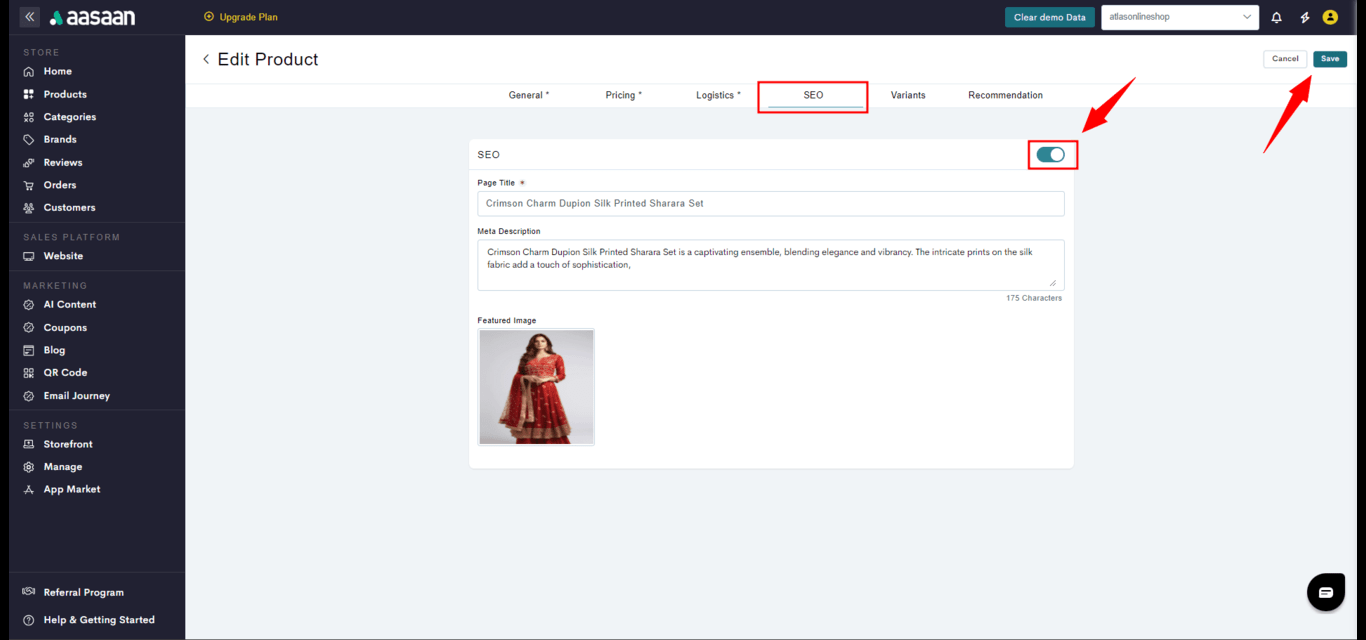
How is product level SEO done?
How is product level SEO done?
- Log in to your aasaan desktop admin panel and click on Products.
- Edit the product for which you want to provide product level SEO information.
- Goto SEO tab.
- Enable the SEO toggle.
- Provide information
- Page title
- Meta description
- Featured image
- Click on Save.