Bigrock Domain
Connecting Bigrock domain to your aasaan website
Connecting Bigrock domain to your aasaan website
If you’ve purchased a domain from Bigrock and want to connect it to your Aasaan website, follow these detailed steps for a smooth integration.
-
Access Aasaan Admin Panel:
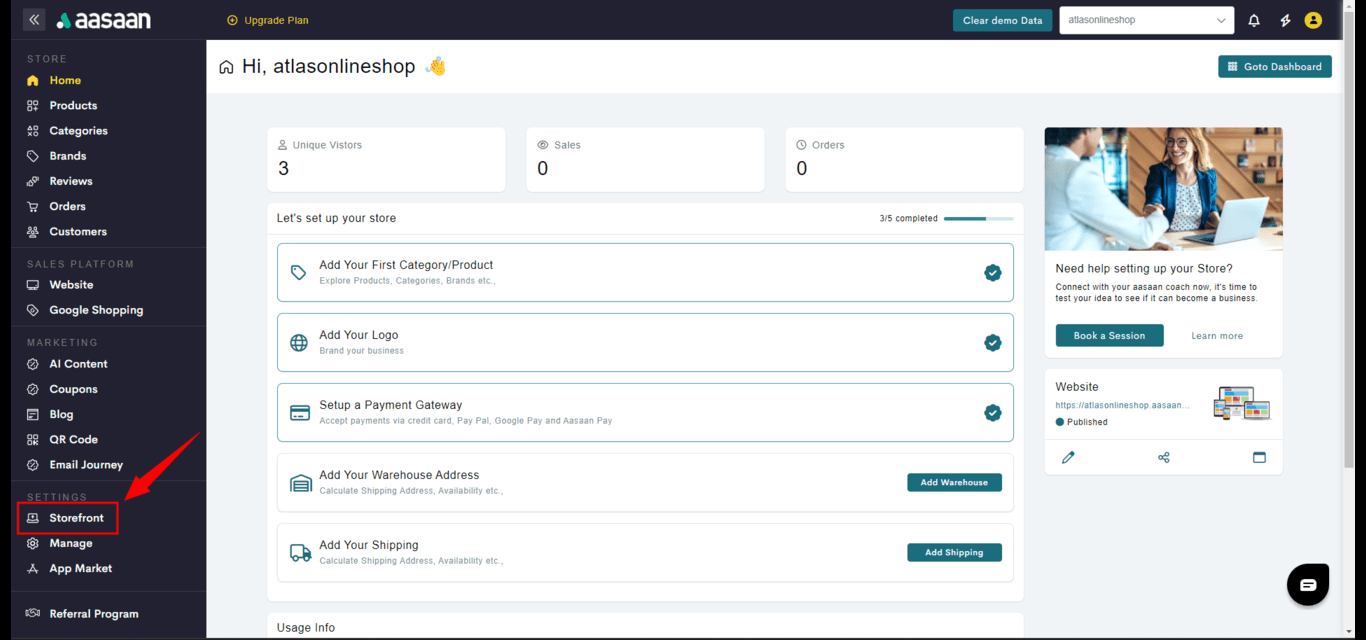
Log in to your Aasaan desktop admin panel and select ‘Store Front’.
-
Navigate to Settings:
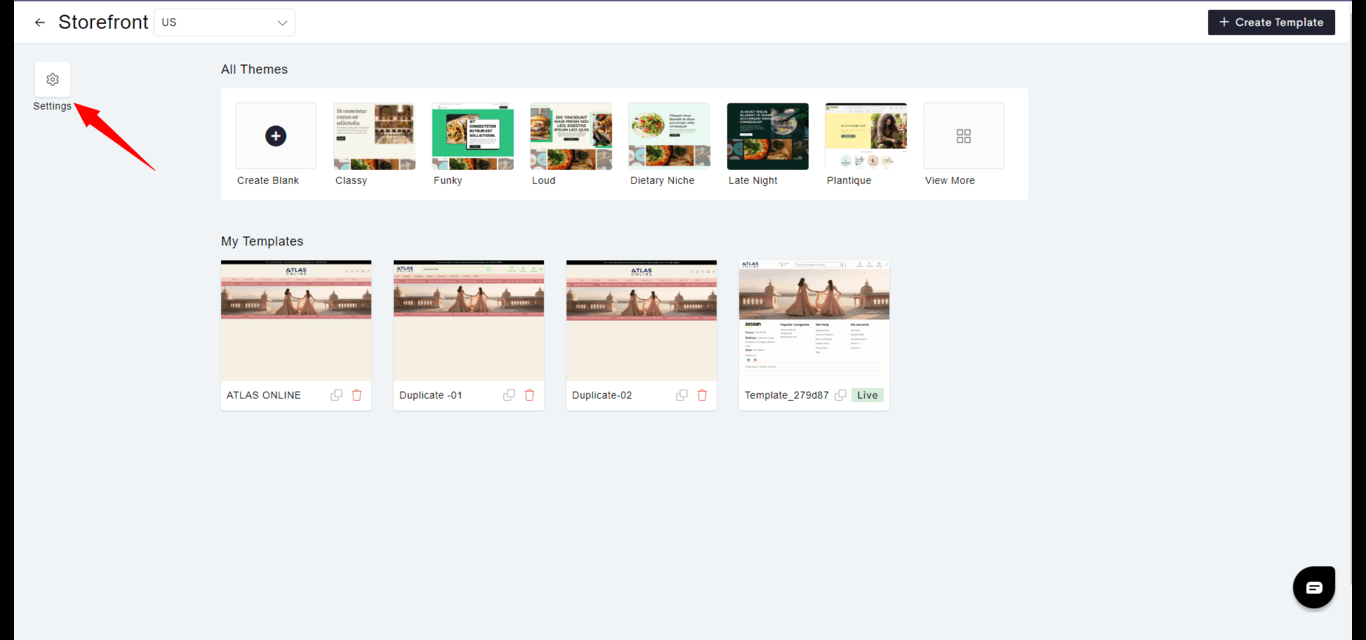
Click on the settings icon within your admin panel.
-
Domain Section:
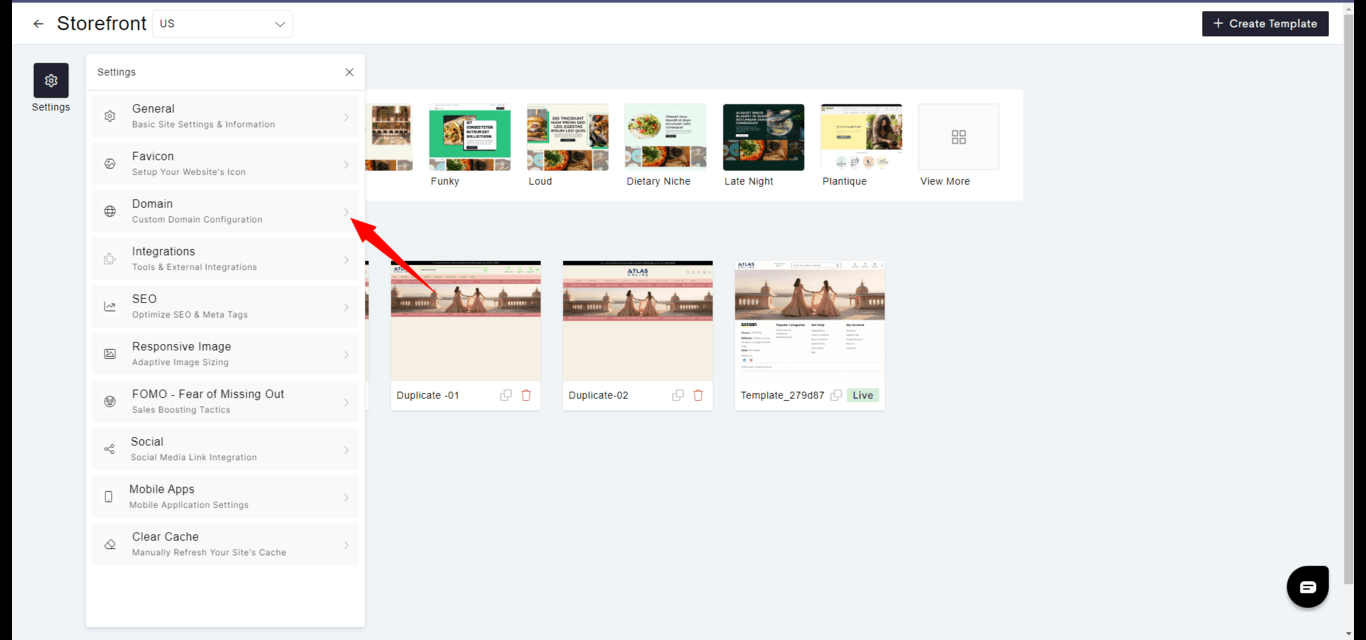
Choose ‘Domain’ from the settings options to manage your domain settings.
-
Enter Domain Name:
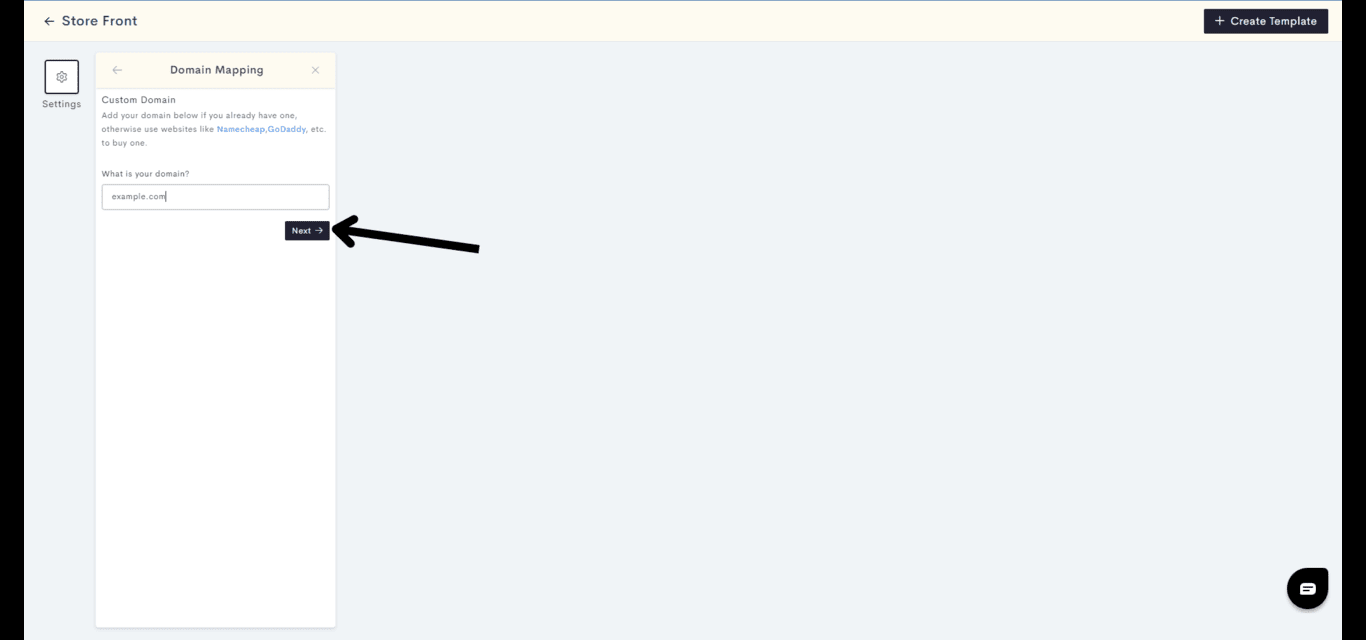
Type in your custom domain name and proceed by clicking ‘Next’.
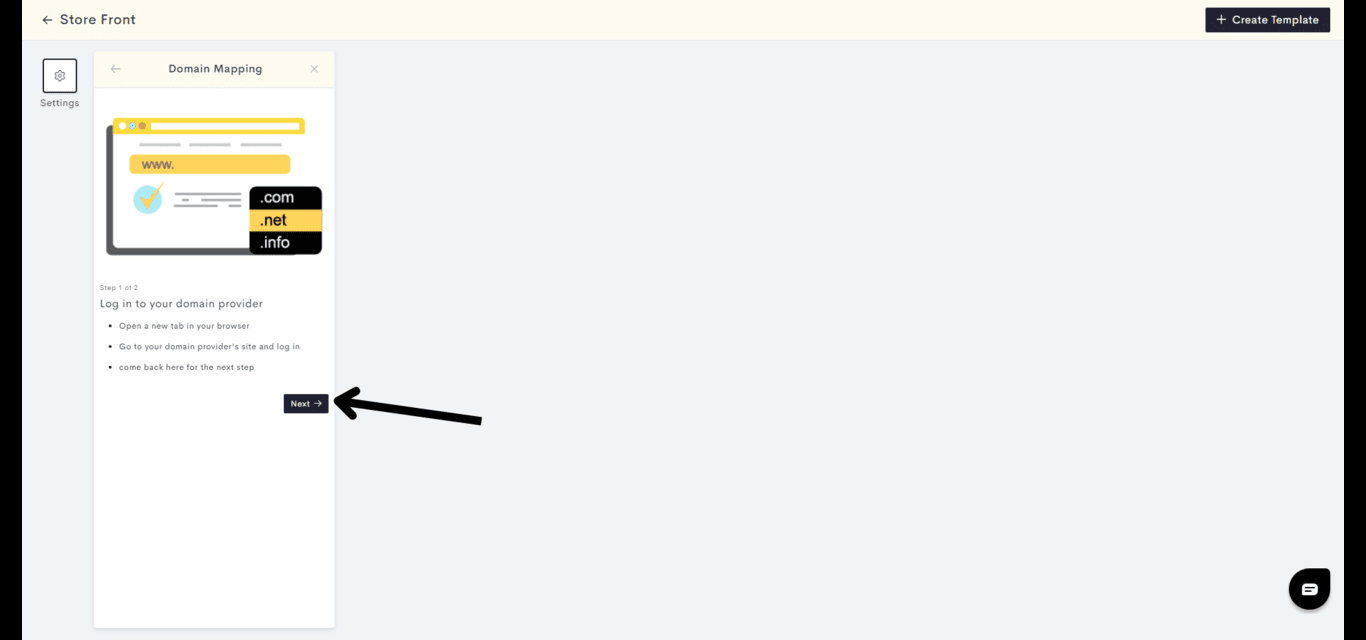
- Provider Login: When prompted, log in to your Bigrock account to access your domain’s settings.
-
Domain Mapping:
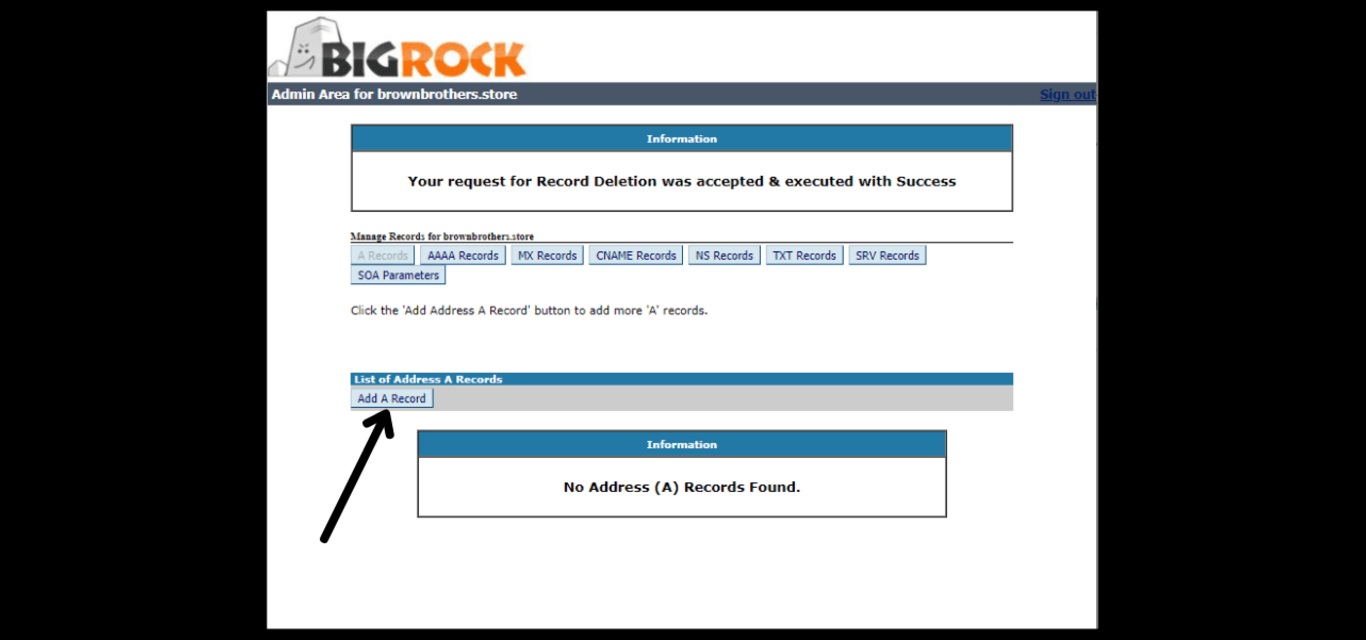
Start the process of domain mapping by adding an “A” record in your Bigrock DNS settings.
-
DNS Settings on Bigrock:
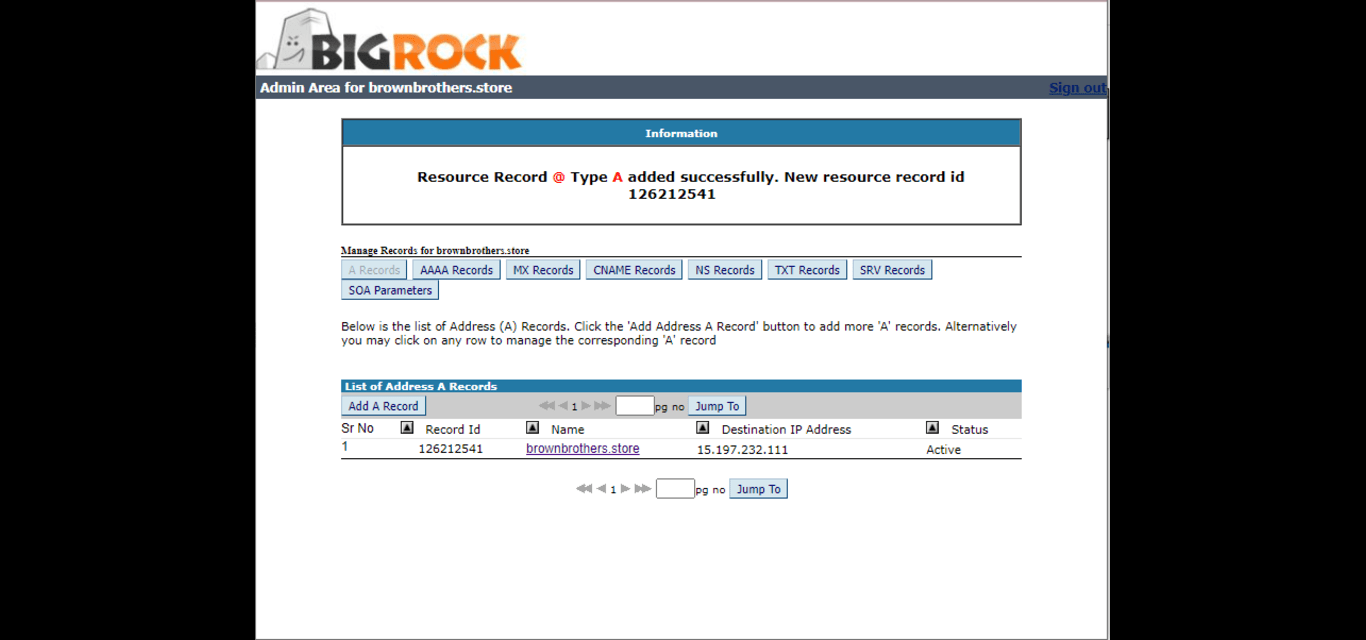
On your Bigrock DNS settings page, add an A record with the following details:
- Hostname: ”@”
- IP Address: “76.76.21.21”
- TTL: “7200 seconds” Then, click on ‘Add Record’.
-
Verify and Confirm:
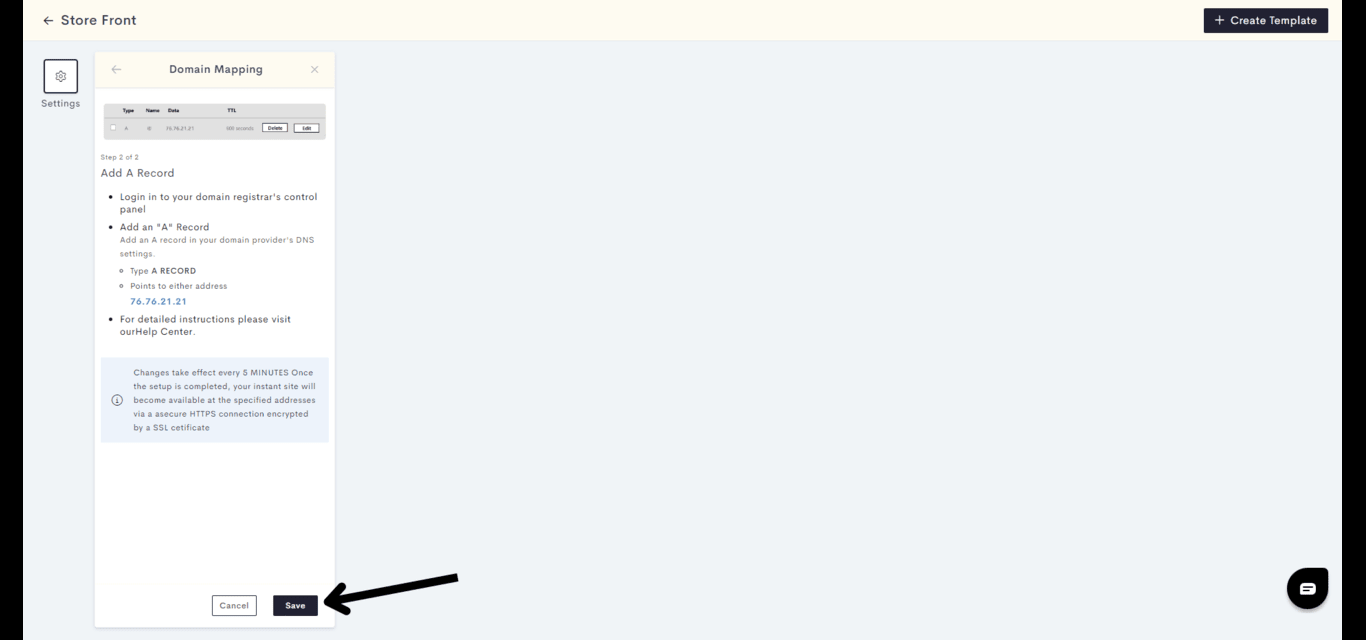
Return to the Aasaan domain mapping section and click ‘Save’ to confirm the connection.
Important DNS Setting Notes:
- Ensure no conflicting A or AAAA records exist.
- Confirm or add a CNAME record with name ‘www’ pointing to your domain. After verification, your custom Bigrock domain will be successfully linked to your Aasaan website, and your domain mapping page will reflect the successful connection.
FastComet Domain
Connecting FastComet domain to your aasaan website
Connecting FastComet domain to your aasaan website
If you’ve purchased a domain from FastComet, you can seamlessly integrate it with your Aasaan website by following the steps outlined below.
-
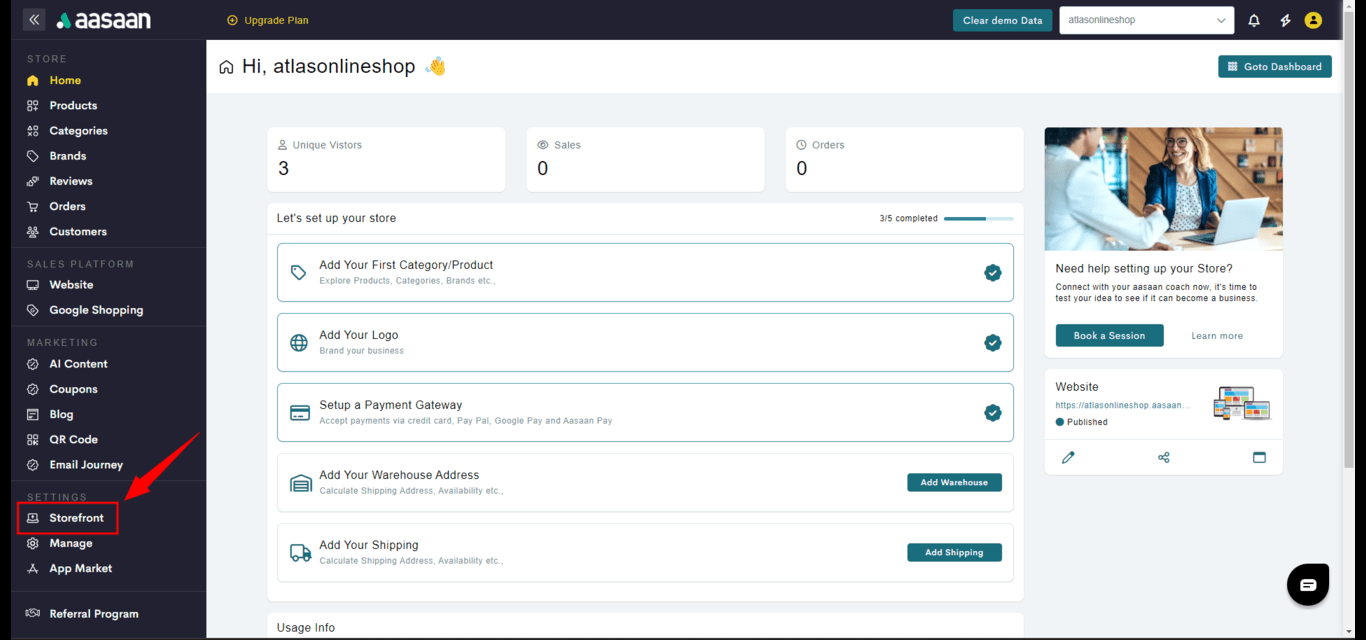
Access Aasaan Admin Panel:
Sign in to your Aasaan desktop admin panel and navigate to the ‘Store Front’ section.
-
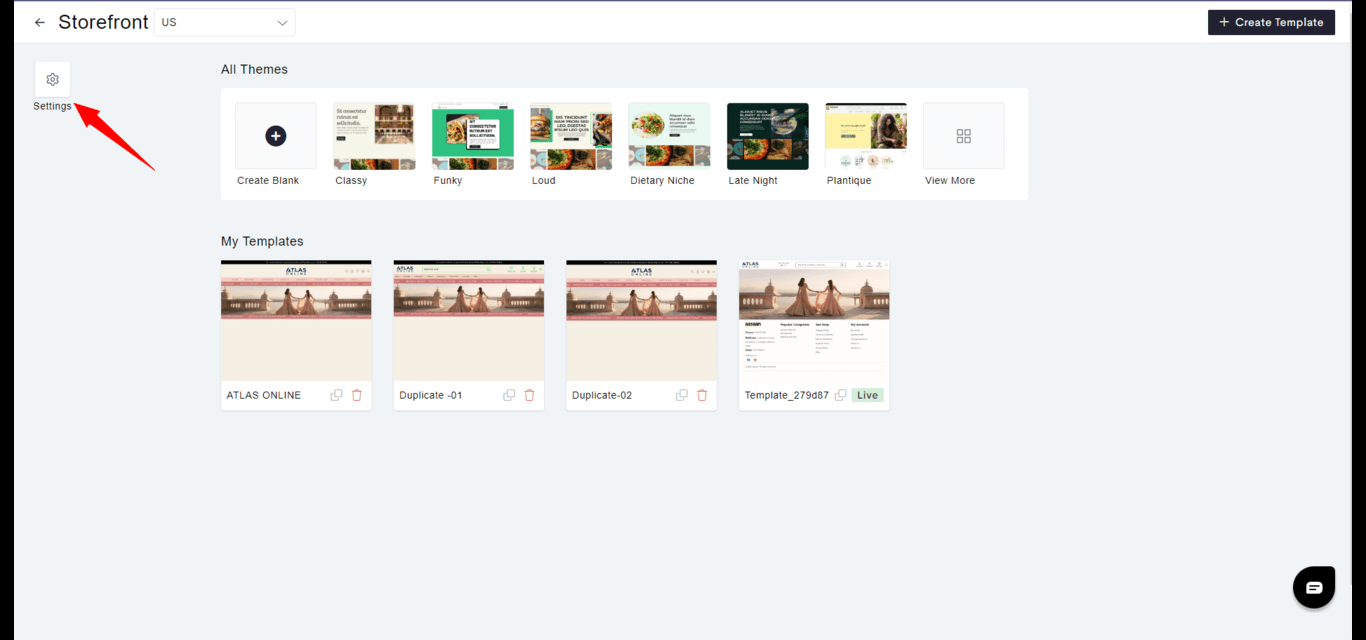
Navigate to Settings:
Click on the settings icon to proceed to the next step.
-
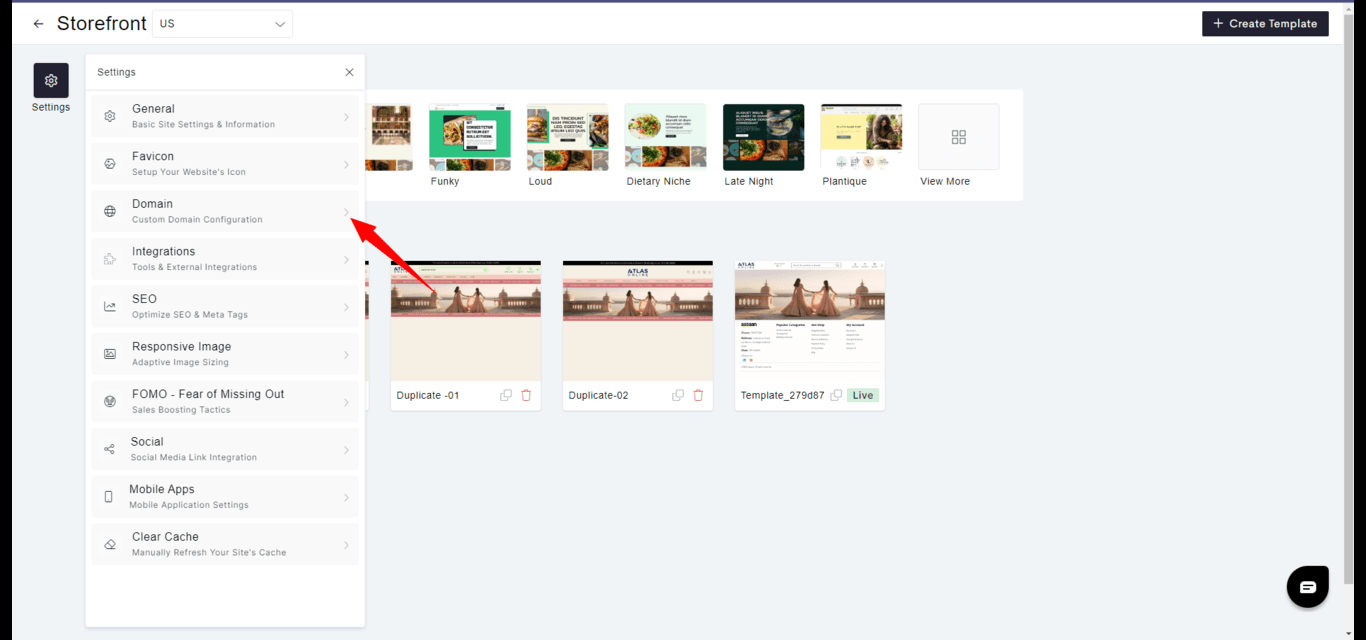
Domain Section:
Select the ‘Domain’ option from the settings menu to manage your domain settings.
-
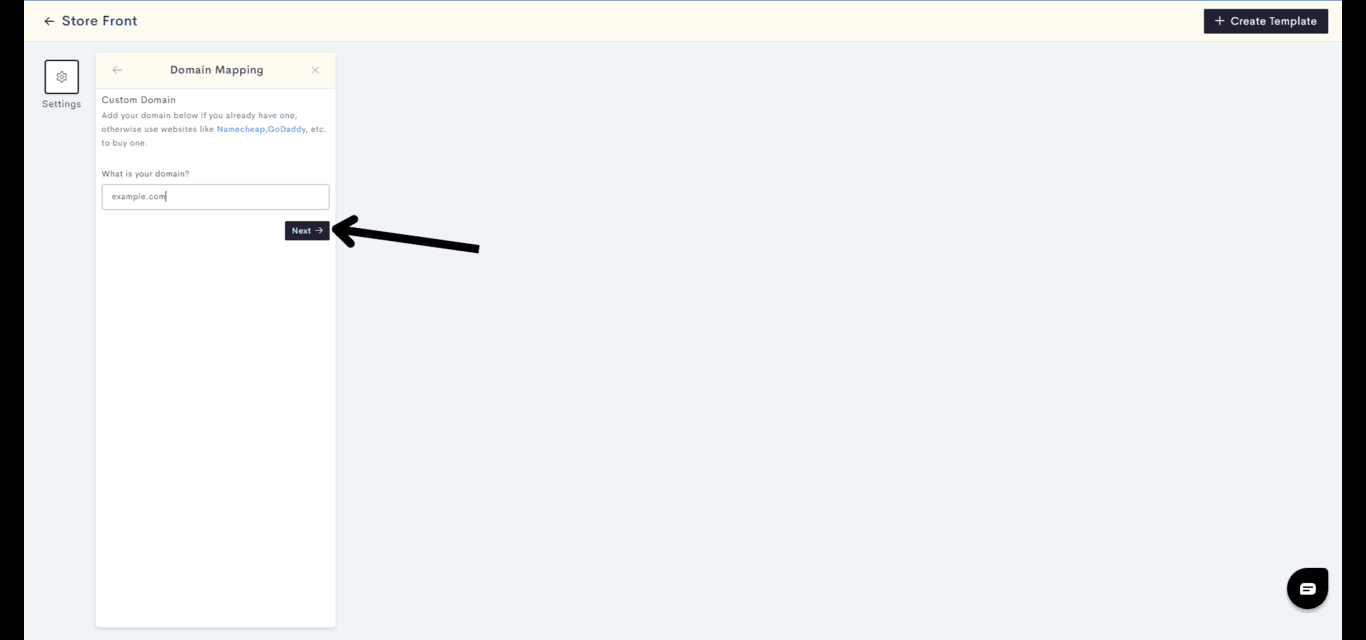
Enter Domain Name:
Type in your custom domain name from FastComet and click ‘Next’.
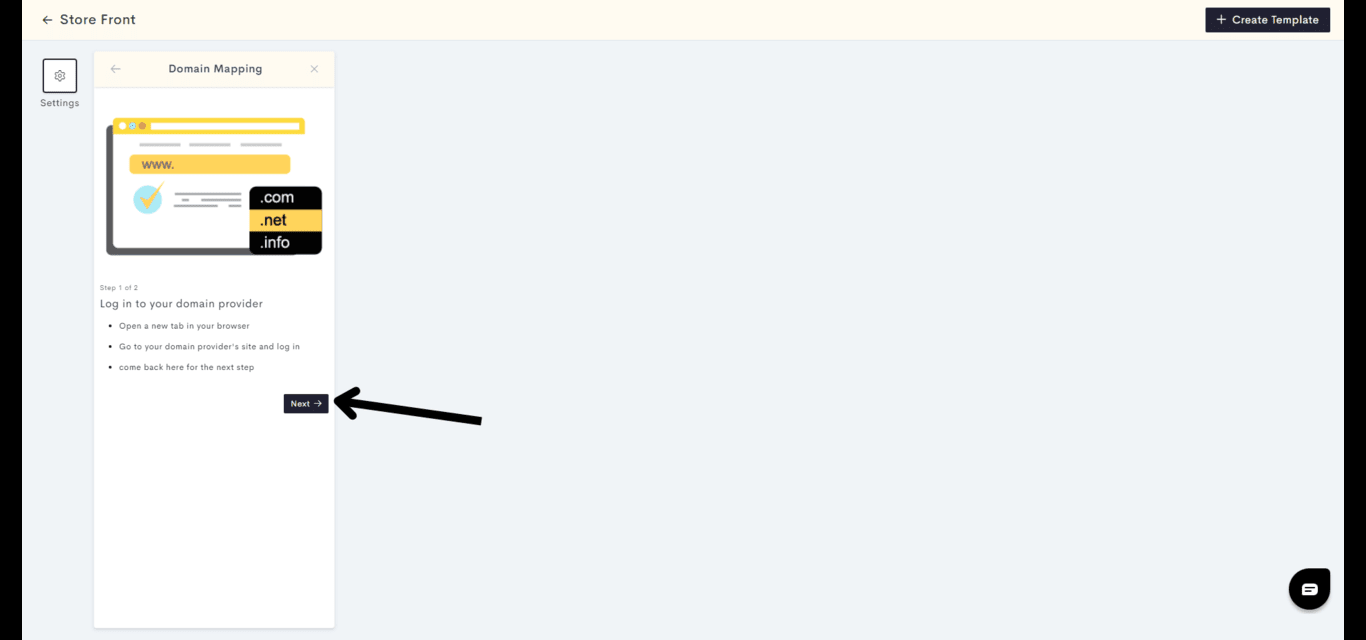
- Provider Login: Log in to your FastComet account when prompted to access the DNS settings.
-
Add an A Record:
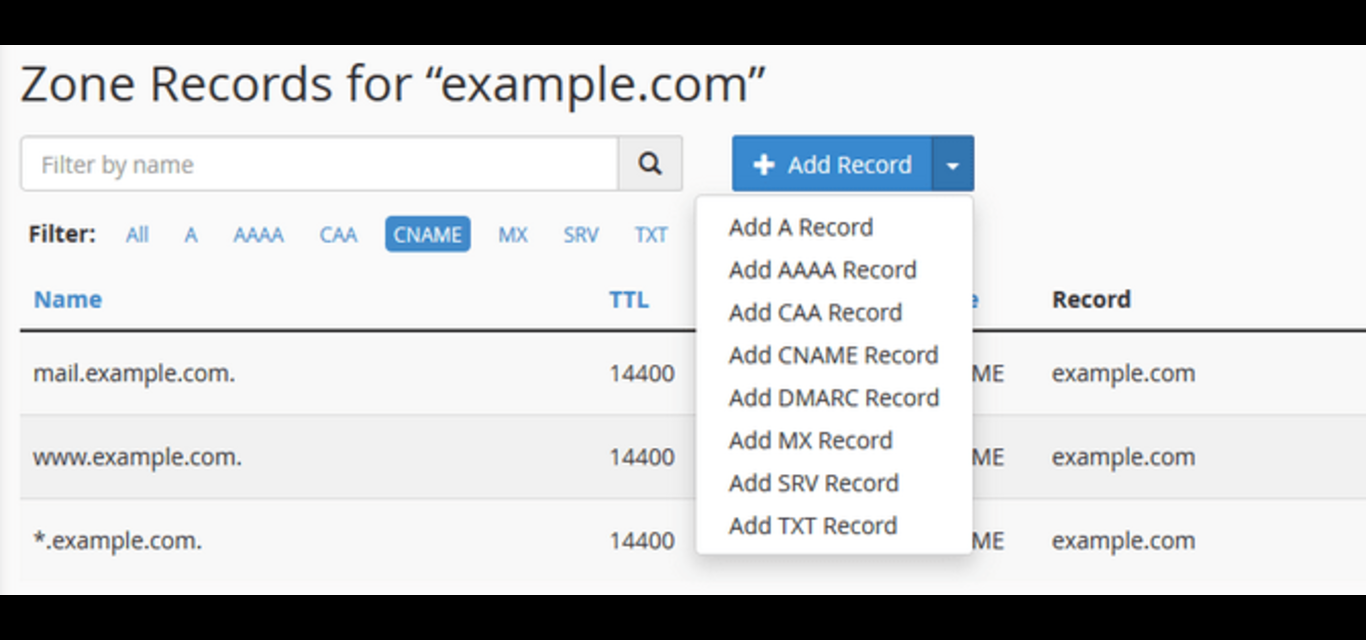
In your FastComet DNS settings, create a new A record with the following details:
- Type: “A”
- Name: ”@”
- Value: “76.76.21.21”
- TTL: “600 seconds” Click ‘Add record’ to finalize this step.
-
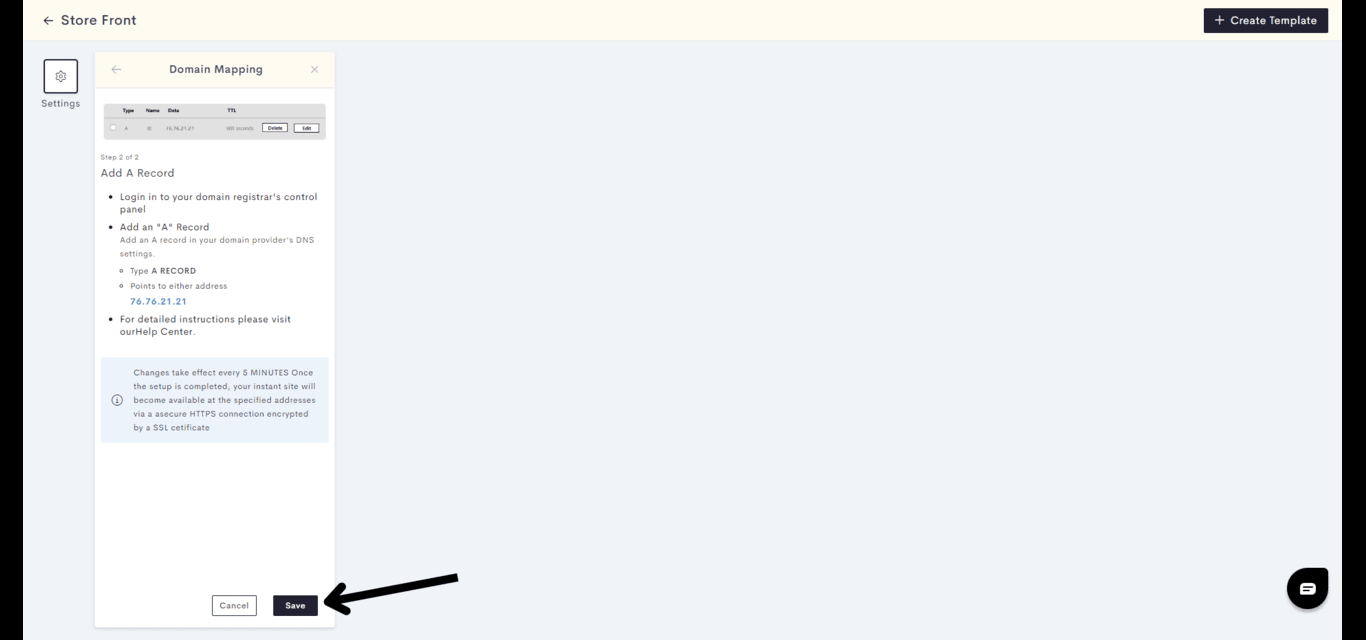
Verify Domain:
Return to the Aasaan domain mapping section and click ‘Verify’ to establish the connection.
Important DNS Setting Notes for FastComet:
- Before proceeding, ensure there are no other A or AAAA records that could conflict with the new settings.
- Verify the presence of a CNAME record with the name ‘www’ that points to your domain. This record typically exists by default, but if not, you should create one. After successful verification, your FastComet domain will be fully connected to your Aasaan website, enabling you to use your custom domain in no time.
GoDaddy Domain
Connecting GoDaddy domain to your aasaan website
Connecting GoDaddy domain to your aasaan website
For Aasaan users with a domain purchased from GoDaddy, follow these instructions to link your domain to your website.
-
Log into Aasaan Admin Panel:
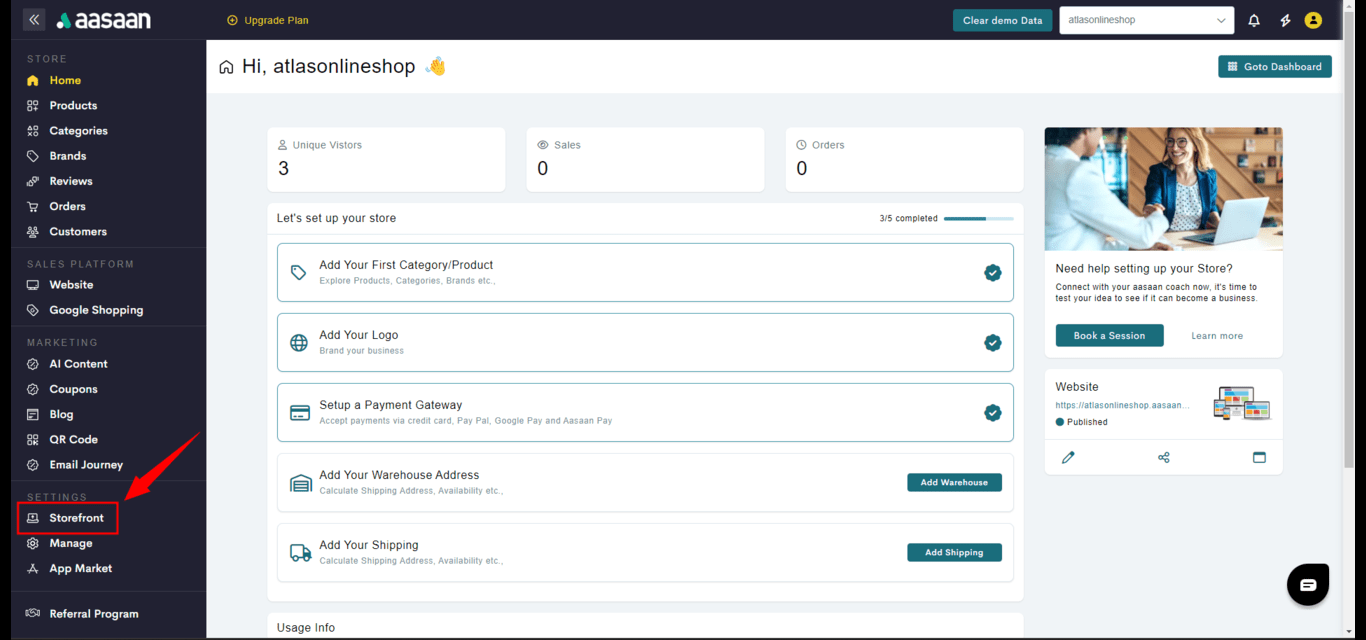
Access your Aasaan admin panel by signing in, and then click on the ‘Store Front’ tab.
-
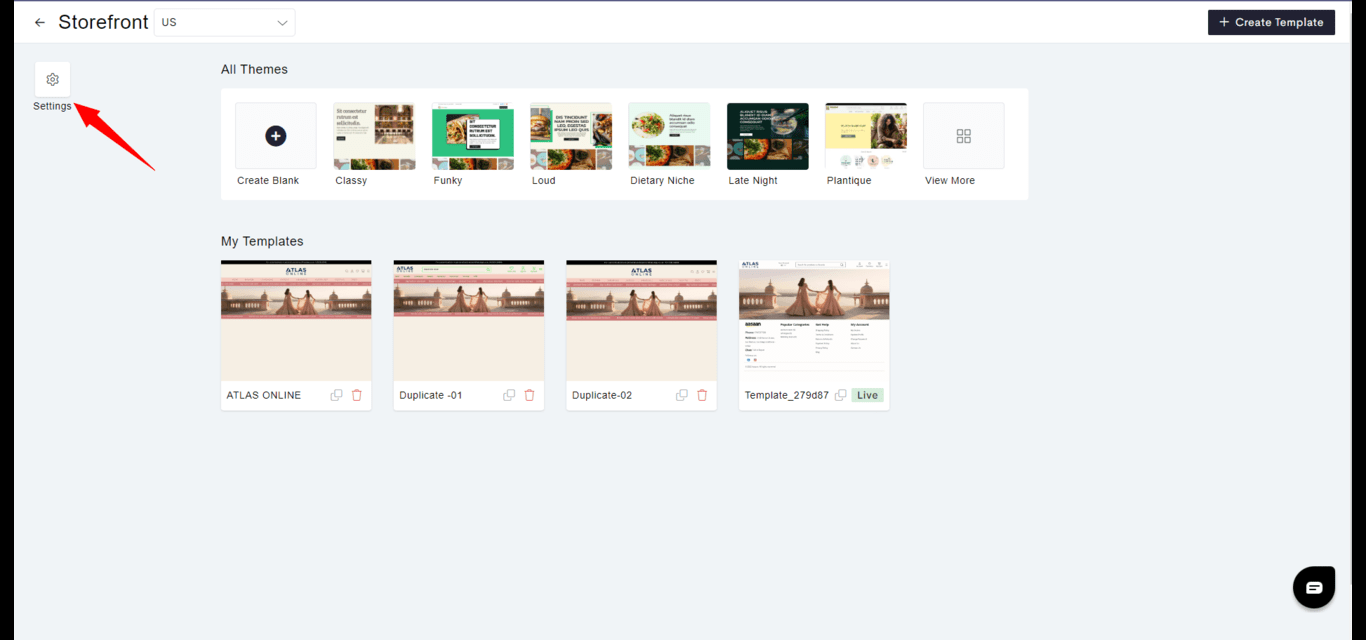
Open Settings:
Click on the settings icon, typically found in the sidebar or top menu.
-
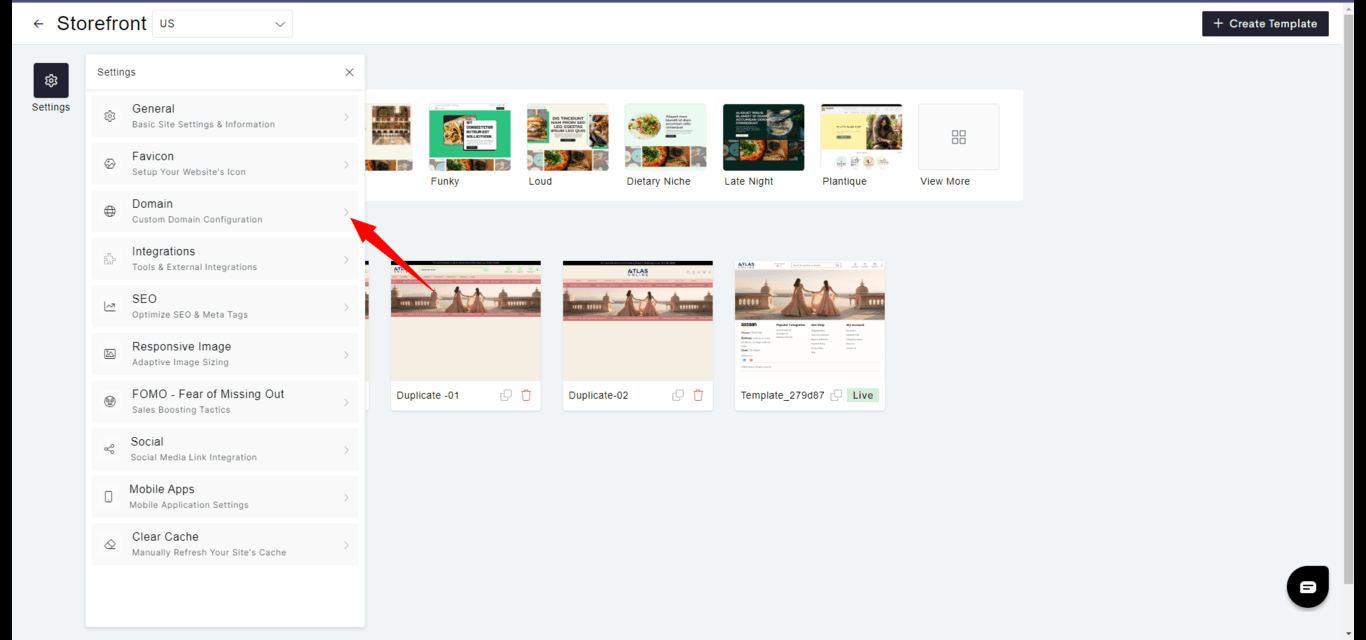
Select Domain Option:
Within settings, find and click on the ‘Domain’ section to begin linking your domain.
-
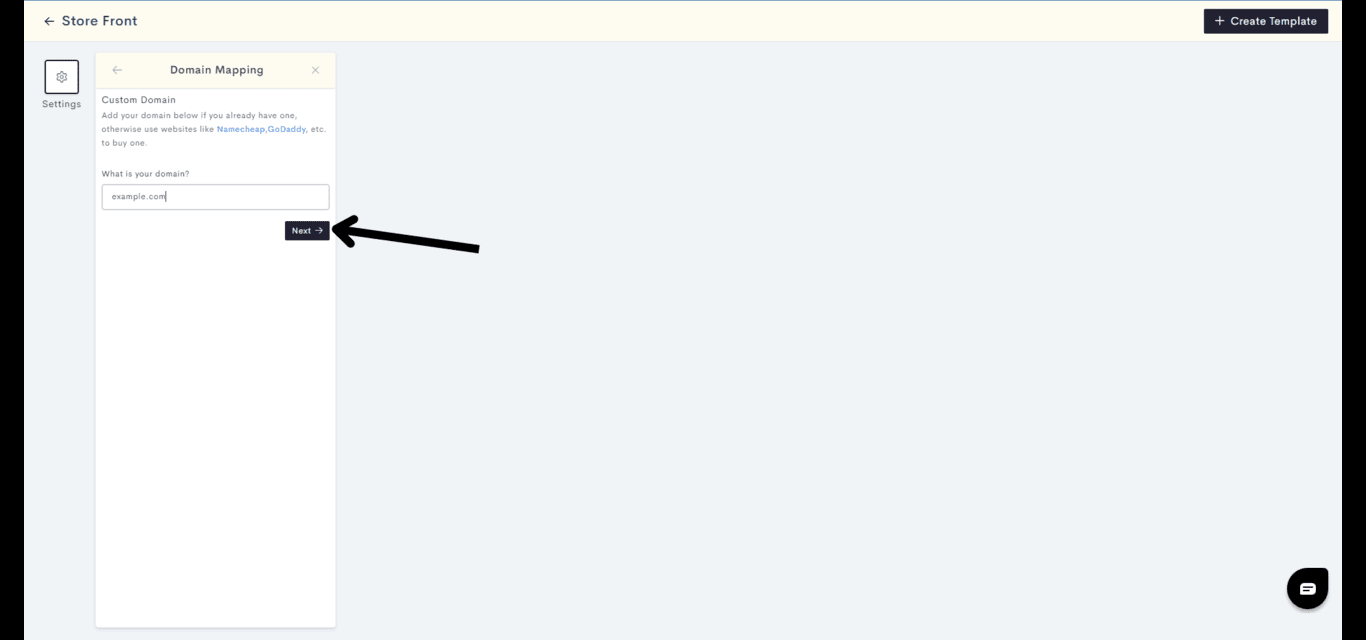
Input Domain Name:
Enter your GoDaddy domain name into the provided field and select ‘Next’.
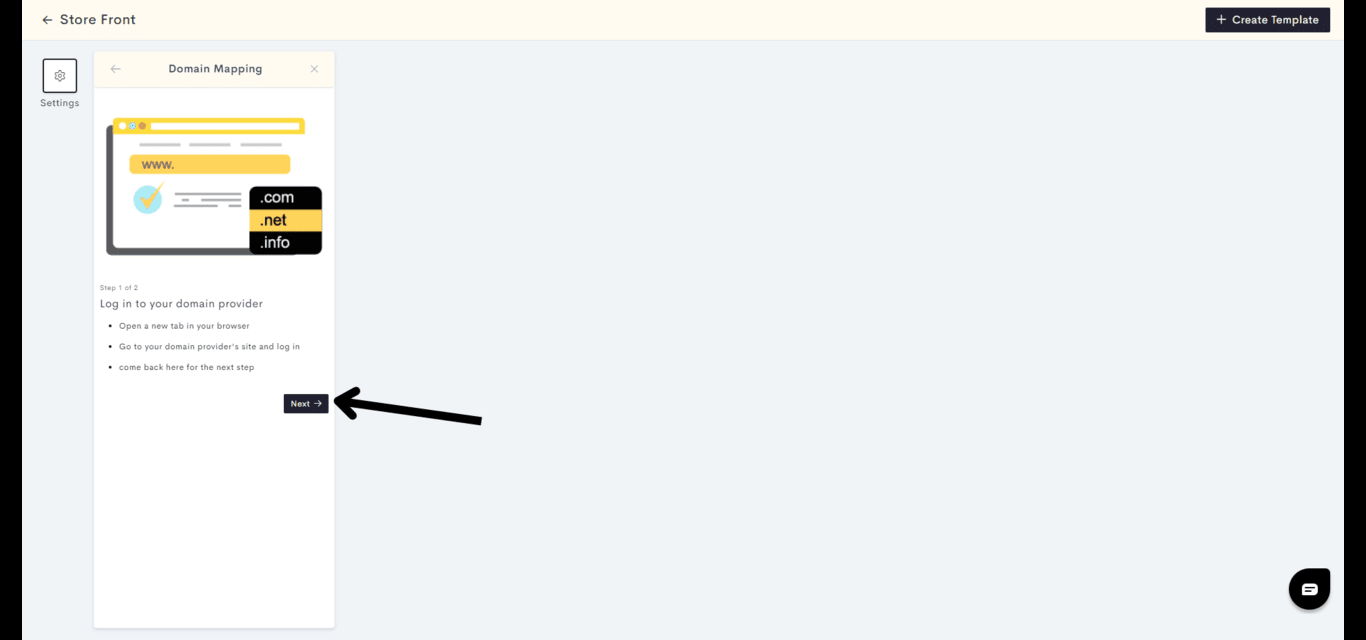
- GoDaddy Login Prompt: Log into your GoDaddy account when prompted to access your domain’s DNS settings.
-
Modify DNS Records:
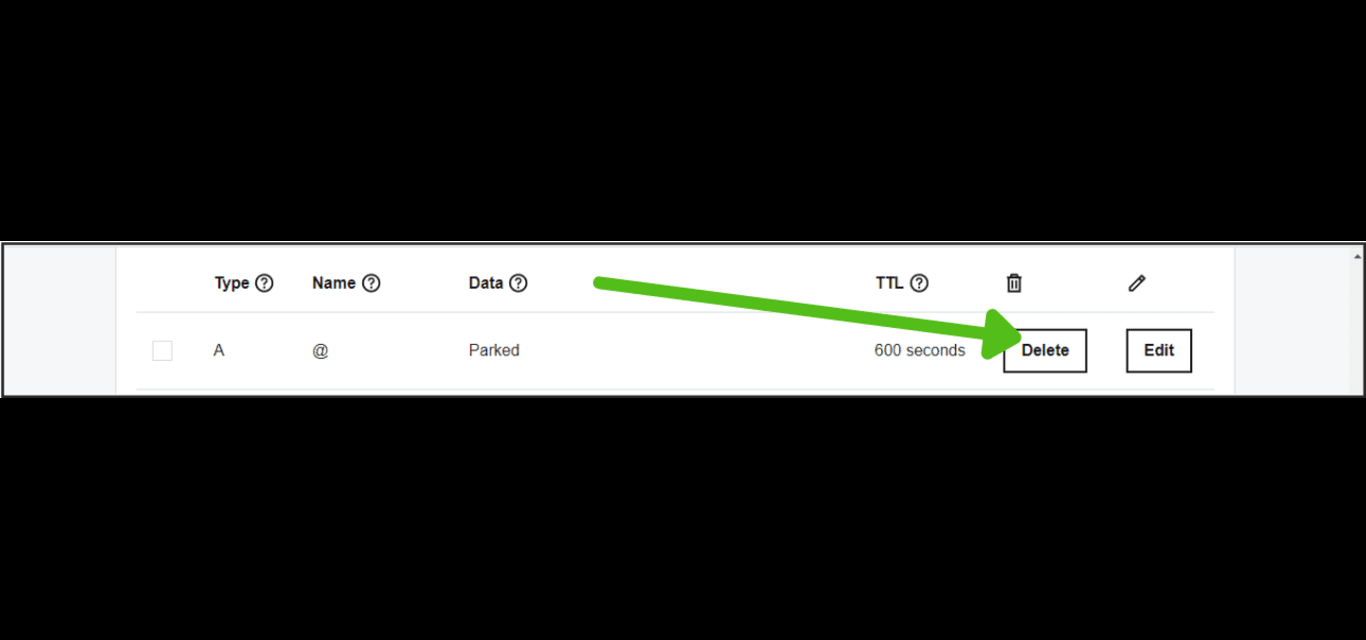
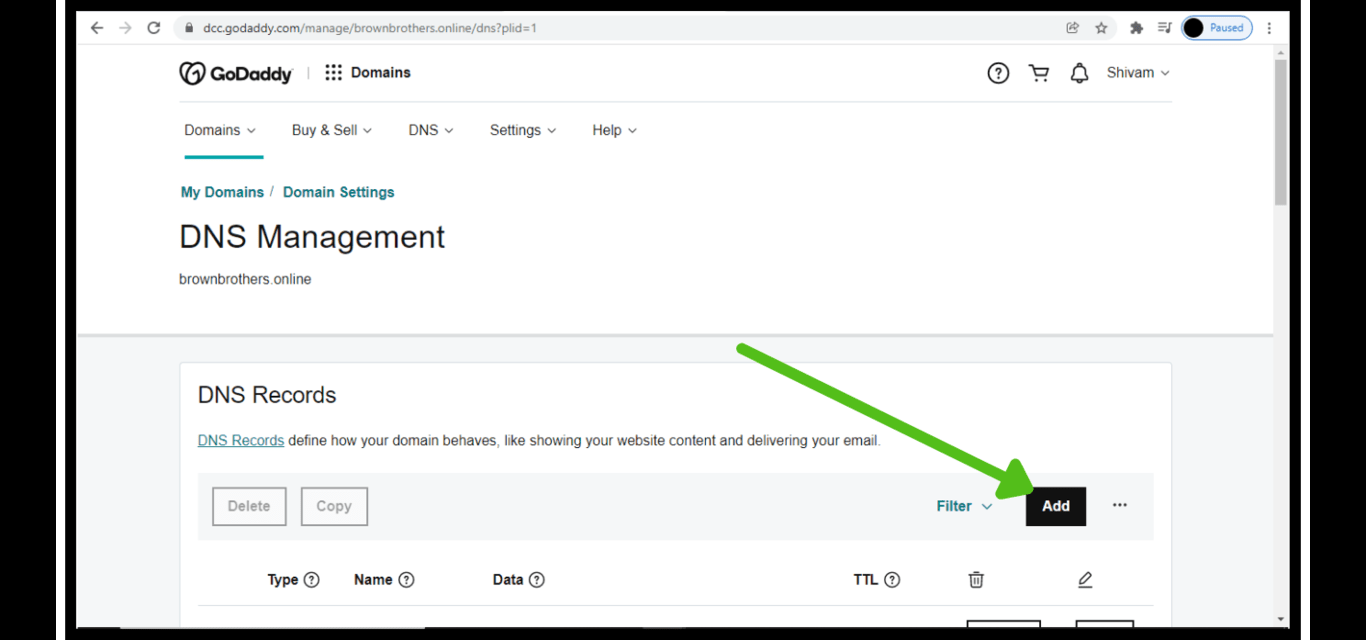
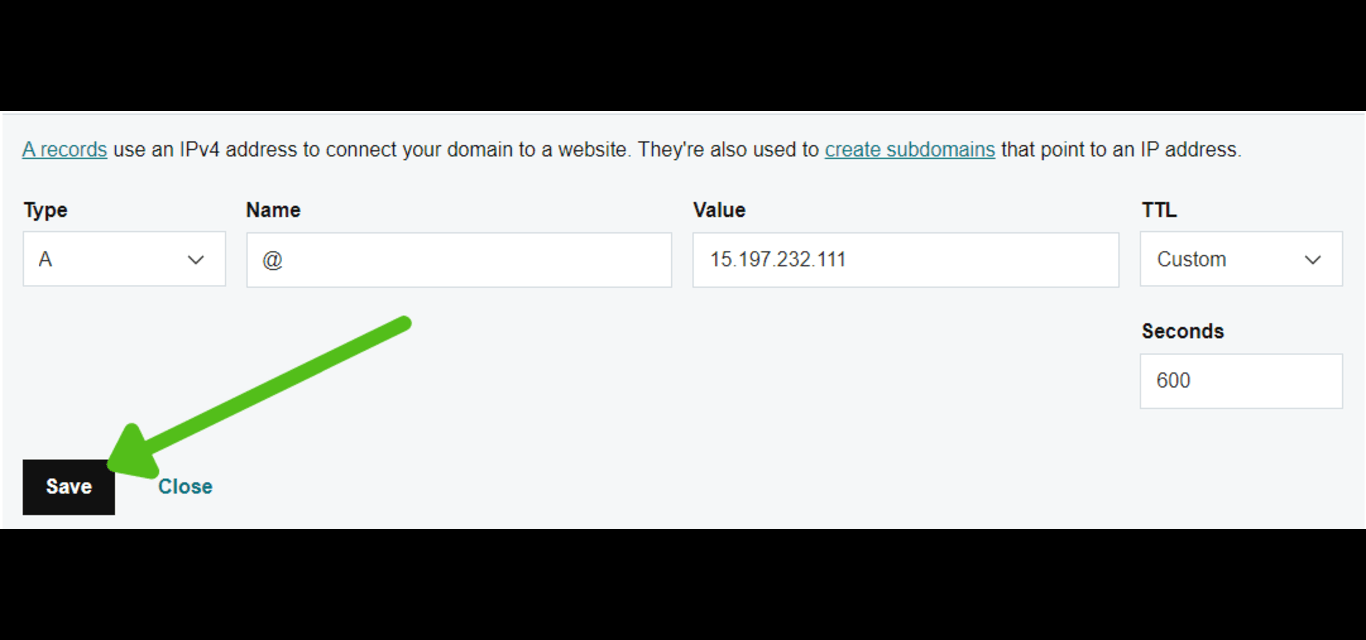
Locate and delete any existing A records with the value ‘Parked’. Then, create a new A record with:
- Type: “A”
- Name: ”@”
- Value: “76.76.21.21”
- TTL: Choose ‘Custom’ and enter “600 seconds” Click ‘Save’ to apply these DNS changes.
-
Verify Connection:
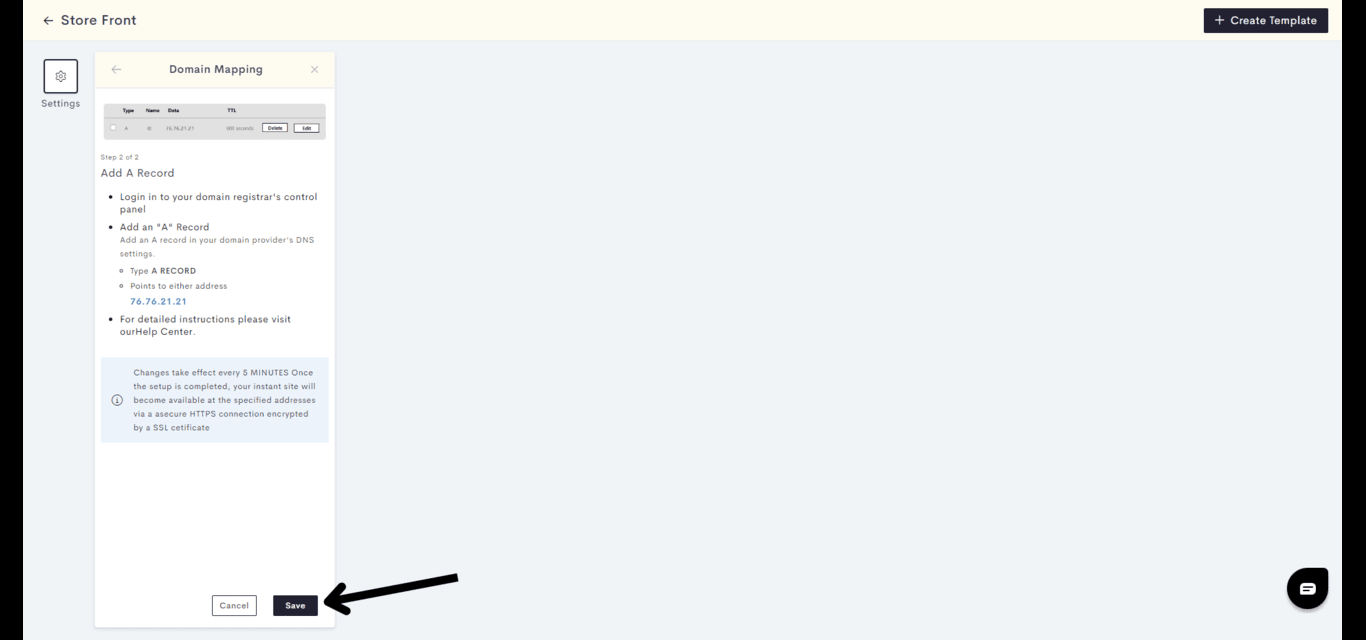
Back in the Aasaan domain mapping interface, click ‘Verify’ to complete the domain connection process.
Important Notes for GoDaddy DNS Settings:
- Double-check for any conflicting A or AAAA records and remove if necessary.
- Ensure a CNAME record exists with the name ‘www’ pointing to your domain. Add one if it’s not present.
Hostinger Domain
Connecting Hostinger domain to your aasaan website
Connecting Hostinger domain to your aasaan website
Connecting a domain from Hostinger to your Aasaan website involves a few specific steps to ensure that your domain points to your Aasaan site correctly.
-
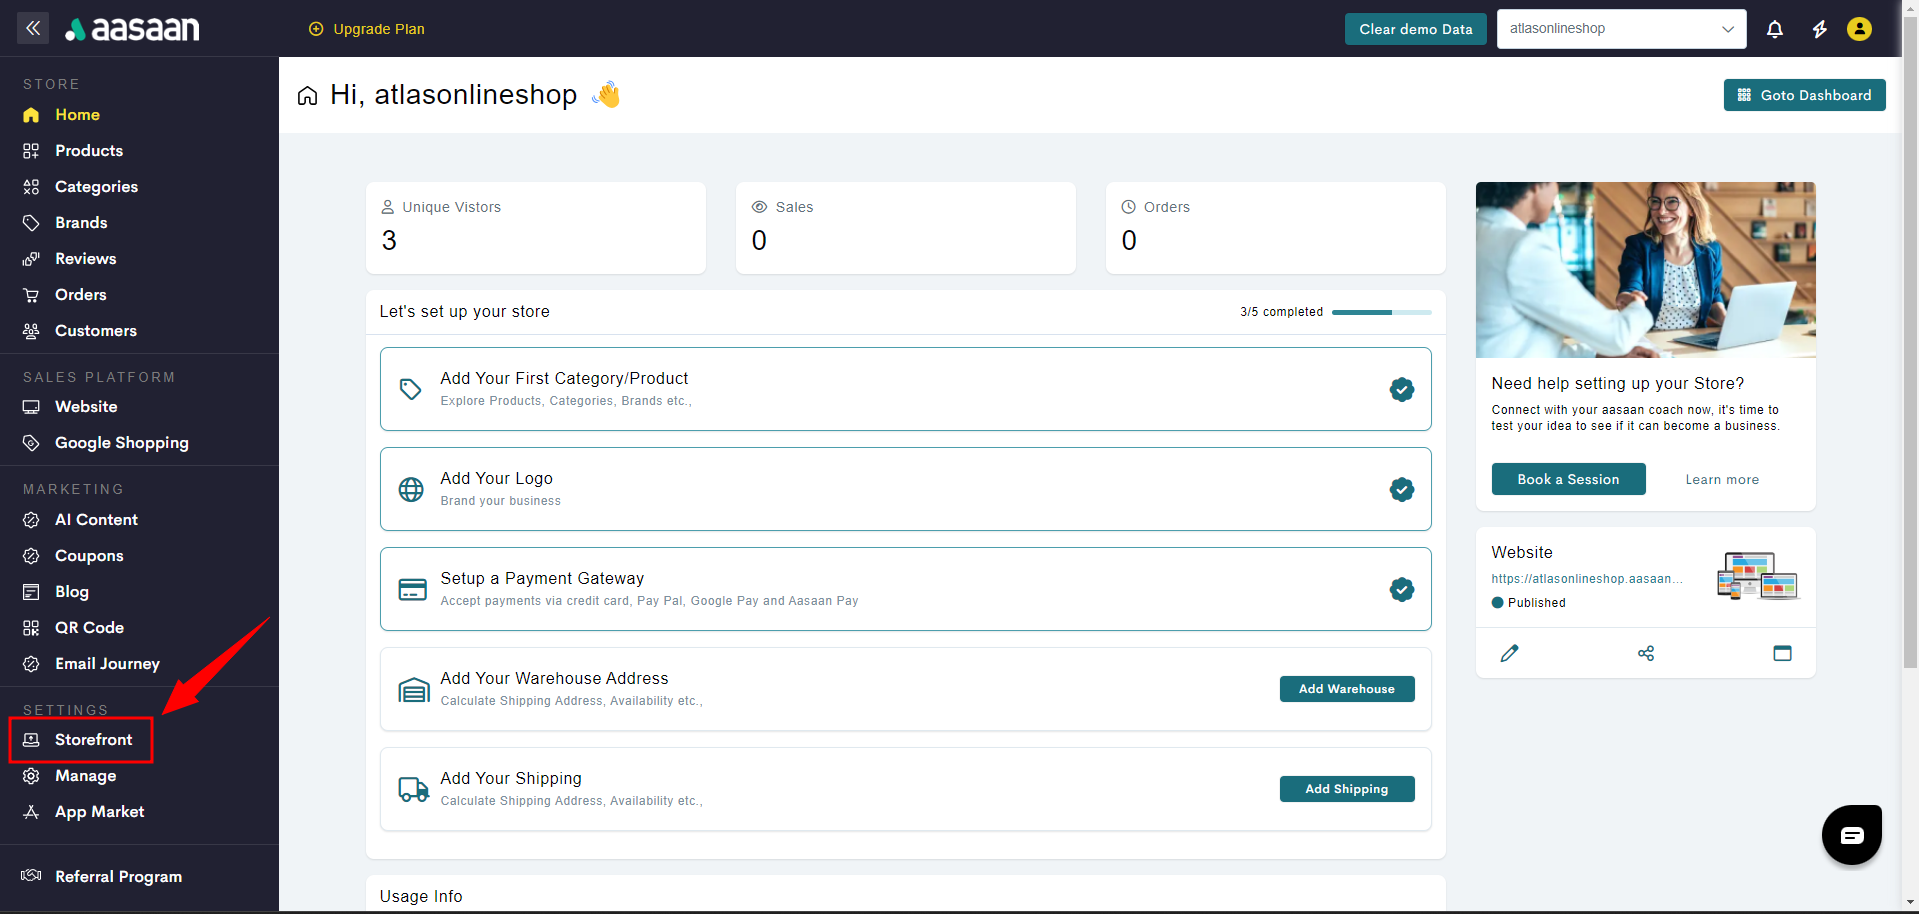
Aasaan Admin Panel Access:
Sign in to your Aasaan desktop admin panel. Click on the ‘Store Front’ section to get started with the domain setup.
-
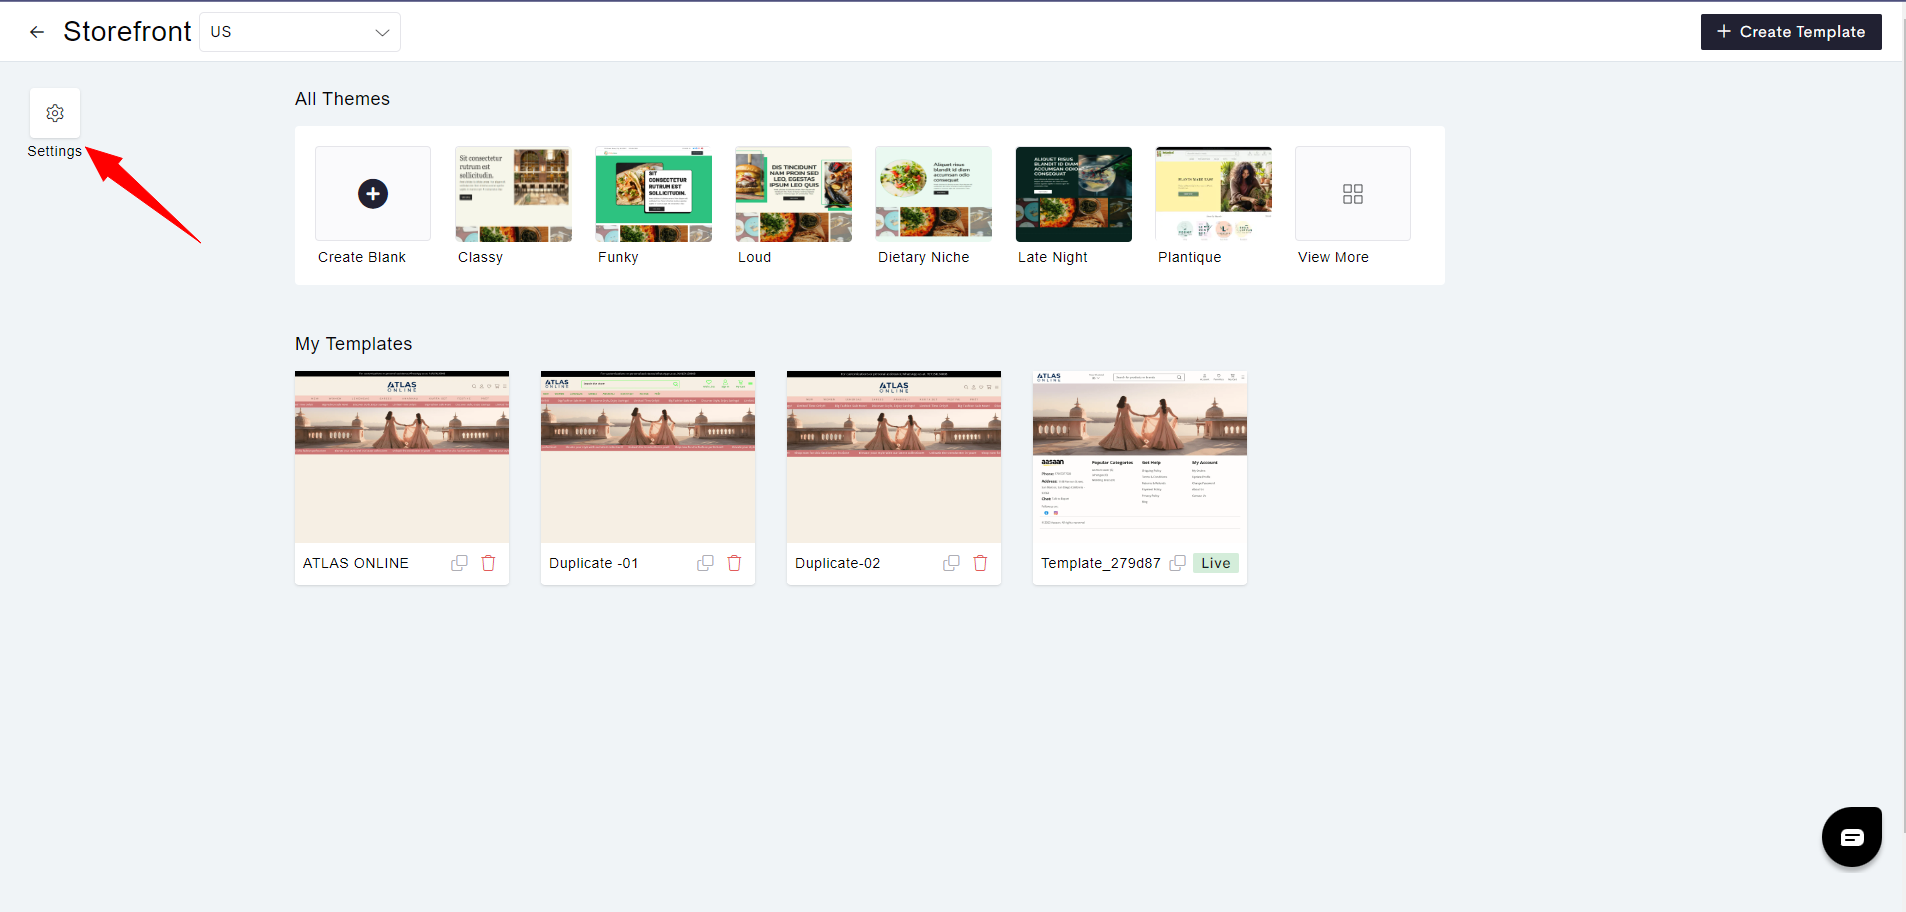
Settings Navigation:
In your Aasaan admin panel, click on the settings icon to open the settings menu.
-
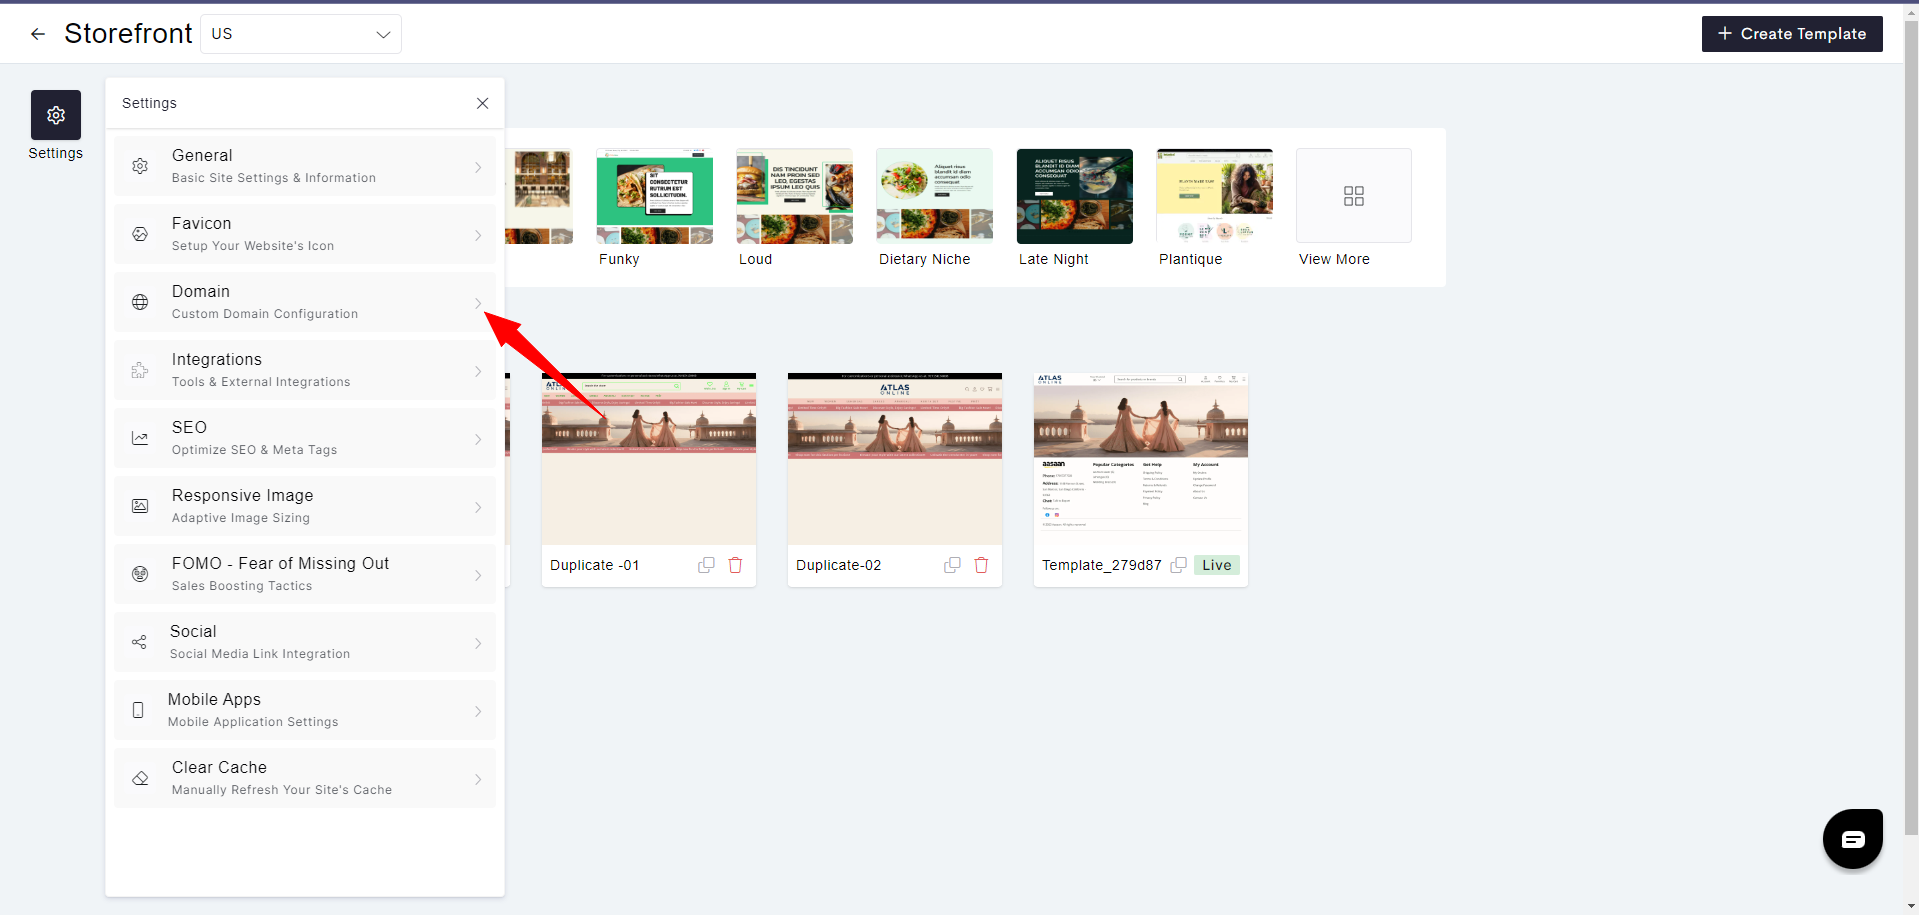
Domain Management:
Select ‘Domain’ from the settings options to proceed with linking your Hostinger domain.
-
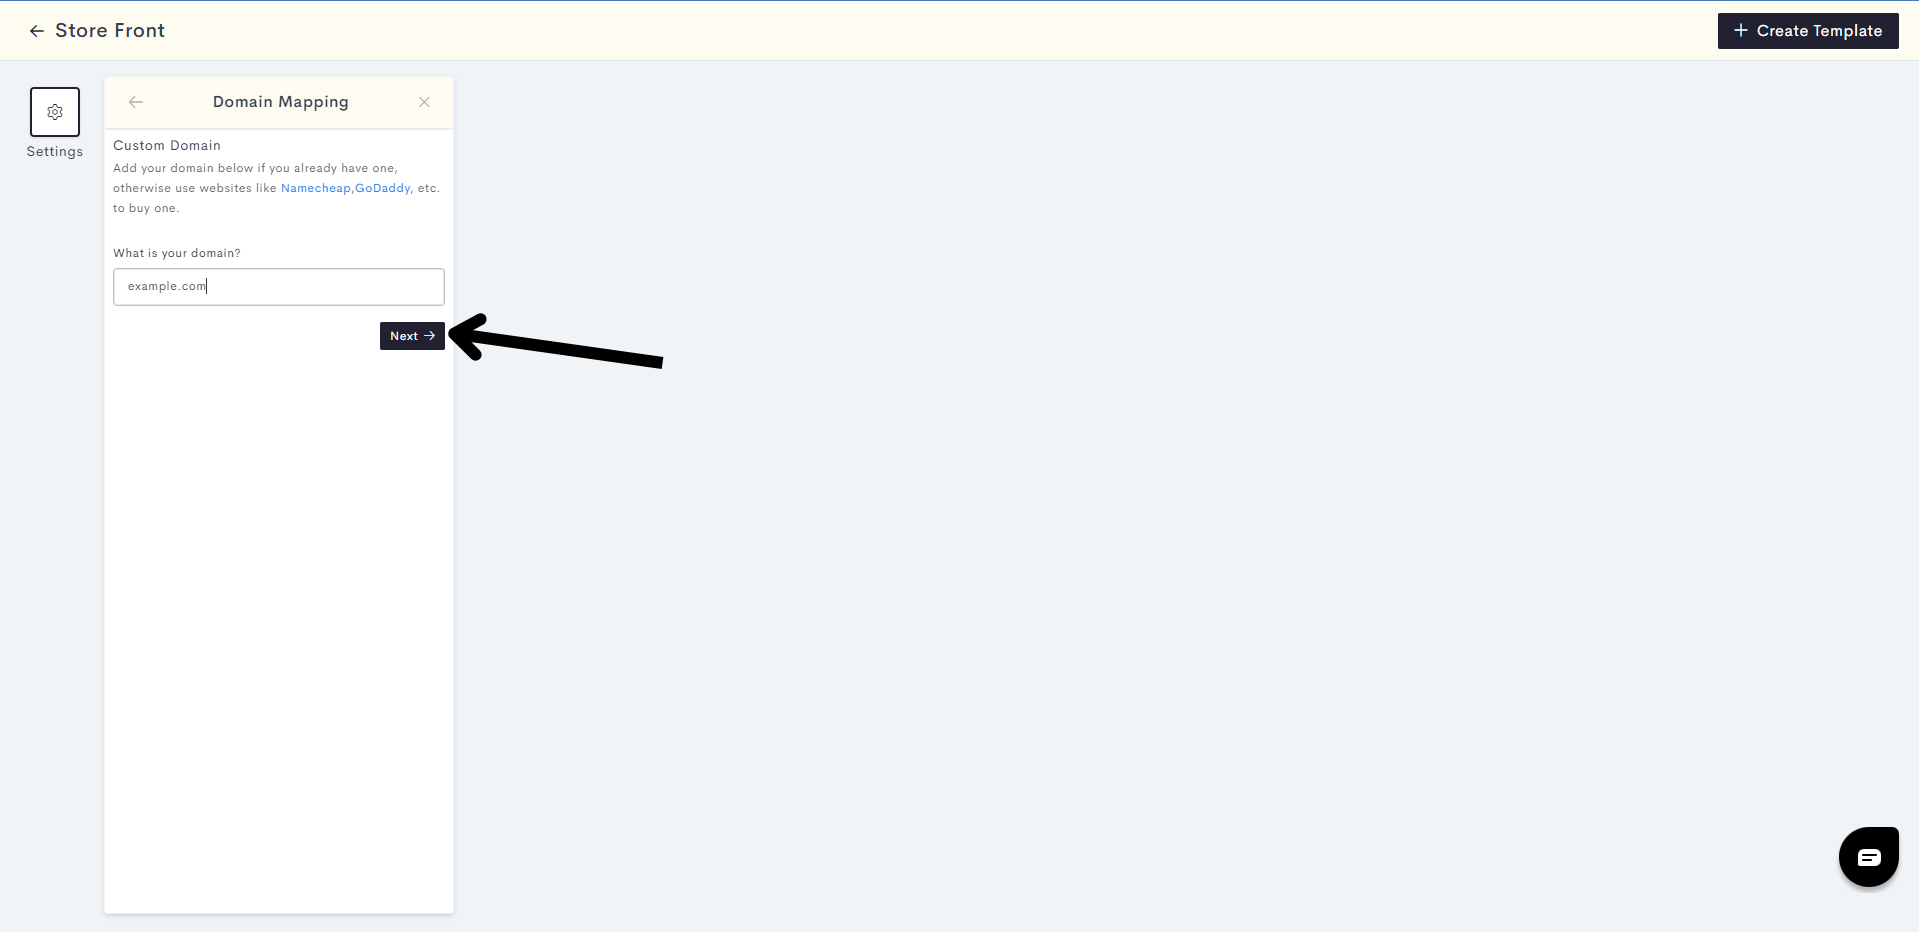
Enter Domain:
Type your Hostinger domain name into the input field provided and click ‘Next’ to continue.
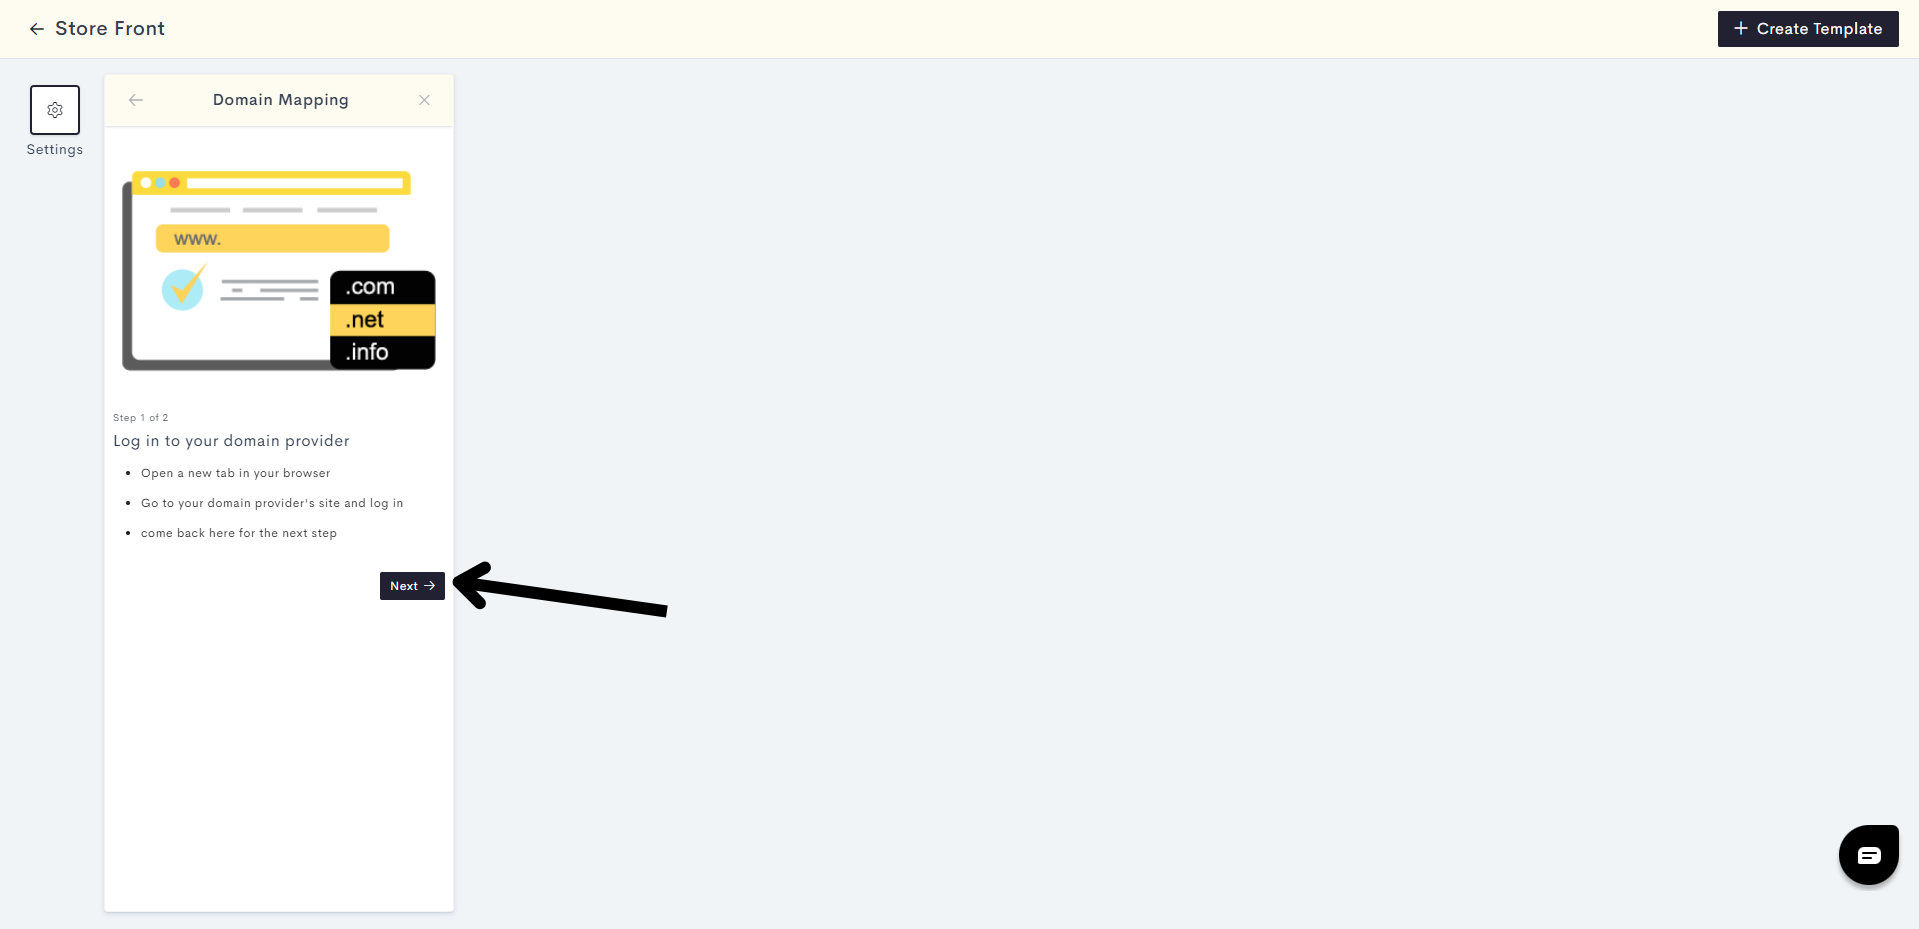
- Domain Provider Login: When prompted, log in to your Hostinger account to access your domain’s DNS management area.
-
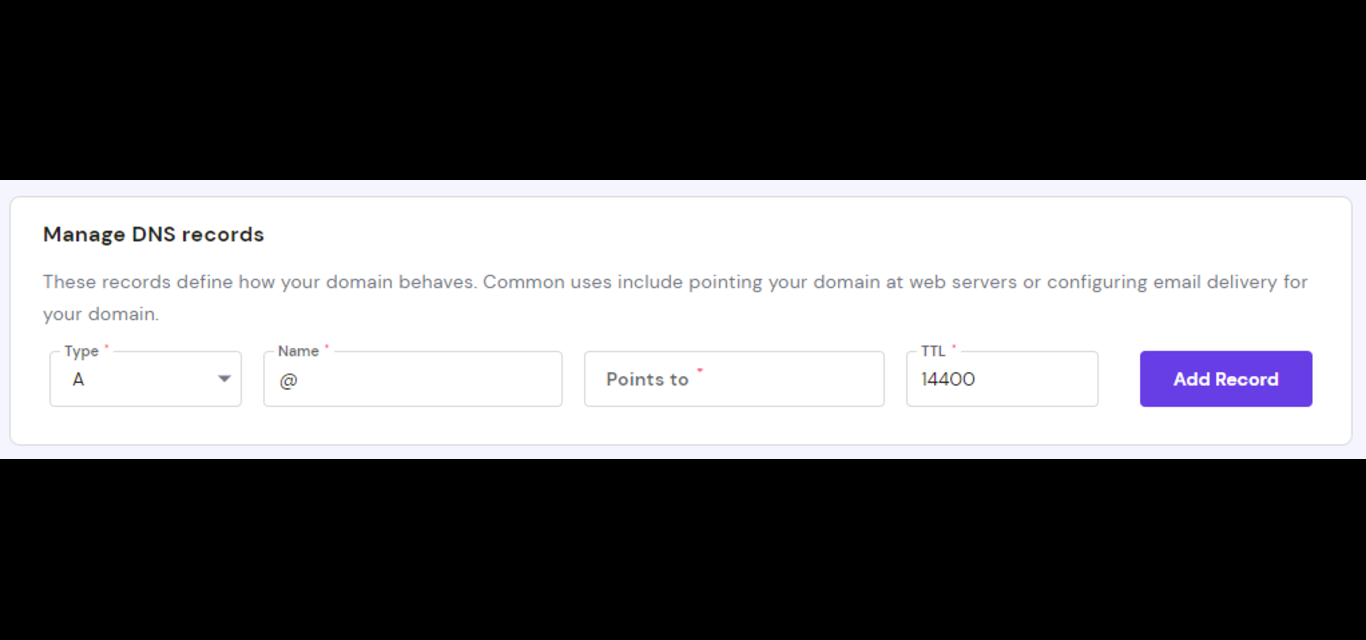
A Record Creation:
In the DNS management section of Hostinger, add a new A record with the following details:
- Type: “A”
- Name: ”@”
- Address: “76.76.21.21”
- TTL: Enter “600 seconds” or choose the default TTL if not customizable. Click ‘Add Record’ to confirm the changes.
-
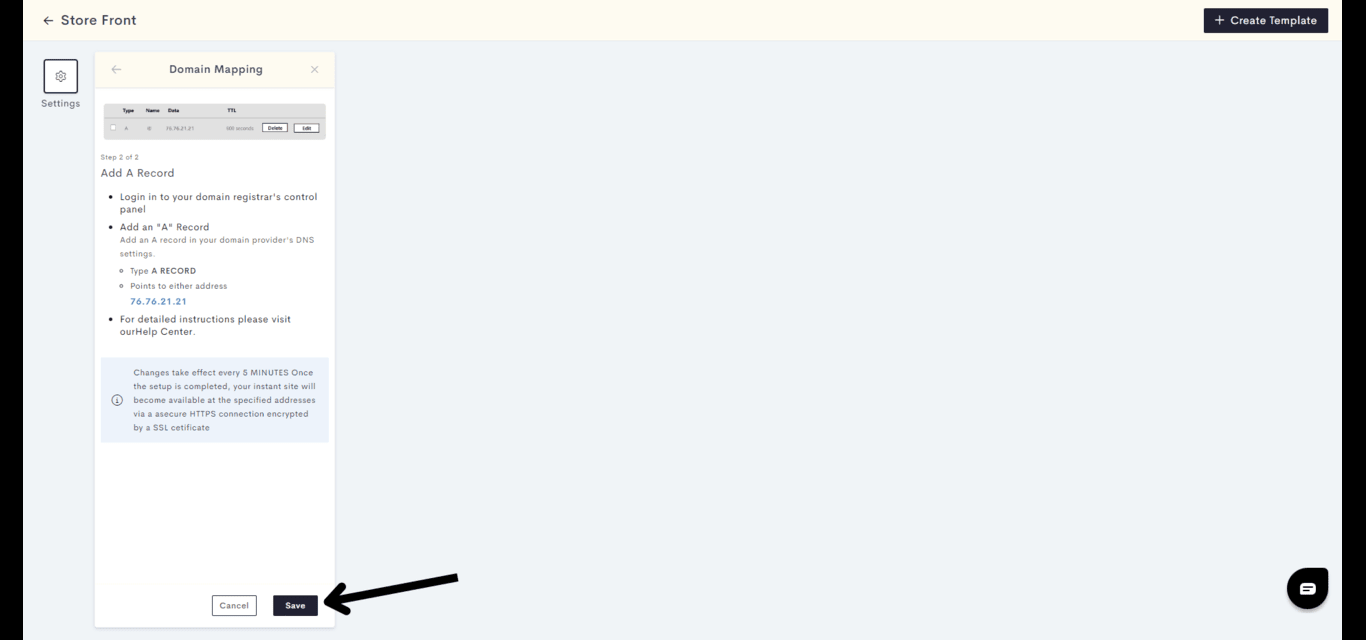
Verification:
Return to the Aasaan domain mapping section. Click on ‘Verify’ to check if the domain has been linked successfully.
Important DNS Setting Notes for Hostinger:
- Make sure to remove any conflicting A or AAAA records that could interfere with the new A record.
- Verify that a CNAME record exists with the name ‘www’ and is pointing to your domain. If this record does not exist, create one accordingly.
