Google Shopping
Integrate your Google Merchant Center Account to Your StoreLink your Store to your Google Merchant Center Account Note: Click here to navigate to the mobile admin app version of this article You can watch the video version of this article here. Google Merchant Center is Google’s official platform which businesses can use to list and promote their products. You can list your products for free, or run ad campaigns which are known as “Shopping Ads”. When you integrate your aasaan store with your Google Merchant Center account, you can list products on Google straight from your aasaan admin panel. The steps for integrating Google Merchant Center are as follows: Note: Make sure to install the Google Shopping app from your app market. Click here to learn how to install apps from the Aasaan app market.
- Steps
- Screenshots
STEP 1:
Login to your Google Merchant account and copy the merchant ID given at the top right corner.STEP 2:
Go to your installed Google Shopping app in aasaan. Enter the Merchant ID you got when you created your Google Merchant Account and click on Sign in with Google.STEP 3:
Login to the Gmail ID you used to create your Google merchant center account, and give the requested permissions.STEP 4:
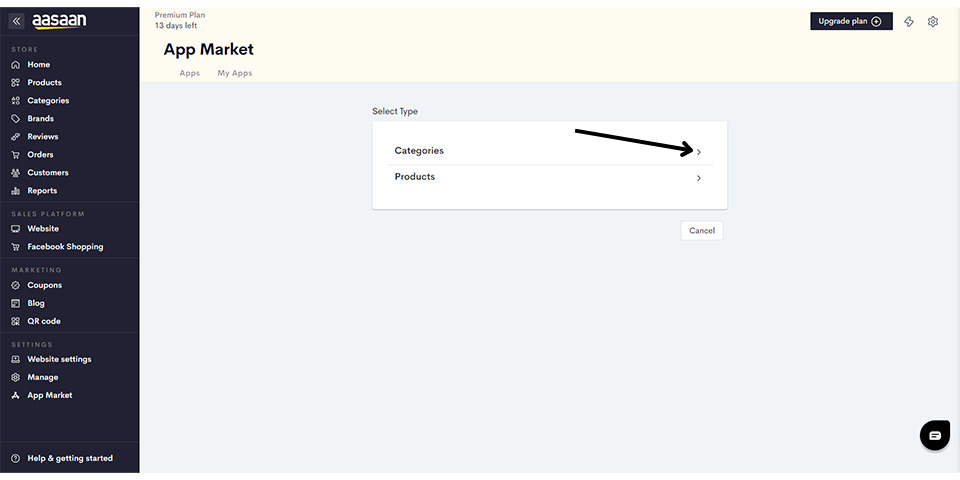
You have successfully integrated your store with Google shopping. Click on Add to list your products directly on your merchant account.STEP 5:
Here you can choose to list individual products or entire categories. Let us select Categories.STEP 6:
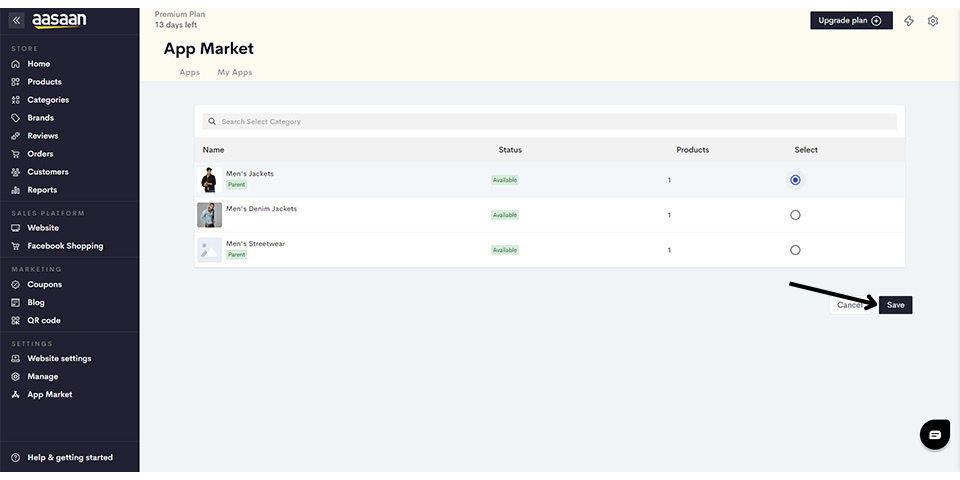
Choose the category you want to upload to your Google Merchant Center account, and click on Save.
Note: You have to enable Google Shopping for each category before you can list categories and products to your merchant account. Click here to learn more.


Google Shopping: Important Prerequisites
Important Prerequisites for Google Shopping Here are some things to bear in mind when setting up Google Shopping on your store. Following these guidelines will maximize your chances of your product listings being approved on Google. Failure to follow the guidelines given can make your Google Merchant Center account liable for suspension. The guidelines are as follows:- Setting up your online payment gateway and verifying your website on Google Search are mandatory.
- All your store policies must be added and visible on your website.
- Make sure that the information you provide in the shipping policy and returns and refunds policy on your website matches the information provided in the “Shipping and Returns” section in your Google Merchant Center account.
- If you have set a minimum checkout amount on your store, make sure to add the same in the Advanced Settings of the “Shipping” section in your Google Merchant Center account.
- Make sure your product description and short description are comprehensive and up to date.
- Use high-quality images for your products.
- Make sure all the mandatory product fields are filled to ensure seamless feed creation.
- Make sure your store has all your contact details, and those details are matching the information provided in your Merchant Center account.
- If possible, add a GTIN for your products. Click here to know more about the GTIN.
- Once you create your product feed on Google Shopping, it usually expires after 30 days. Don’t forget to recreate your product feeds every 30 days.
- If there are any changes made to the product information or shipping and returns policies on the website, those have to be updated in the Google Merchant Center account as well. For any updates in product information (pricing, description, images, etc.), the products in question need to be deleted from the Merchant Center account, and a new feed must be created from the Google Shopping app in aasaan.
Facebook Shop
Integrate Facebook Shopping to Your StoreLink your Store to your Facebook Commerce Manager Catalog Note: Click here to navigate to the mobile admin app version of this article You can watch the video version of this article here. Facebook Shop, or Facebook Commerce Manager is Facebook’s platform for businesses to list and promote their products. With aasaan’s Facebook Shop integration, you can easily list your products in your Facebook Commerce Manager’s catalog from your aasaan admin panel itself. The steps to integrate Facebook Shop are as follows: Note: Make sure to install Facebook Shop from your app market. Click here to learn how to install apps from the aasaan app market.
- Steps
- Screenshots
STEP 1:
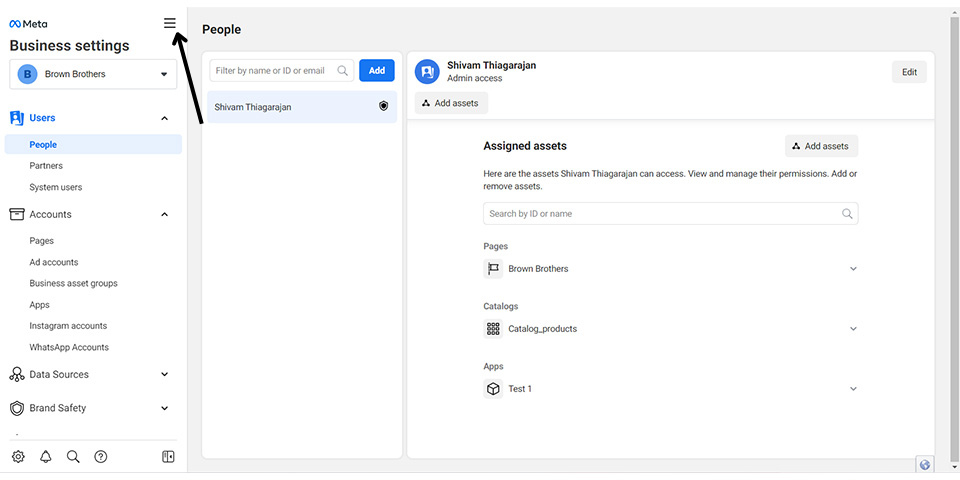
Login to your Facebook Business Account and go to your business settings.STEP 2:
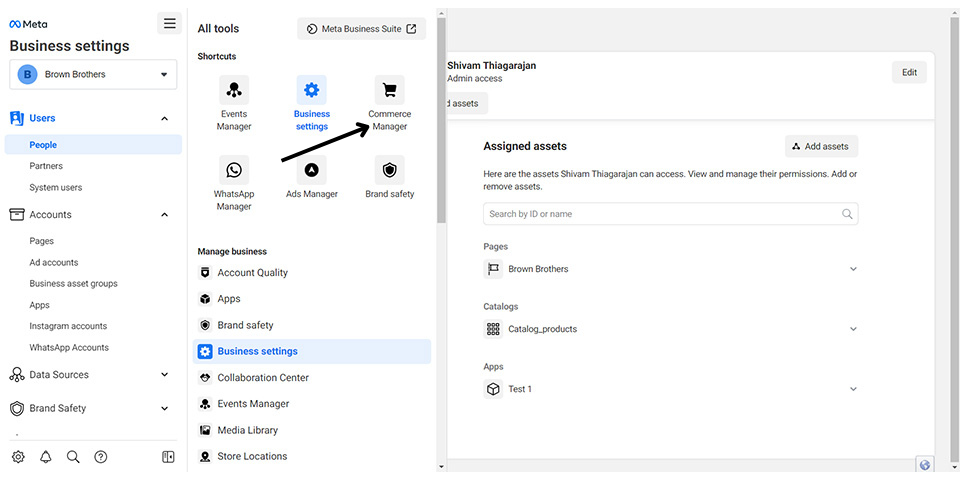
Click on the three horizontal lines shown.STEP 3:
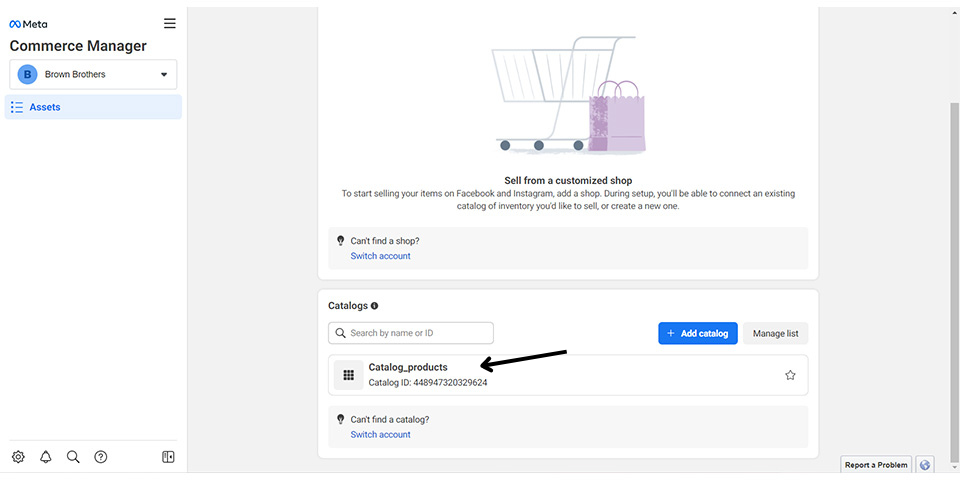
Click on Commerce Manager.STEP 4:
Click on the catalog that you wish to integrate into your store.STEP 5:
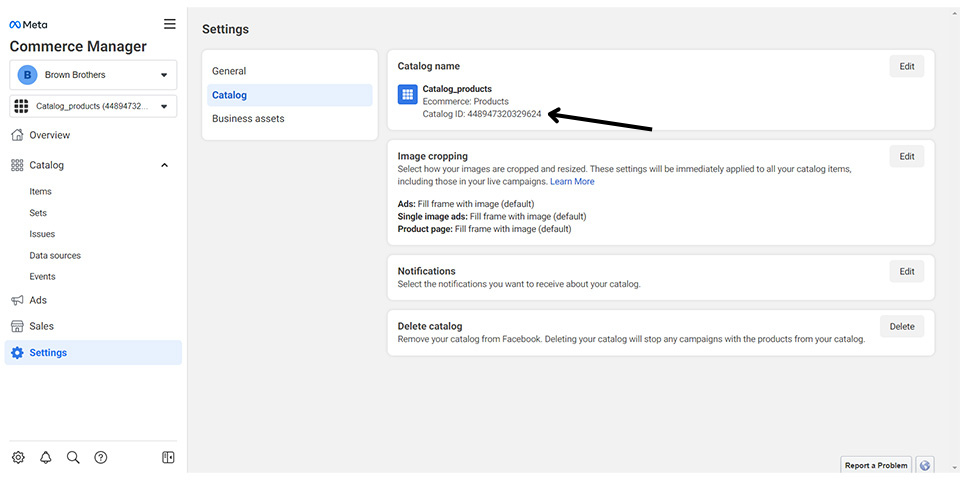
On the left-hand panel, click on Settings.STEP 6:
Go to the Catalog section and copy the catalog ID given.STEP 7:
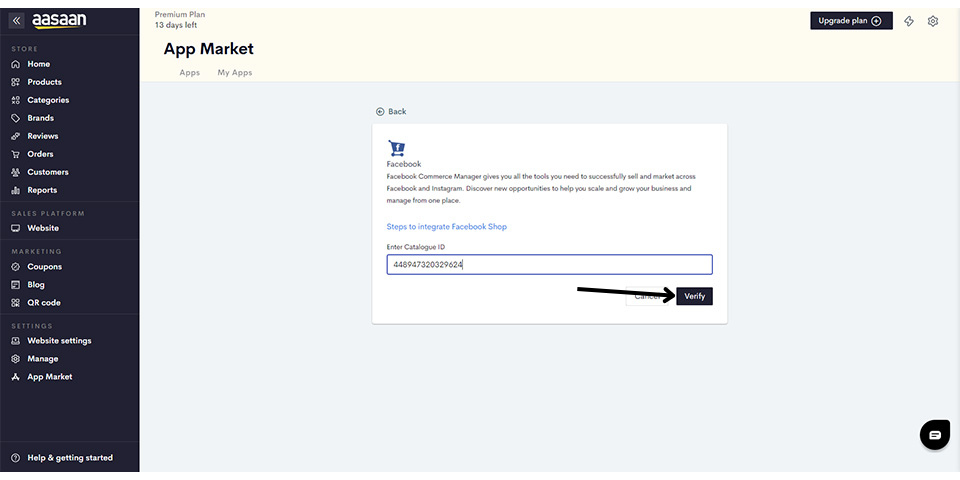
Go to the installed Facebook Shop app in aasaan. Enter the catalog ID and click on Verify.STEP 8:
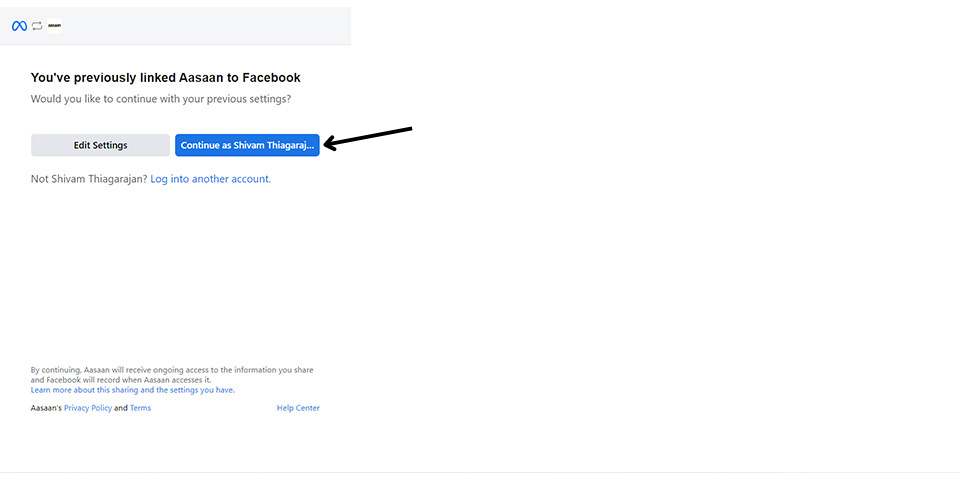
Click on the Facebook account your catalog is a part of.
Note: You might also be asked to provide permissions for aasaan to manage products in your Facebook catalog.STEP 9:
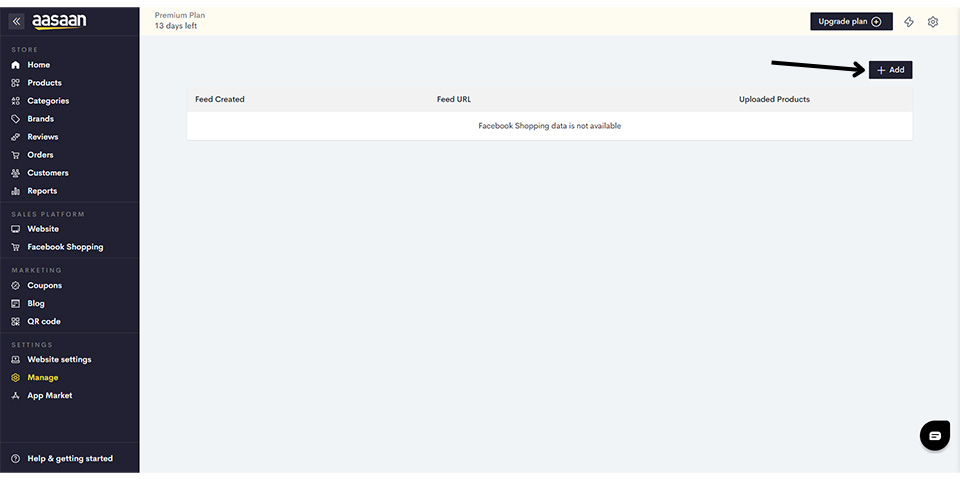
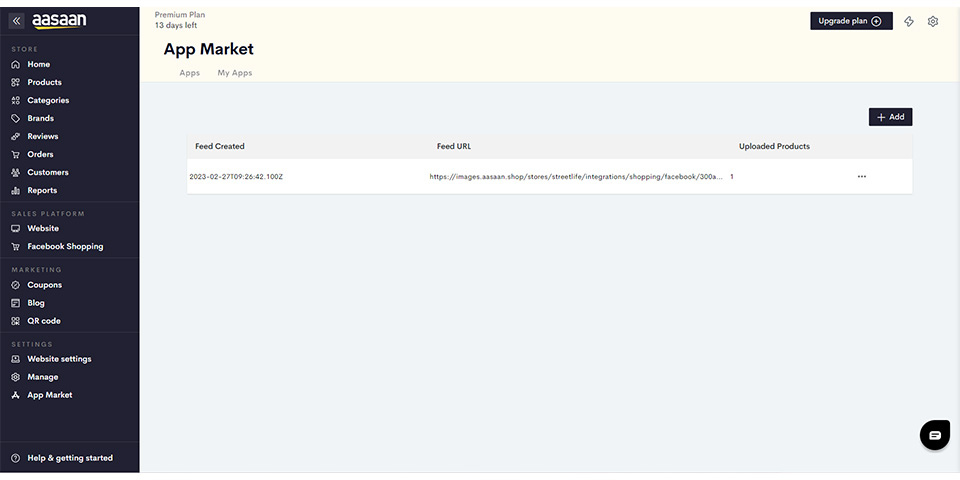
Your Facebook Catalog has been successfully connected to your store. Click on Add to list your products in your catalog directly from your aasaan admin panel.STEP 10:
You can either add categories or products. Here we will click on Categories.STEP 11:
Choose the category you want to add and click on Save.
Note: You have to enable Google Shopping for each category before you can list categories and products to your merchant account. Click here to learn more.

Facebook Shopping: Important Prerequisites
Important Prerequisites for Facebook Shopping Here are some things to bear in mind when setting up Facebook Shopping on your store. The guidelines are as follows:- Setting up your online payment gateway and verifying your website through the Facebook Domain Verification app are mandatory.
- All your store policies must be added and visible on your website.
- Your contact information (address, email, and phone number) must be visible on your website.
- Make sure your product description and short description are comprehensive and up to date.
- Make sure all the mandatory product fields are filled to ensure seamless feed creation.
- Use high-quality images for your products.
- If there are any changes made to the product information (pricing, description, images, etc.), the products in question need to be deleted from your Facebook Shopping feed in aasaan, and a new feed must be created.