Payment Gateway Integration Guide
Welcome to the Payment Gateway Integration Guide, where you can learn how to set up various payment gateways for your website.Table of Contents
aasaan Pay
Set up Online Payments with aasaan PayReceive Online Payments with aasaan Pay
- aasaan Pay
- aasaan Pay FAQs
Did you know you could set up online payments on your website in just a few minutes? You can do it with Aasaan Pay - our custom payment gateway. Once you integrate it into your Aasaan store, you can receive payments from UPI, debit, and credit cards. Here’s how to do it.
STEP 1:
Install the Aasaan Pay app from the app market. Click here to learn how you can install apps from your app market.STEP 2:
Enter your business and bank account details and click on Save.Points to remember:- If you have a checking or savings account, please select the business type as “Individual”.
- Please use a unique email ID which you haven’t used for any previous Aasaan Pay accounts.
PayPal
Setup Paypal on Your WebsiteIntegrate Paypal Payment Gateway to your Store Note: Click here to navigate to the mobile admin app version of this article With more than 400 million active users worldwide, PayPal is one of the most recognized and trusted payment service providers. With aasaan, you can offer Paypal as a payment option on your website to deliver a seamless, personalized checkout experience on the web and mobile. Note: Make sure to install Paypal from the aasaan app market. Click here to learn how to install apps from your app market.
- PayPal Steps
- PayPal Screenshots
PayPal - Setup Paypal on Your Website
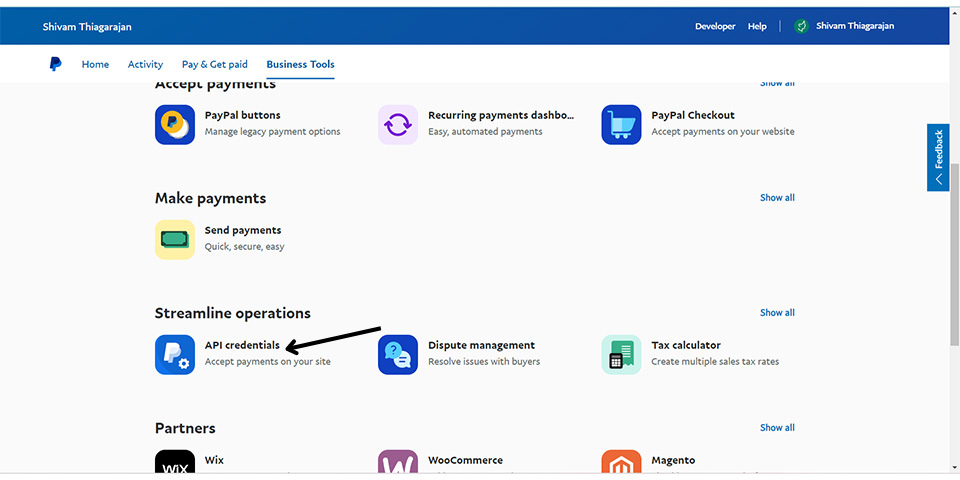
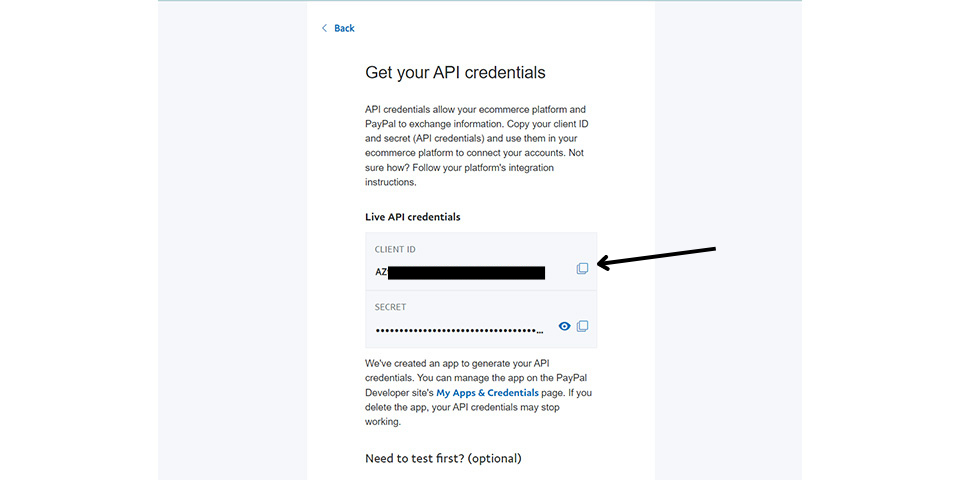
STEP 1:- Login to your Paypal account and click on Business Tools.
- Click on API credentials.
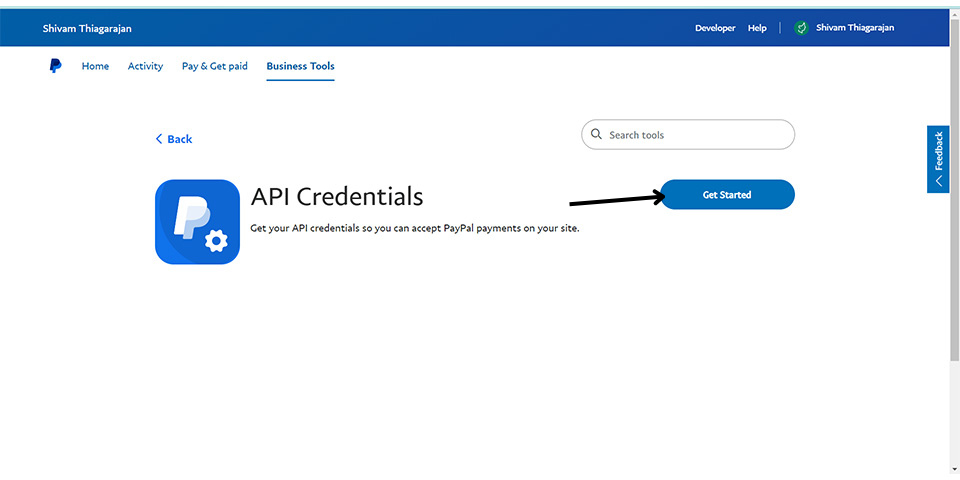
- Click on Get Started to get your API credentials.
- Copy your client ID and secret.
- Go to your installed Paypal app in aasaan. Enter your secret key and client ID in the respective fields and click on Verify.


PayU
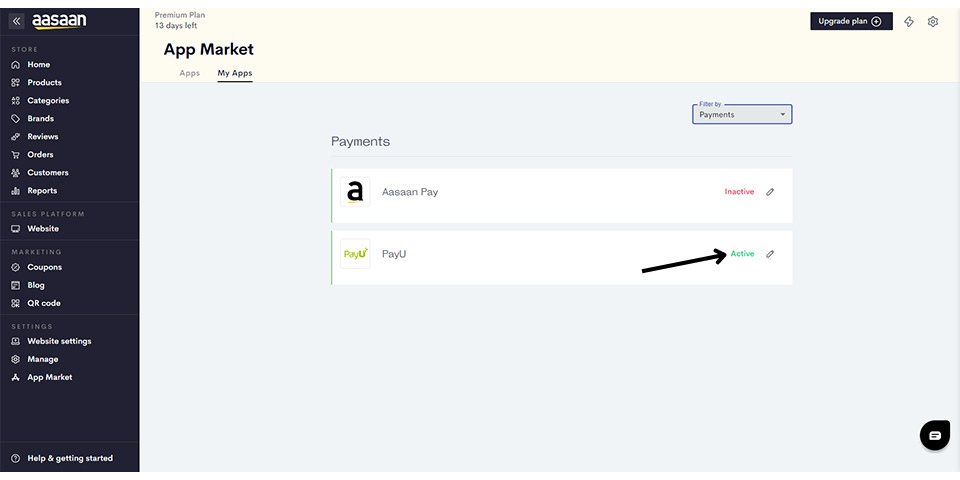
Setup PayU Payment Gateway on your StoreIntegrate PayU to your Store Note: Click here to navigate to the mobile admin app version of this article You can watch the video version of this article here. If you have an existing account with PayU payment gateway, you can easily integrate with Aasaan to receive your online payments. Here’s how you do it. Note: Make sure to install PayU from the aasaan app market. Click here to learn how to install apps from your app market.
- PayU Steps
- PayU Screenshots
PayU - Setup PayU Payment Gateway on your Store
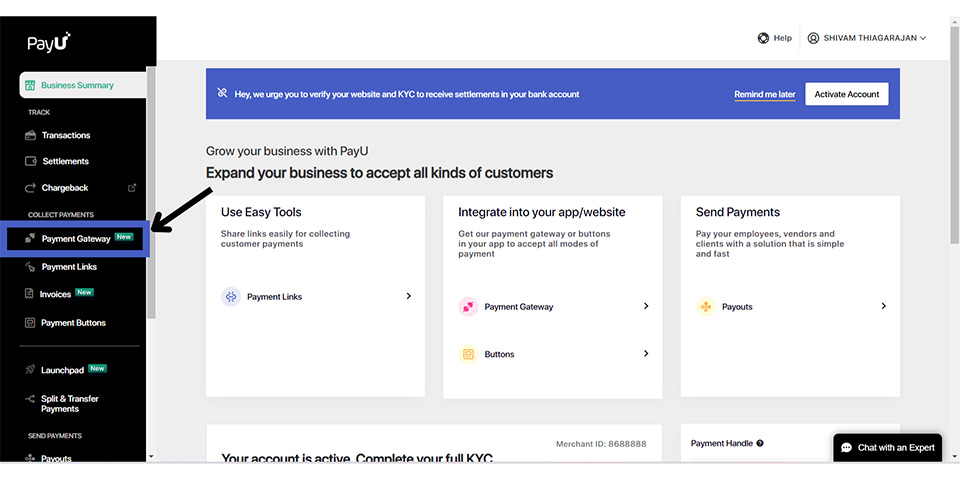
STEP 1:- Login to your PayU account and click on Payment Gateway.
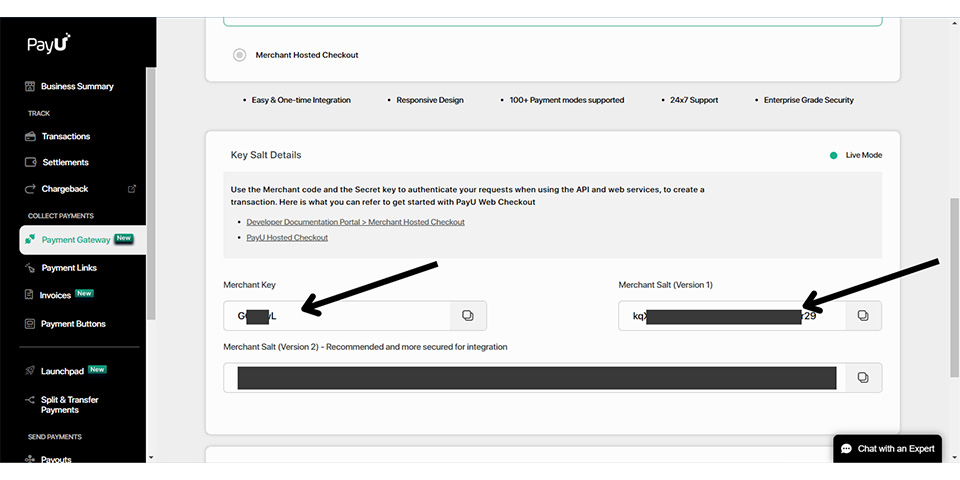
- Copy your Merchant Key and the Merchant Salt (Version 1).
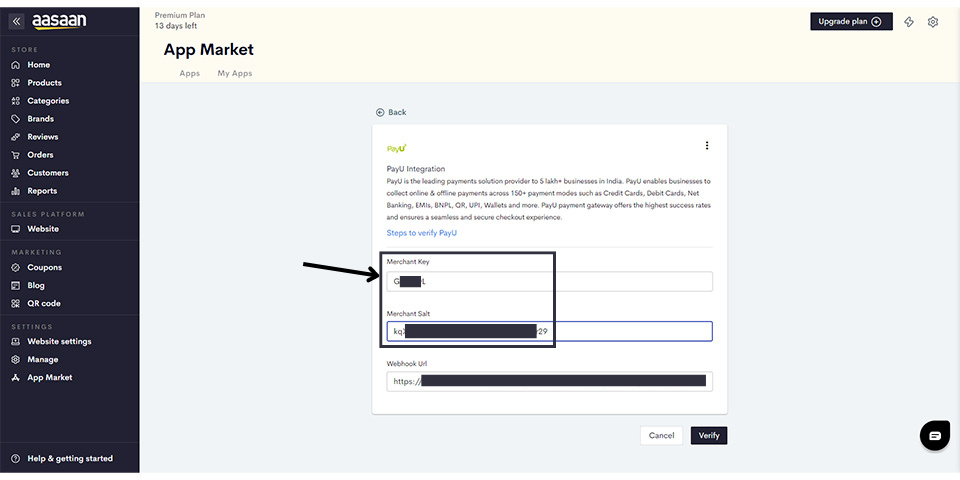
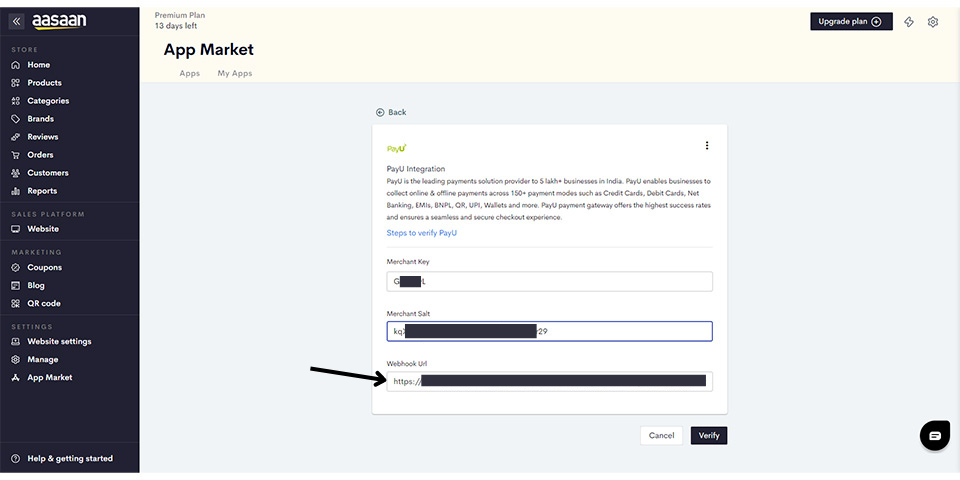
- Go to your installed PayU app in aasaan. Paste the merchant key and merchant salt.
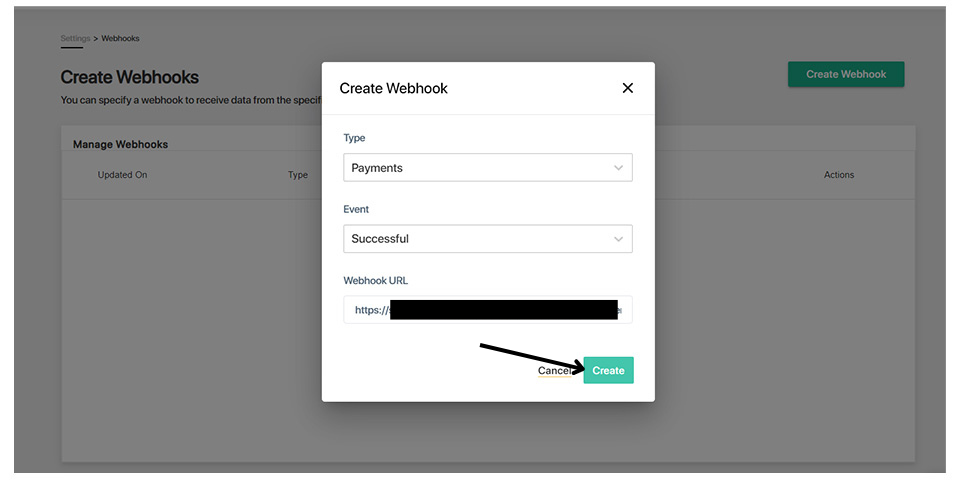
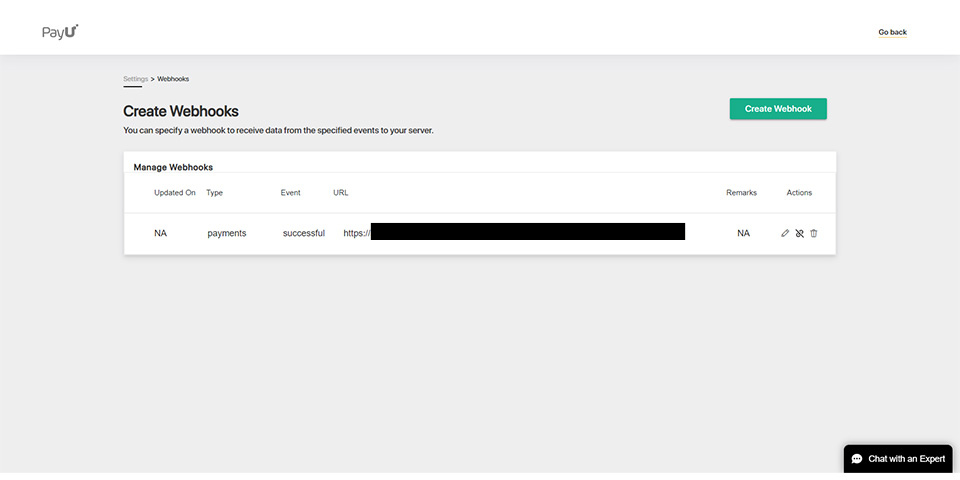
- Copy the Webhook URL shown.
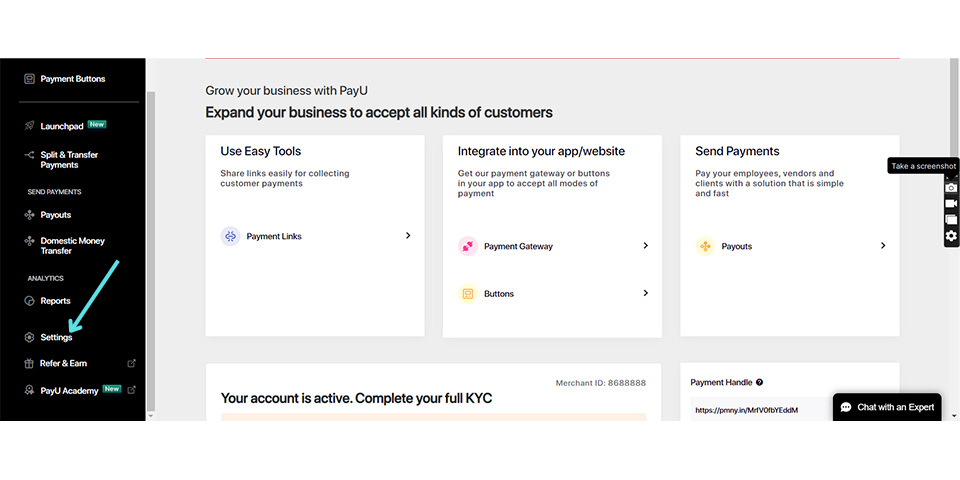
- Go to your PayU dashboard and click on Settings.
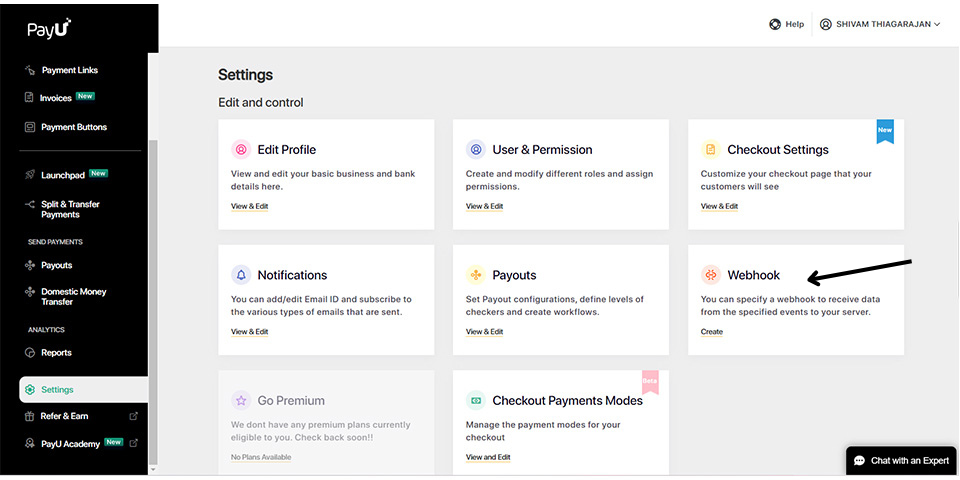
- Click on Webhook.
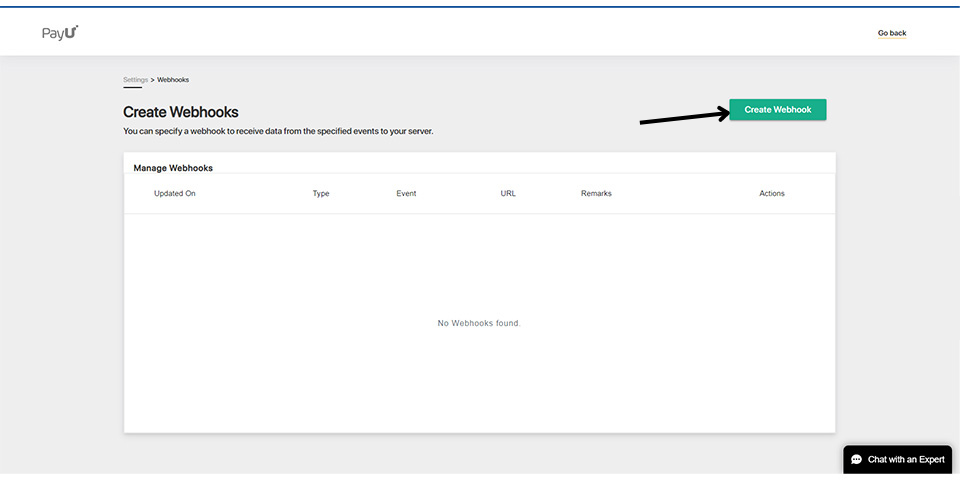
- Click on Create Webhook.
- Select the type as Payments and the Event as Successful. Enter the Webhook URL and click on Create.

Razorpay
How to Integrate Razorpay to aasaanSet up Razorpay on your Store Note: Click here to navigate to the mobile admin app version of this article You can watch the video version of this article here. Our regular method of setting up online payments involves setting up aasaan Pay by entering your bank account details. This works if you don’t have a payment gateway account like Razorpay. Note: Make sure to install Razorpay from the aasaan app market. Click here to learn how to install apps from your app market.
- Razorpay Steps
- Razorpay Screenshots
Razorpay - How to Integrate Razorpay to aasaan
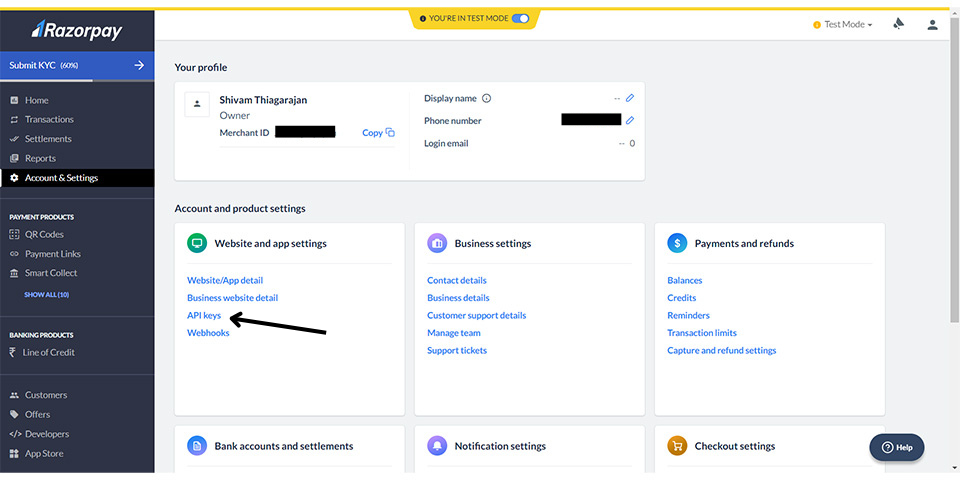
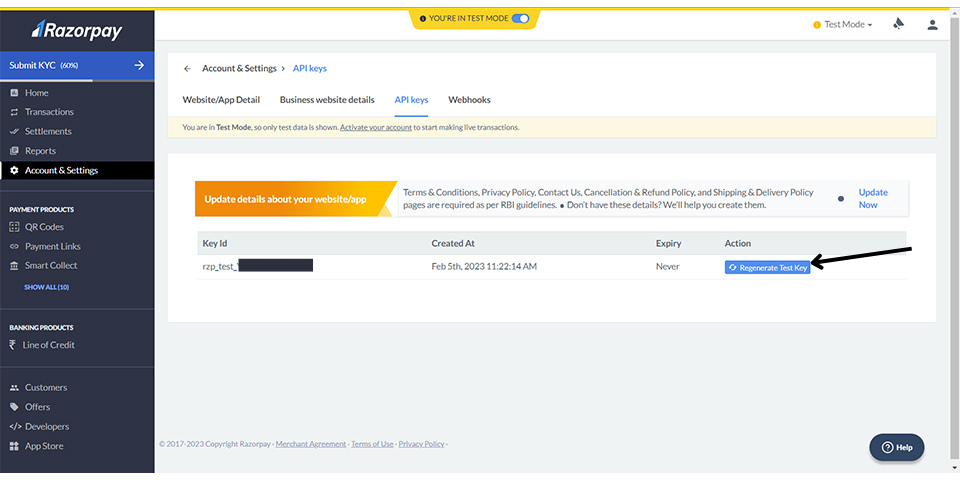
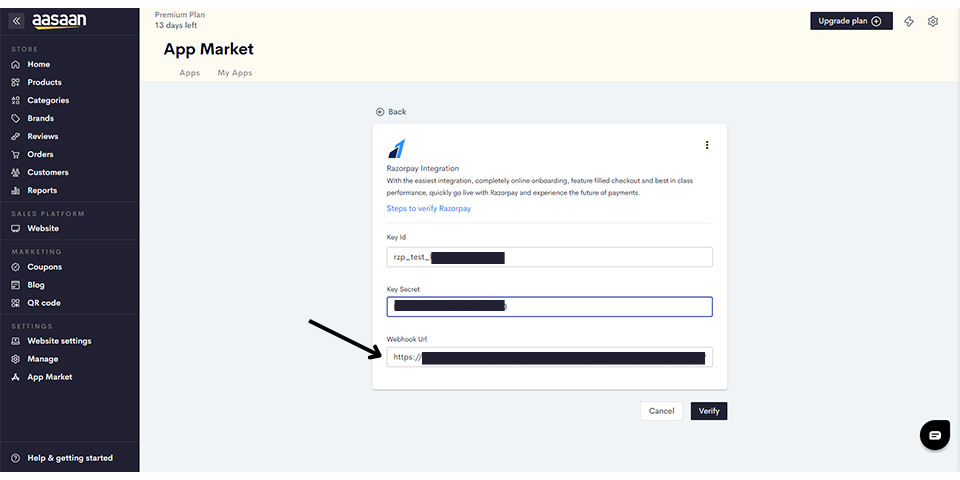
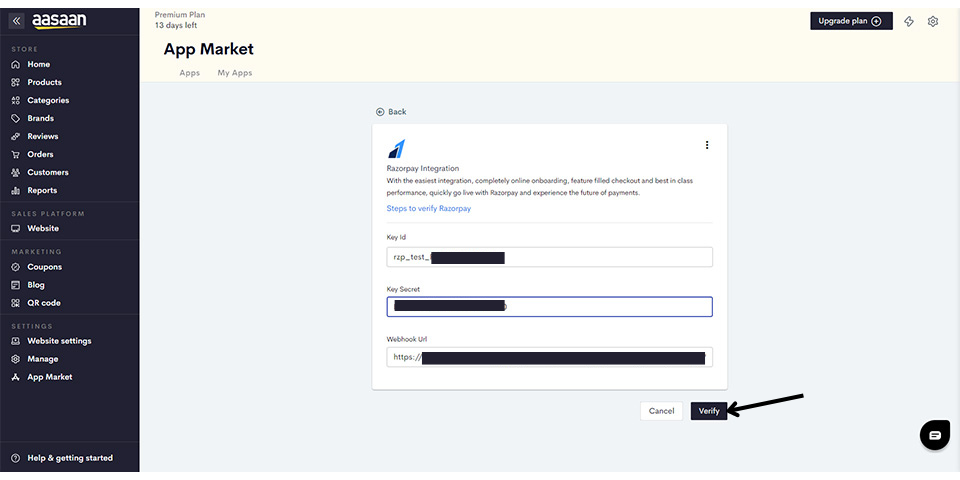
STEP 1:- Login to your existing Razorpay account and click on Account & Settings > API Keys.
- Since we already have existing API keys and need new ones, click on Regenerate Test Key.
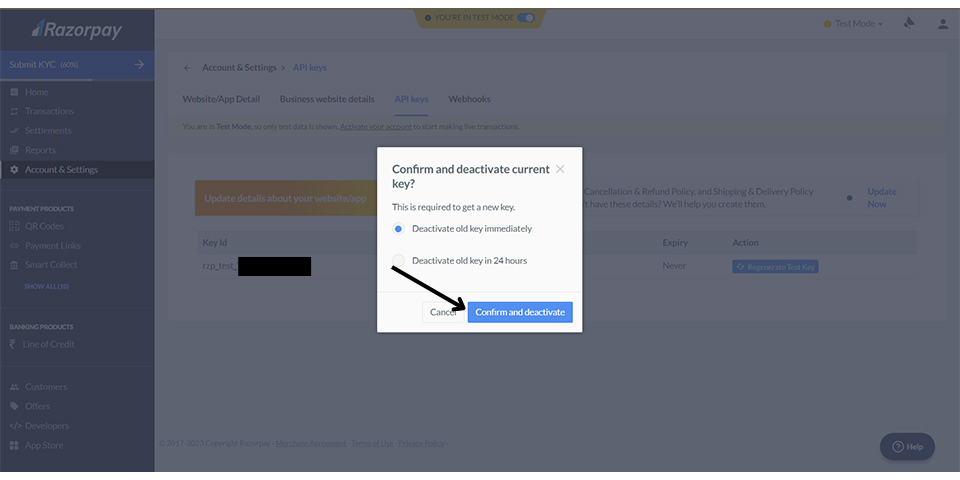
- Important note: This guide illustrates the steps for integrating Razorpay in test mode. You will need to integrate Razorpay to your store in live mode to be able to accept real payments. The Razorpay integration process is the same in both the test mode and live mode. So if you are carrying out this step in live mode, you will need to click on Regenerate Live Key.
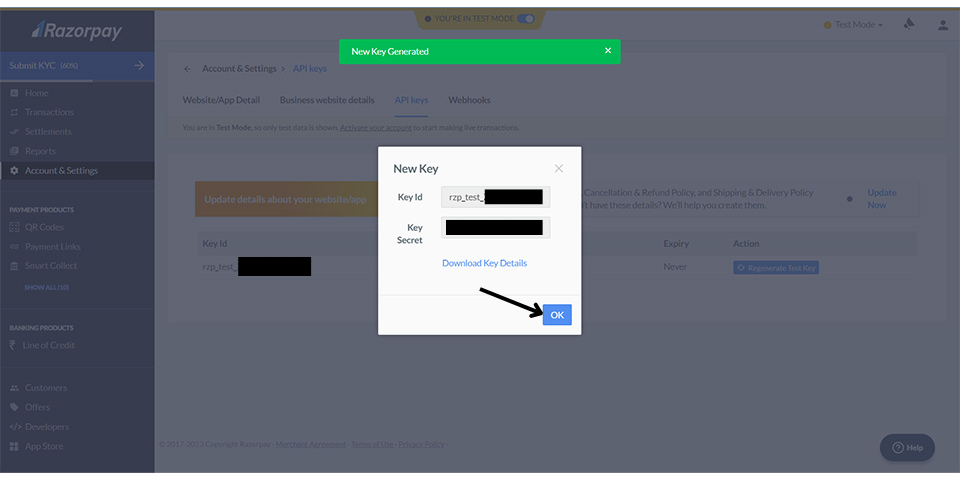
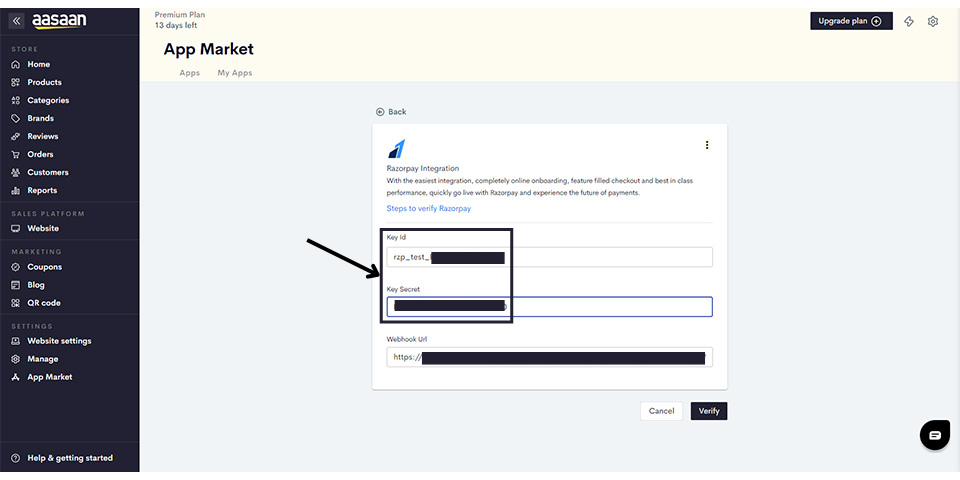
- Copy and save your Key ID and Key Secret. You can download them by clicking on Download Key Details.
- Important note: The key secret will be displayed only once.
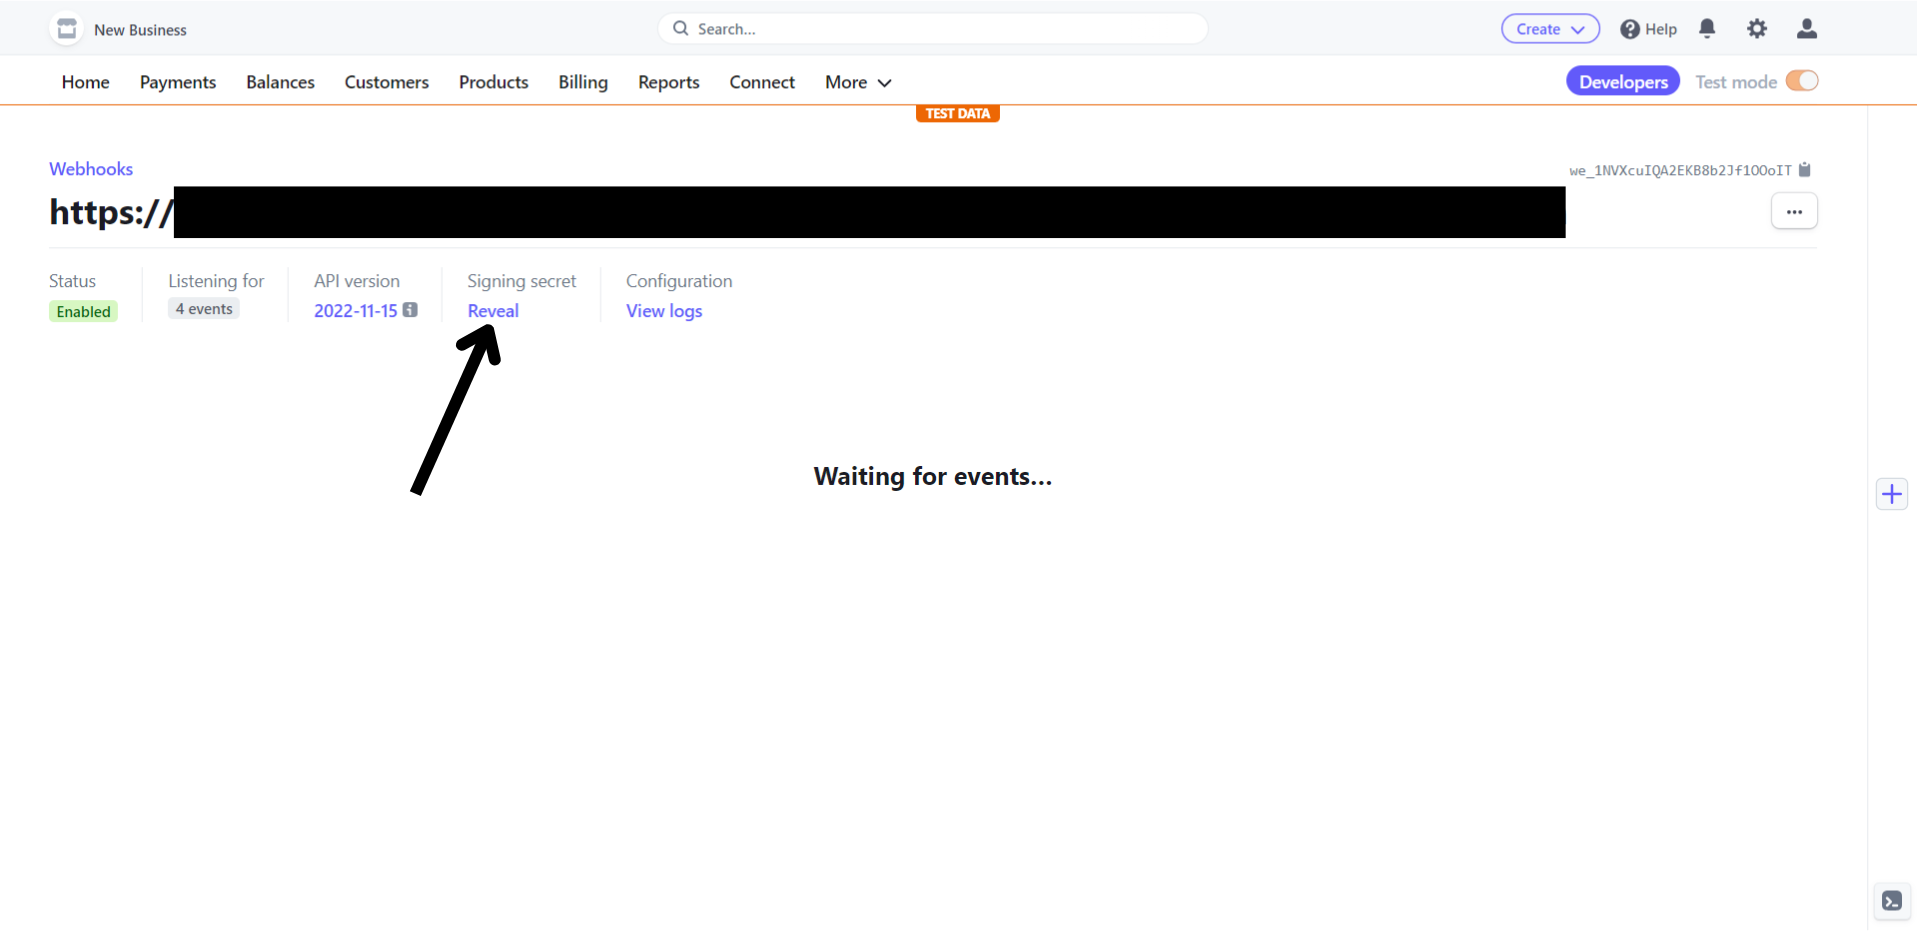
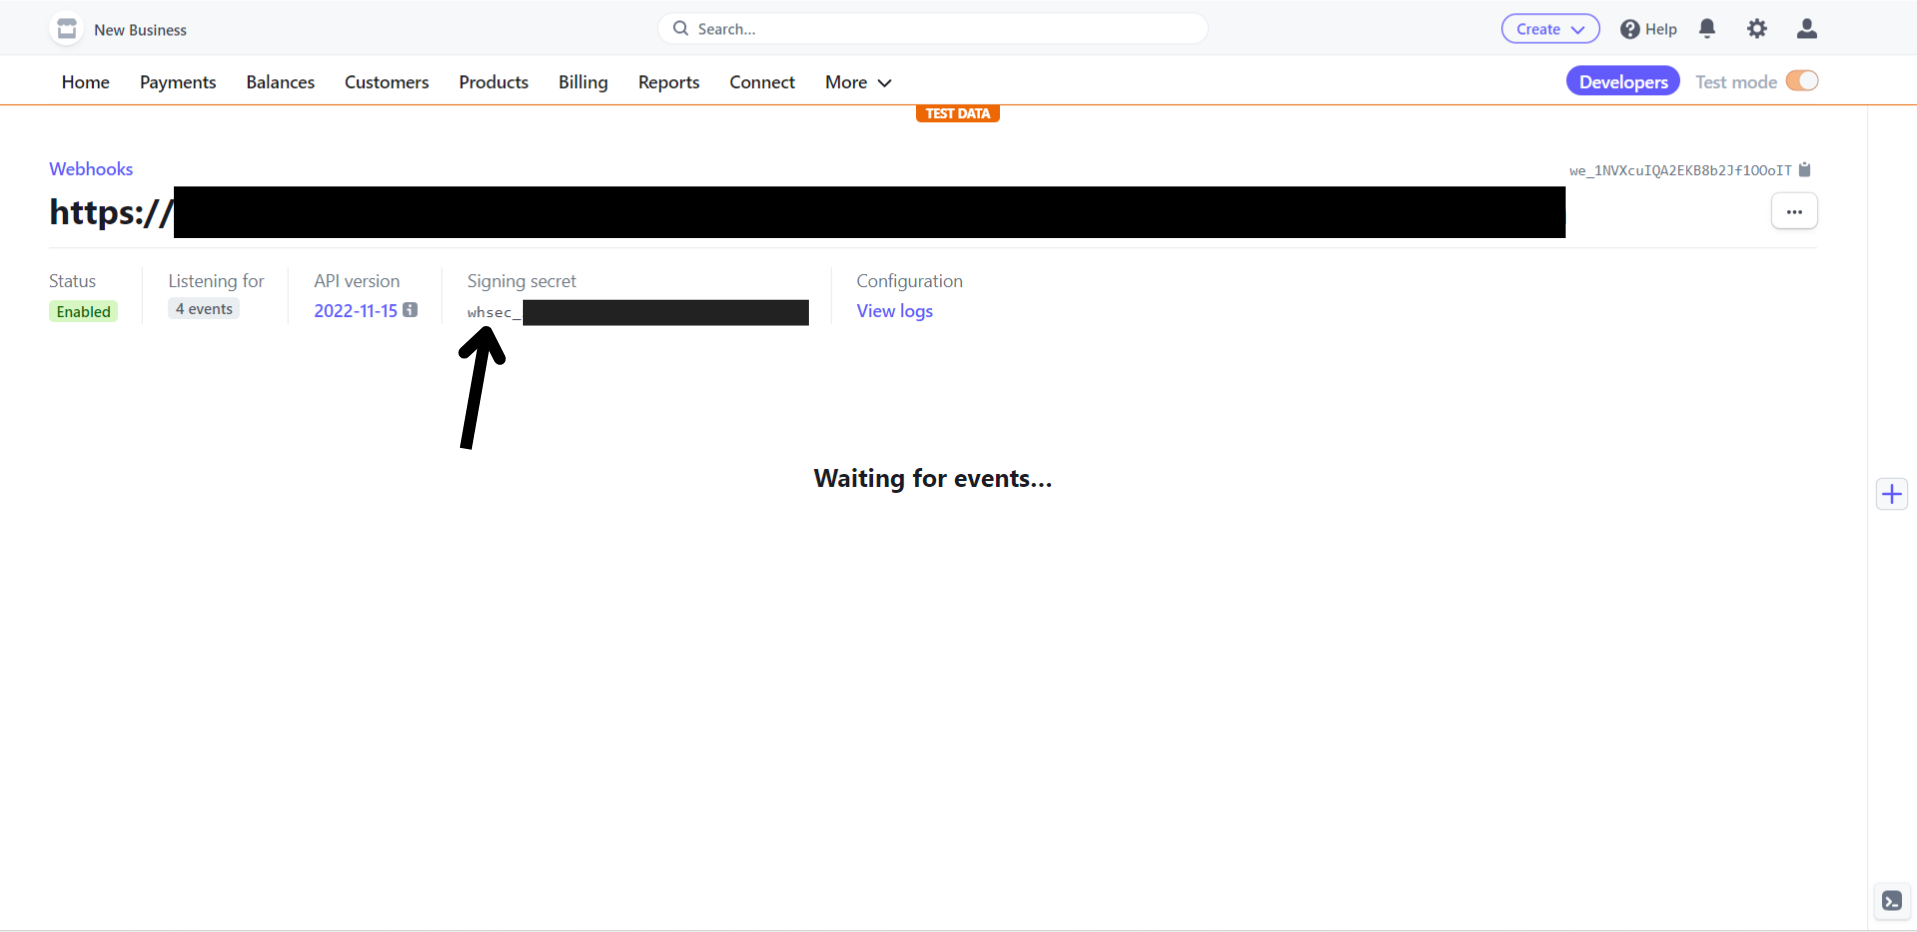
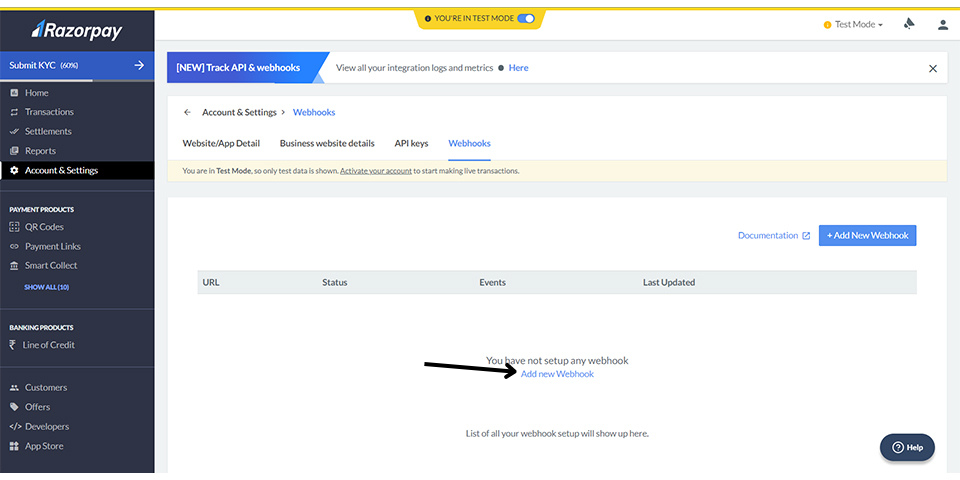
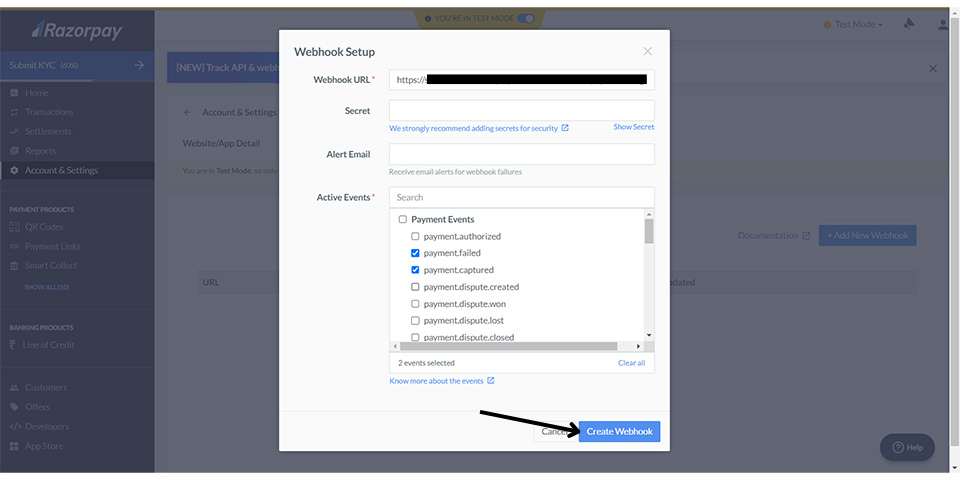
- In your Razorpay settings, click on Webhooks > Add New Webhook.
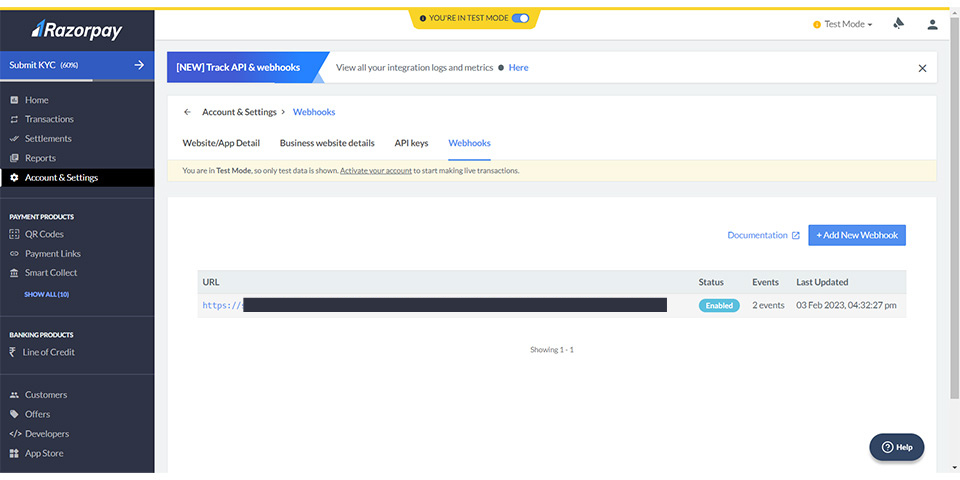
- Your webhook will be created.

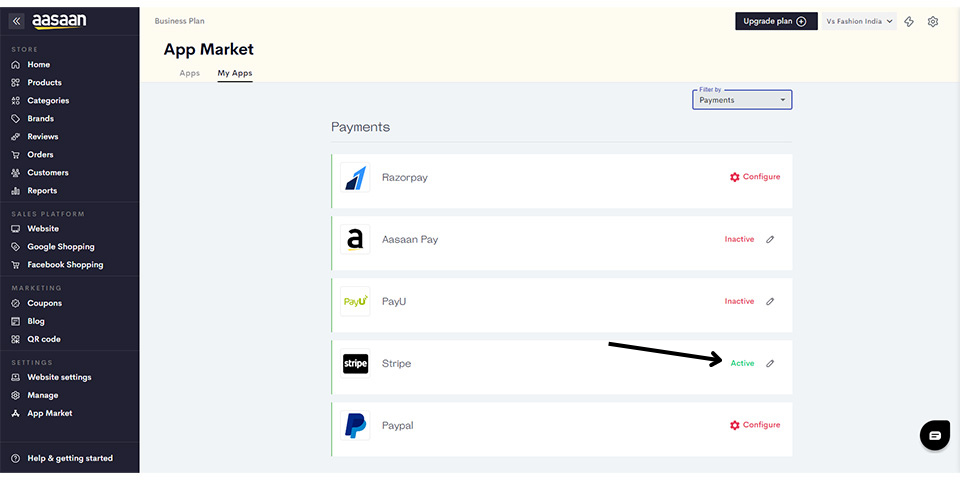
Stripe
How to Set up Stripe Payment Gateway on Your WebsiteSet up Stripe Payment Gateway on your Store Note: Click here to navigate to the mobile admin app version of this article You can watch the video version of this article here. If you have an existing account with the Stripe payment gateway, you can easily integrate it with Aasaan to receive your online payments. Here’s how you do it. Note: Make sure to install Stripe from the aasaan app market. Click here to learn how to install apps from your app market.
- Stripe Steps
- Stripe Screenshots
Stripe - How to Set up Stripe Payment Gateway on Your Website
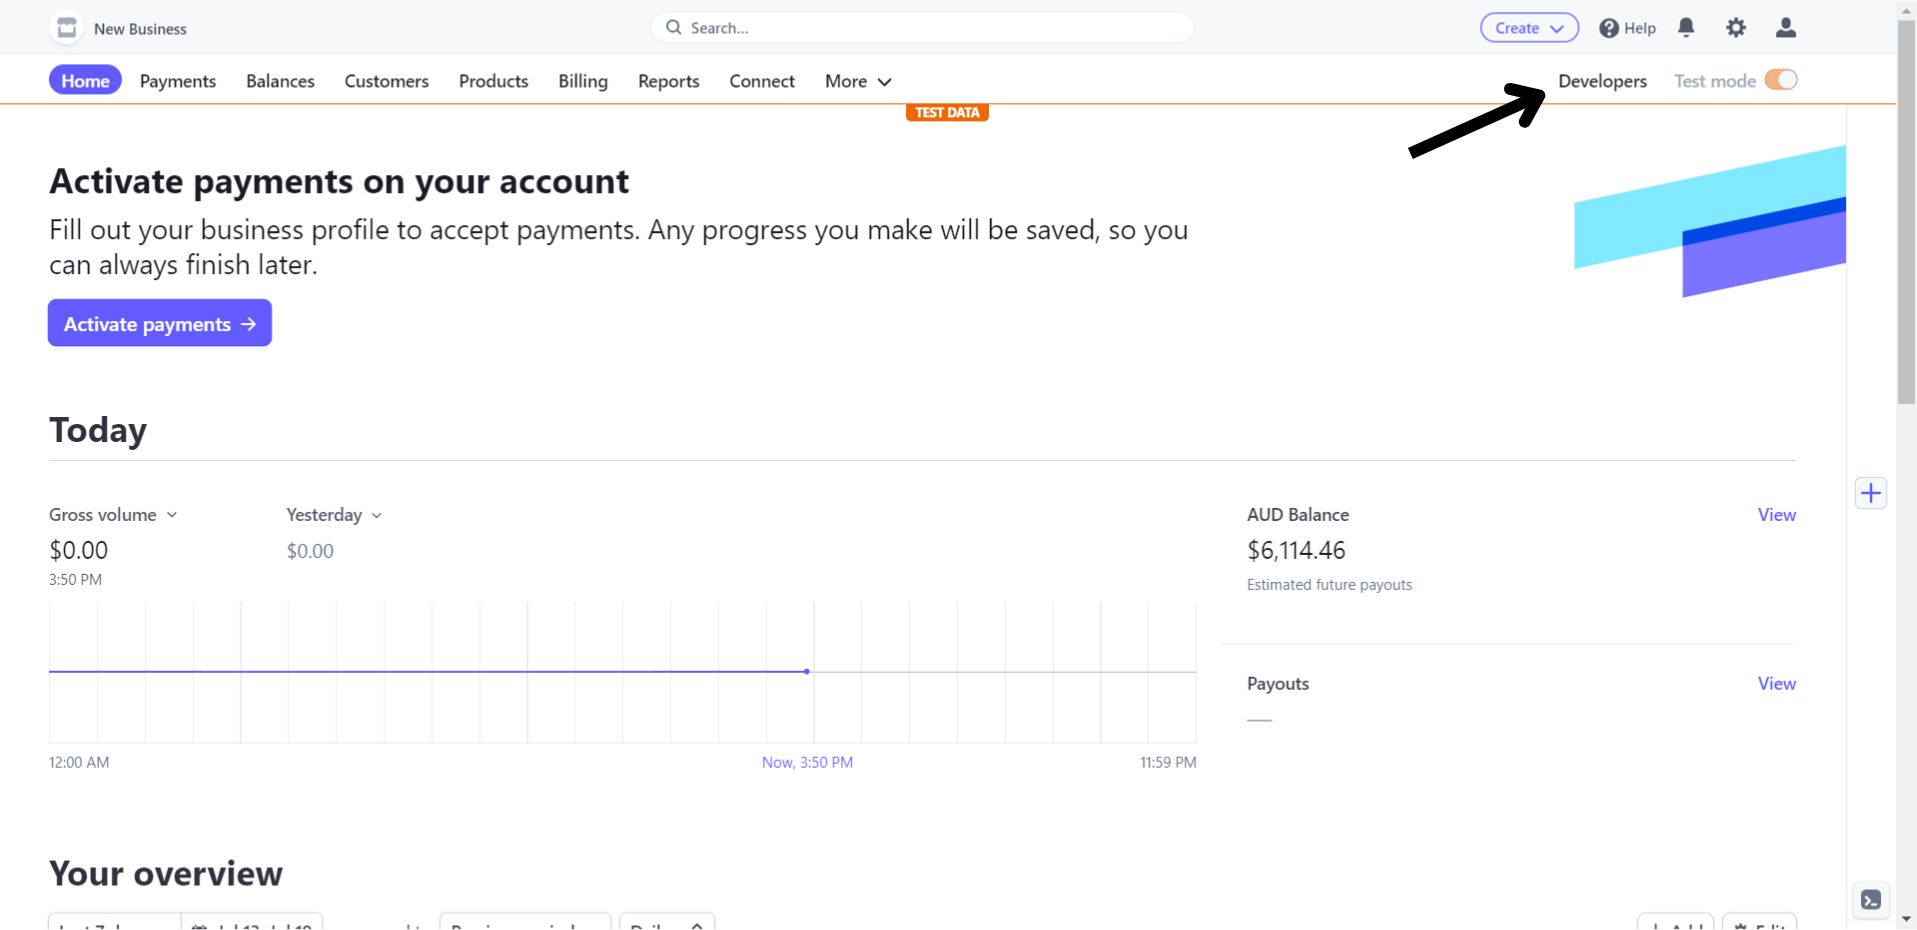
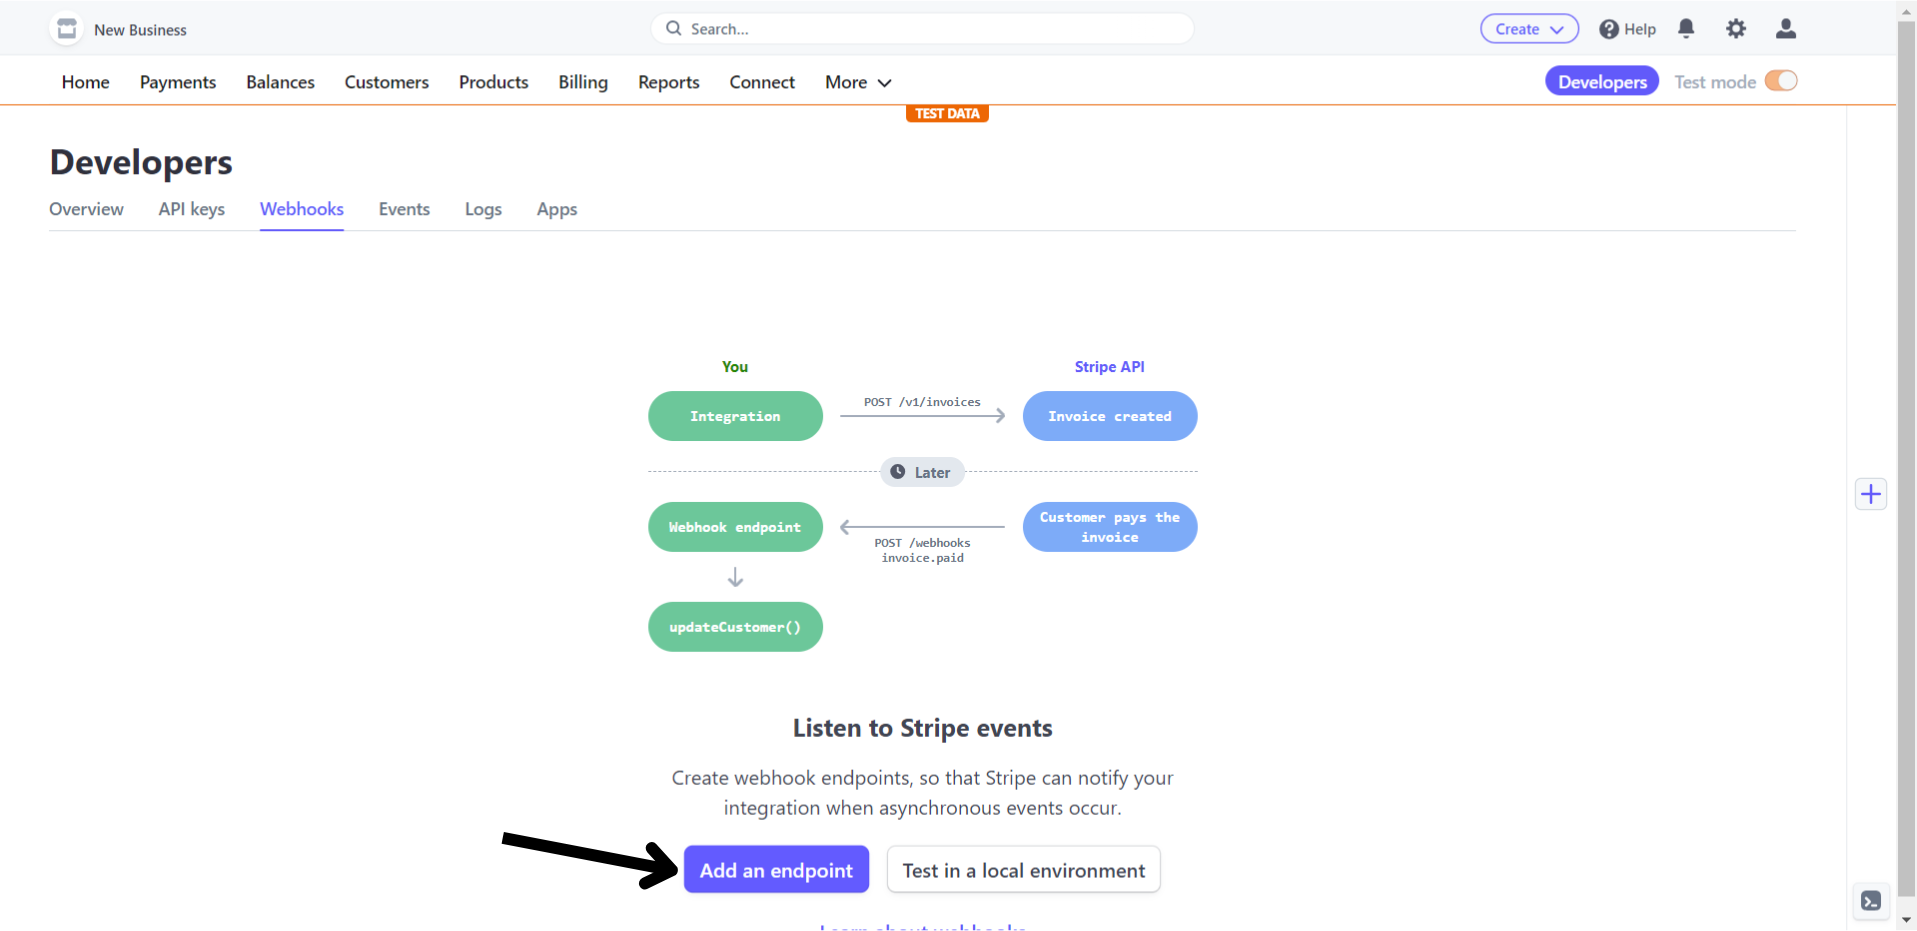
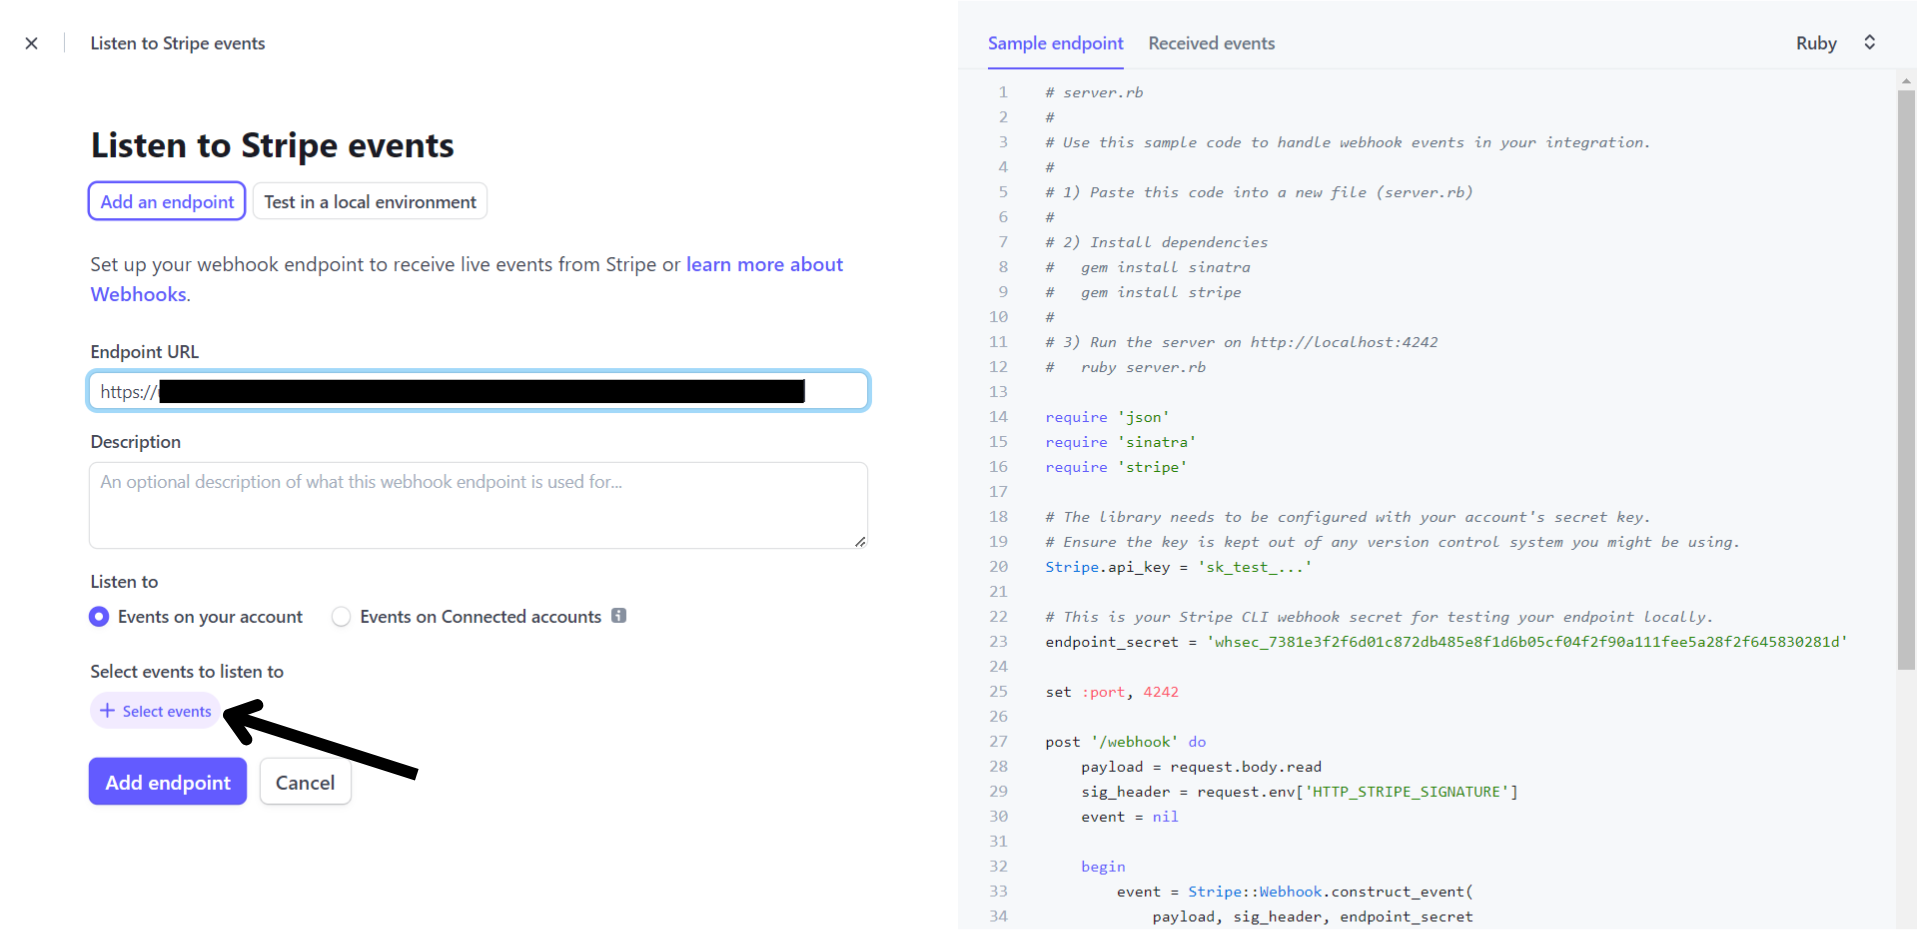
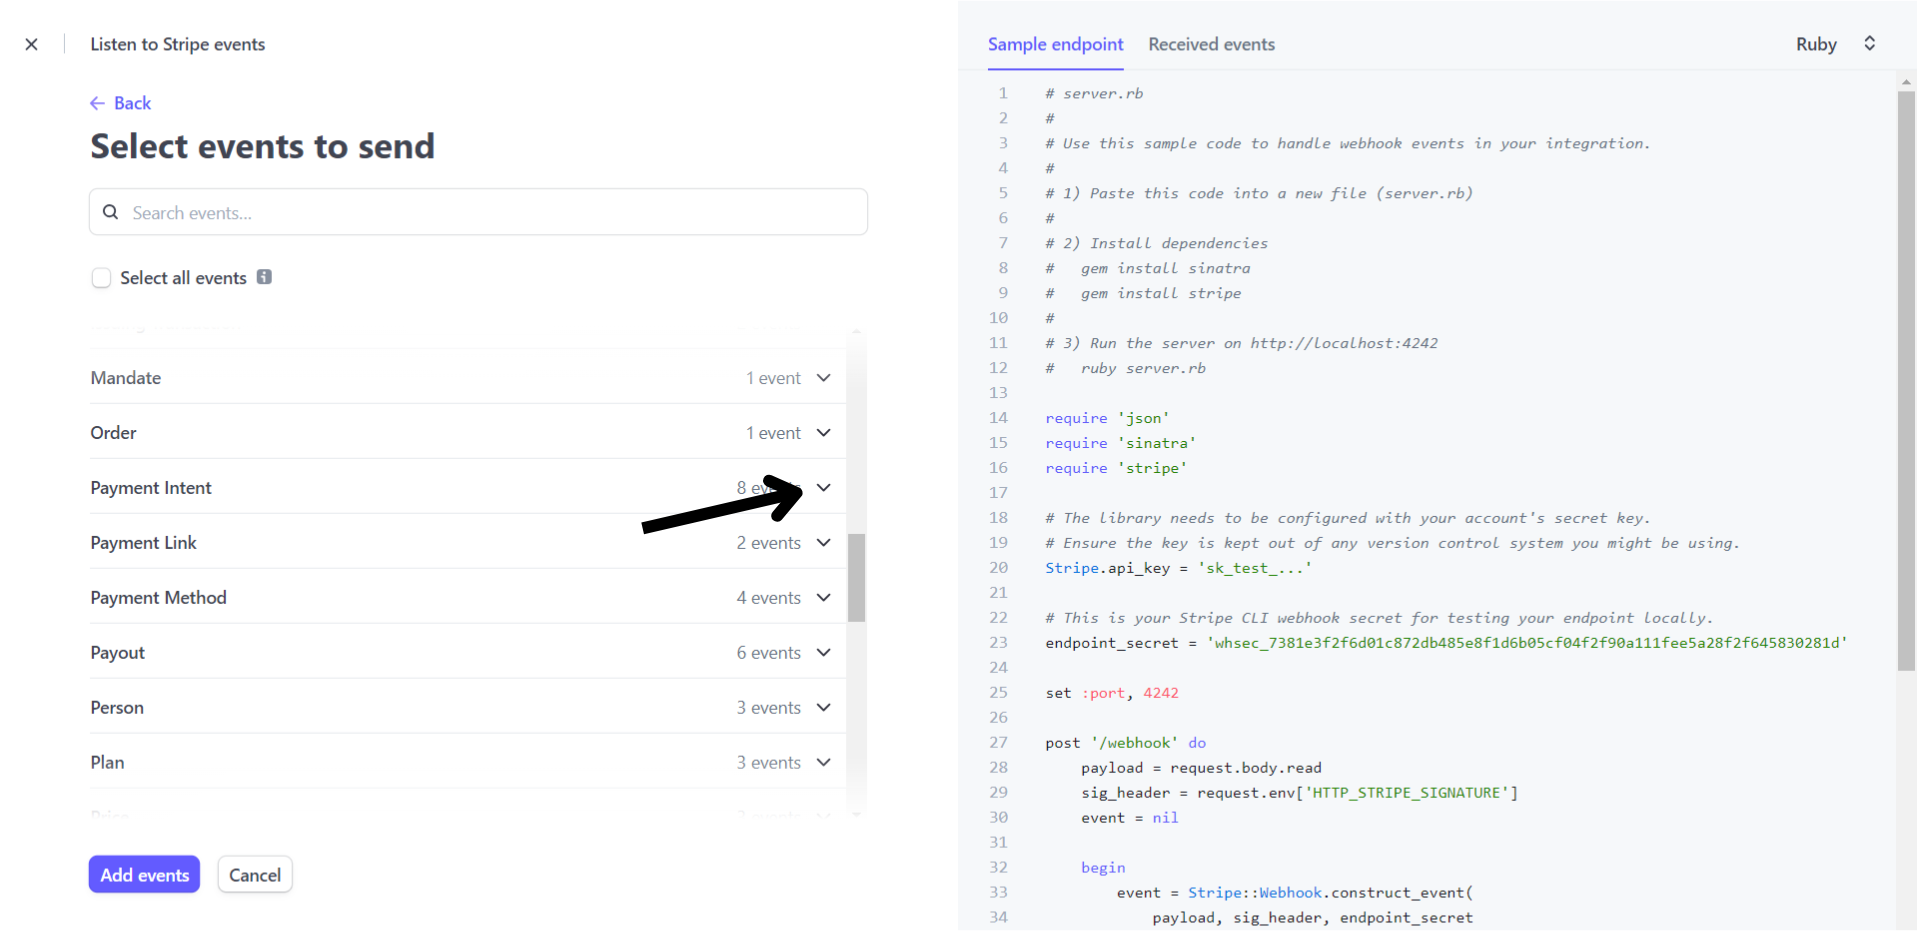
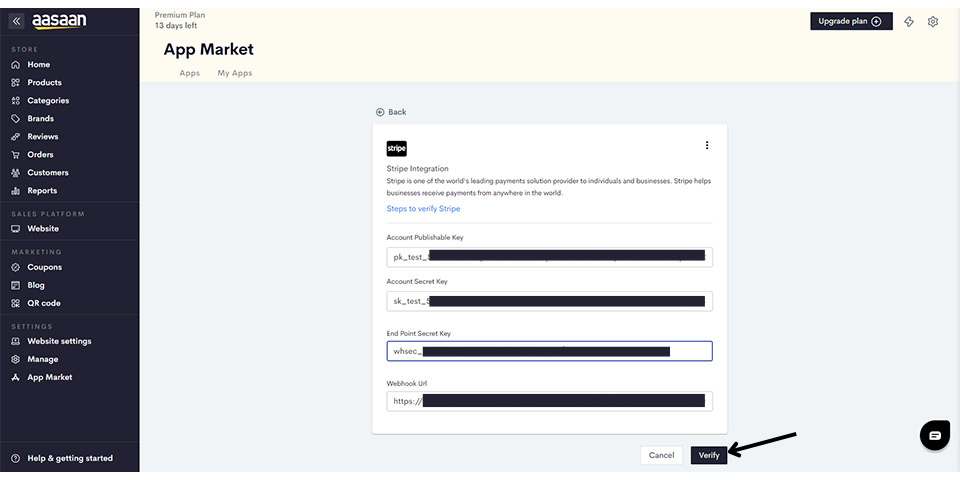
STEP 1:- Login to your Stripe account and click on Developers.
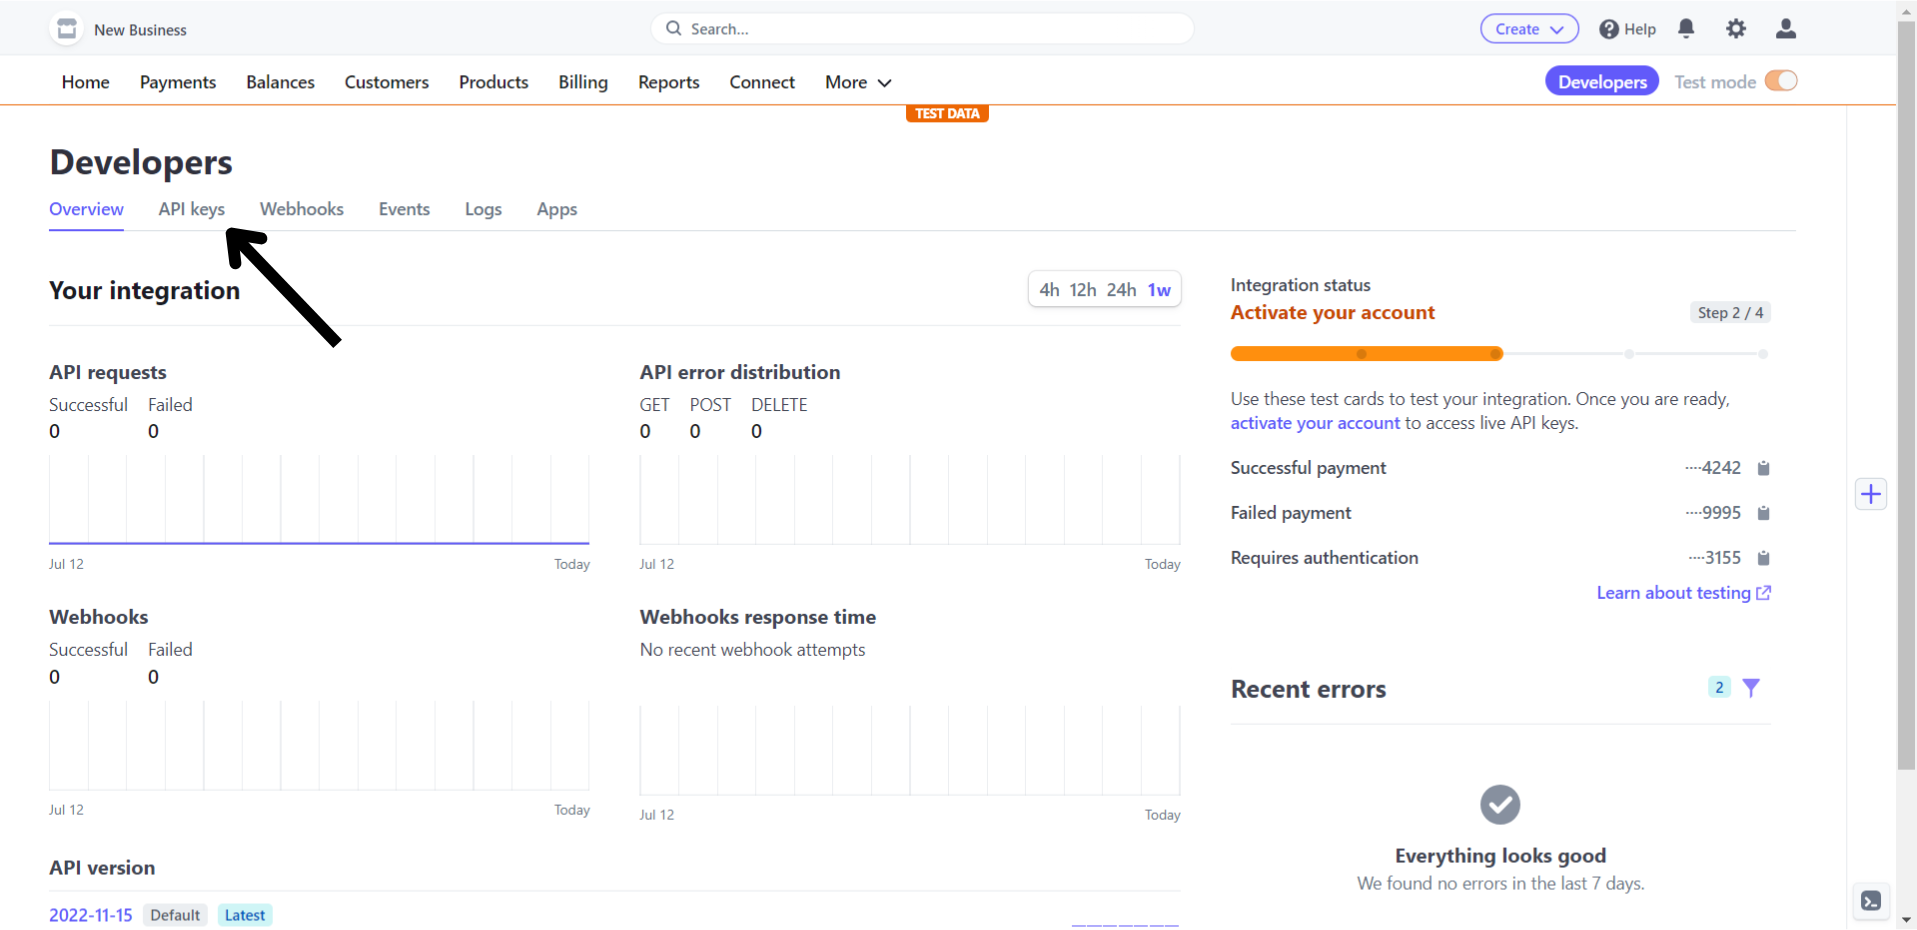
- Click on API Keys.
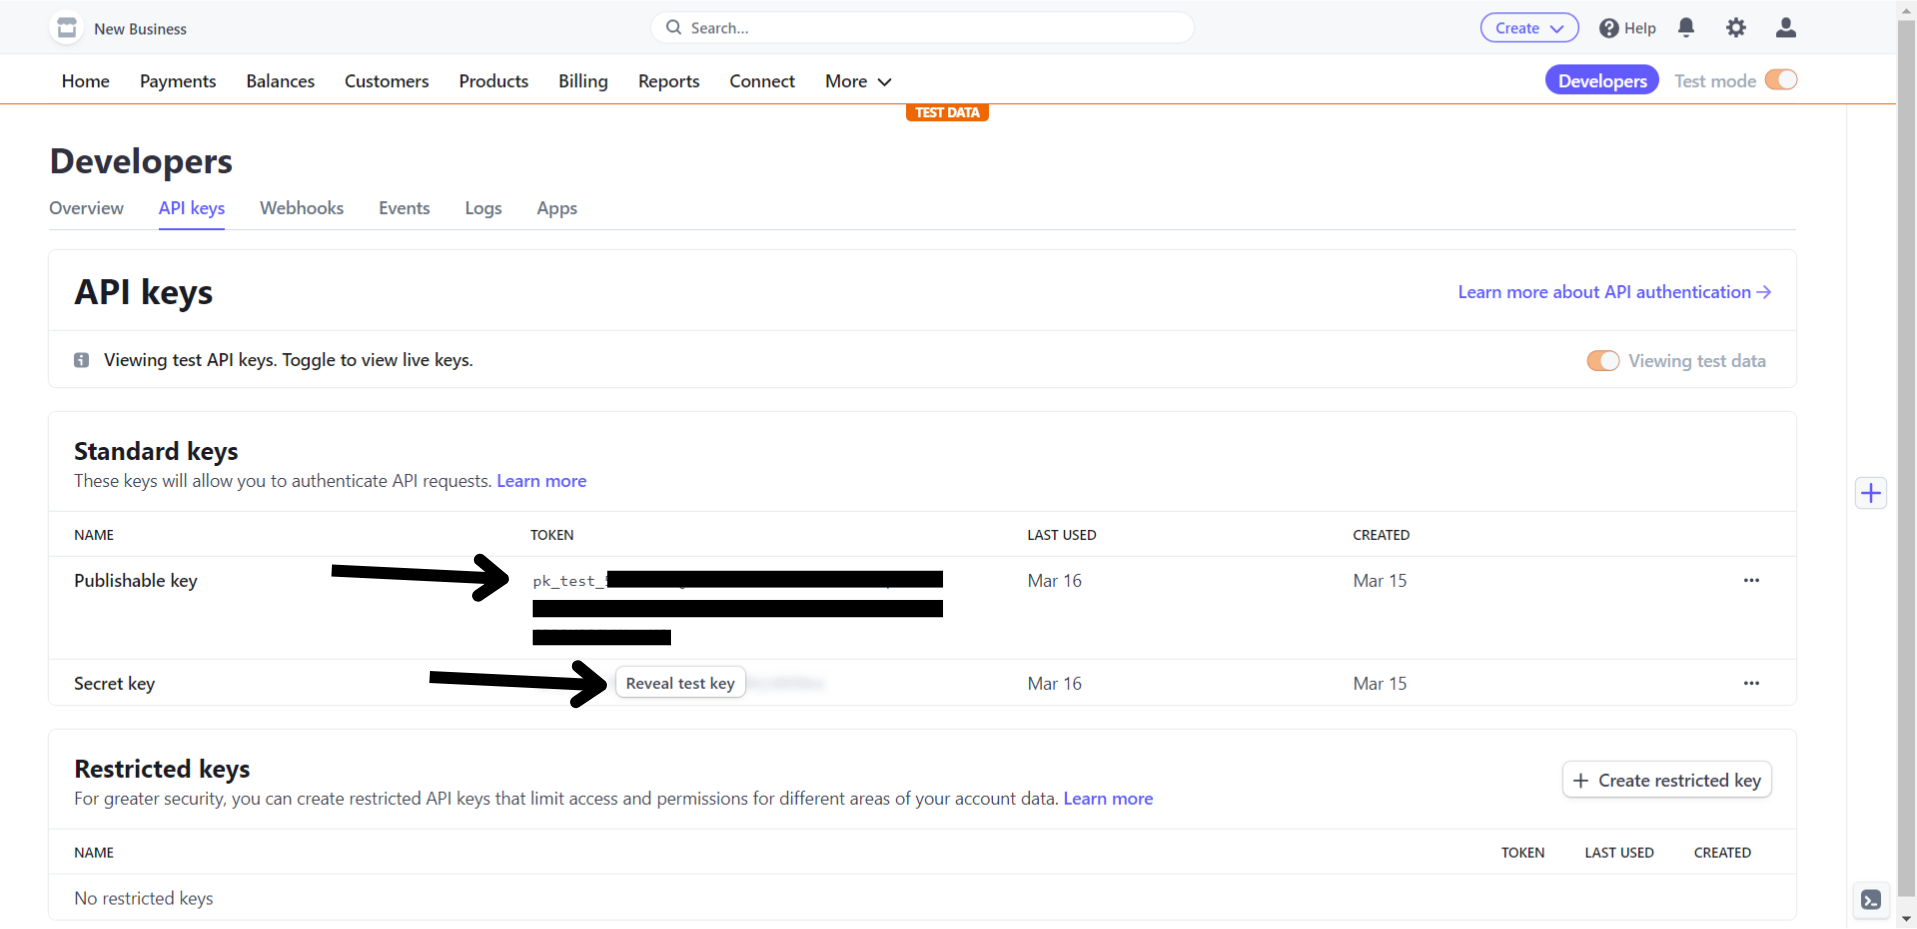
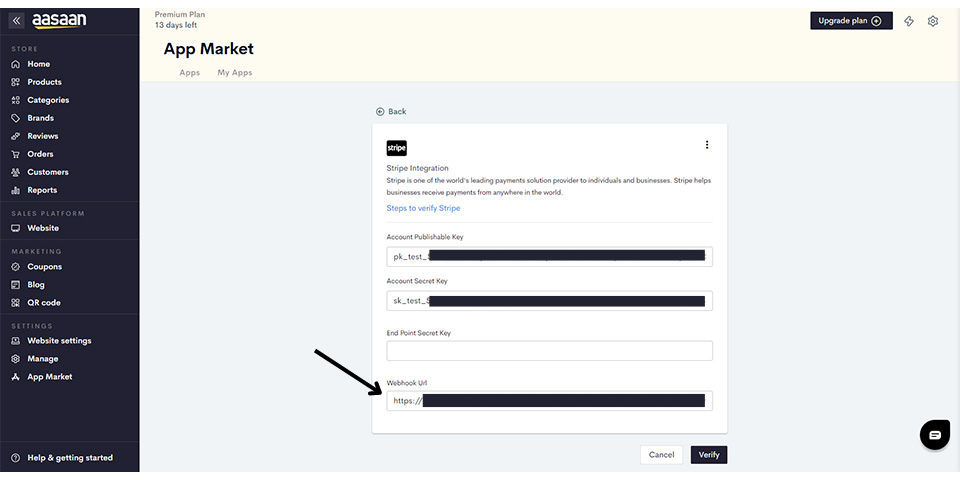
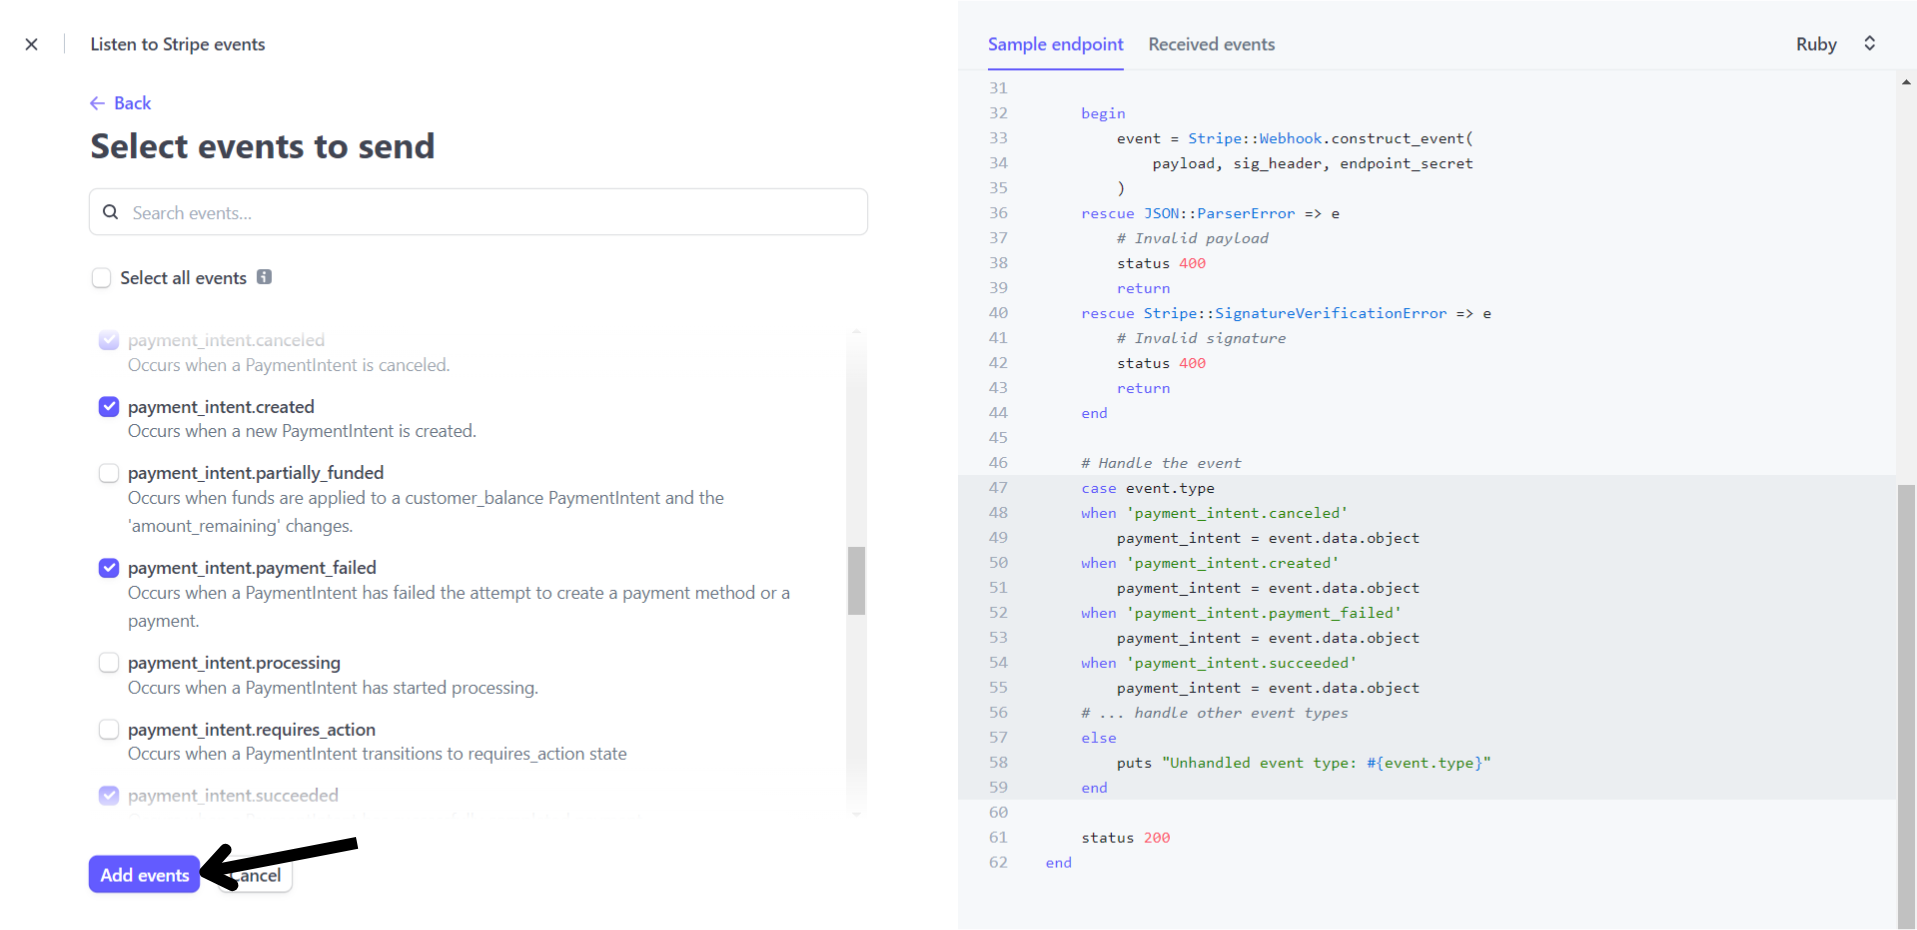
- Copy the publishable key and secret key and save them. The secret key will only be displayed once.
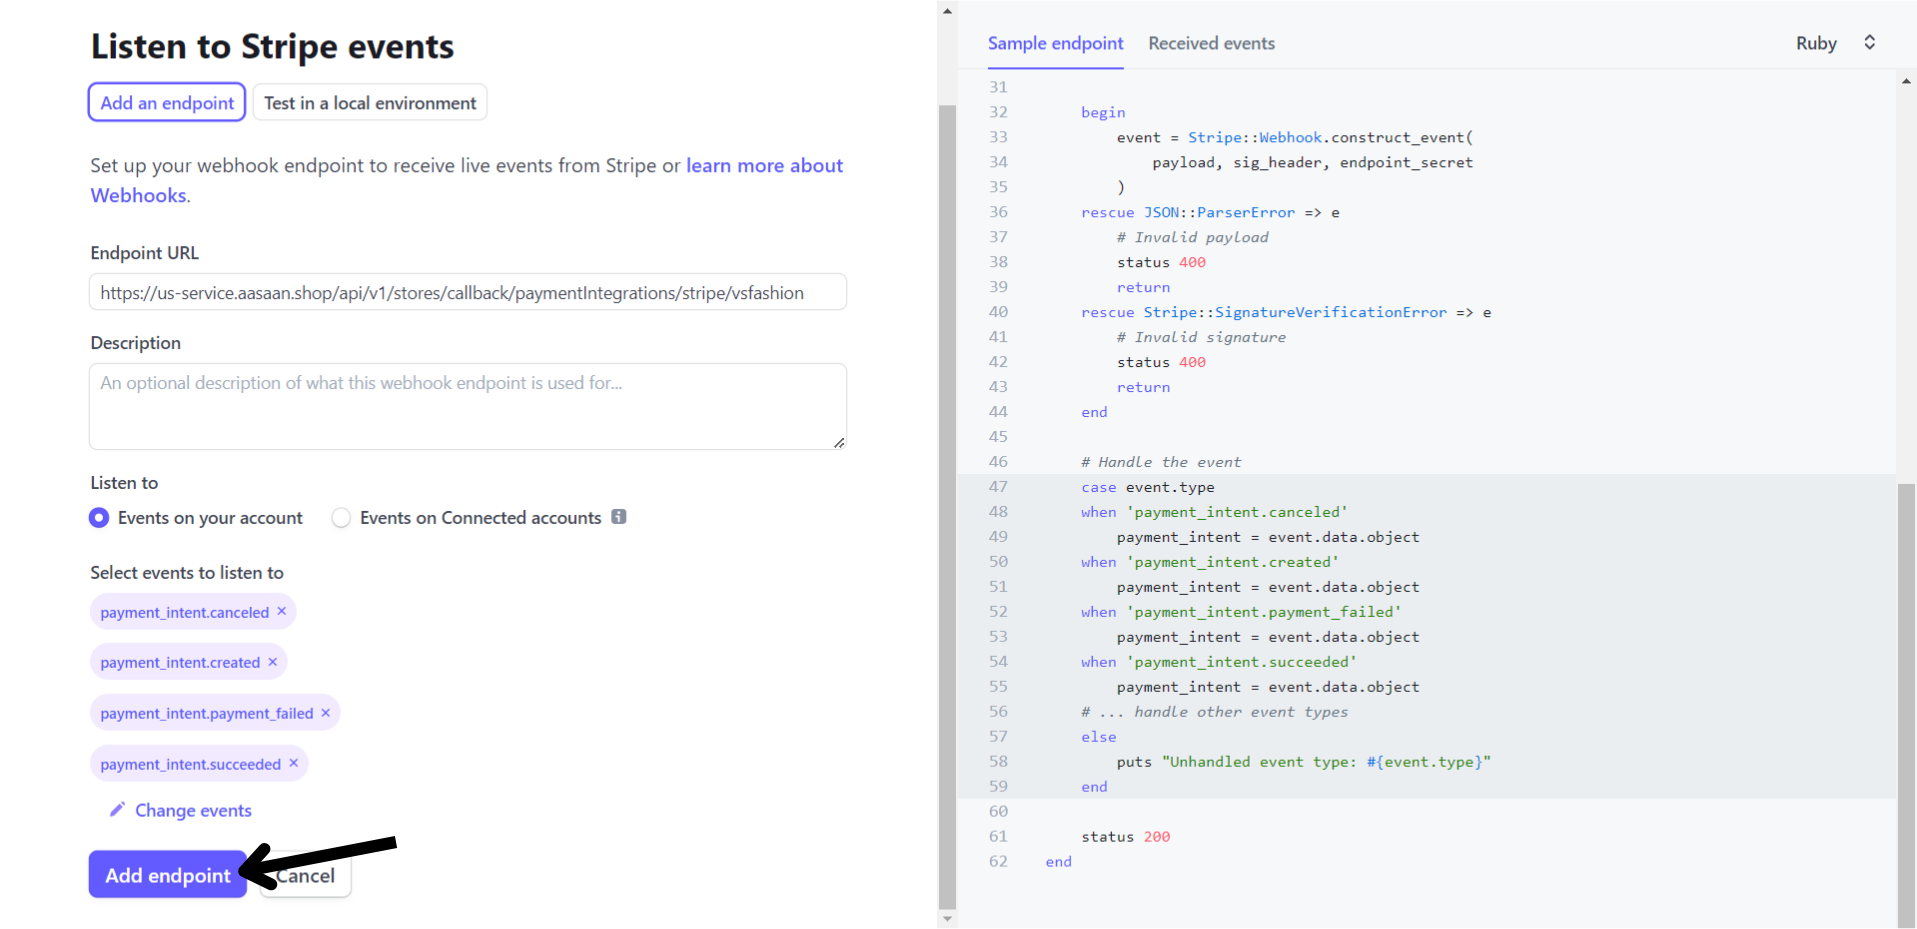
- payment_intent.canceled
- payment_intent.created
- payment_intent.payment_failed
- payment_intent.succeeded Then click on Add Events.