> ## Documentation Index
> Fetch the complete documentation index at: https://help.aasaan.app/llms.txt
> Use this file to discover all available pages before exploring further.
# Categories
> Manage categories & sub-categories in your Store
Before you add your first product to your store, you must add a category. Here's how you add categories to your store:
## Add Category
To add a category to your store:
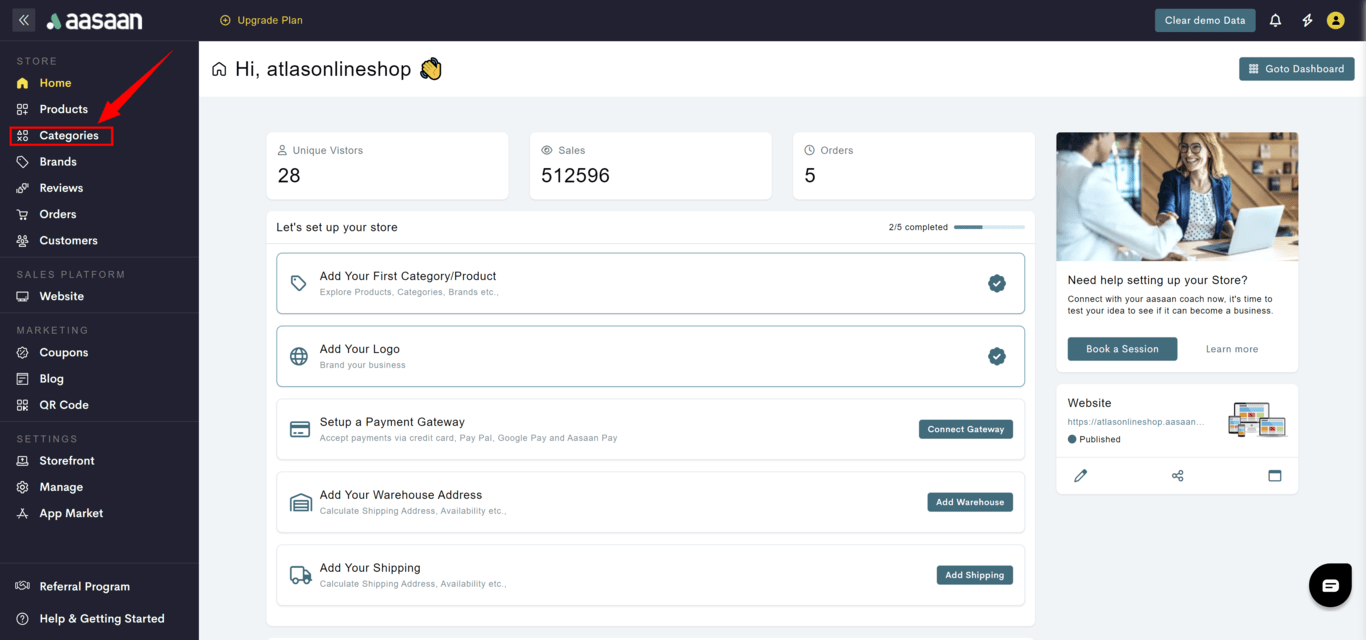
* Log in to your aasaan desktop admin panel and click on **Categories**.
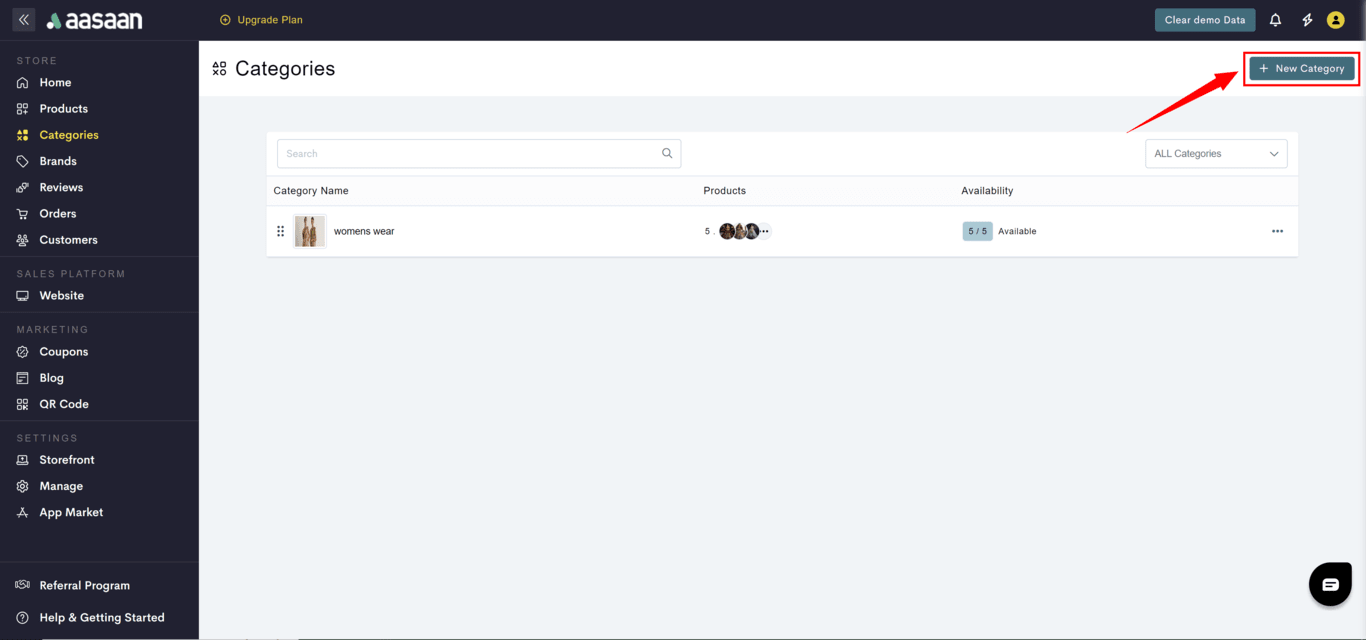
* Click on **+ New Category**.
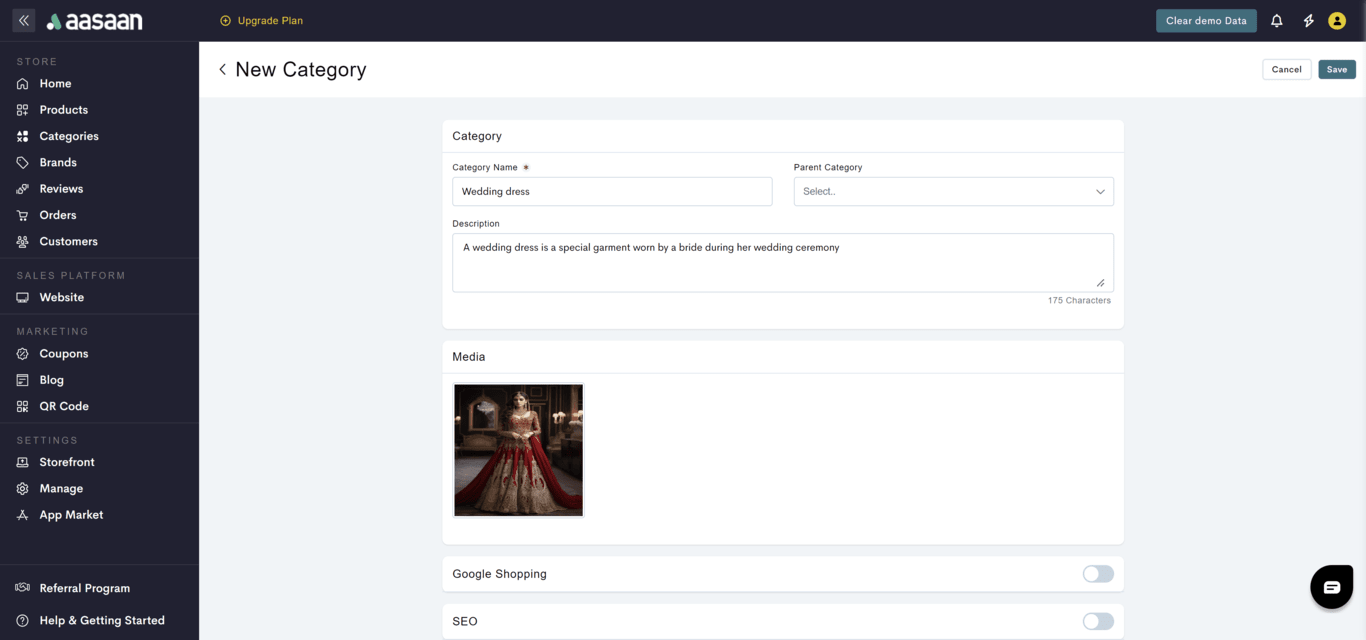
* Provide category details like:
* Category name
* Description
* Category image
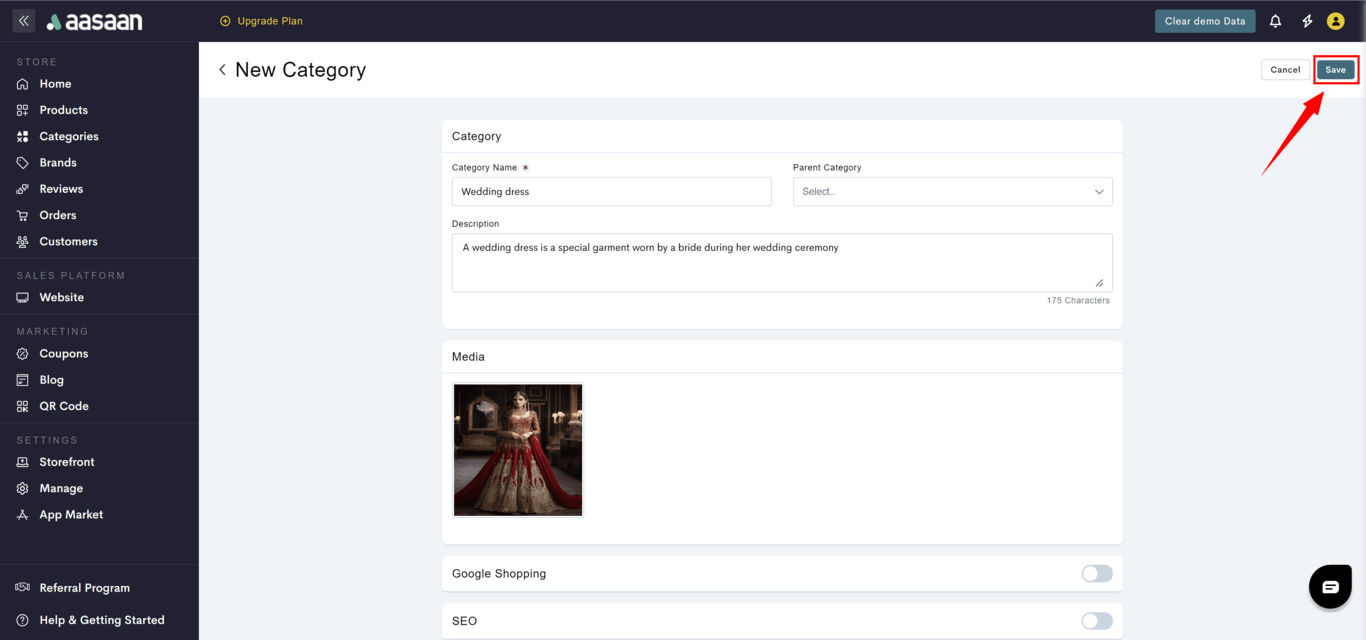
* Click on **Save**.
 ## Modify Category
To modify a category to your store:
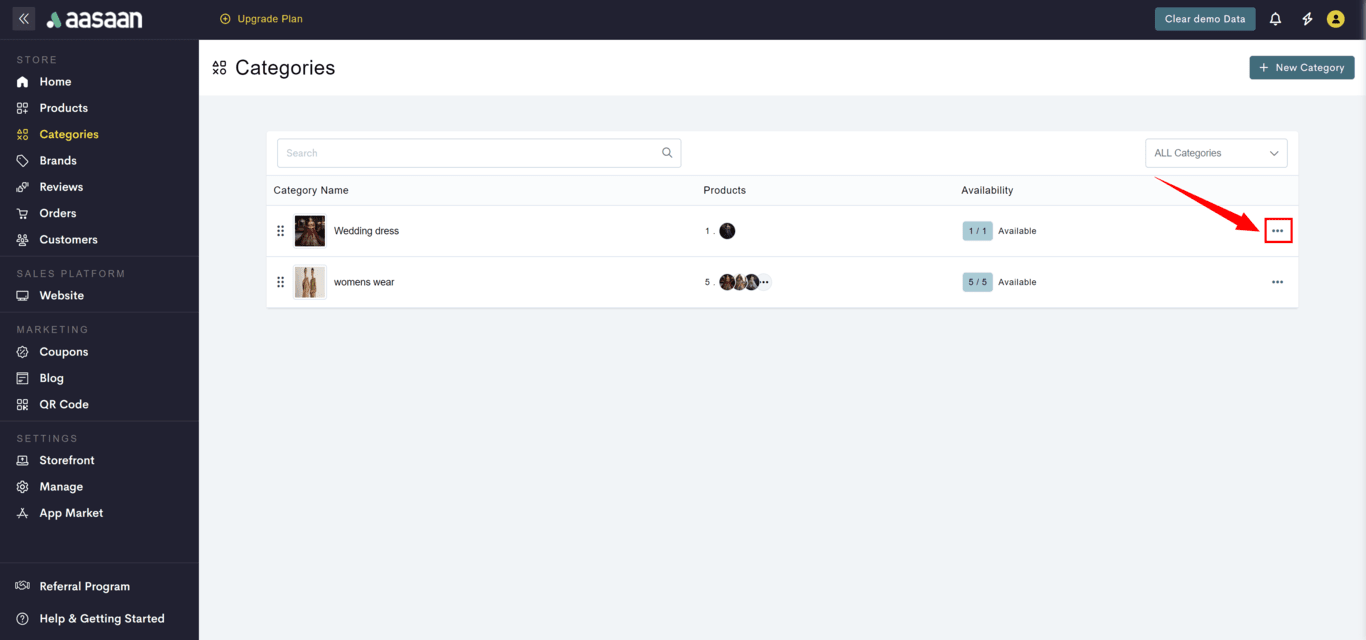
* Log in to your aasaan desktop admin panel and click on **Categories**.
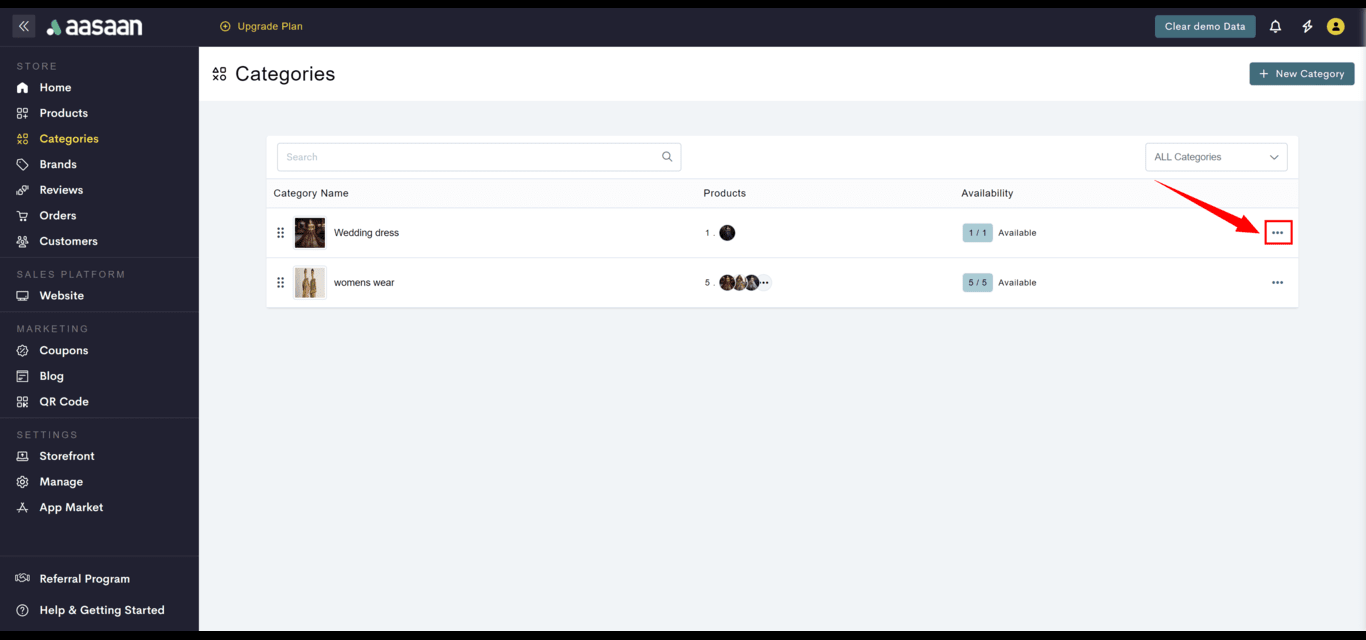
* Click on **...** at the category you want to modify.
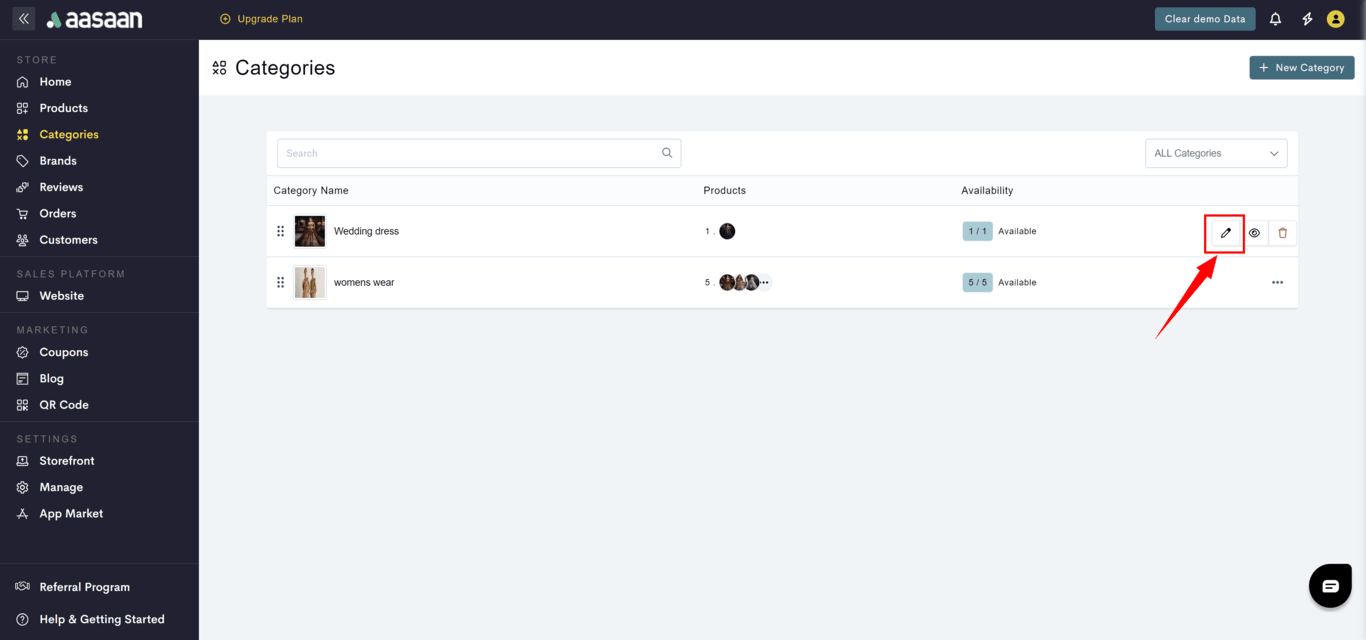
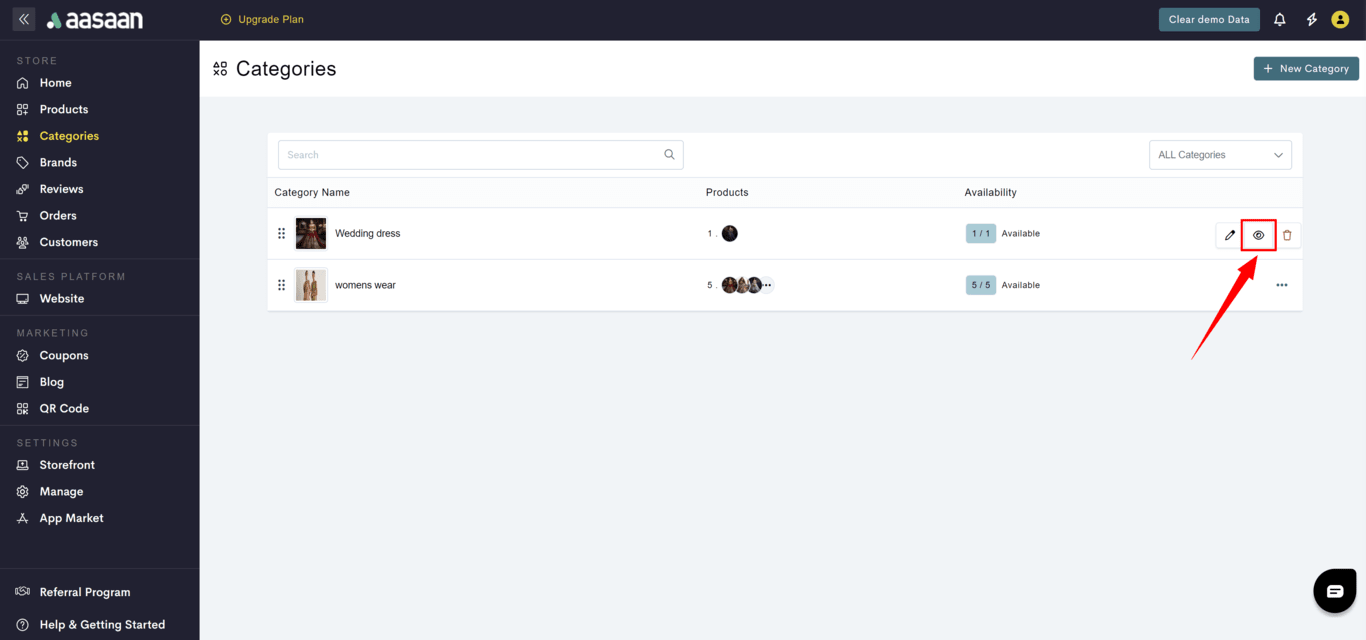
* Click on the ✏️ icon.
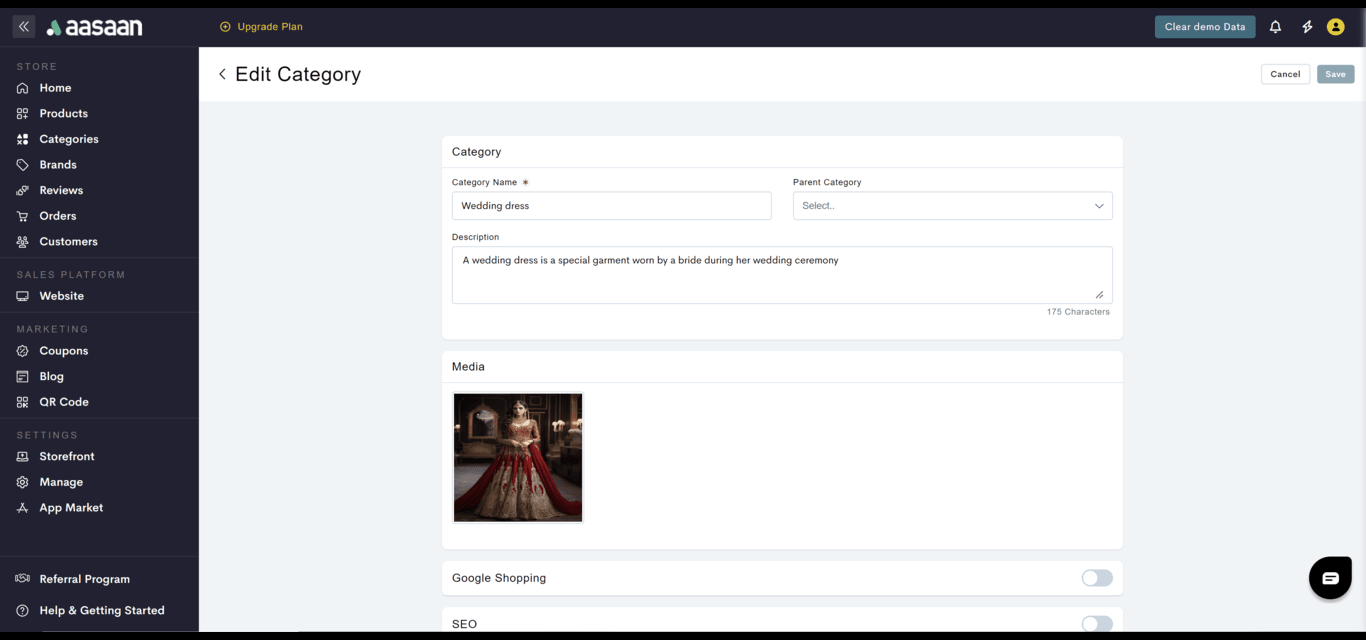
* Update the category details like:
* Category name
* Description
* Category image
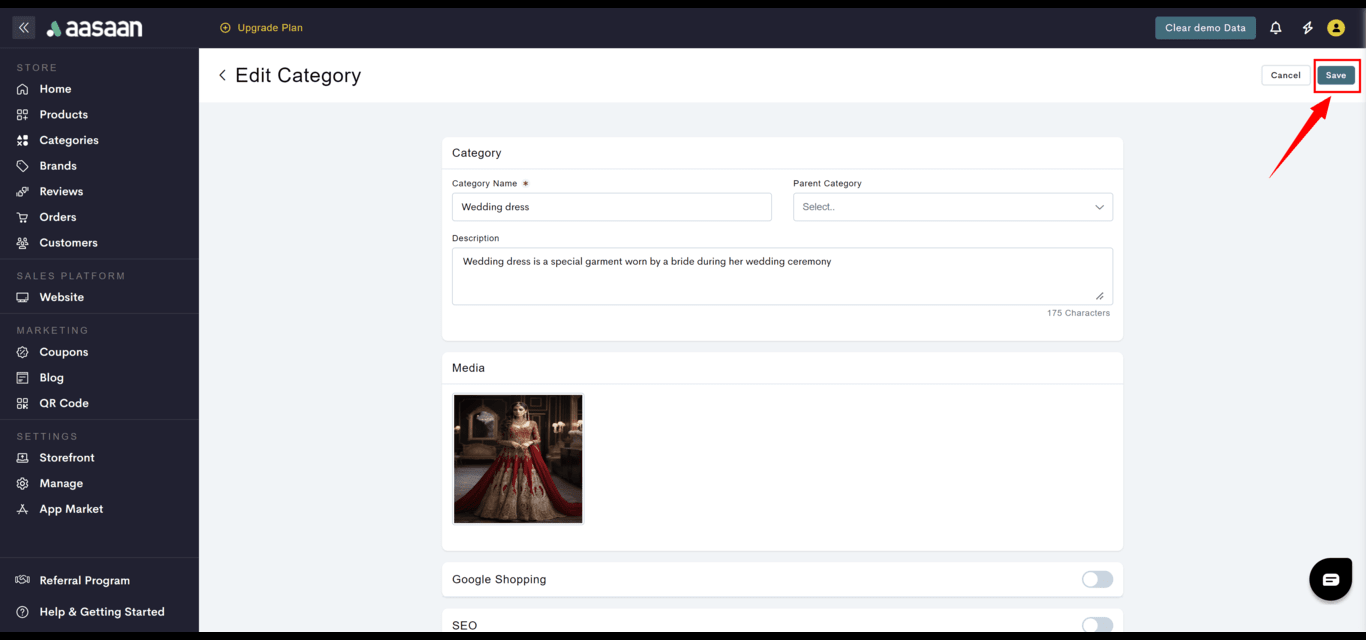
* Click on **Save**.
## Modify Category
To modify a category to your store:
* Log in to your aasaan desktop admin panel and click on **Categories**.
* Click on **...** at the category you want to modify.
* Click on the ✏️ icon.
* Update the category details like:
* Category name
* Description
* Category image
* Click on **Save**.
 ## Delete Category
When you delete a category, all the products associated with the category will also be deleted.
To delete a category in your store:
* Log in to your aasaan desktop admin panel and click on **Categories**.
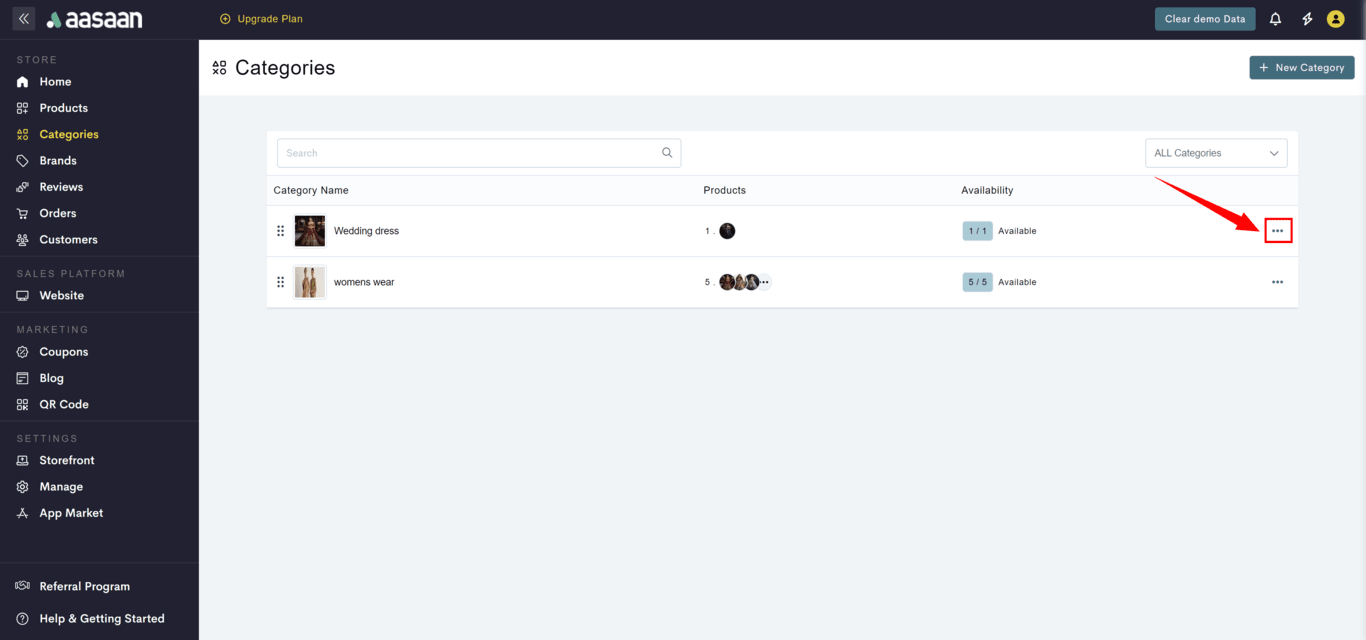
* Click on **...** at the category you want to delete.
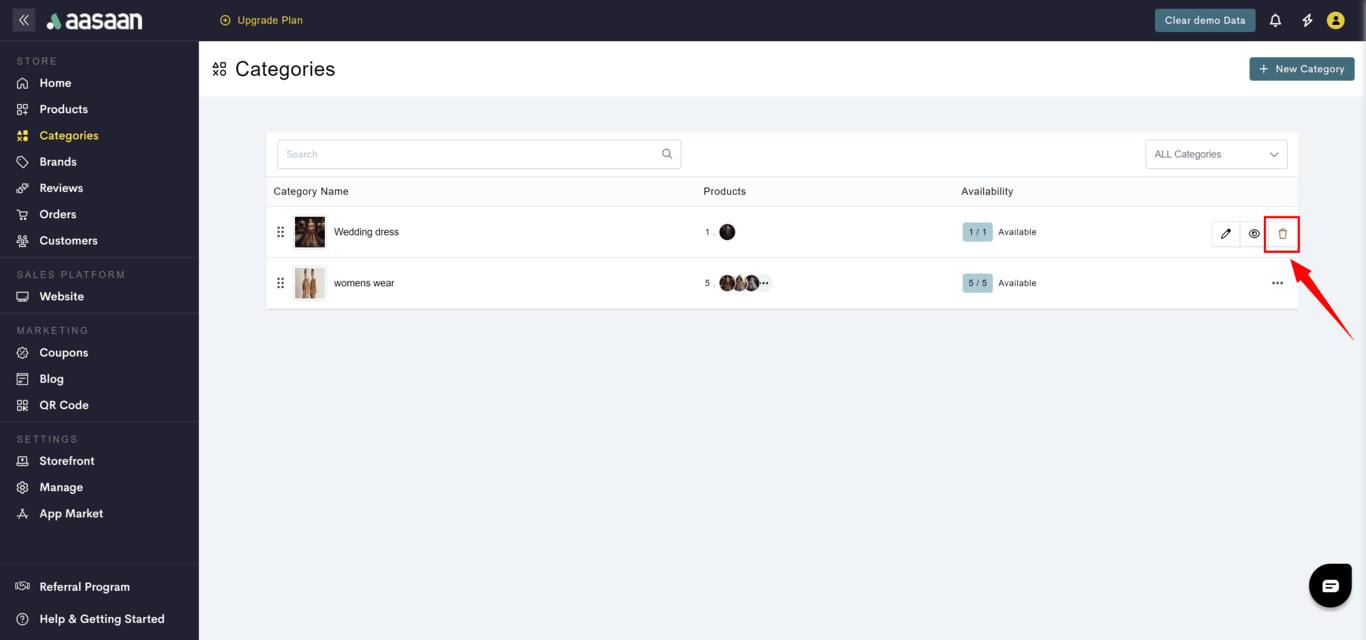
* Click on the **🗑** icon.
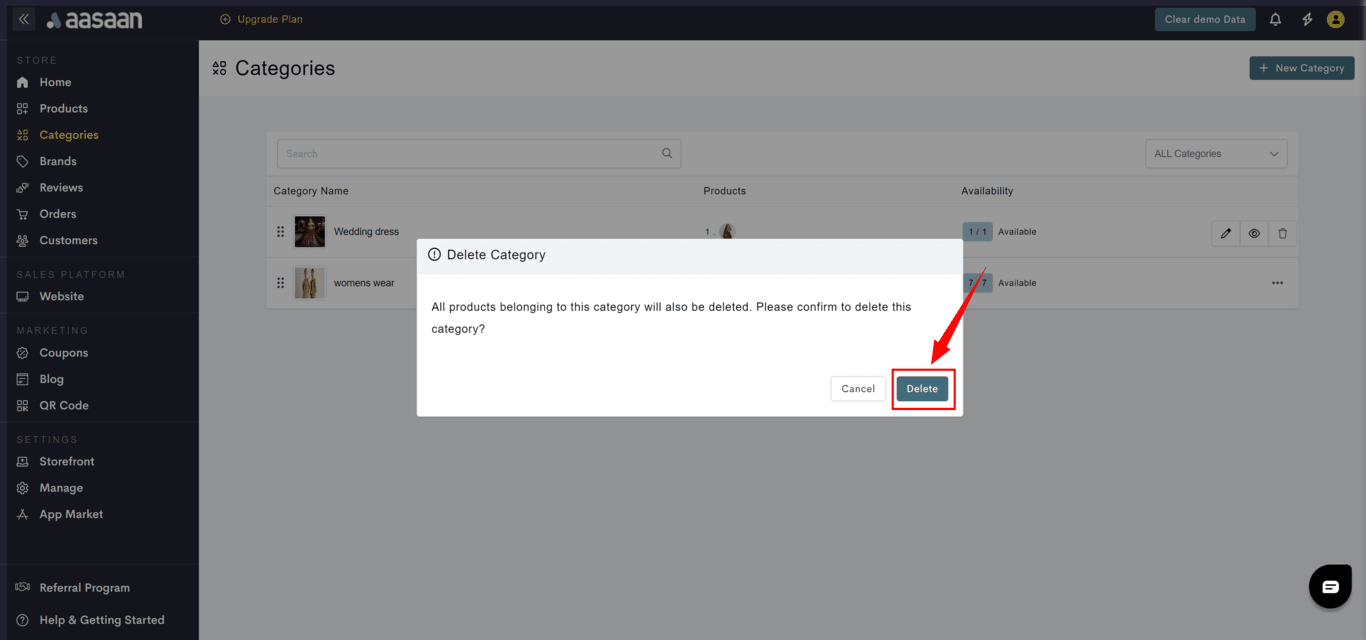
* A confirmation popup will be shown for your acknowledgement.
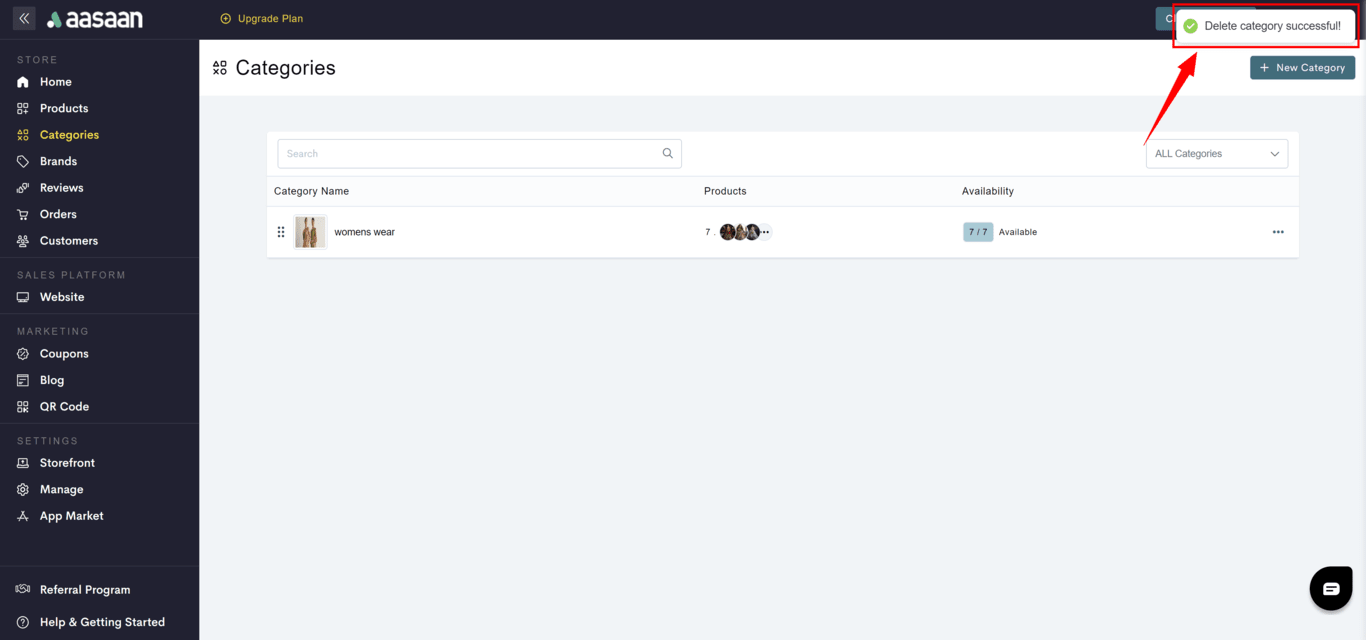
* When you press **delete**, the category would be deleted.
## Delete Category
When you delete a category, all the products associated with the category will also be deleted.
To delete a category in your store:
* Log in to your aasaan desktop admin panel and click on **Categories**.
* Click on **...** at the category you want to delete.
* Click on the **🗑** icon.
* A confirmation popup will be shown for your acknowledgement.
* When you press **delete**, the category would be deleted.
 ## Frequently Asked Questions
* To add a sub-category within a category, choose the relevant category from the parent category drop down list when creating/editing the sub-category.
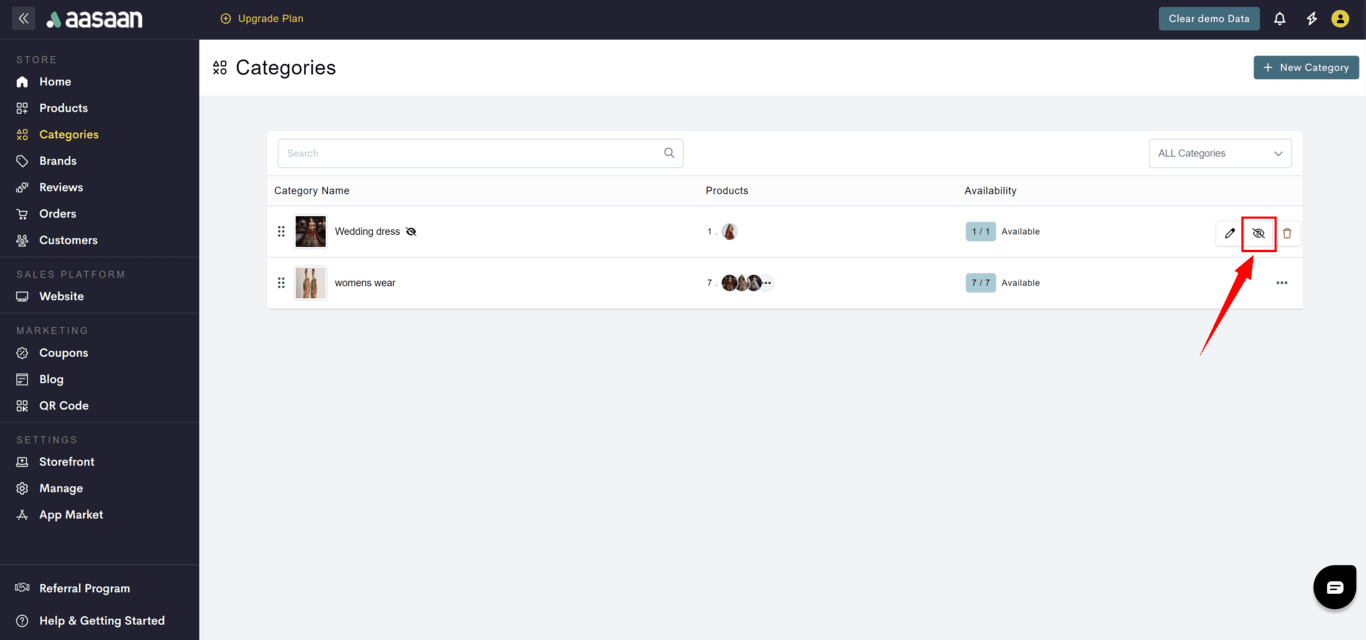
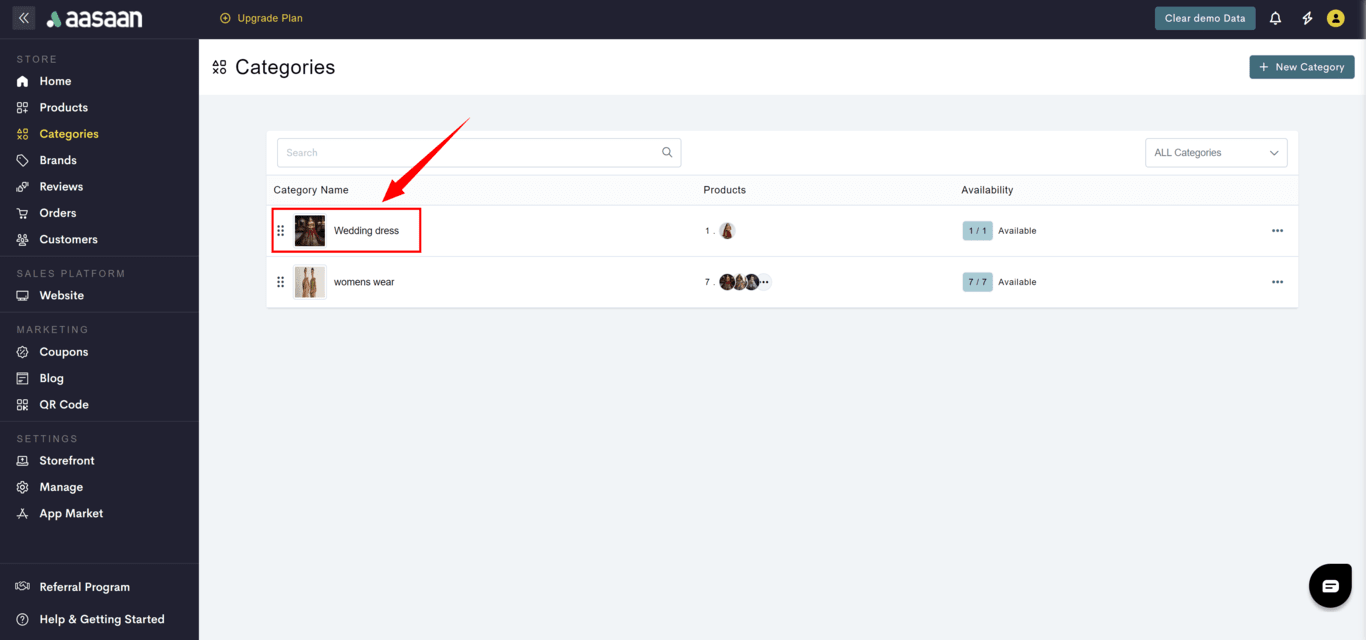
To hide a category in your store:
* Log in to your aasaan desktop admin panel and click on **Categories**.
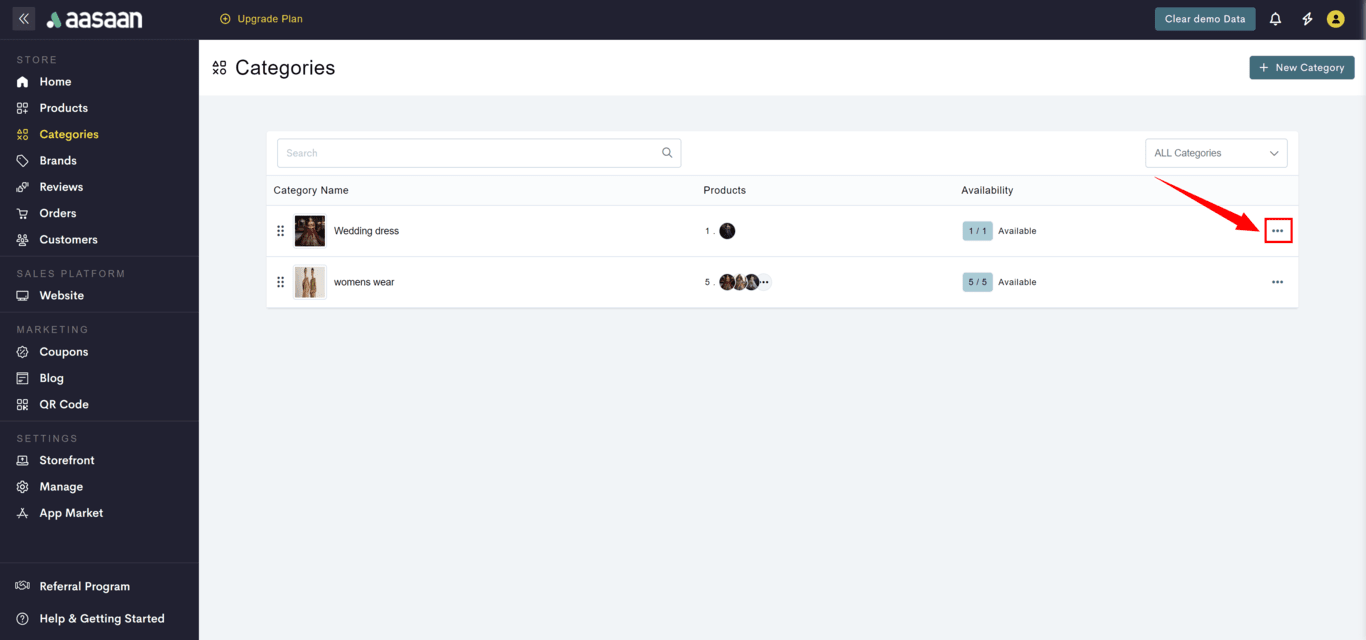
* Click on **...** at the category
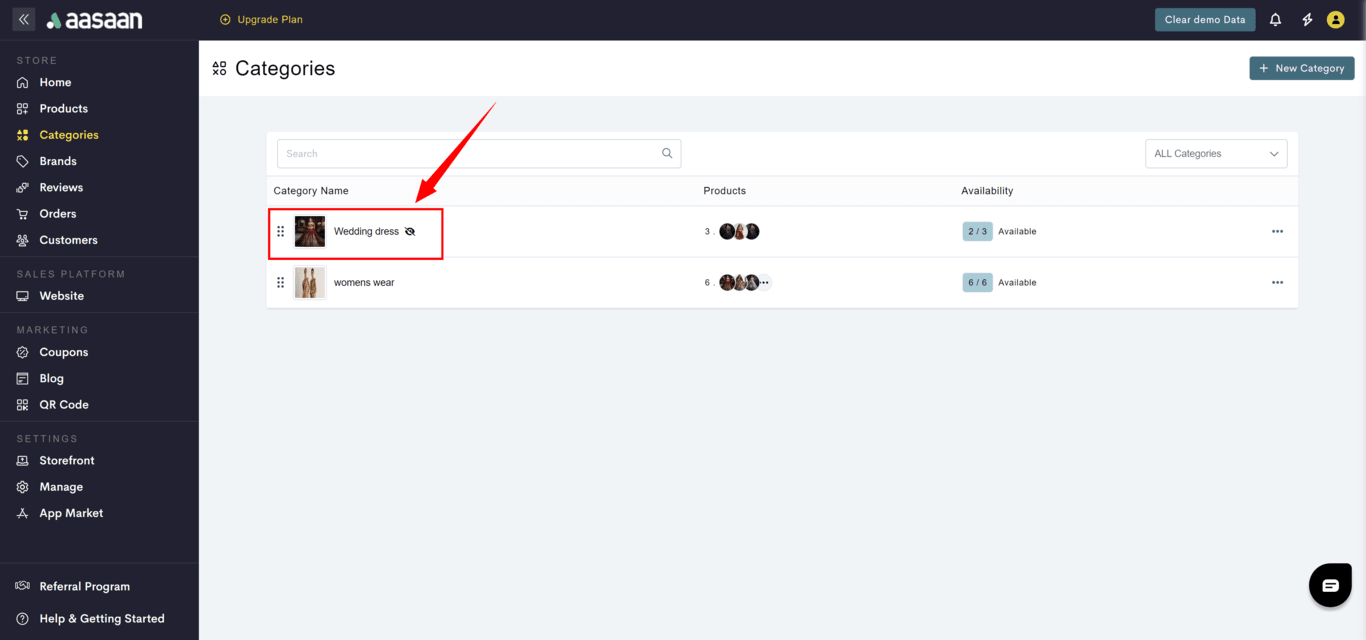
* if you want to hide, click on the **hide** icon.
* if you want to unhide, click on the **👁** icon. !Eye with slash
## Frequently Asked Questions
* To add a sub-category within a category, choose the relevant category from the parent category drop down list when creating/editing the sub-category.
To hide a category in your store:
* Log in to your aasaan desktop admin panel and click on **Categories**.
* Click on **...** at the category
* if you want to hide, click on the **hide** icon.
* if you want to unhide, click on the **👁** icon. !Eye with slash
 * If you wish to list your products on Google Merchant Center,
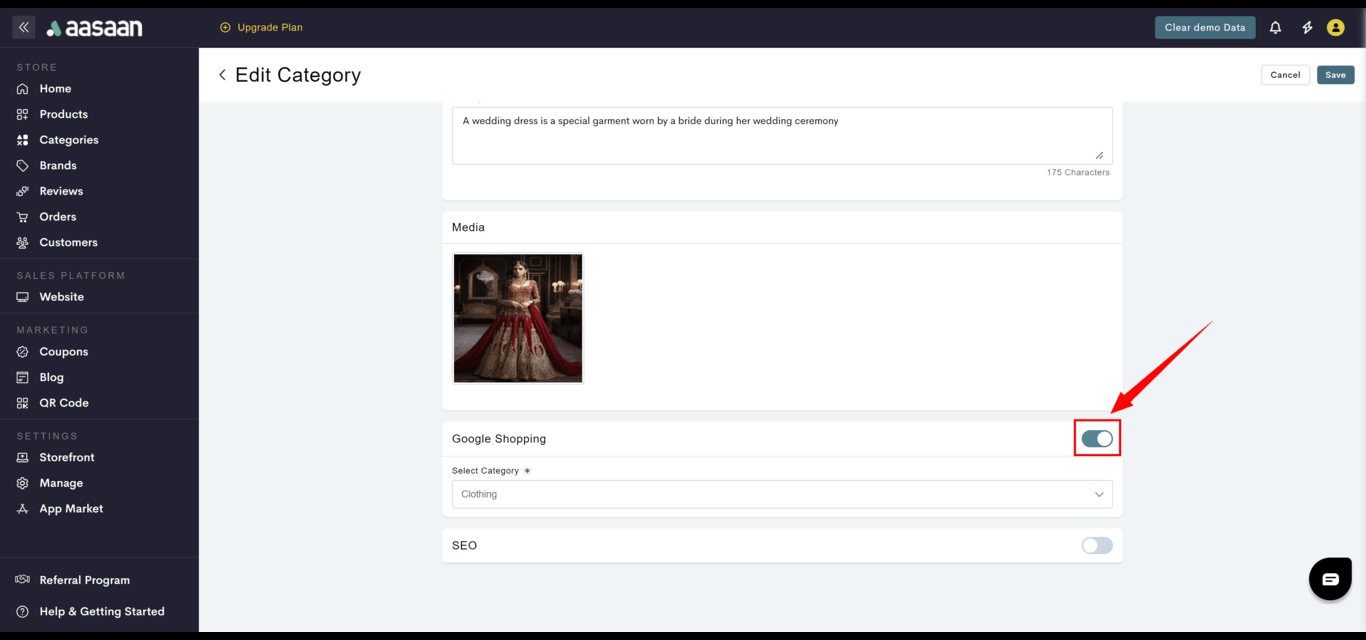
* Navigate to the category and click on the toggle to enable **Google Shopping**.
* Select the Google Shopping Category that most closely matches your category.
Note: Google has its own list of categories for ecommerce businesses. This step is important if you want to list your products on Google Merchant Center. [Click here](https://www.google.com/basepages/producttype/taxonomy.en-US.txt) to view Google's full list of categories.
* If you wish to list your products on Google Merchant Center,
* Navigate to the category and click on the toggle to enable **Google Shopping**.
* Select the Google Shopping Category that most closely matches your category.
Note: Google has its own list of categories for ecommerce businesses. This step is important if you want to list your products on Google Merchant Center. [Click here](https://www.google.com/basepages/producttype/taxonomy.en-US.txt) to view Google's full list of categories.
 * If you wish to include category level SEO information.
* Navigate to the category and Click on the toggle to enable **SEO**
* Provide SEO information like:
* Page title
* Description
* Image
* Click on **Save**.
* If you wish to include category level SEO information.
* Navigate to the category and Click on the toggle to enable **SEO**
* Provide SEO information like:
* Page title
* Description
* Image
* Click on **Save**.