> ## Documentation Index
> Fetch the complete documentation index at: https://help.aasaan.app/llms.txt
> Use this file to discover all available pages before exploring further.
# Shopify Connect
> How to connect your shopify store to aasaan storefront
Your amazing Storefront experience is right here! Head over to this [link](https://admin.aasaan.app/auth/register) for a quick sign up.
### Setting up your Shopify store
**Shopify Custom Apps must be enabled**
To enable custom apps in your Shopify store
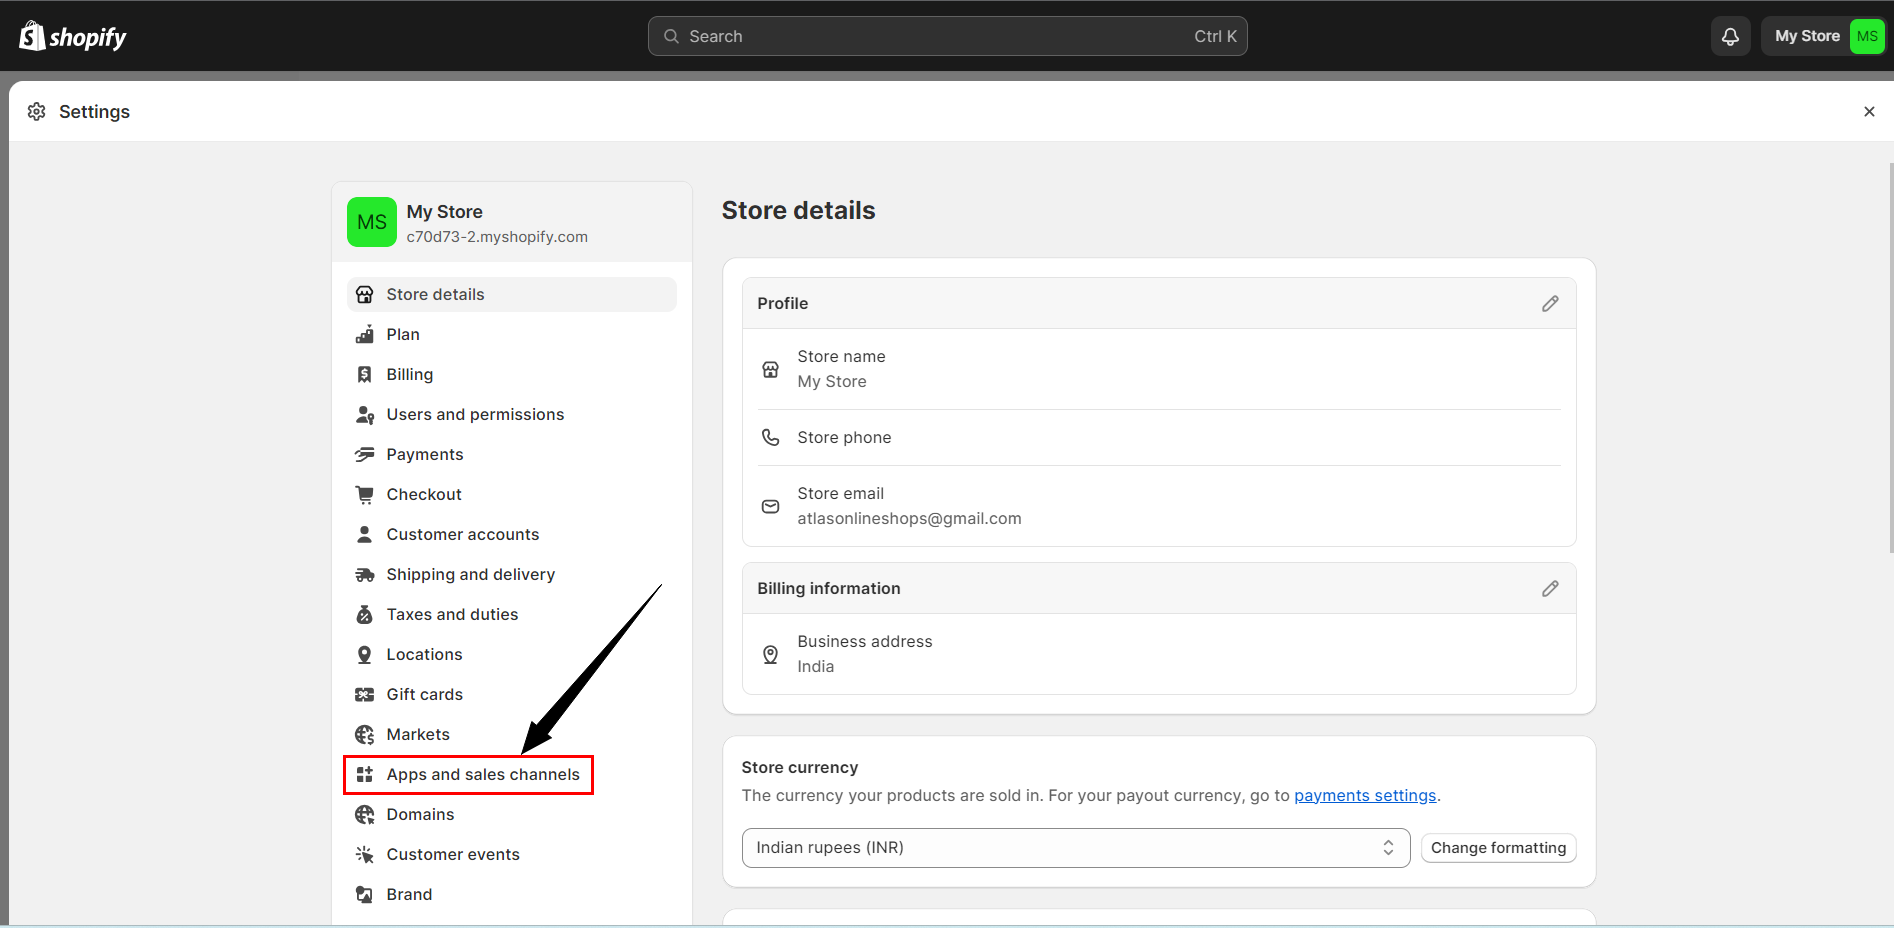
* From your Shopify admin, click Settings > Apps and sales channels.
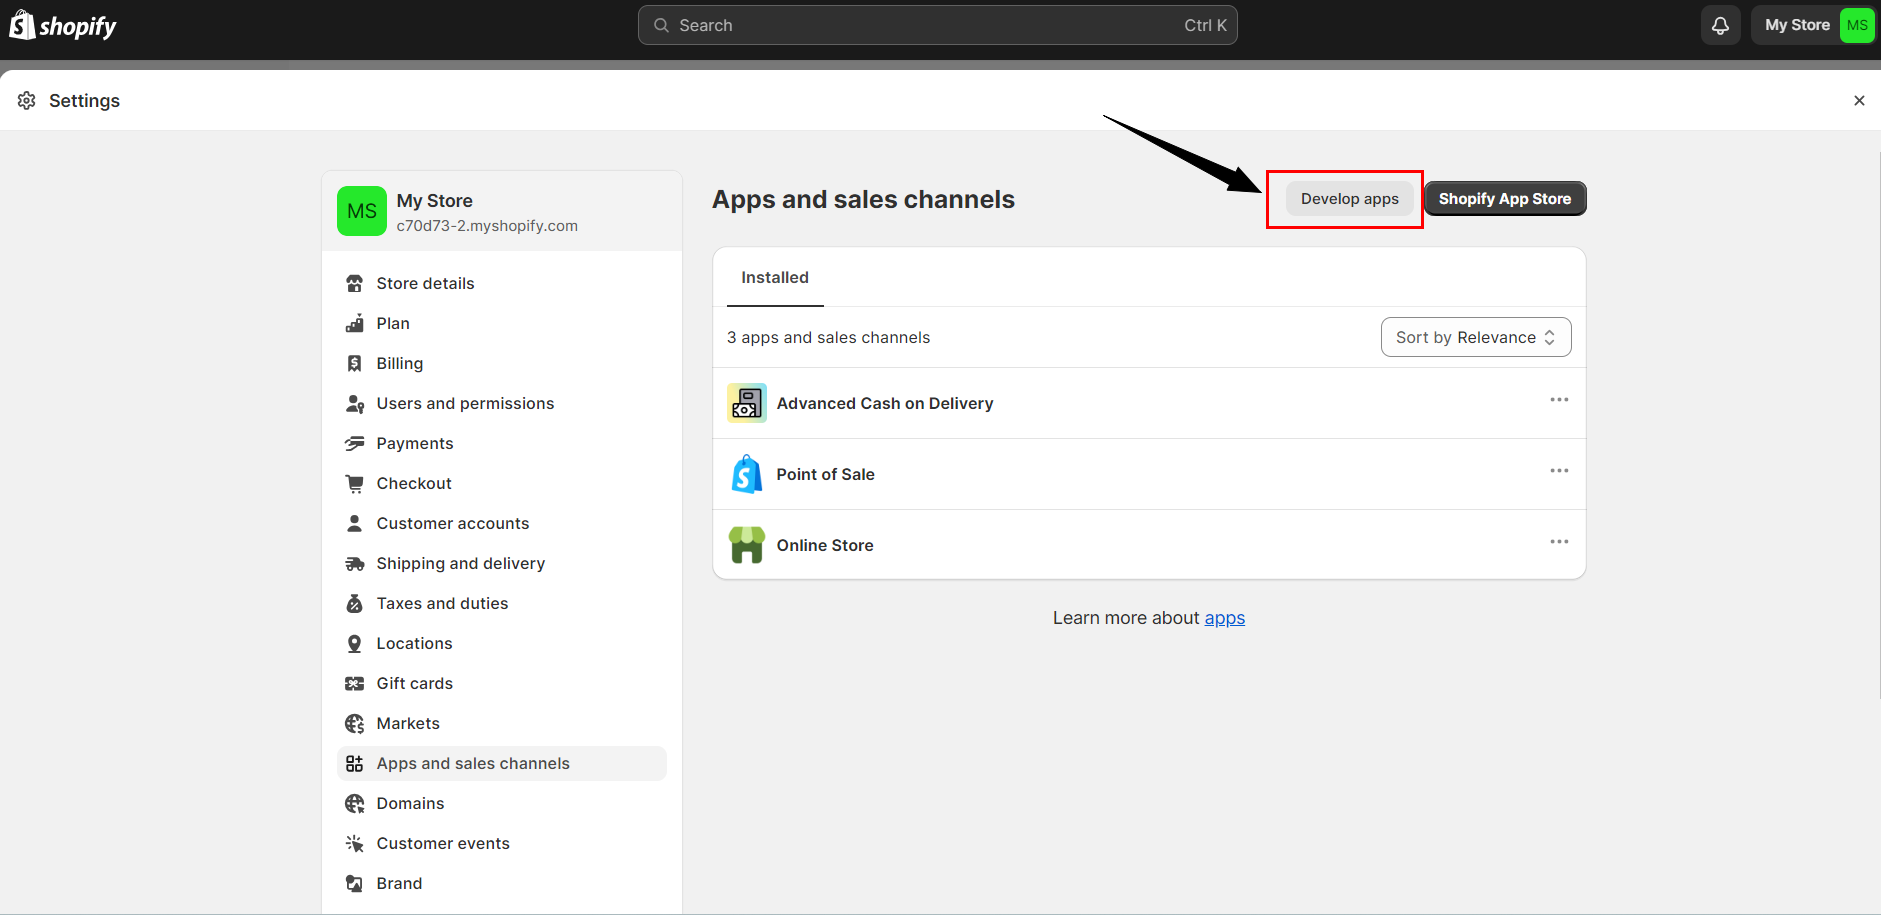
* Click Develop apps.
* Click Allow custom app development.
* Read the warning and information provided, and then click Allow custom app development.
Learn more about custom apps here in the [Shopify documentation](https://help.shopify.com/en/manual/apps/custom-apps).
After enabling Custom Apps in your Shopify store, to get started you need to create a Custom App and install the Custom App. To do so:
* From your Shopify admin, click Settings > Apps and sales channels.
* Click ***Develop apps***.
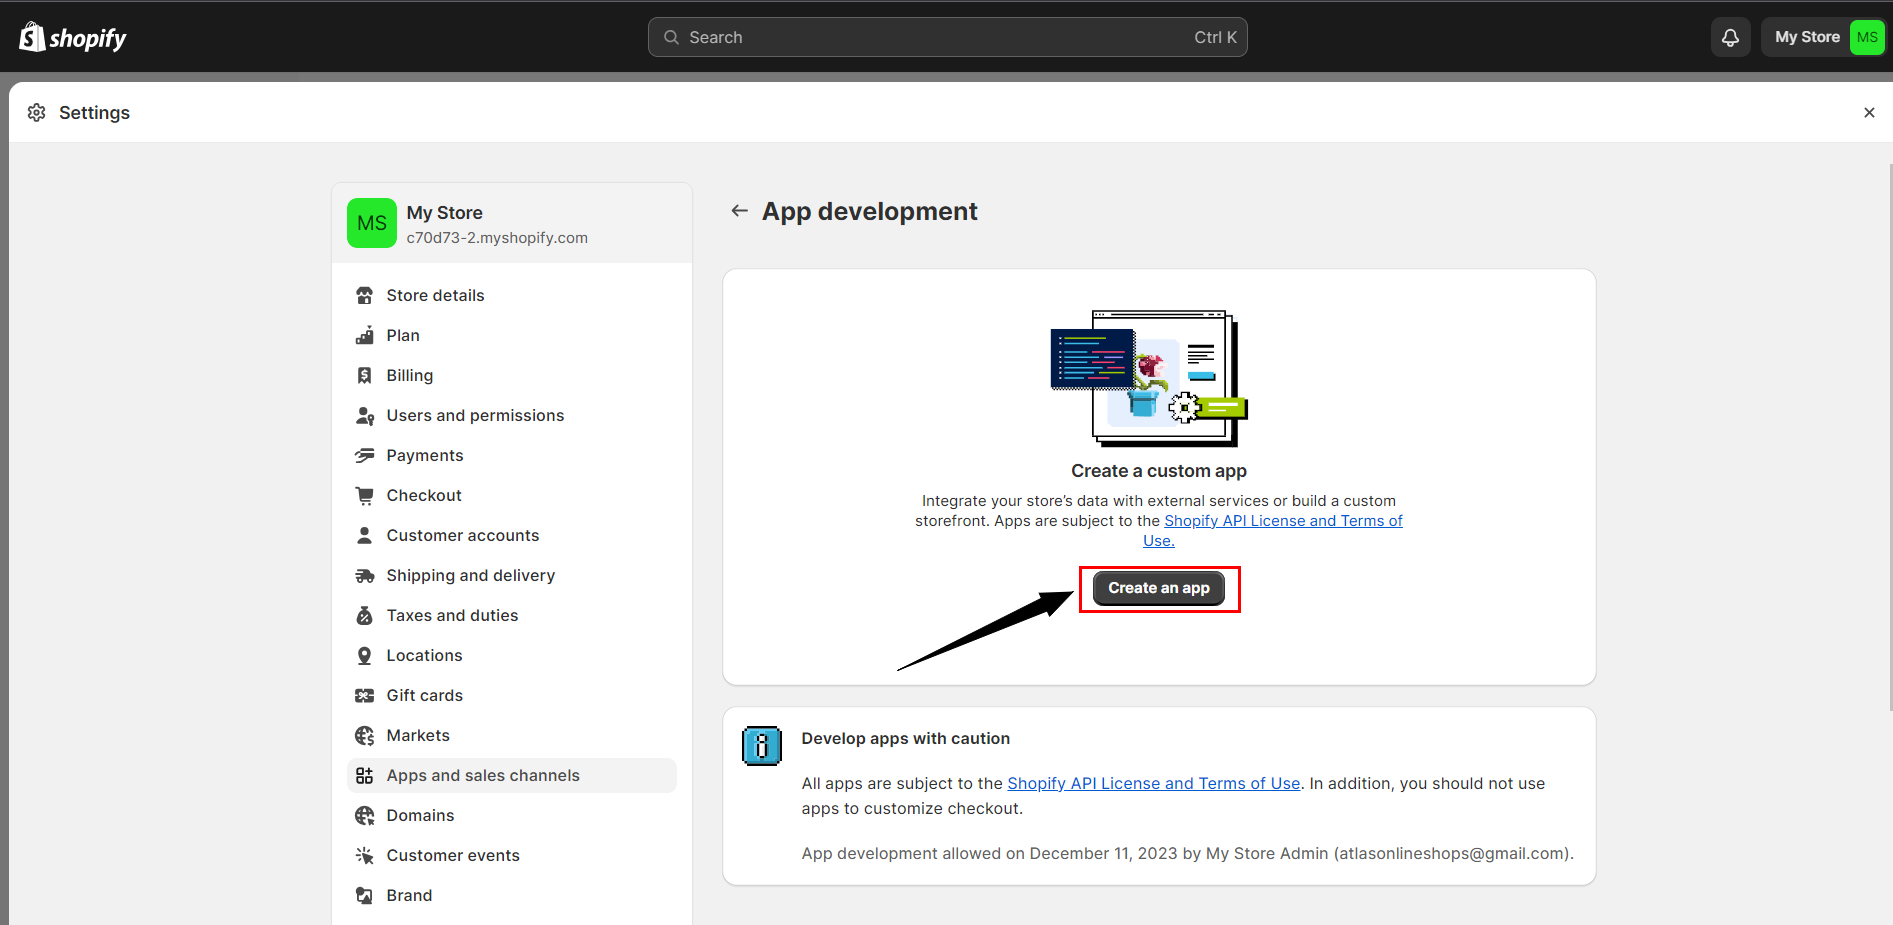
* Click ***Create an app***.
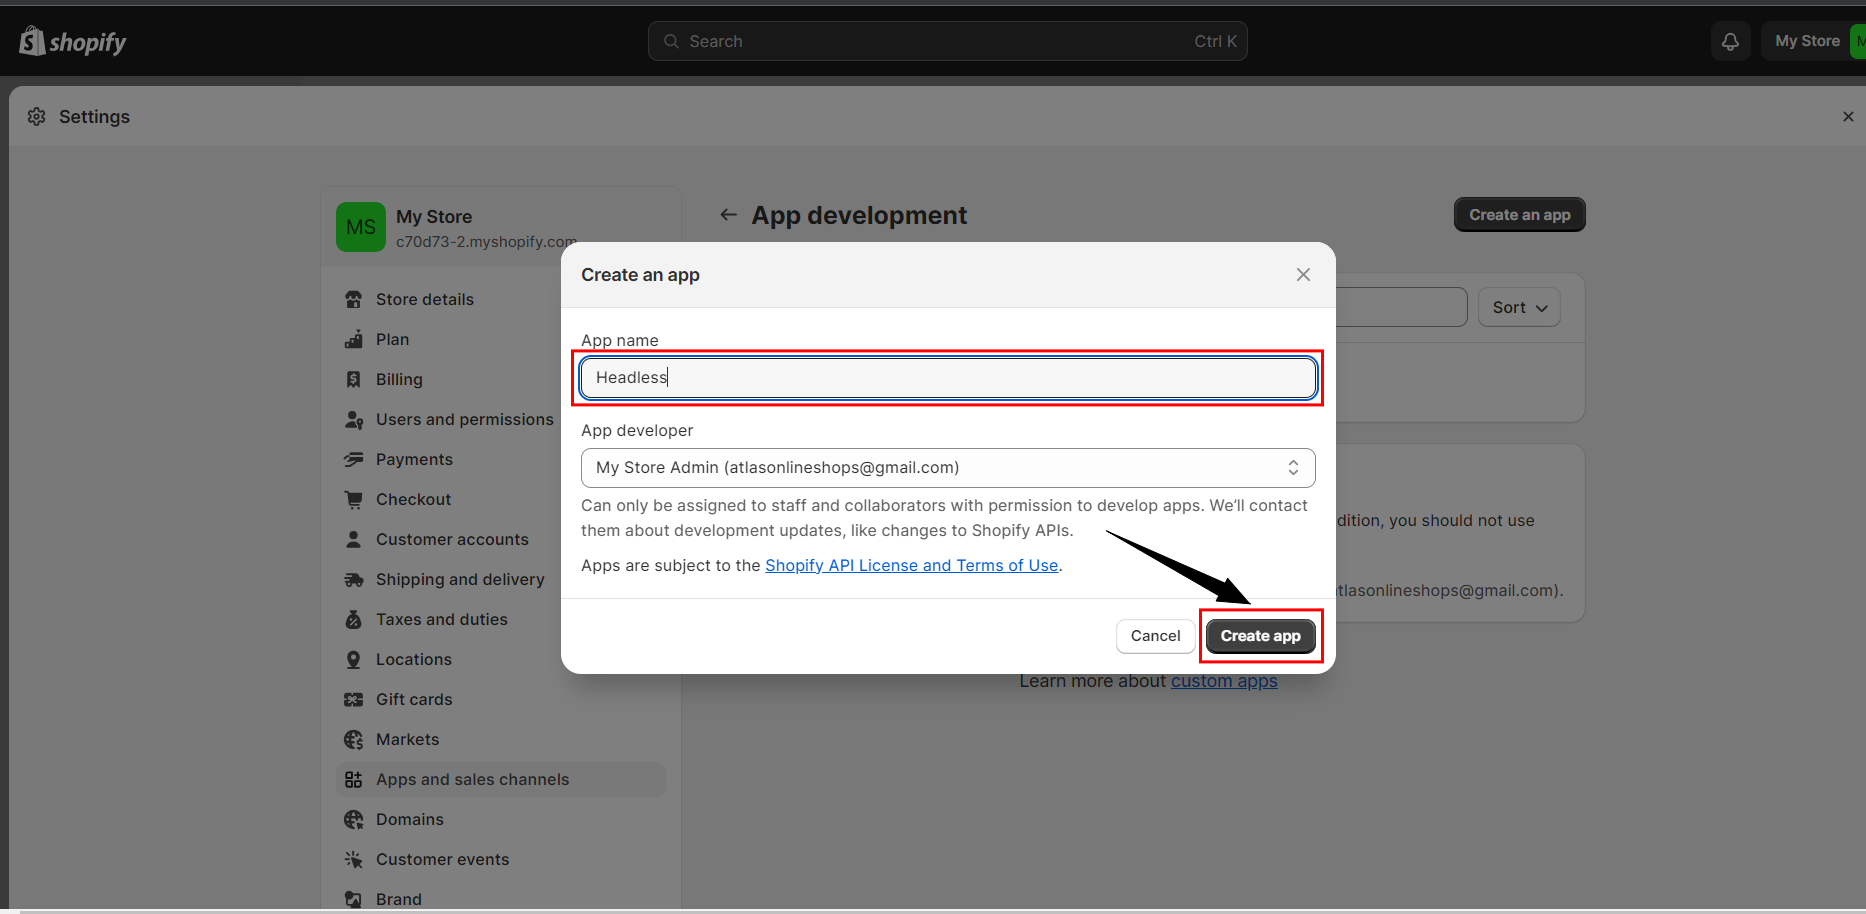
* In the modal window, enter the App name and select an App developer. The app developer can be the store owner or any staff or collaborator account with the Develop apps permission.
* Click ***Create app***.
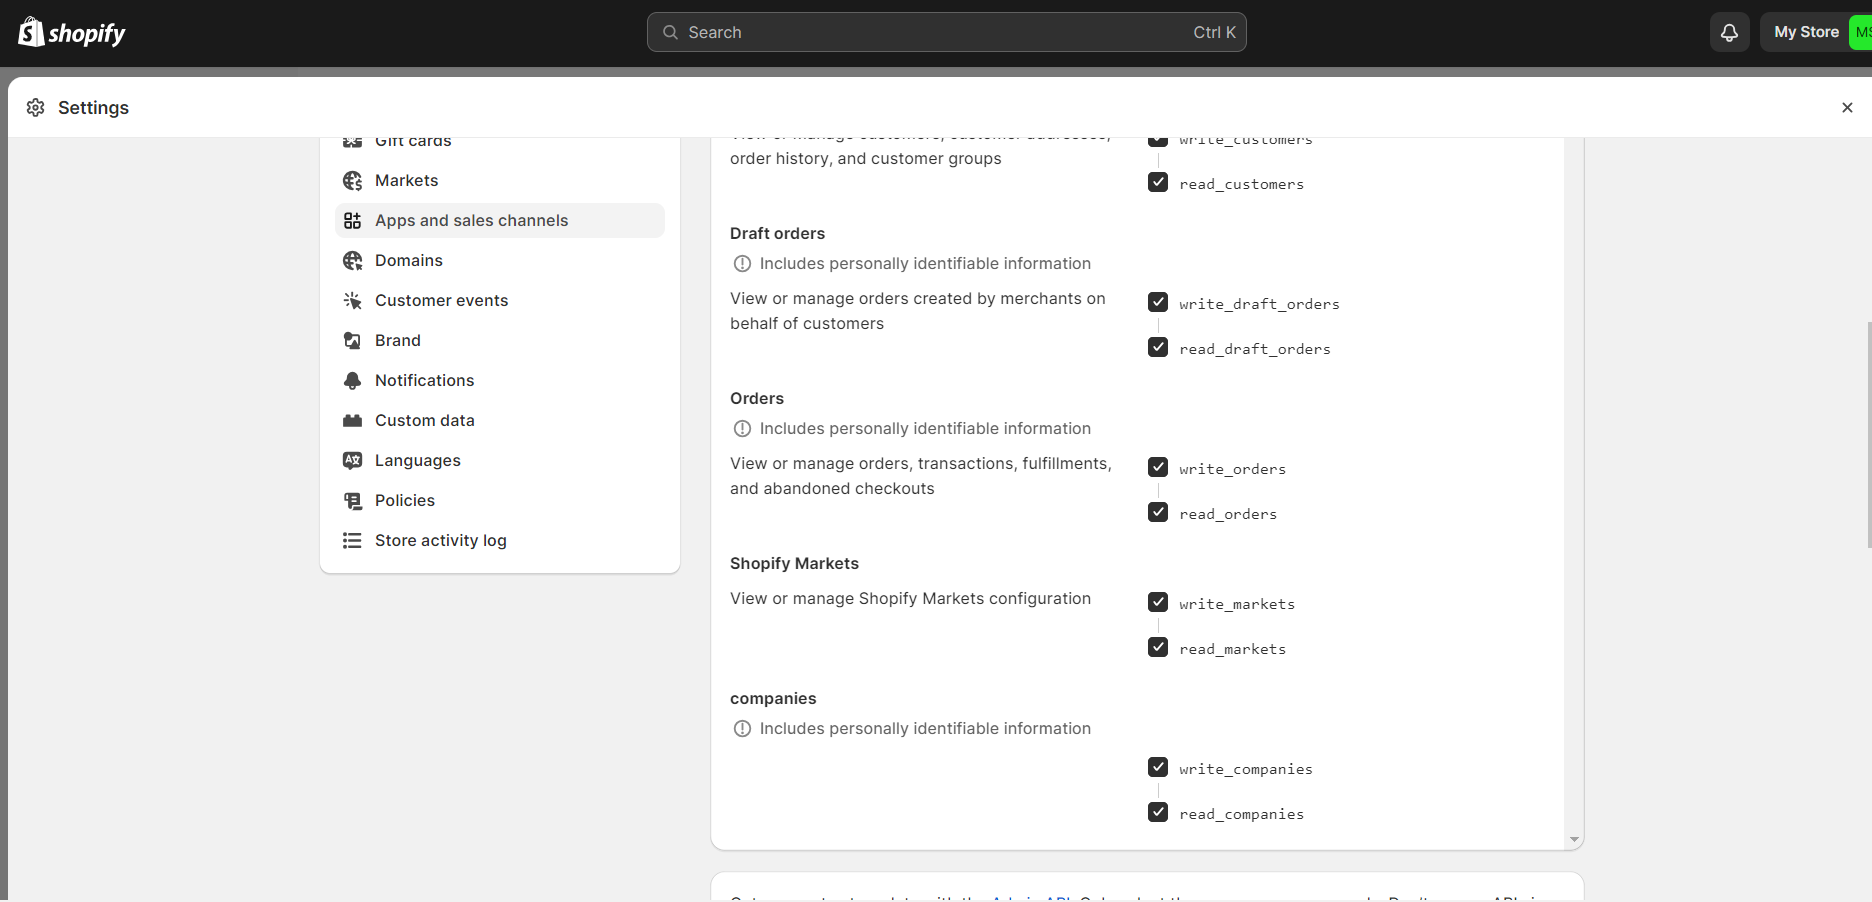
 For **aasaan** to work correctly, you must configure two API scopes:
* **Admin API Scopes:** aasaan will use these scopes to sync and manage your products and store assets.
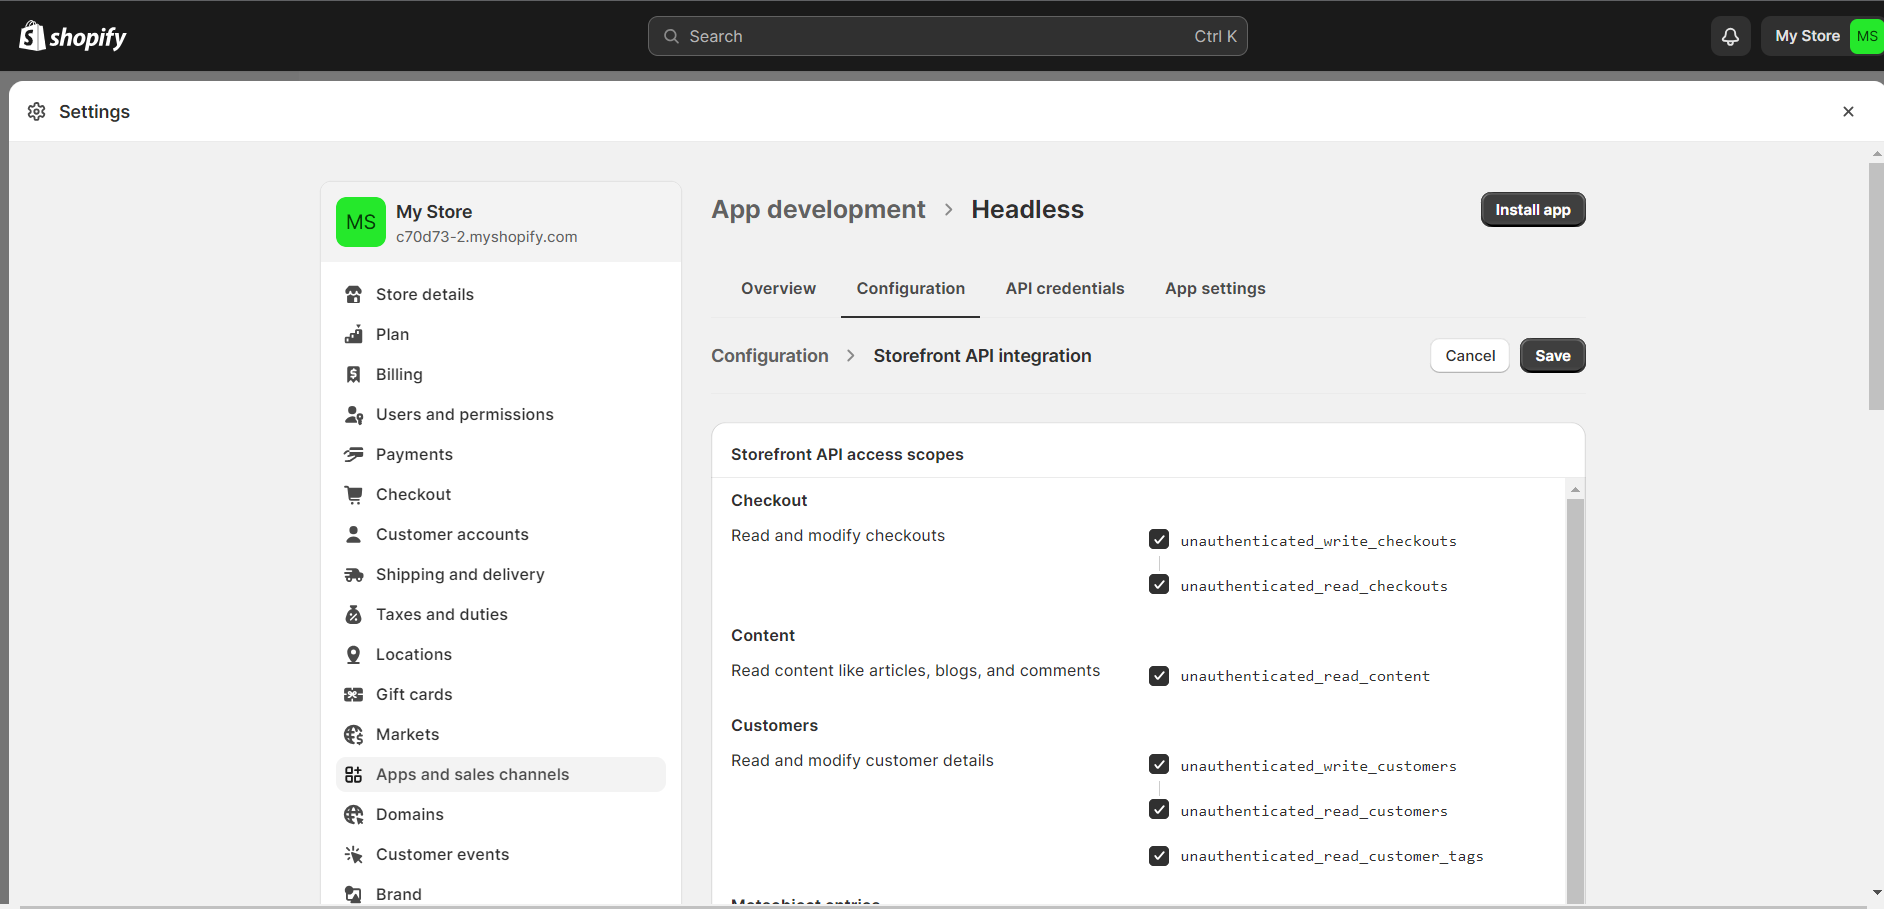
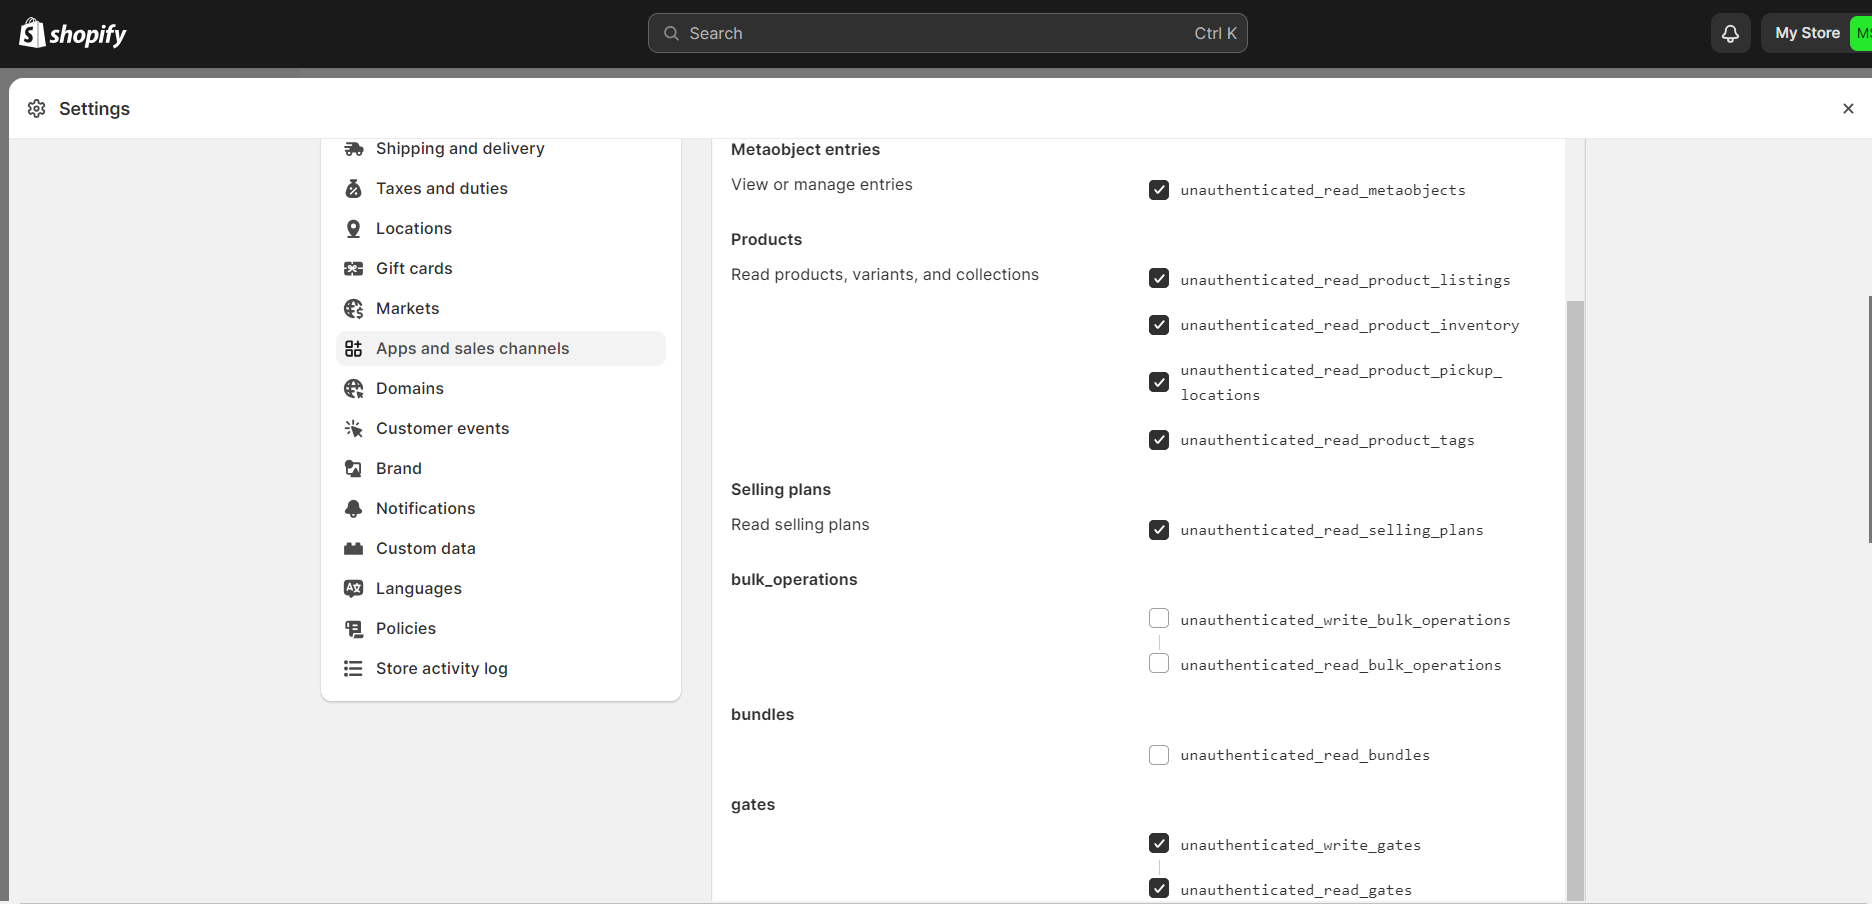
* **Storefront API Scopes:** Which are required for the Shopify Storefront APIs functionality (Cart, Customers, Market, etc).
For **aasaan** to work correctly, you must configure two API scopes:
* **Admin API Scopes:** aasaan will use these scopes to sync and manage your products and store assets.
* **Storefront API Scopes:** Which are required for the Shopify Storefront APIs functionality (Cart, Customers, Market, etc).
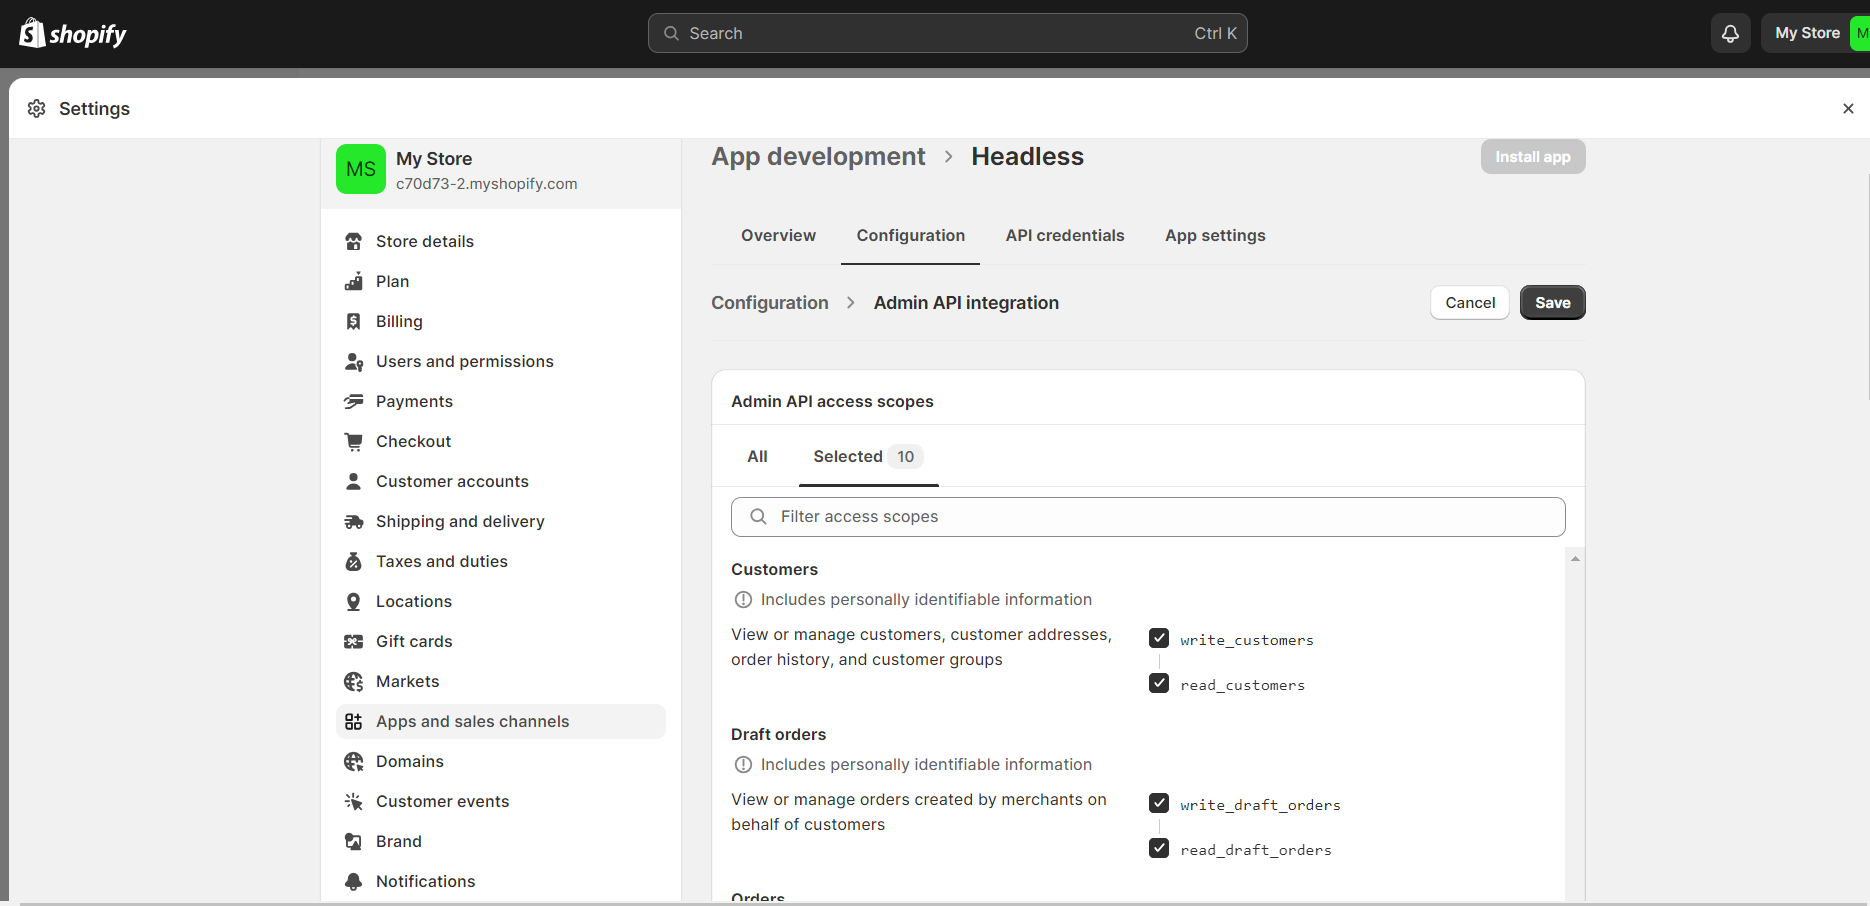
* To start, first, configure your Admin API Scopes:
* In your Custom App, click Configure Admin API scopes.
* Select all the scopes.
* Once done, click Save.
* Next, configure your Storefront API Scopes:
* In your Custom App, click Configure Storefront API scopes.
* Select all the scopes.
* Once done, click Save.
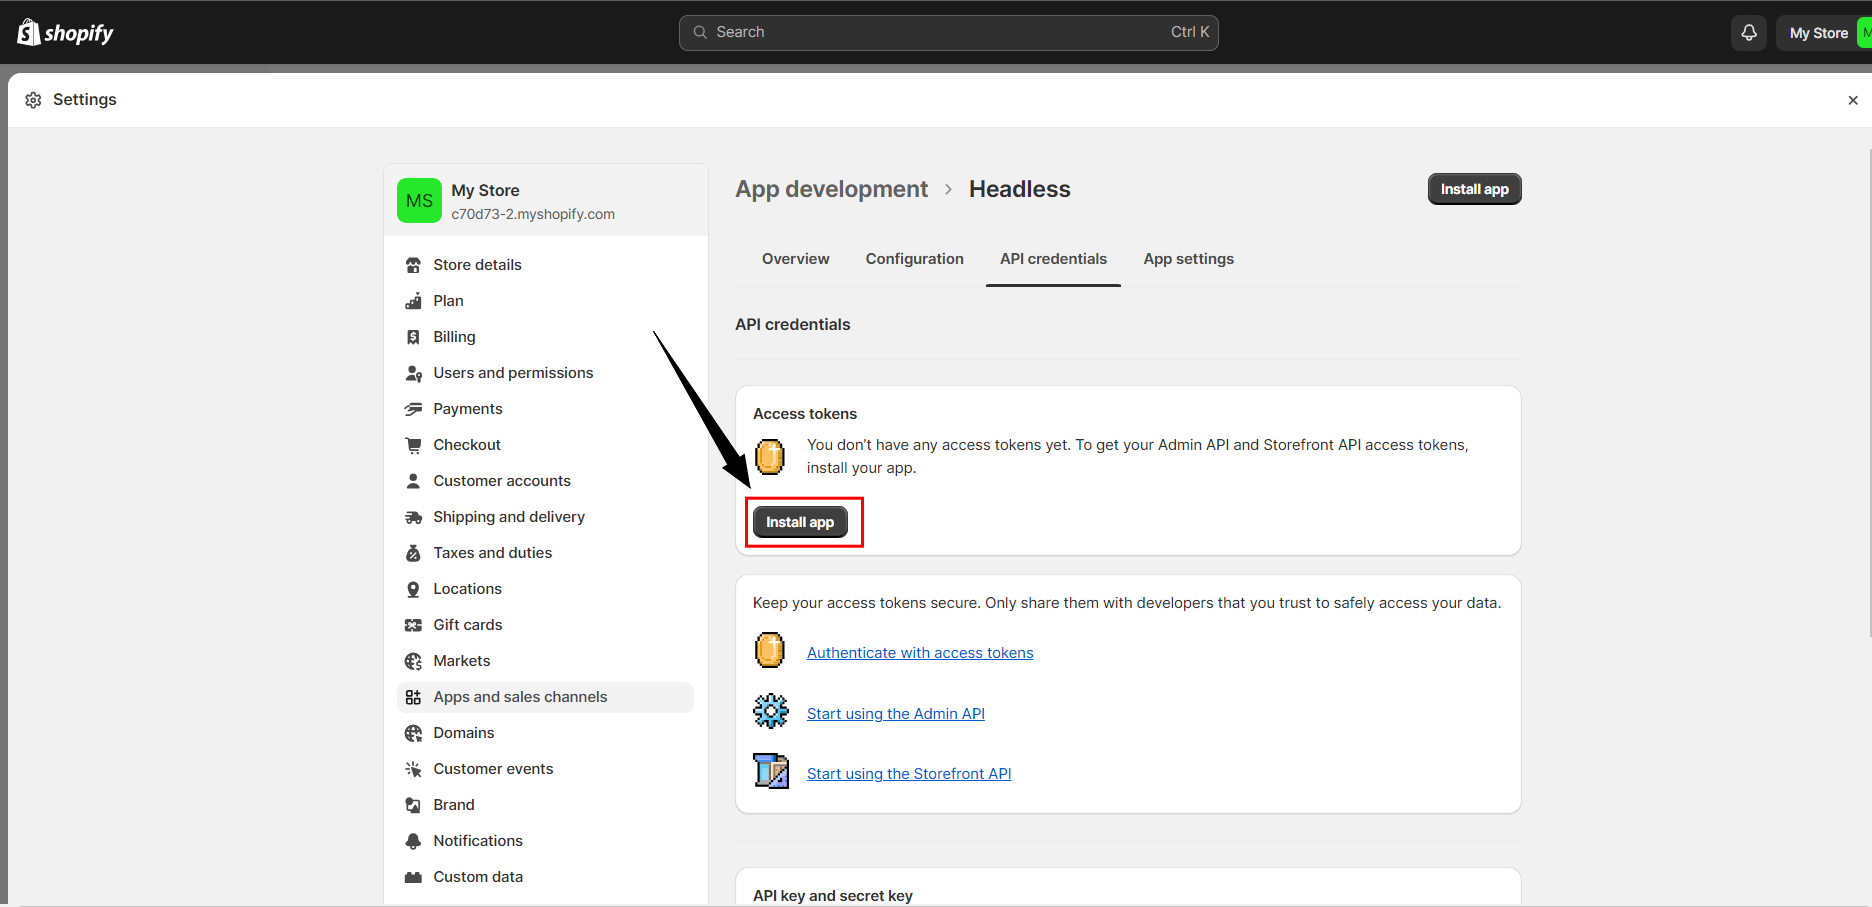
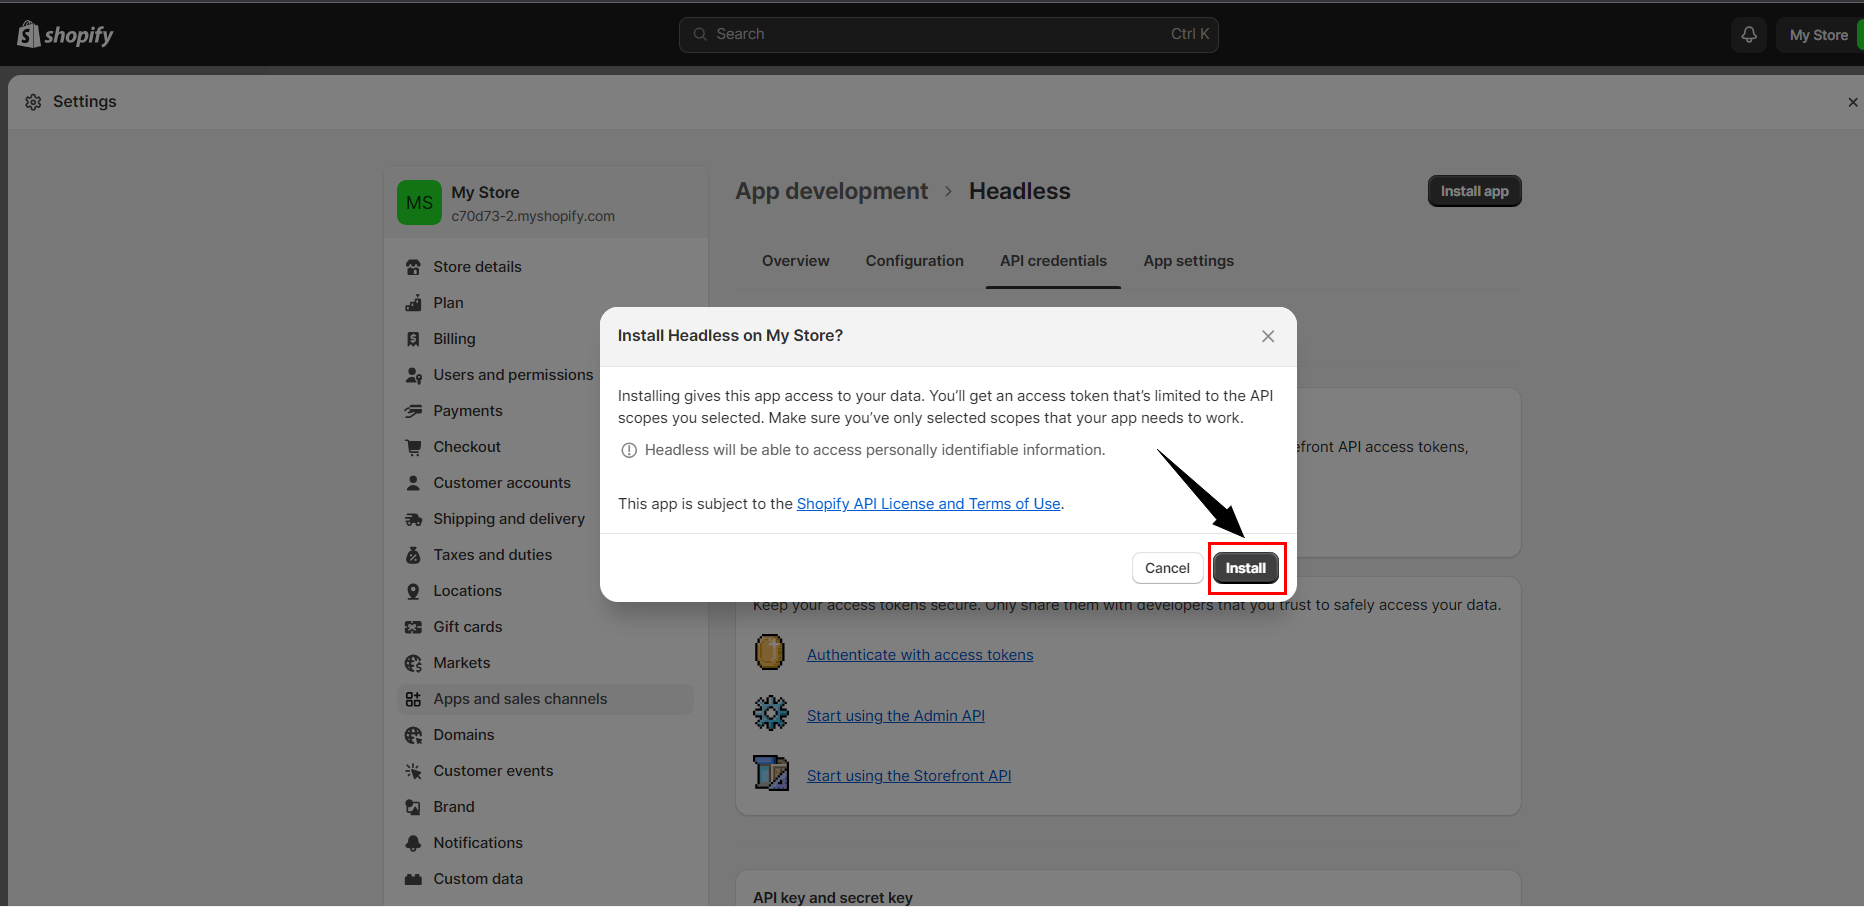
 When you are done setting up your API scopes, you now need to install the custom app to your Shopify Store, only then will you get your API keys.
* Click ***Install app***.
* In the modal window, click ***Install app***.
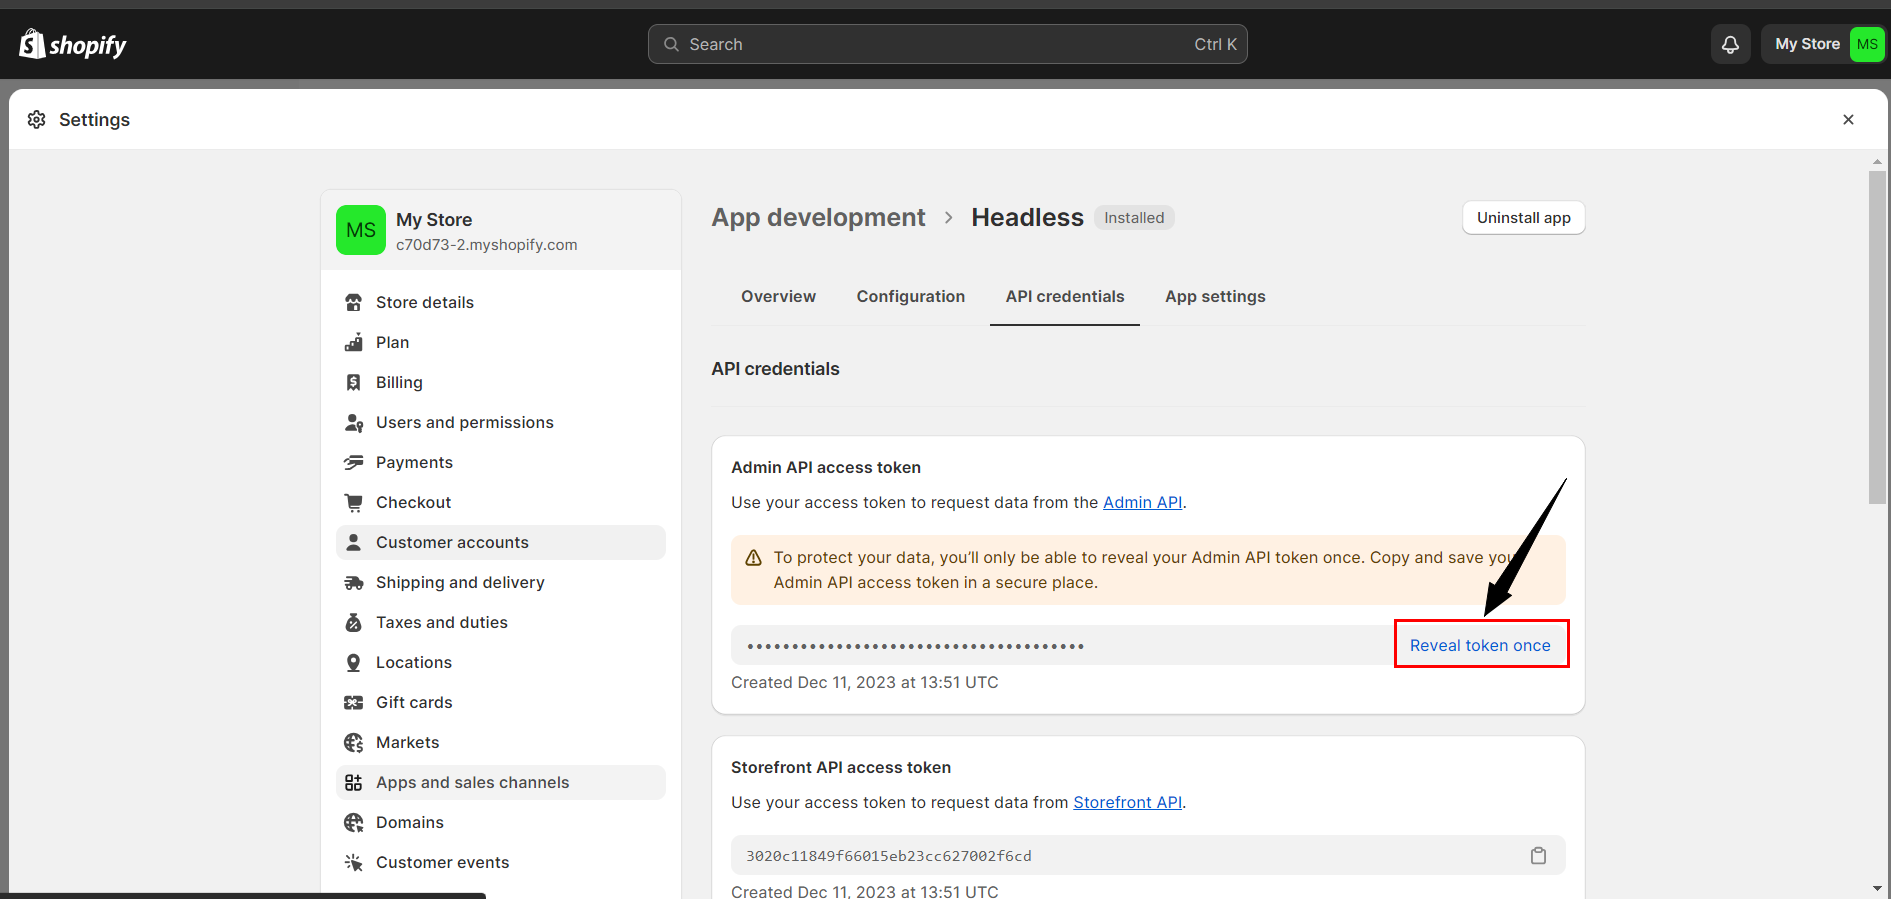
* Go to ***API Credentials***.
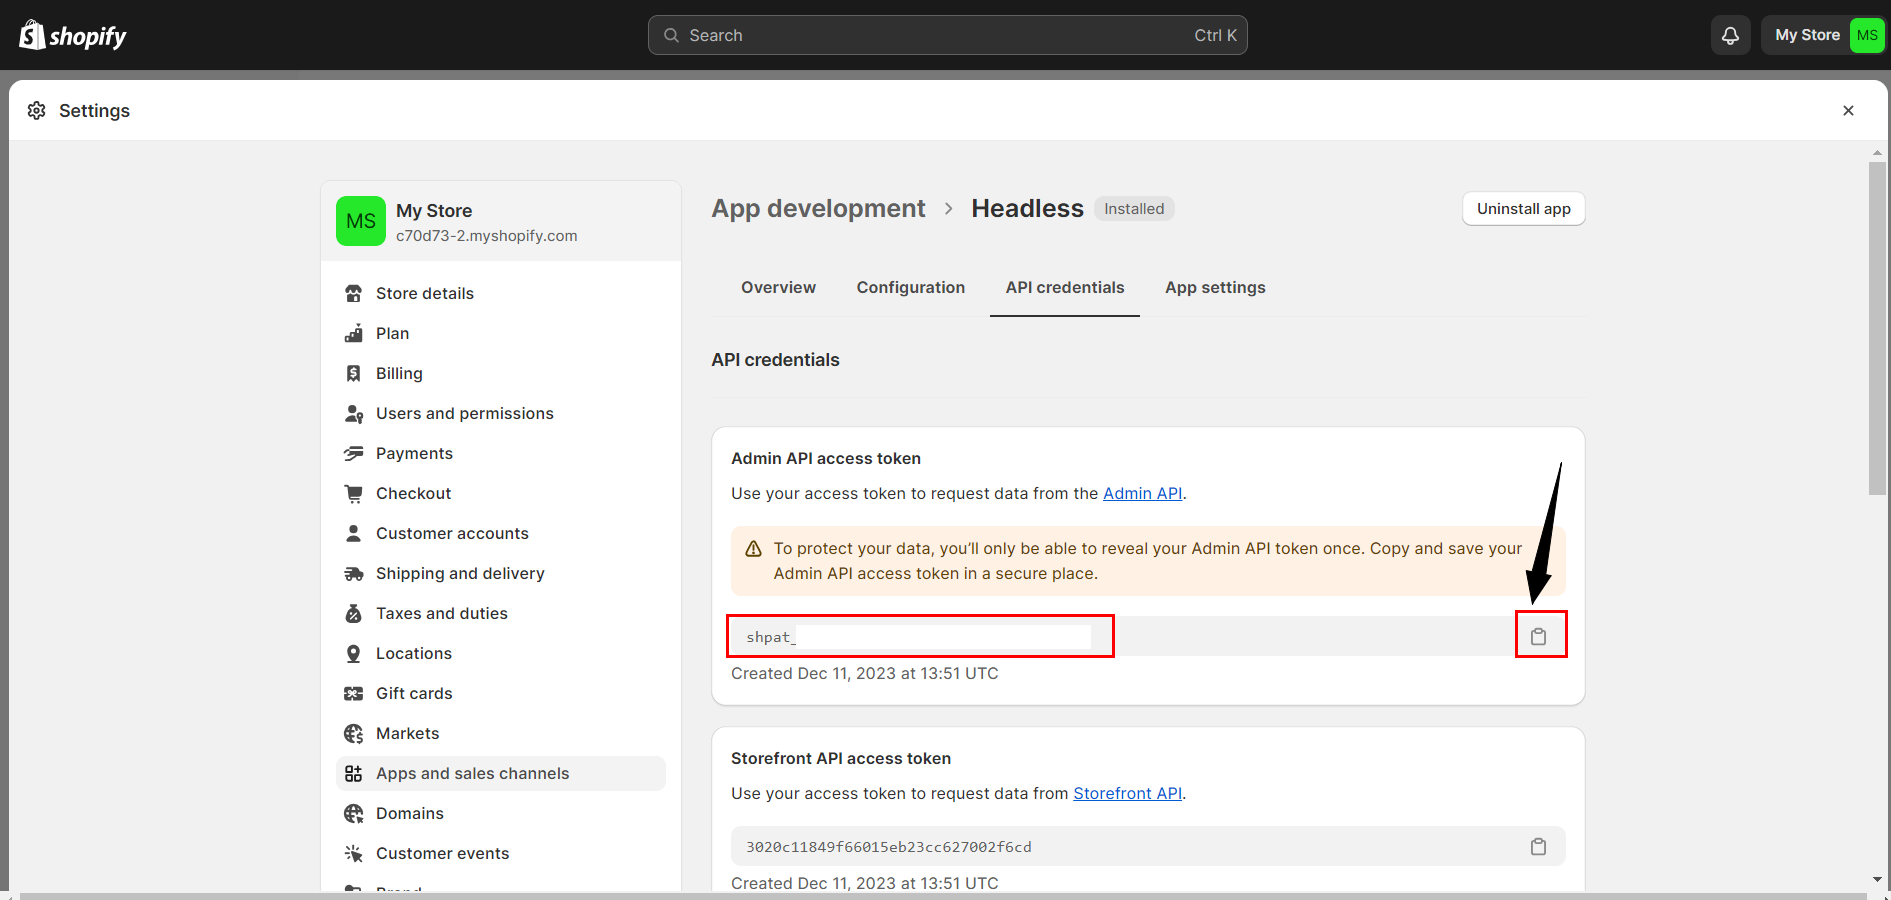
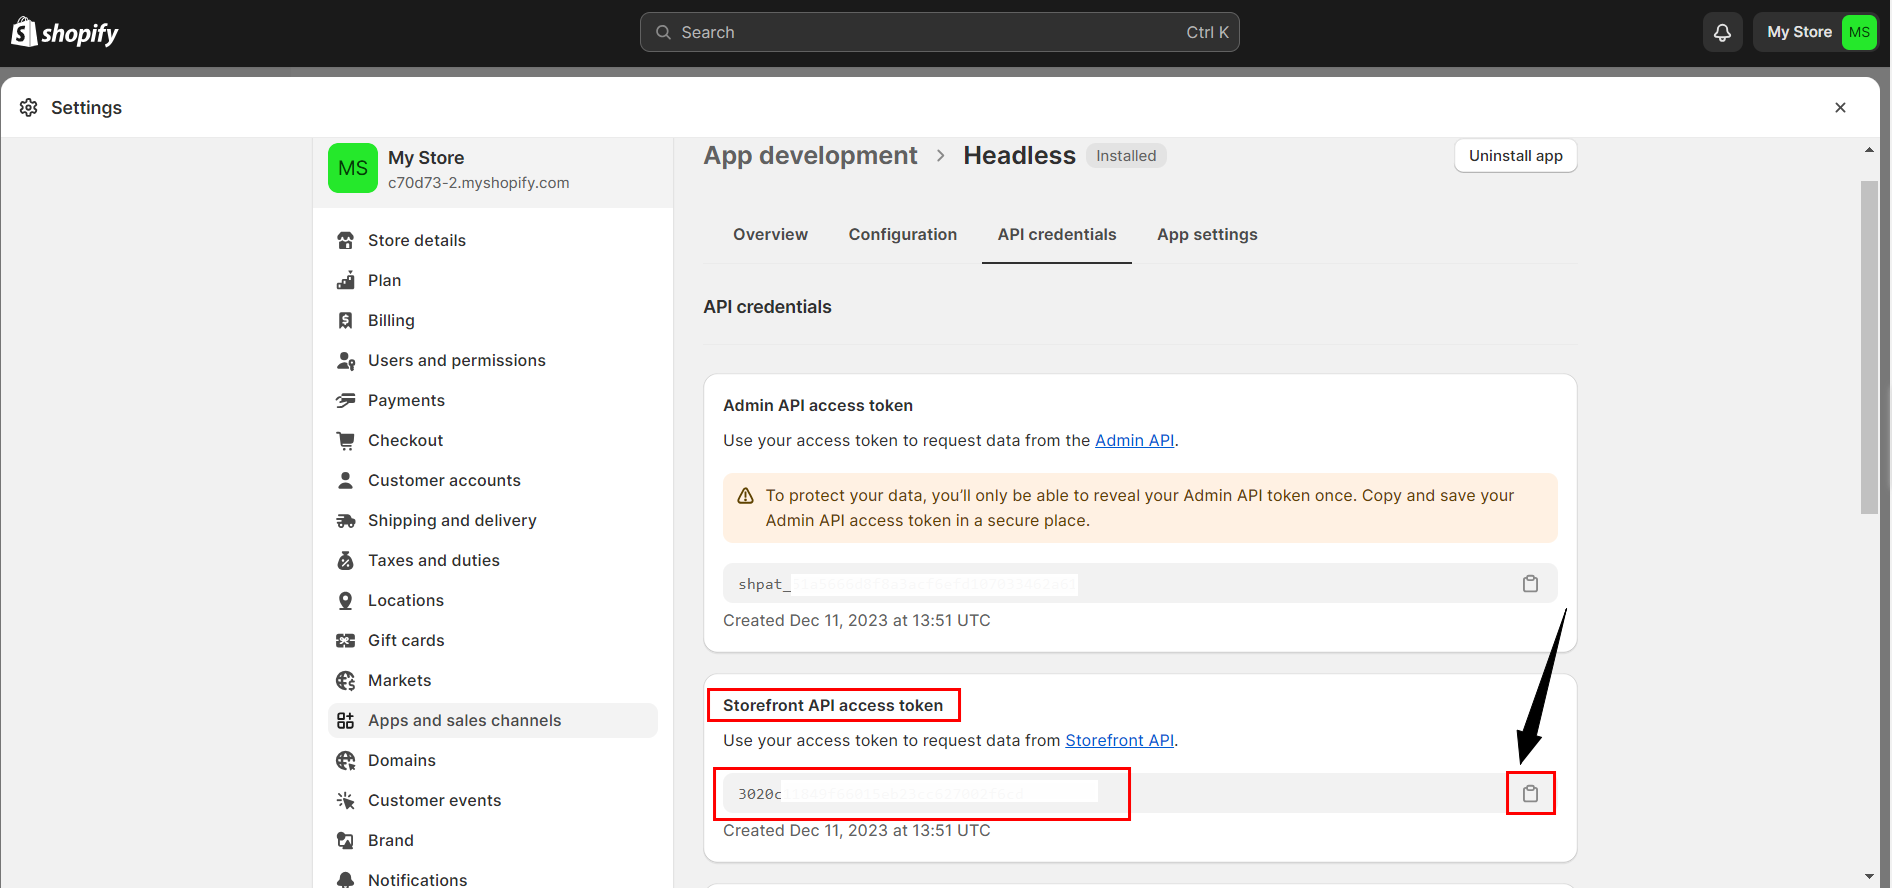
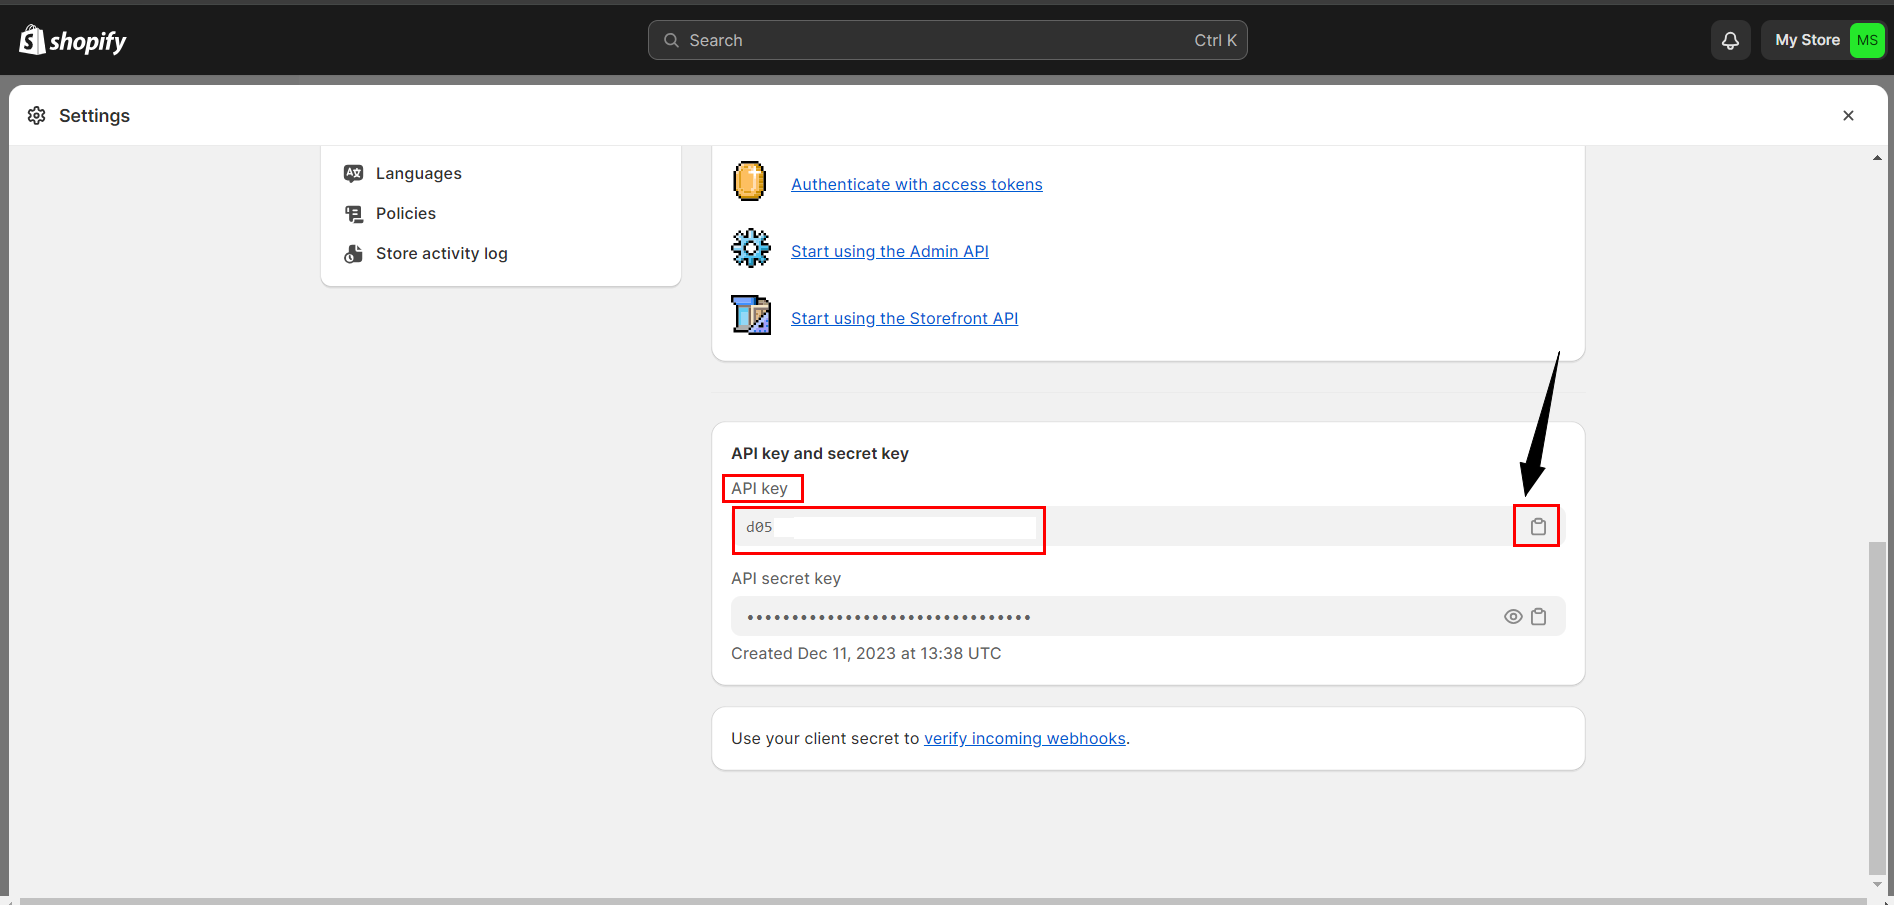
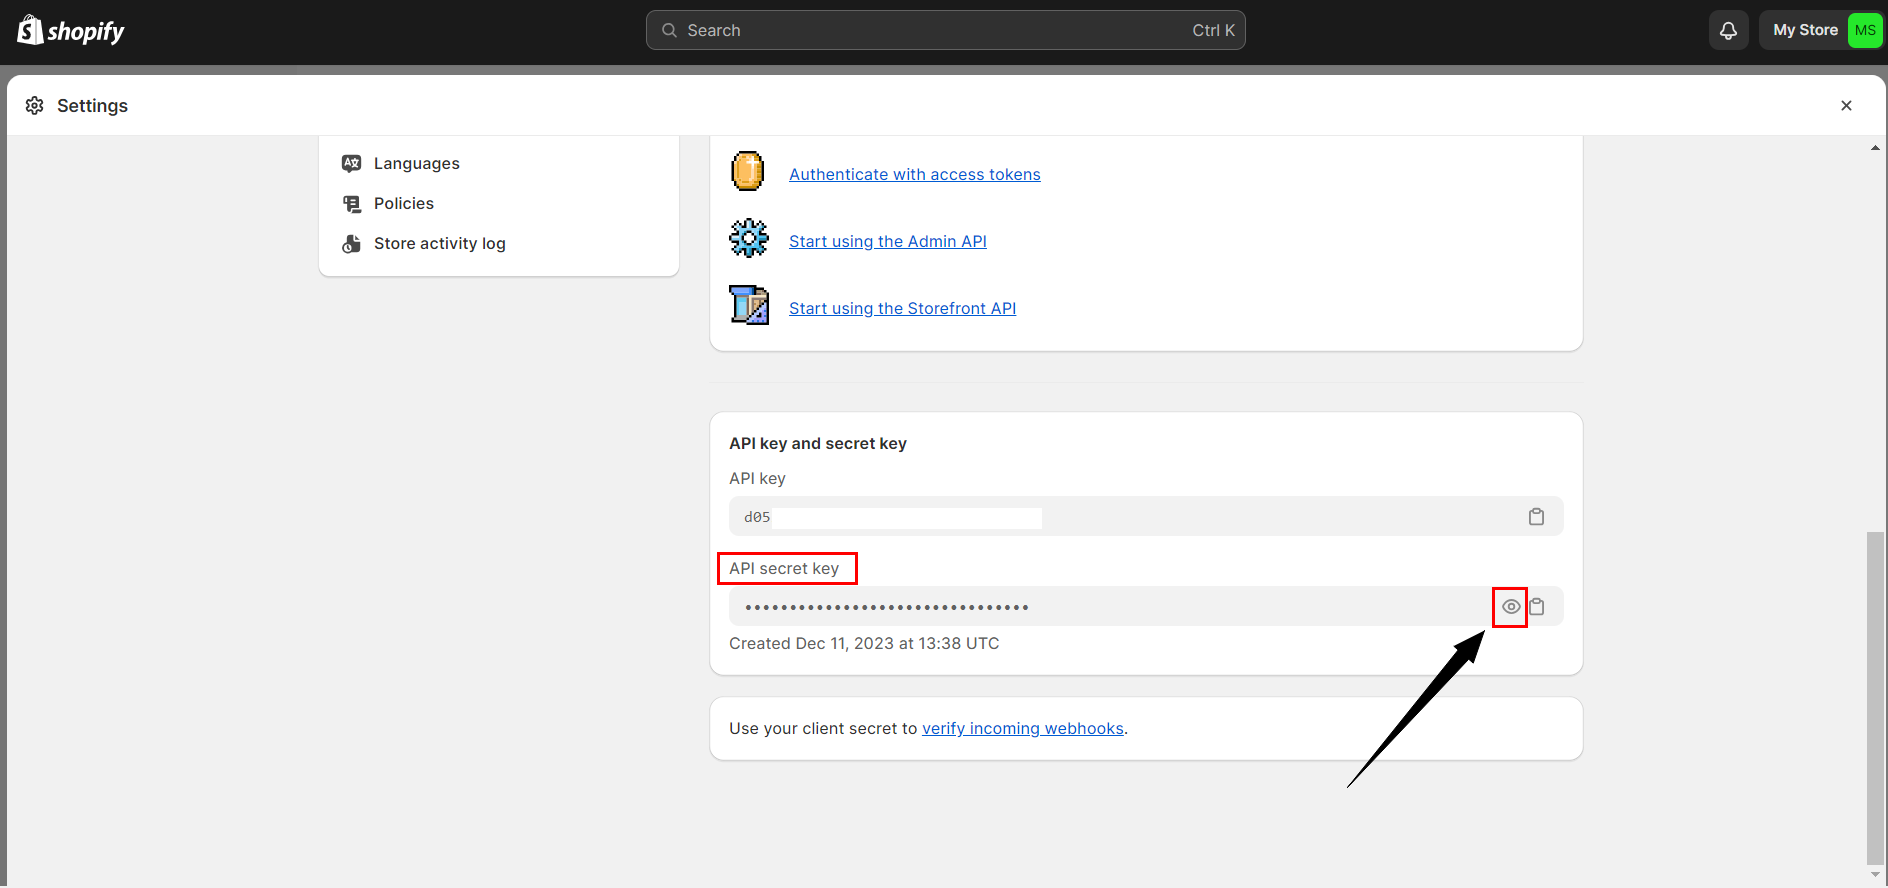
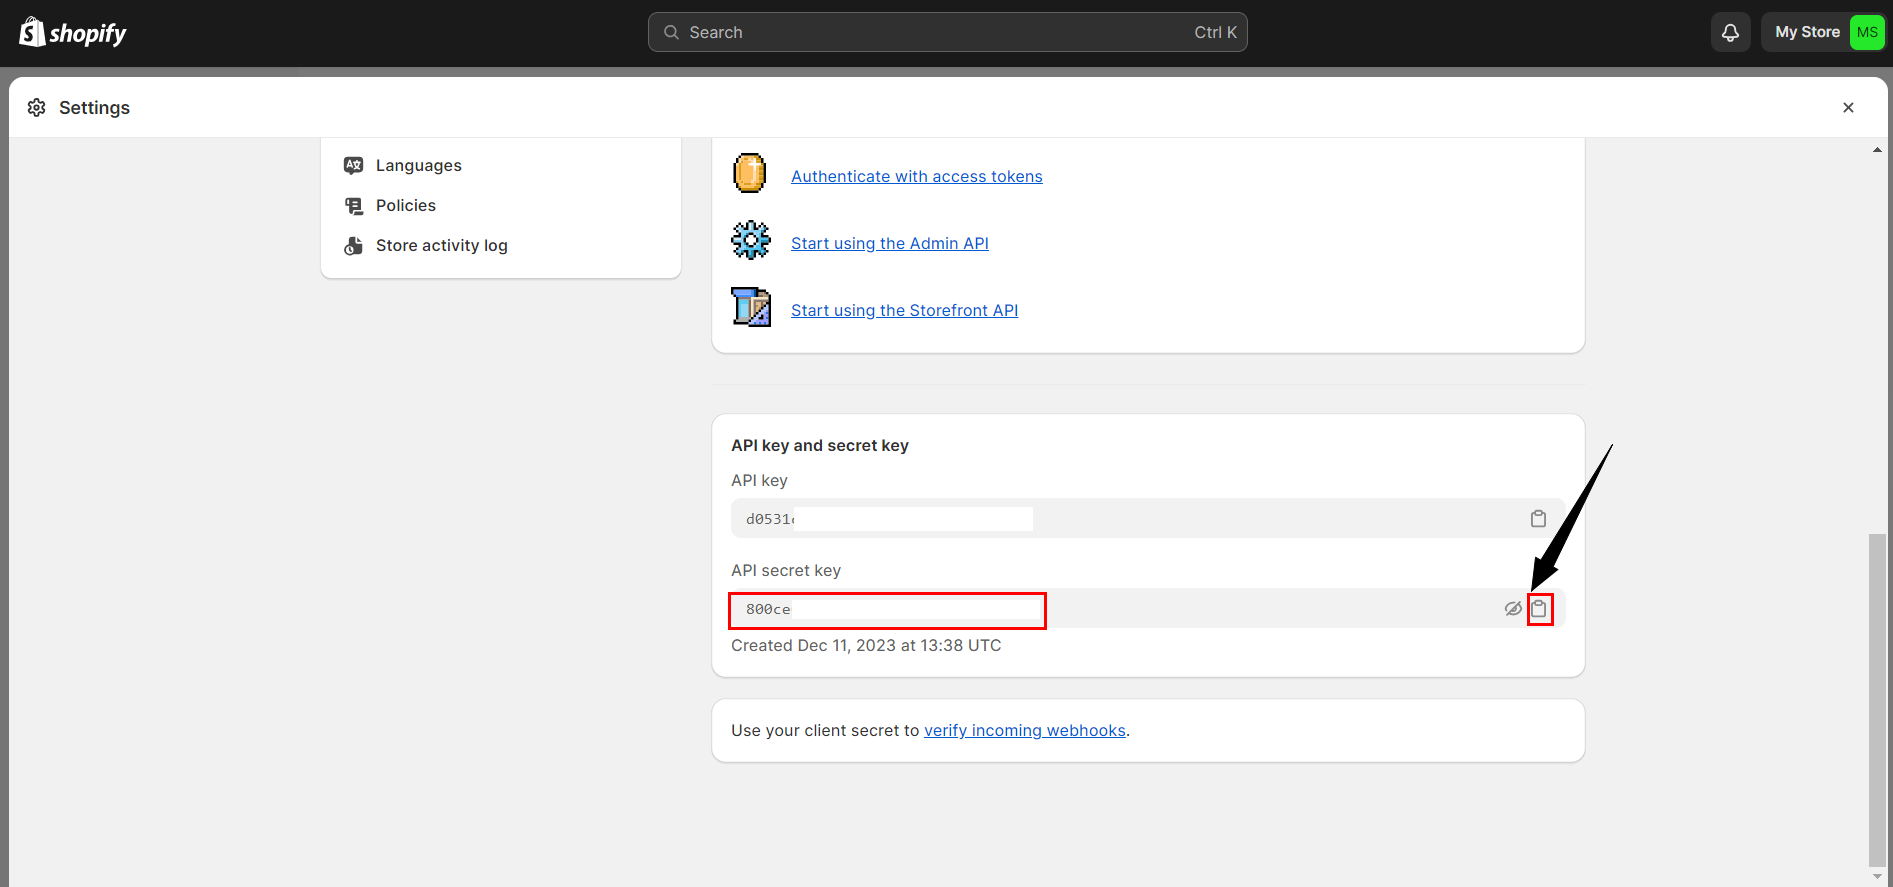
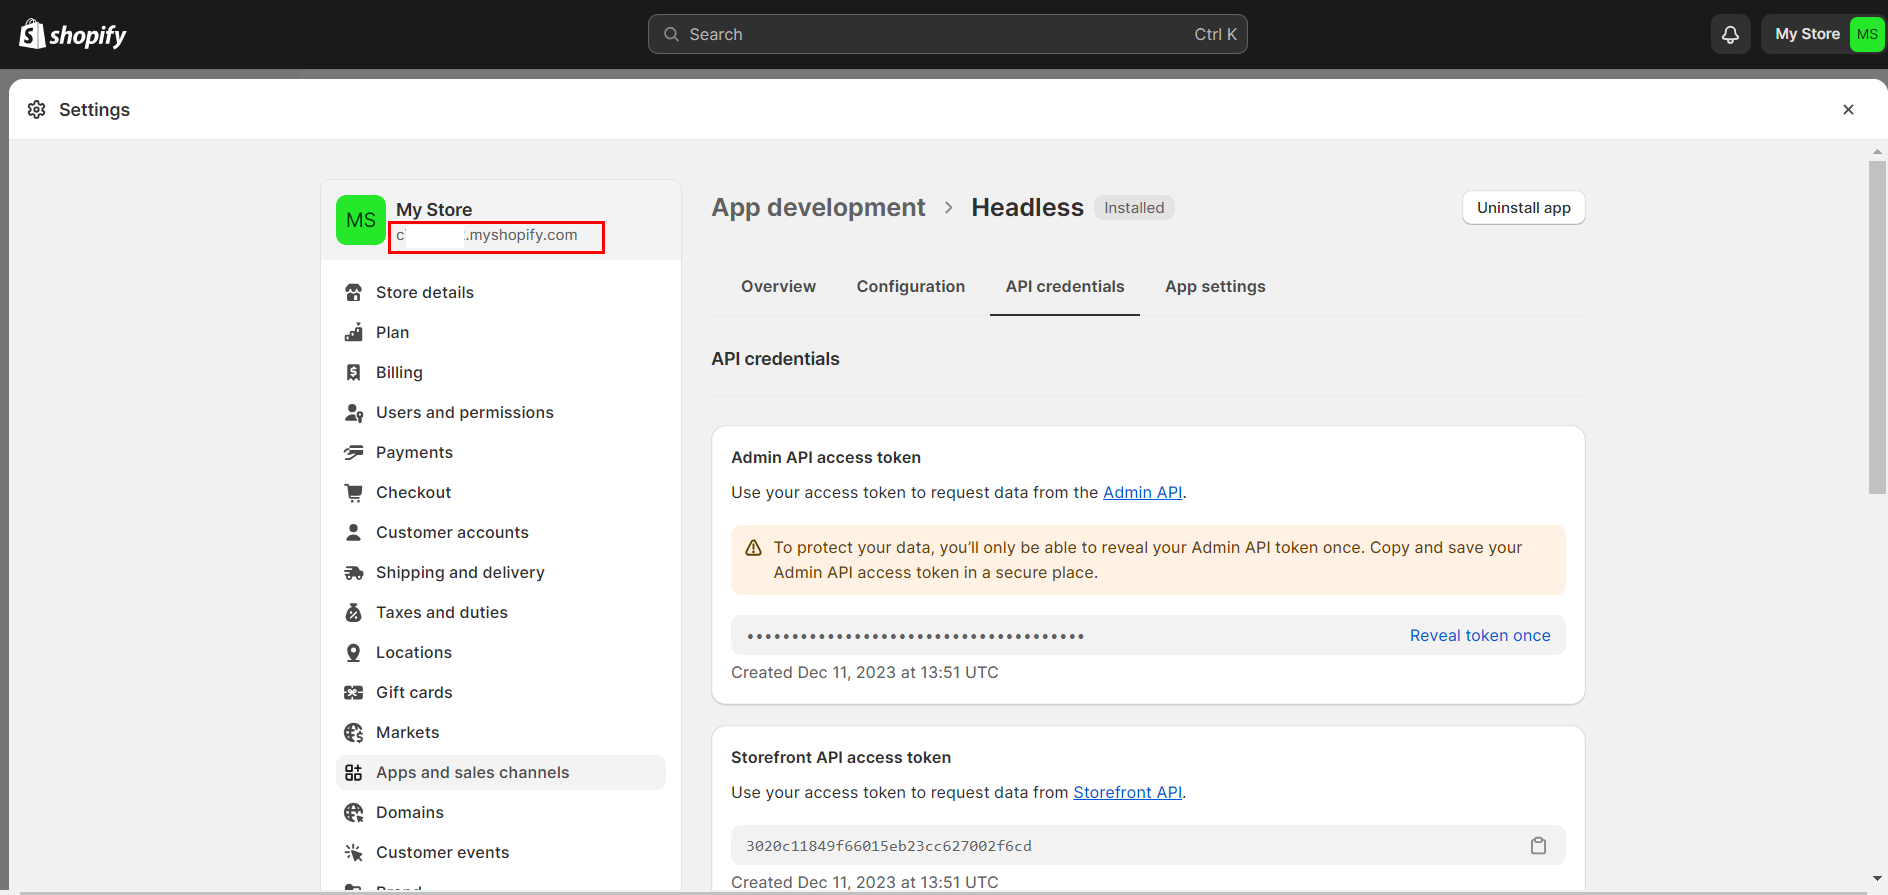
* You will need to take note of the ***Admin API access token*** & ***Storefront API access token*** for the Shopify setup in aasaan.
You will only be able to view the **Admin API access token** once. So remember to store it somewhere safe or you will have to recreate and install another custom app.
When you are done setting up your API scopes, you now need to install the custom app to your Shopify Store, only then will you get your API keys.
* Click ***Install app***.
* In the modal window, click ***Install app***.
* Go to ***API Credentials***.
* You will need to take note of the ***Admin API access token*** & ***Storefront API access token*** for the Shopify setup in aasaan.
You will only be able to view the **Admin API access token** once. So remember to store it somewhere safe or you will have to recreate and install another custom app.
 ### Connecting your Shopify store to aasaan storefront
* Goto aasaan [sign up](https://admin.aasaan.app/auth/register) page.
* Provide all the required information.
* Press Submit.
* Choose the business category.
* Choose the theme of your choice.
* Select ***Shopify Connect***.
Once you have successfully installed your new Custom App in Shopify, it is now time to go link your store to aasaan.
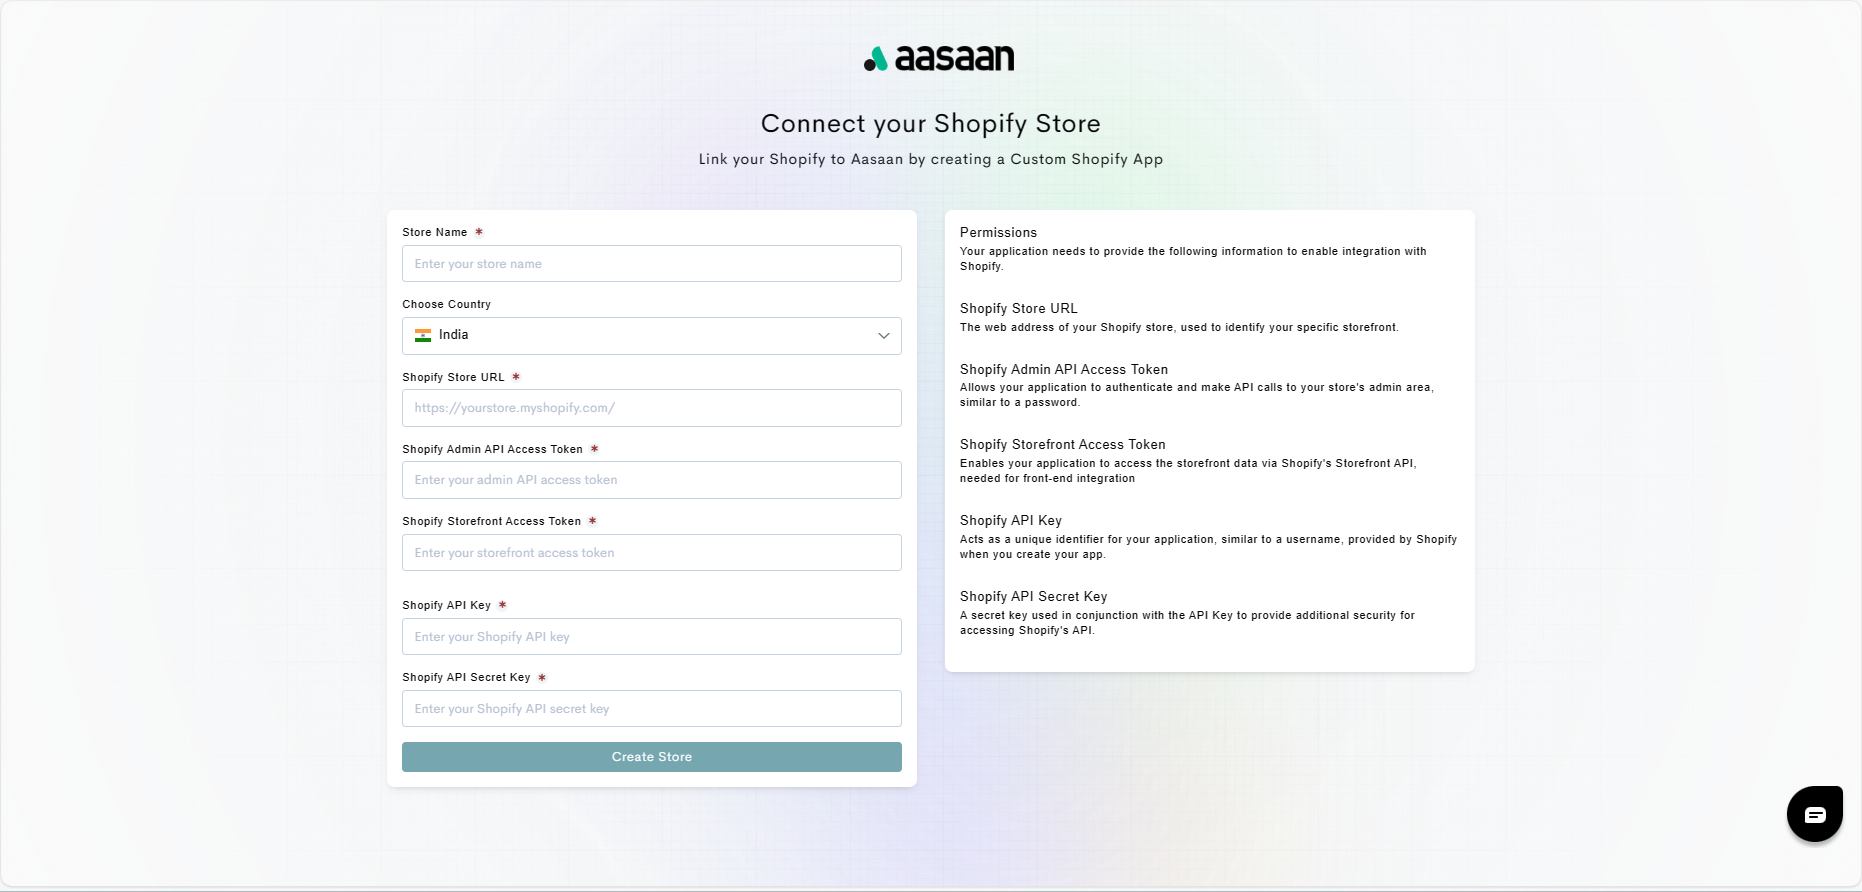
* Provide your ***Store name***
* Choose the ***Country***
* Add in your ***Shopify store URL*** xxxxxxx.myshopify.com.
* Paste in your ***Shopify Admin API Access Token*** that you had created earlier.
* Paste in your ***Shopify Storefront Access Token*** that you had created earlier.
* Paste in your ***Shopify API Key*** that you had created earlier.
* Paste in your ***Shopify API Secret Key*** that you had created earlier.
* Click ***Create Store***.
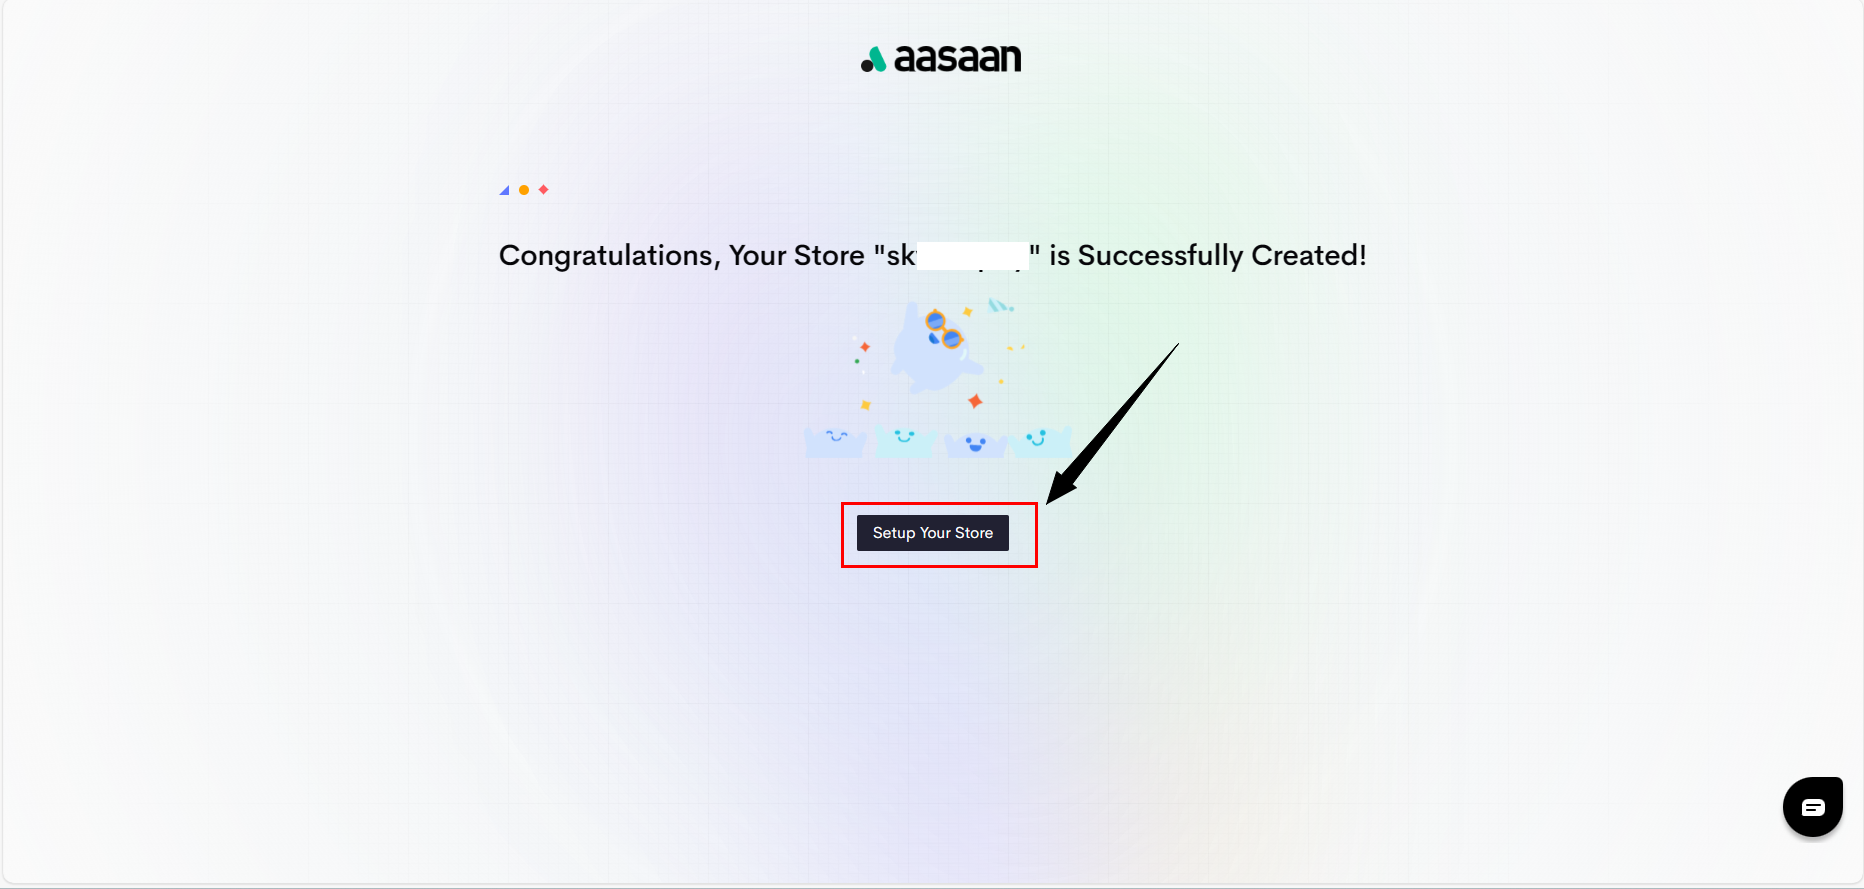
* Once your Storefront linking is complete, click ***Setup Your Store*** to go to your aasaan dashboard.
### Connecting your Shopify store to aasaan storefront
* Goto aasaan [sign up](https://admin.aasaan.app/auth/register) page.
* Provide all the required information.
* Press Submit.
* Choose the business category.
* Choose the theme of your choice.
* Select ***Shopify Connect***.
Once you have successfully installed your new Custom App in Shopify, it is now time to go link your store to aasaan.
* Provide your ***Store name***
* Choose the ***Country***
* Add in your ***Shopify store URL*** xxxxxxx.myshopify.com.
* Paste in your ***Shopify Admin API Access Token*** that you had created earlier.
* Paste in your ***Shopify Storefront Access Token*** that you had created earlier.
* Paste in your ***Shopify API Key*** that you had created earlier.
* Paste in your ***Shopify API Secret Key*** that you had created earlier.
* Click ***Create Store***.
* Once your Storefront linking is complete, click ***Setup Your Store*** to go to your aasaan dashboard.
 ### Setup Callback URL for Checkout
How to Setup Callback URL for Checkout
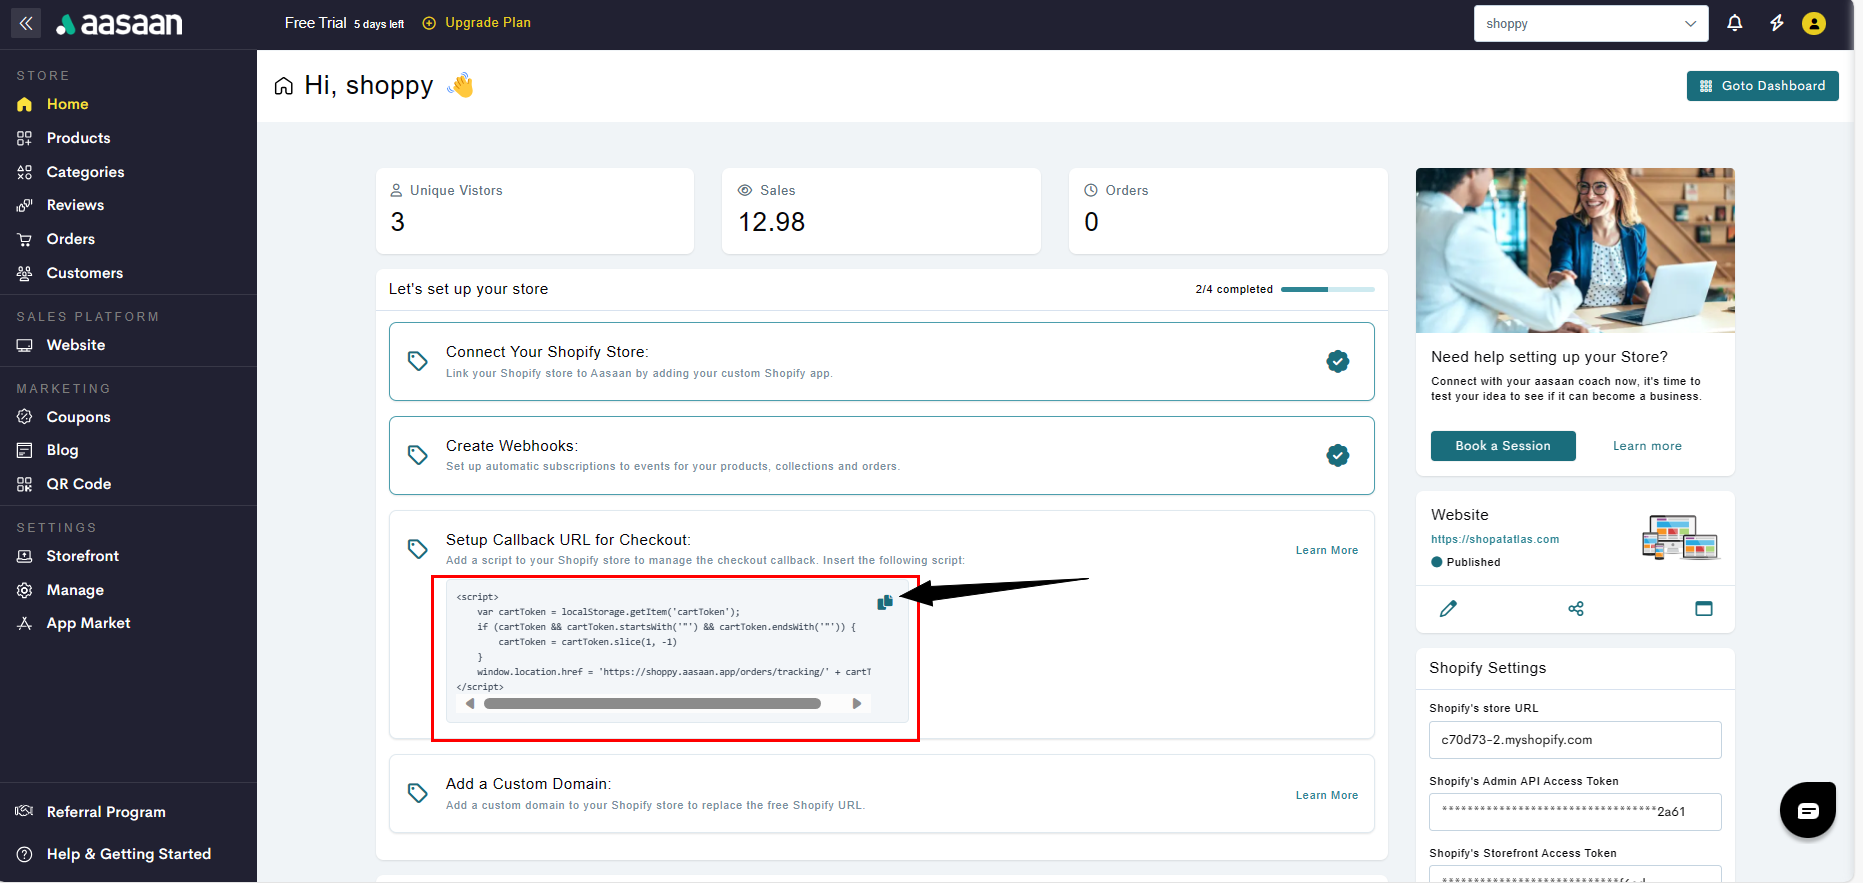
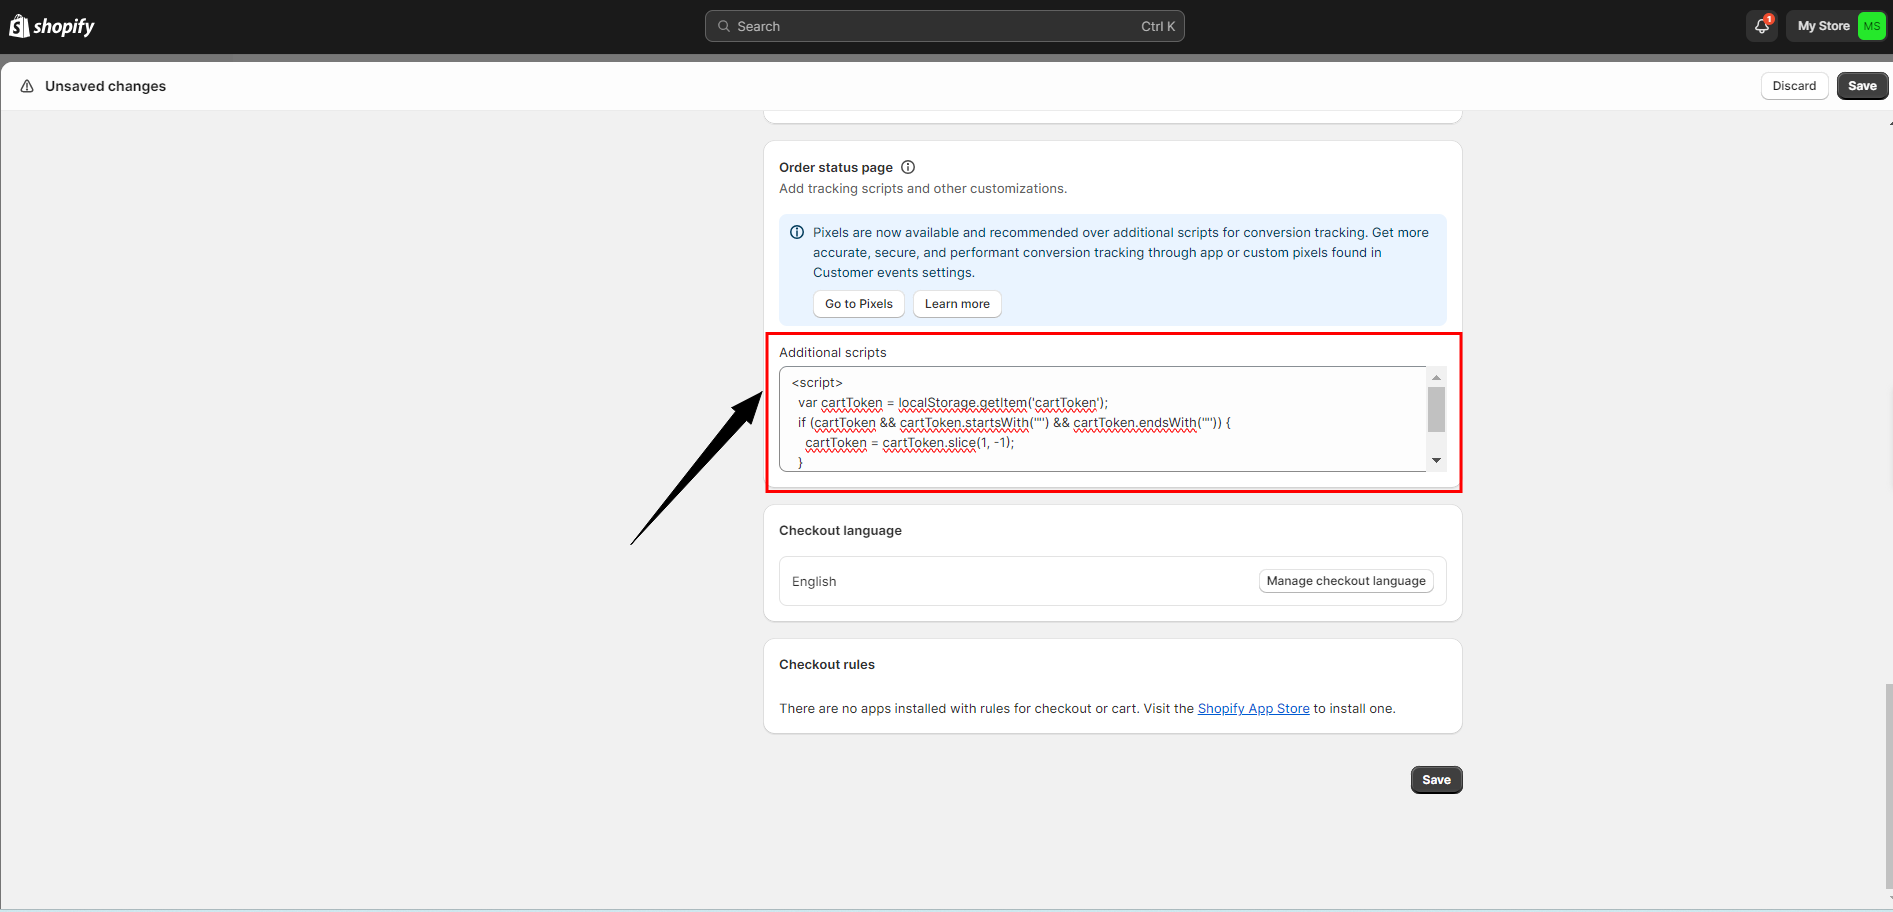
After connecting your Shopify store to aasaan storefront, you need setup Callback URL for Checkout. To do so:
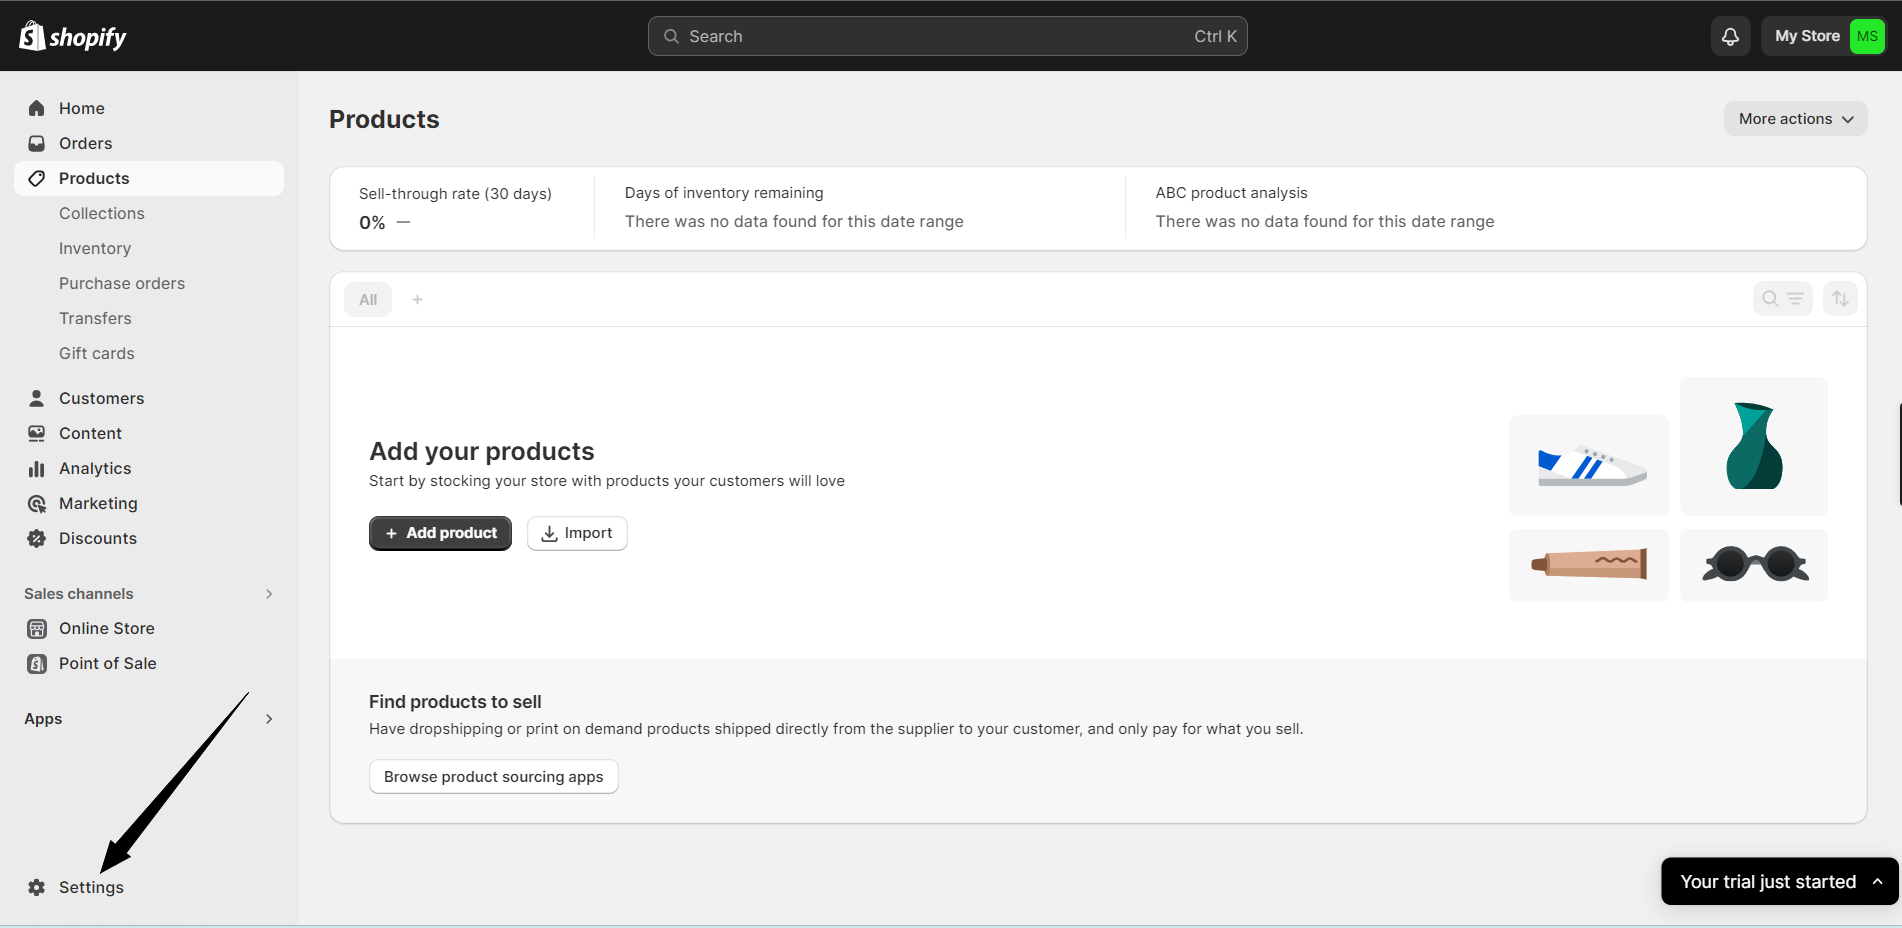
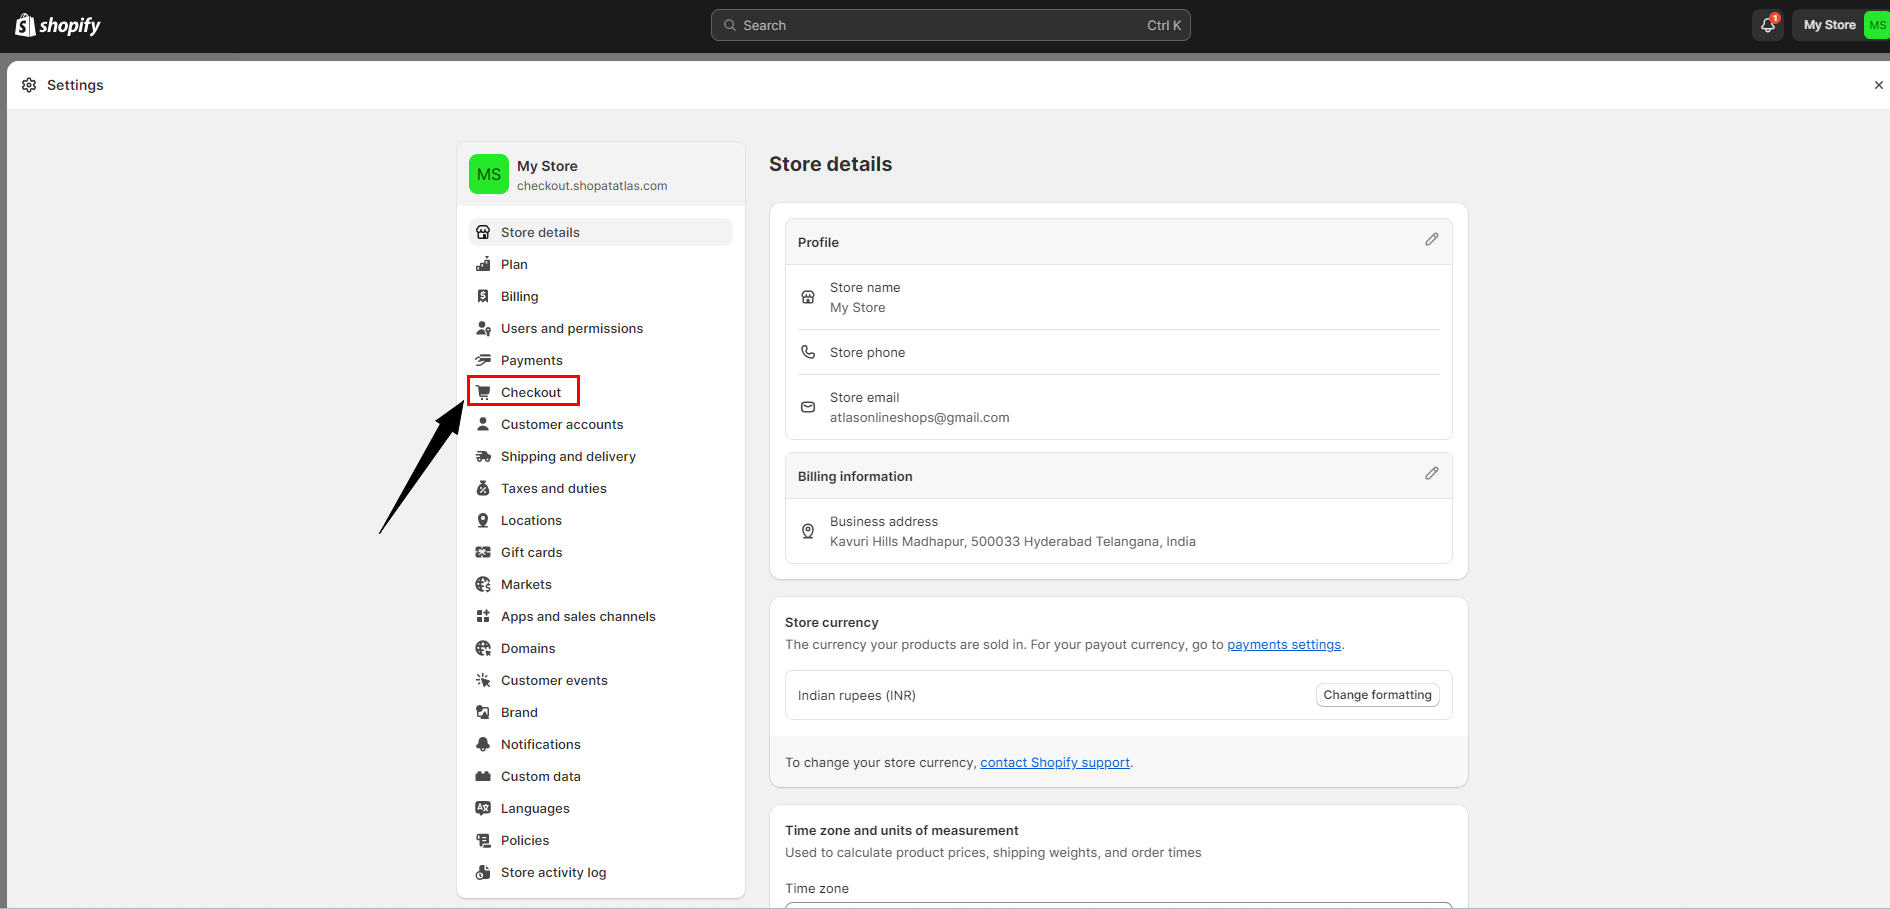
* From your Shopify admin,
* Click ***Settings***.
* Click ***Checkout***.
* Scroll down to ***Additional Scripts*** section and paste the script provided on the aasaan dashboard.
```javascript Additional Scripts Example theme={null}
```
* Click ***Save***.
### Setup Callback URL for Checkout
How to Setup Callback URL for Checkout
After connecting your Shopify store to aasaan storefront, you need setup Callback URL for Checkout. To do so:
* From your Shopify admin,
* Click ***Settings***.
* Click ***Checkout***.
* Scroll down to ***Additional Scripts*** section and paste the script provided on the aasaan dashboard.
```javascript Additional Scripts Example theme={null}
```
* Click ***Save***.
 ### Custom Domain to your Shopify Store
How to Add a Custom Domain to your Shopify Store
After connecting your Shopify store to aasaan storefront, you need a domain to your Shopify store to maintain URL consistency. To do so:
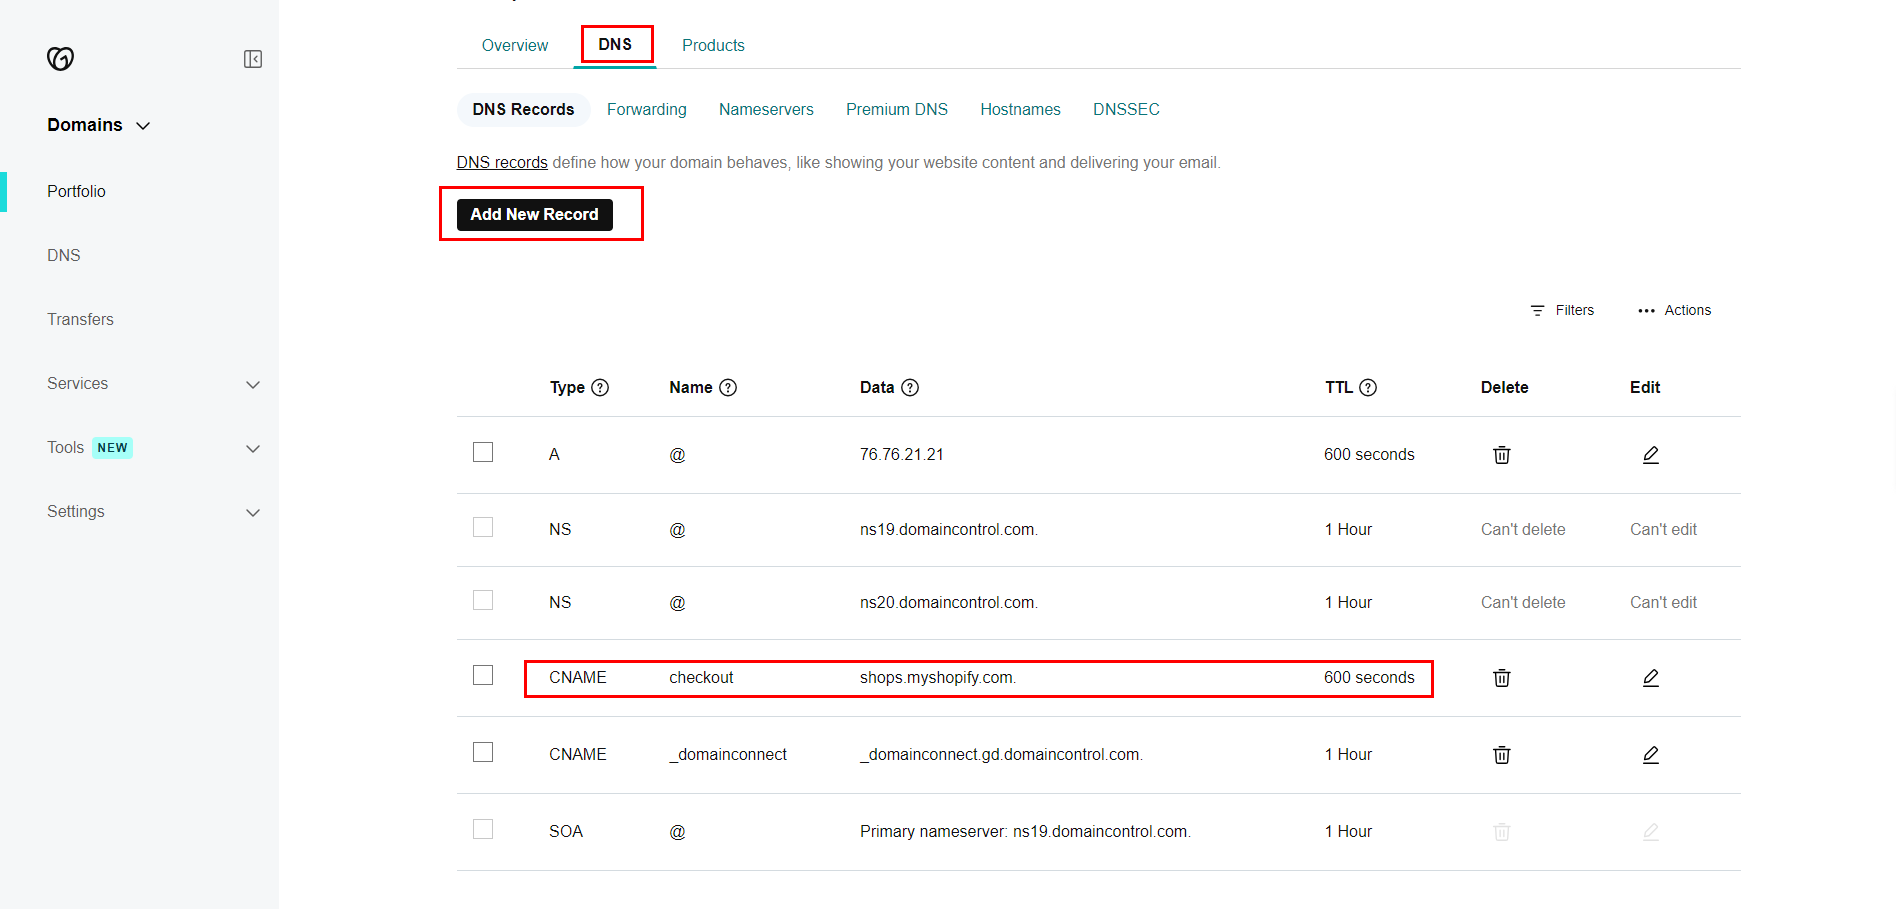
* First,
* Login to domain account
* Goto ***DNS*** Settings
* Add ***New Record***
* Choose "CNAME" as Type
* Provide "checkout" as Name
* Provide "shops.myshopify.com" as Value
* Provide "600" as TTL-Custom value
* Click ***Save*** button
* Second,
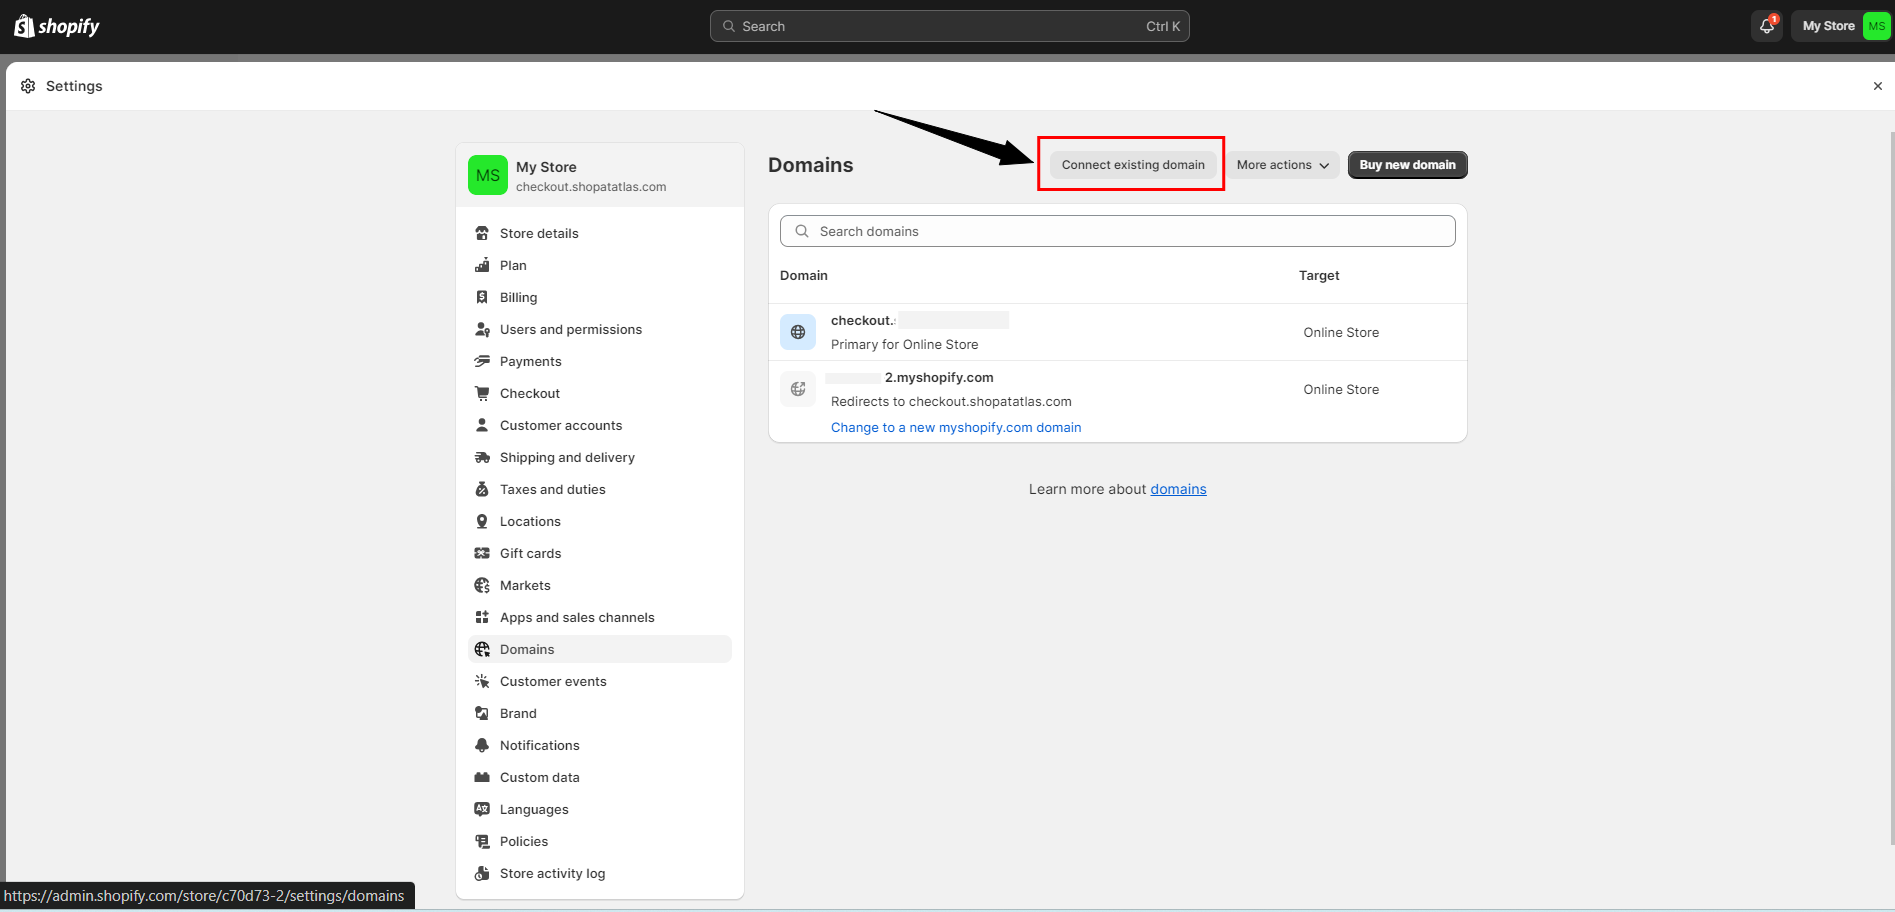
* From your Shopify admin,
* Click ***Settings***.
* Click ***Domain***.
* Click ***Connect existing domain***.
* Use "checkout.yourdomainname" and complete the steps to connect your domain setup.
### Custom Domain to your Shopify Store
How to Add a Custom Domain to your Shopify Store
After connecting your Shopify store to aasaan storefront, you need a domain to your Shopify store to maintain URL consistency. To do so:
* First,
* Login to domain account
* Goto ***DNS*** Settings
* Add ***New Record***
* Choose "CNAME" as Type
* Provide "checkout" as Name
* Provide "shops.myshopify.com" as Value
* Provide "600" as TTL-Custom value
* Click ***Save*** button
* Second,
* From your Shopify admin,
* Click ***Settings***.
* Click ***Domain***.
* Click ***Connect existing domain***.
* Use "checkout.yourdomainname" and complete the steps to connect your domain setup.